Volume 70, Issue 1, 1992
NEBRASKAland Magazine
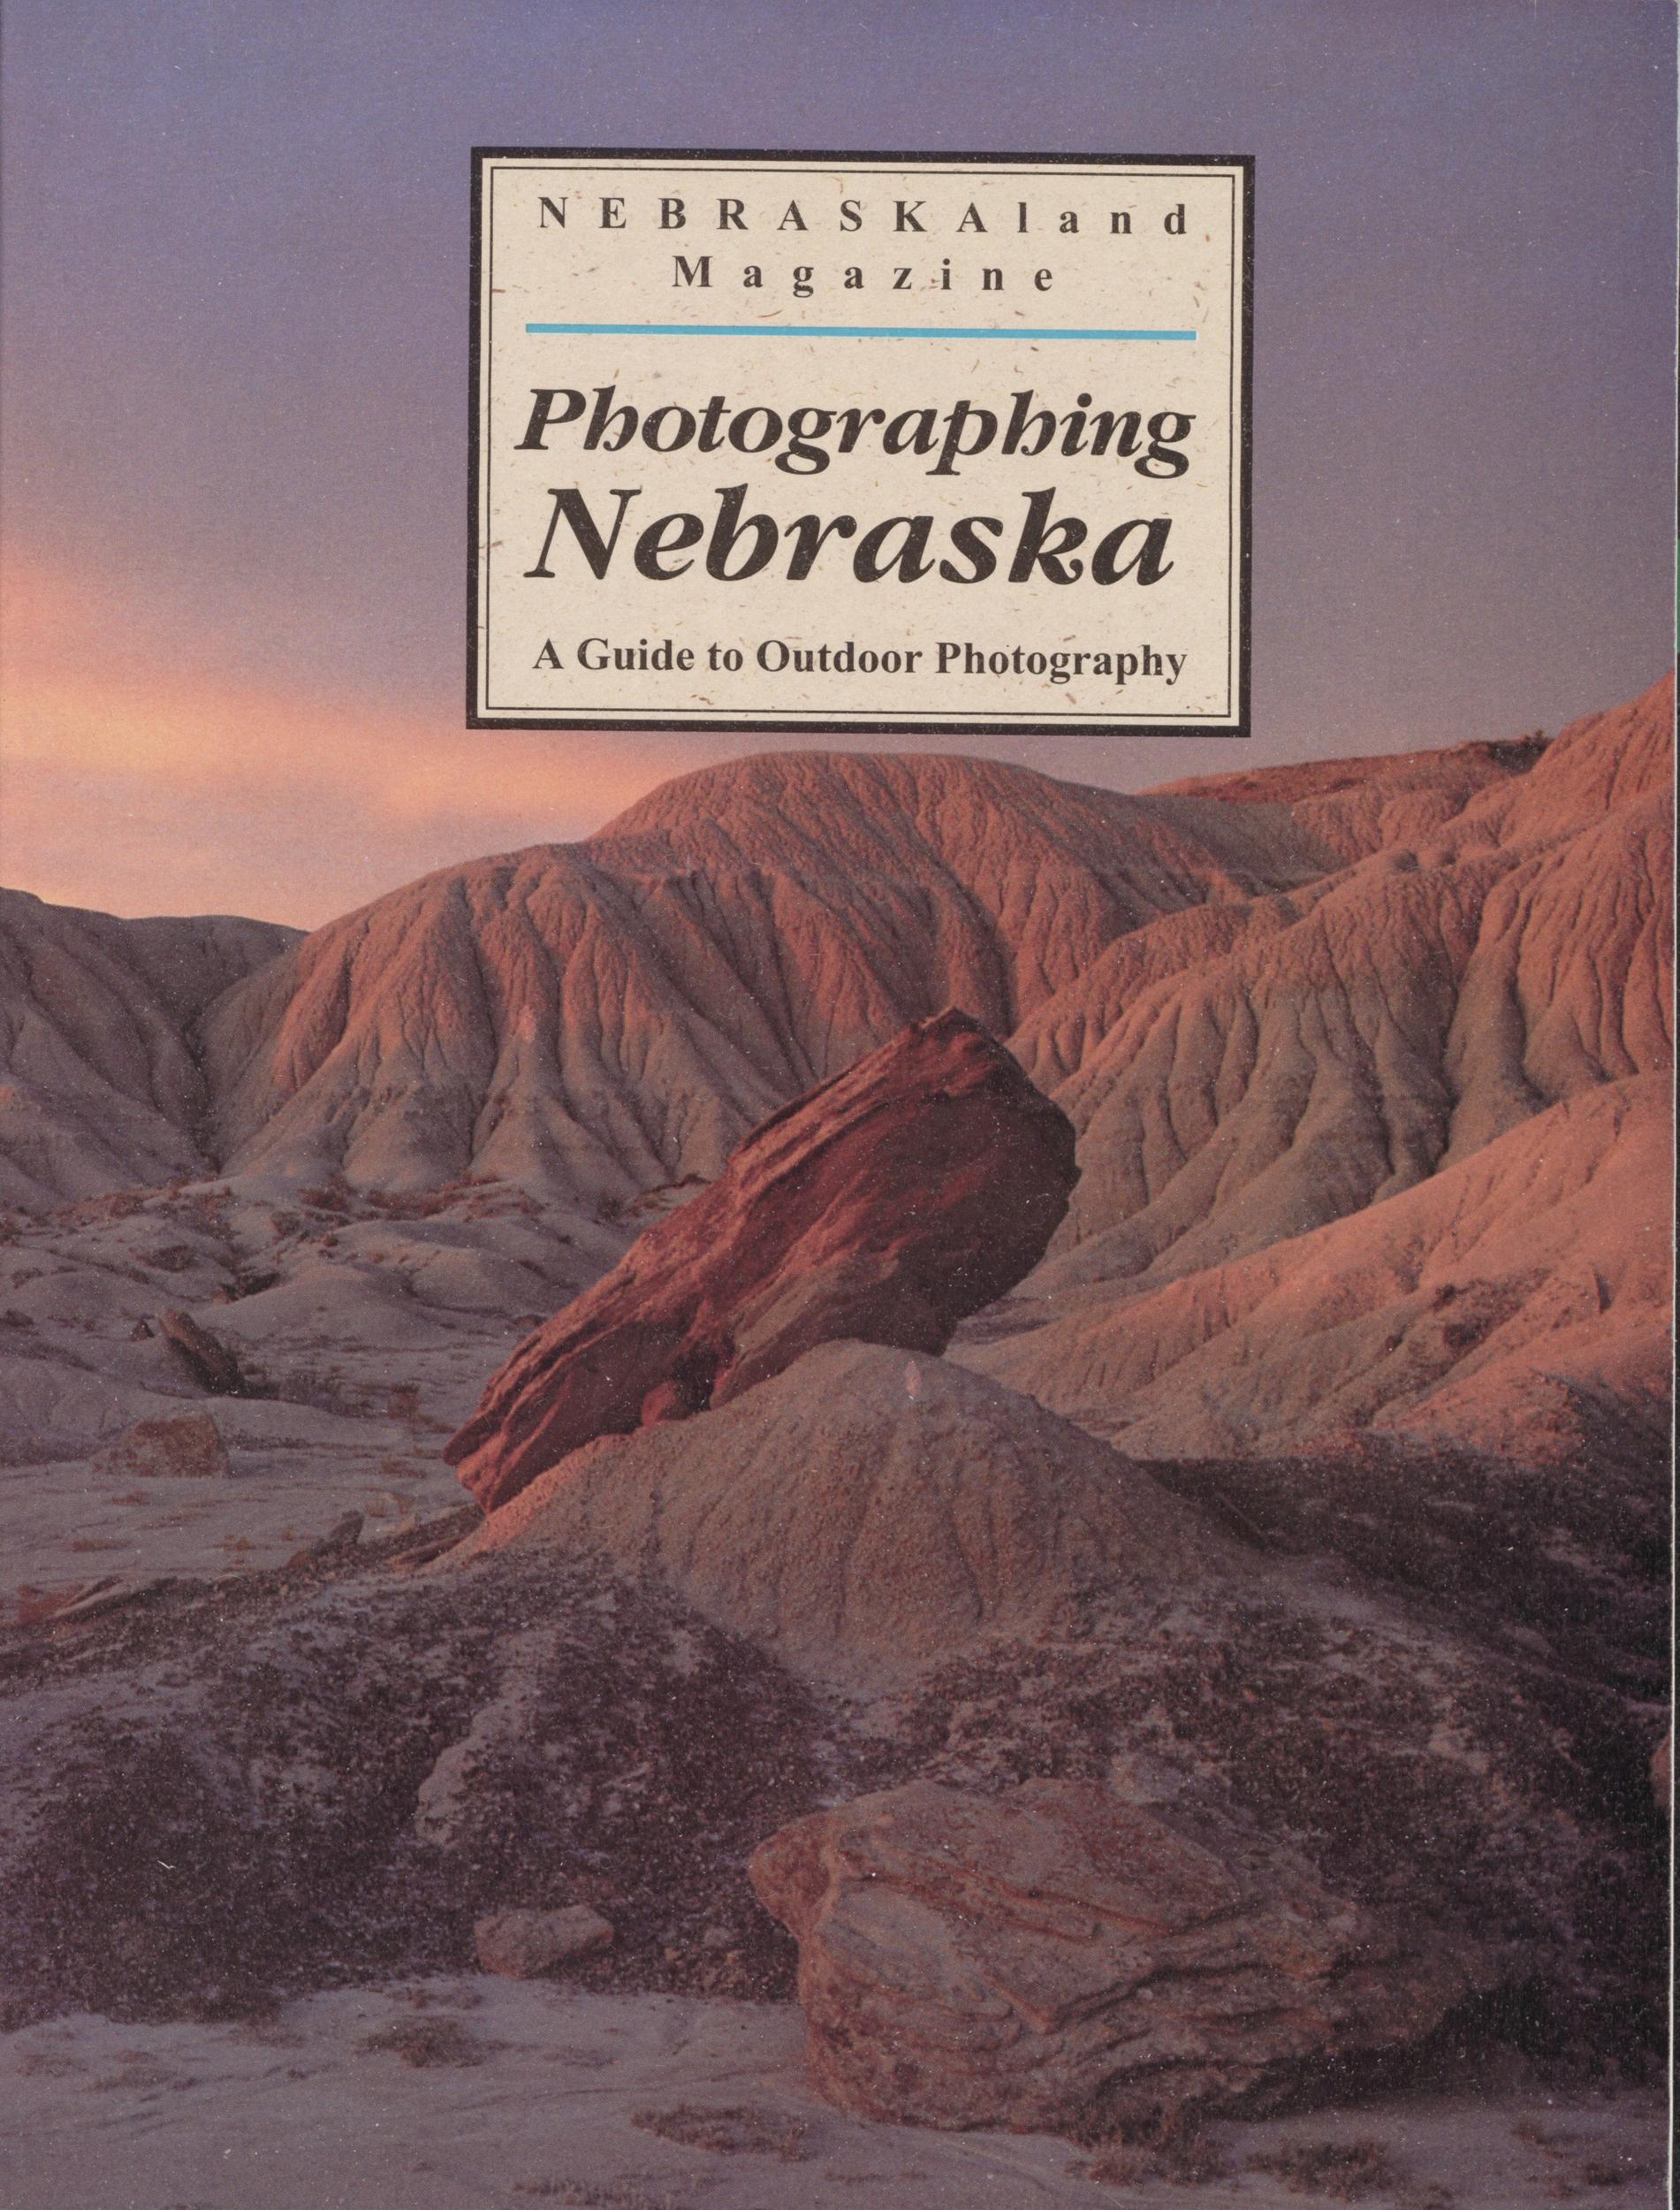
Photographing Nebraska A Guide to Outdoor Photography
NEBRASKALand Magazine
Photographing Nebraska
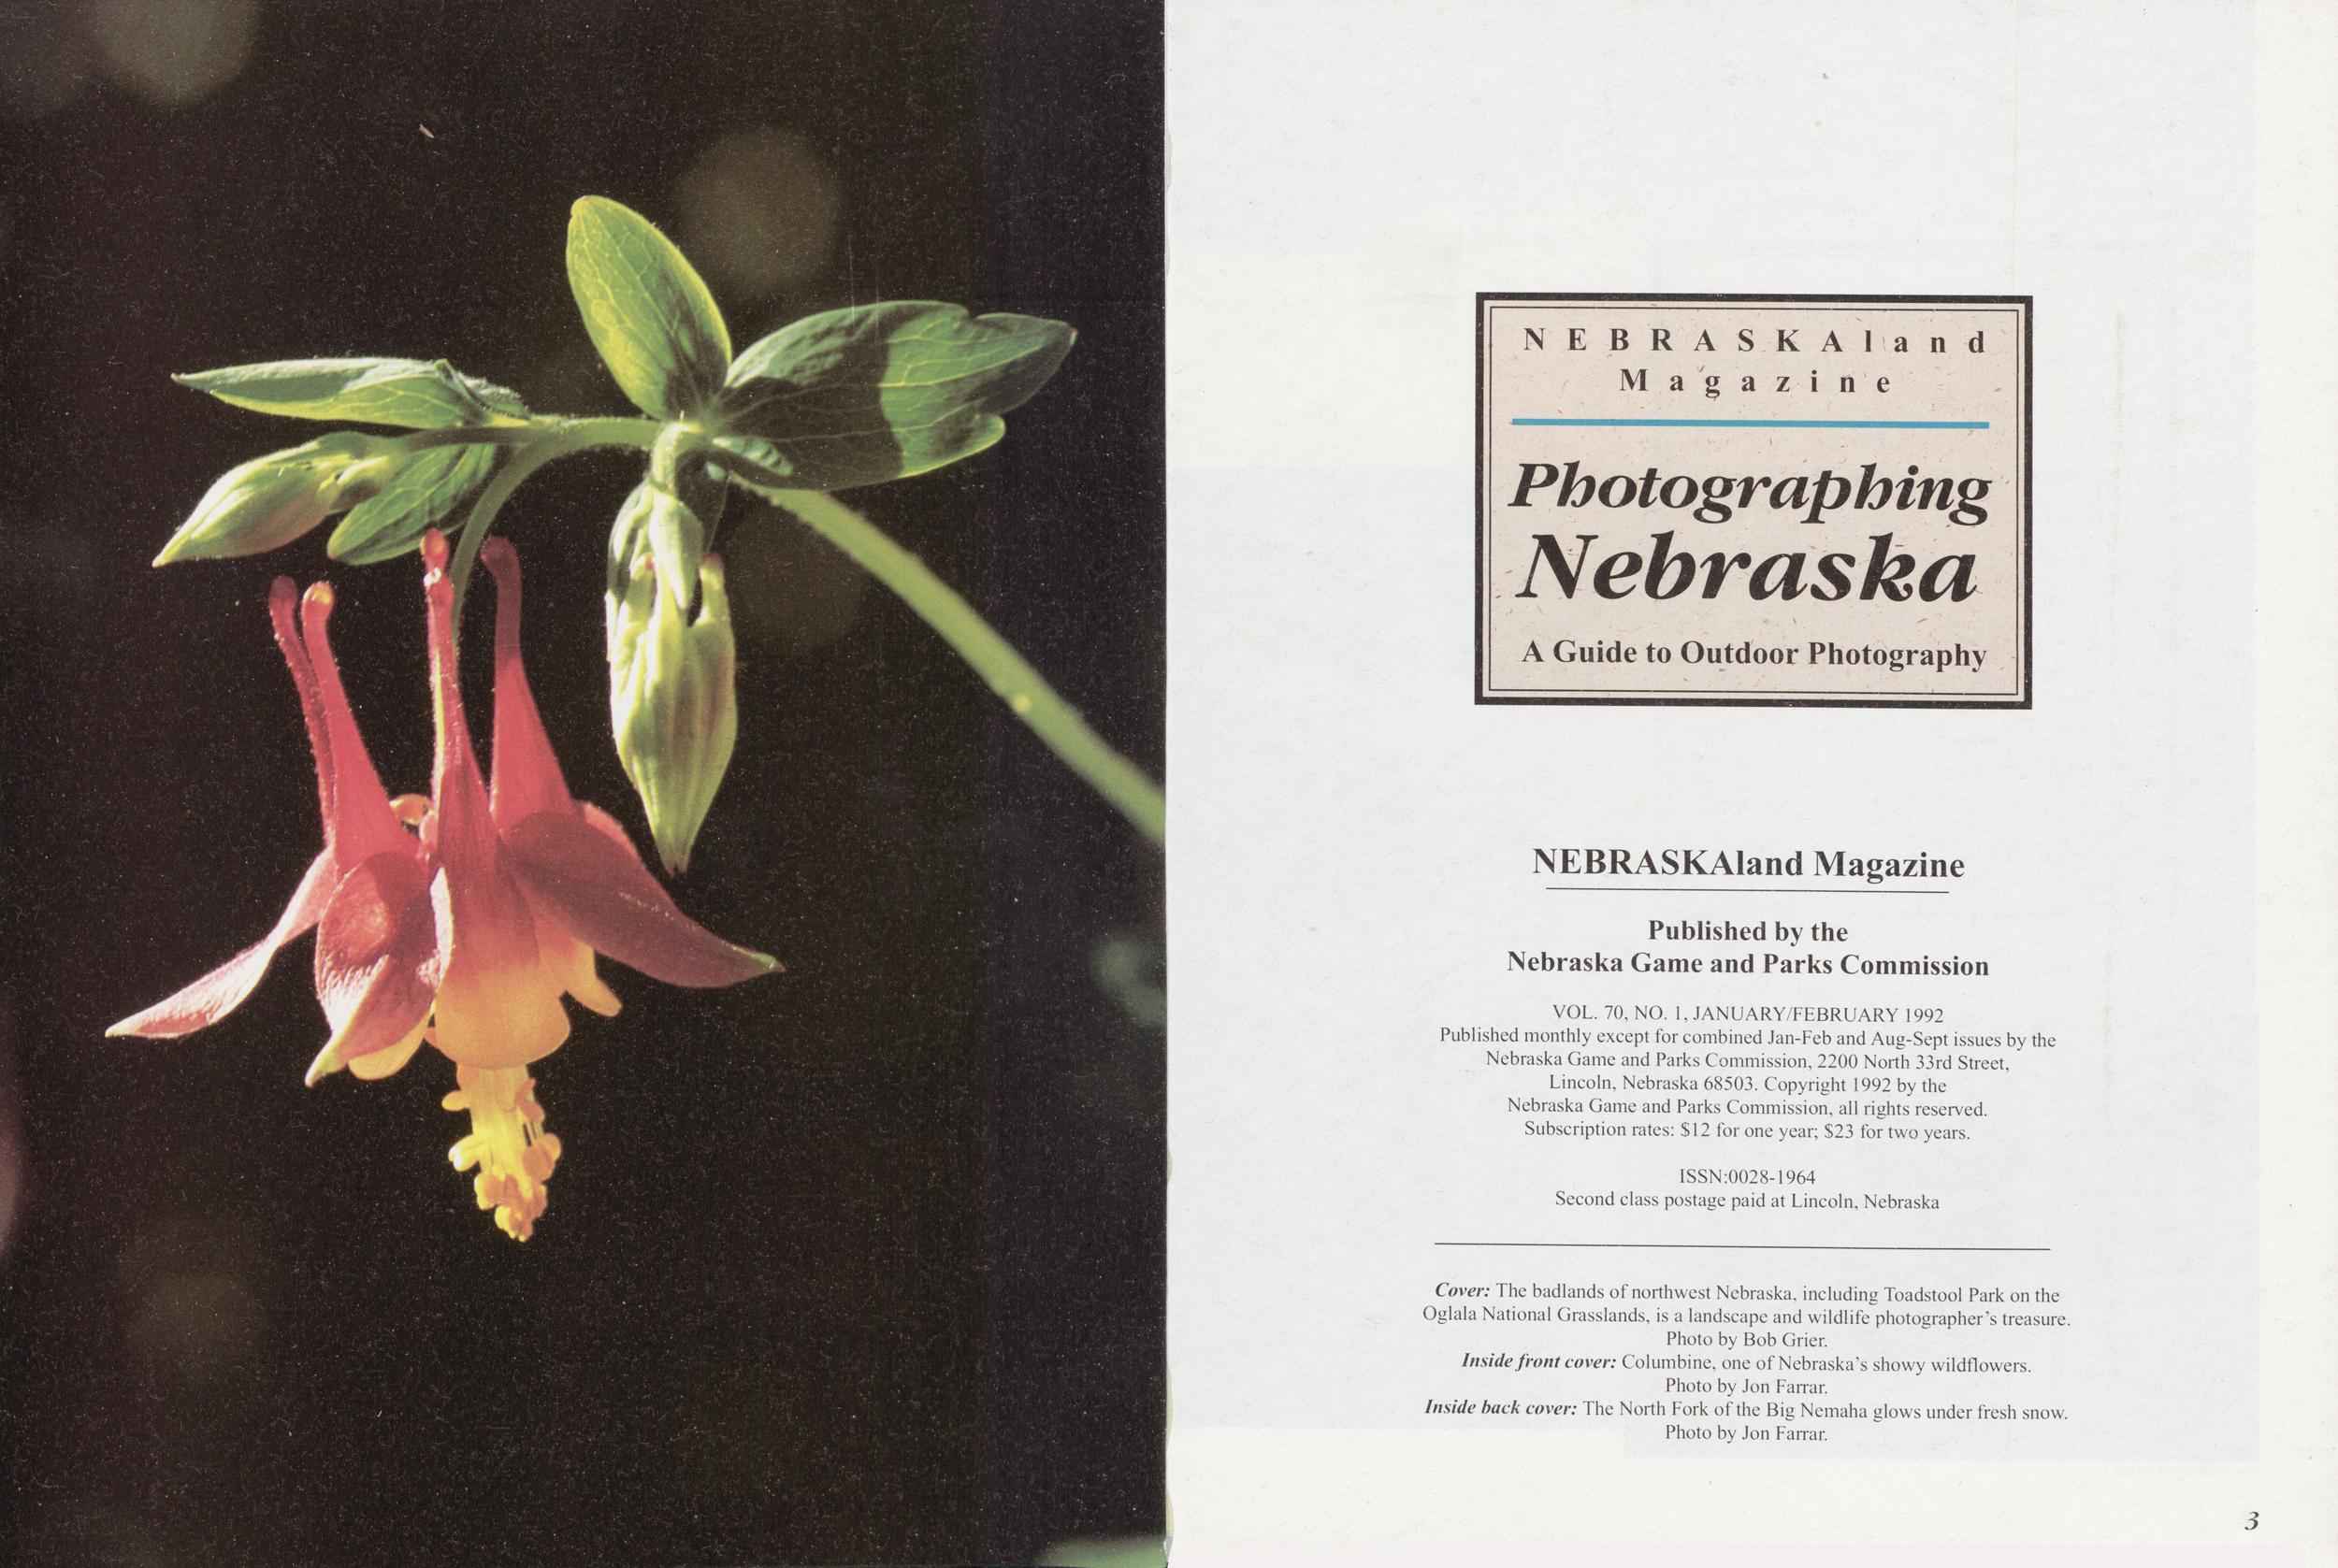
A Guide to Outdoor Photography NEBRASKAland Magazine Published by the Nebraska Game and Parks Commission VOL. 70, NO. 1, JANUARY/FEBRUARY 1992 Published monthly except for combined Jan-Feb and Aug-Sept issues by the Nebraska Game and Parks Commission, 2200 North 33rd Street, Lincoln, Nebraska 68503. Copyright 1992 by the Nebraska Game and Parks Commission, all rights reserved. Subscription rates: $12 for one year; $23 for two years. 1SSN:0028-1964 Second class postage paid at Lincoln, Nebraska Cover: The badlands of northwest Nebraska, including Toadstool Park on the Oglala National Grasslands, is a landscape and wildlife photographer's treasure Photo by Bob Grier. Inside front cover: Columbine, one of Nebraska's showy wildflowers. Photo by Jon Farrar. Inside back cover: The North Fork of the Big Nemaha glows under fresh snow. Photo by Jon Farrar.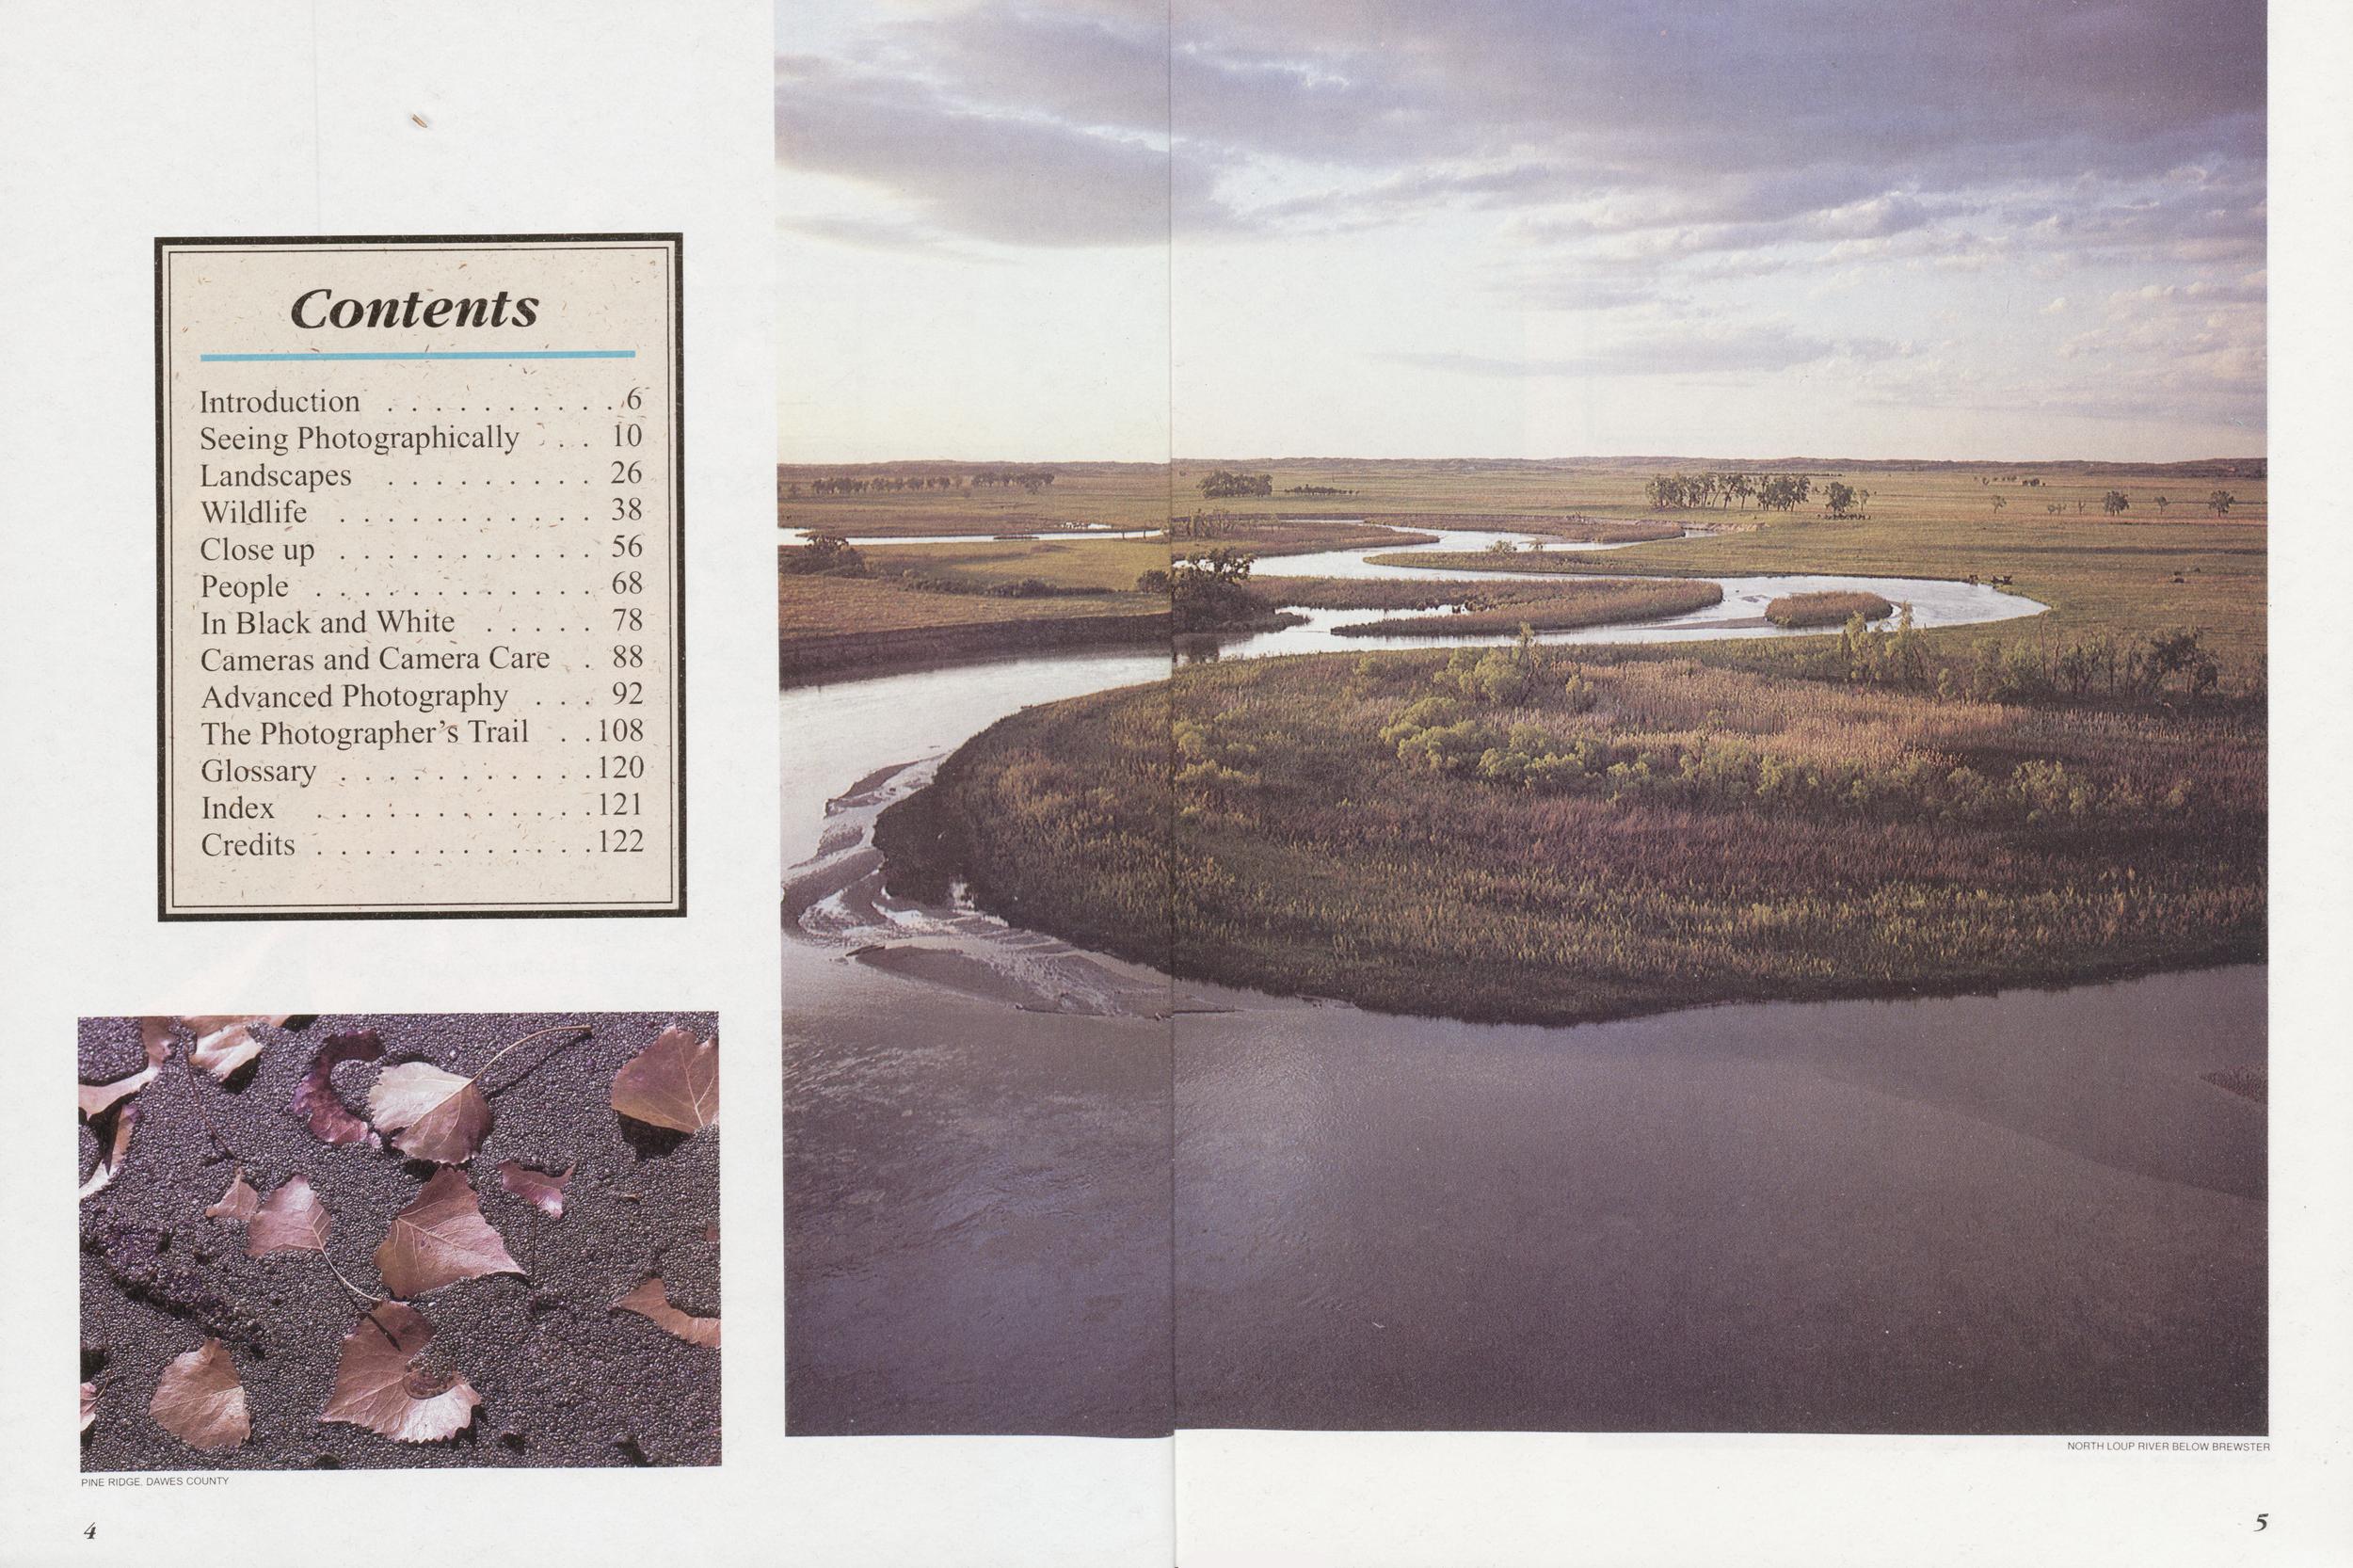
Pine Ridge, Dawes County
North Loup River Below Brewster
Introduction
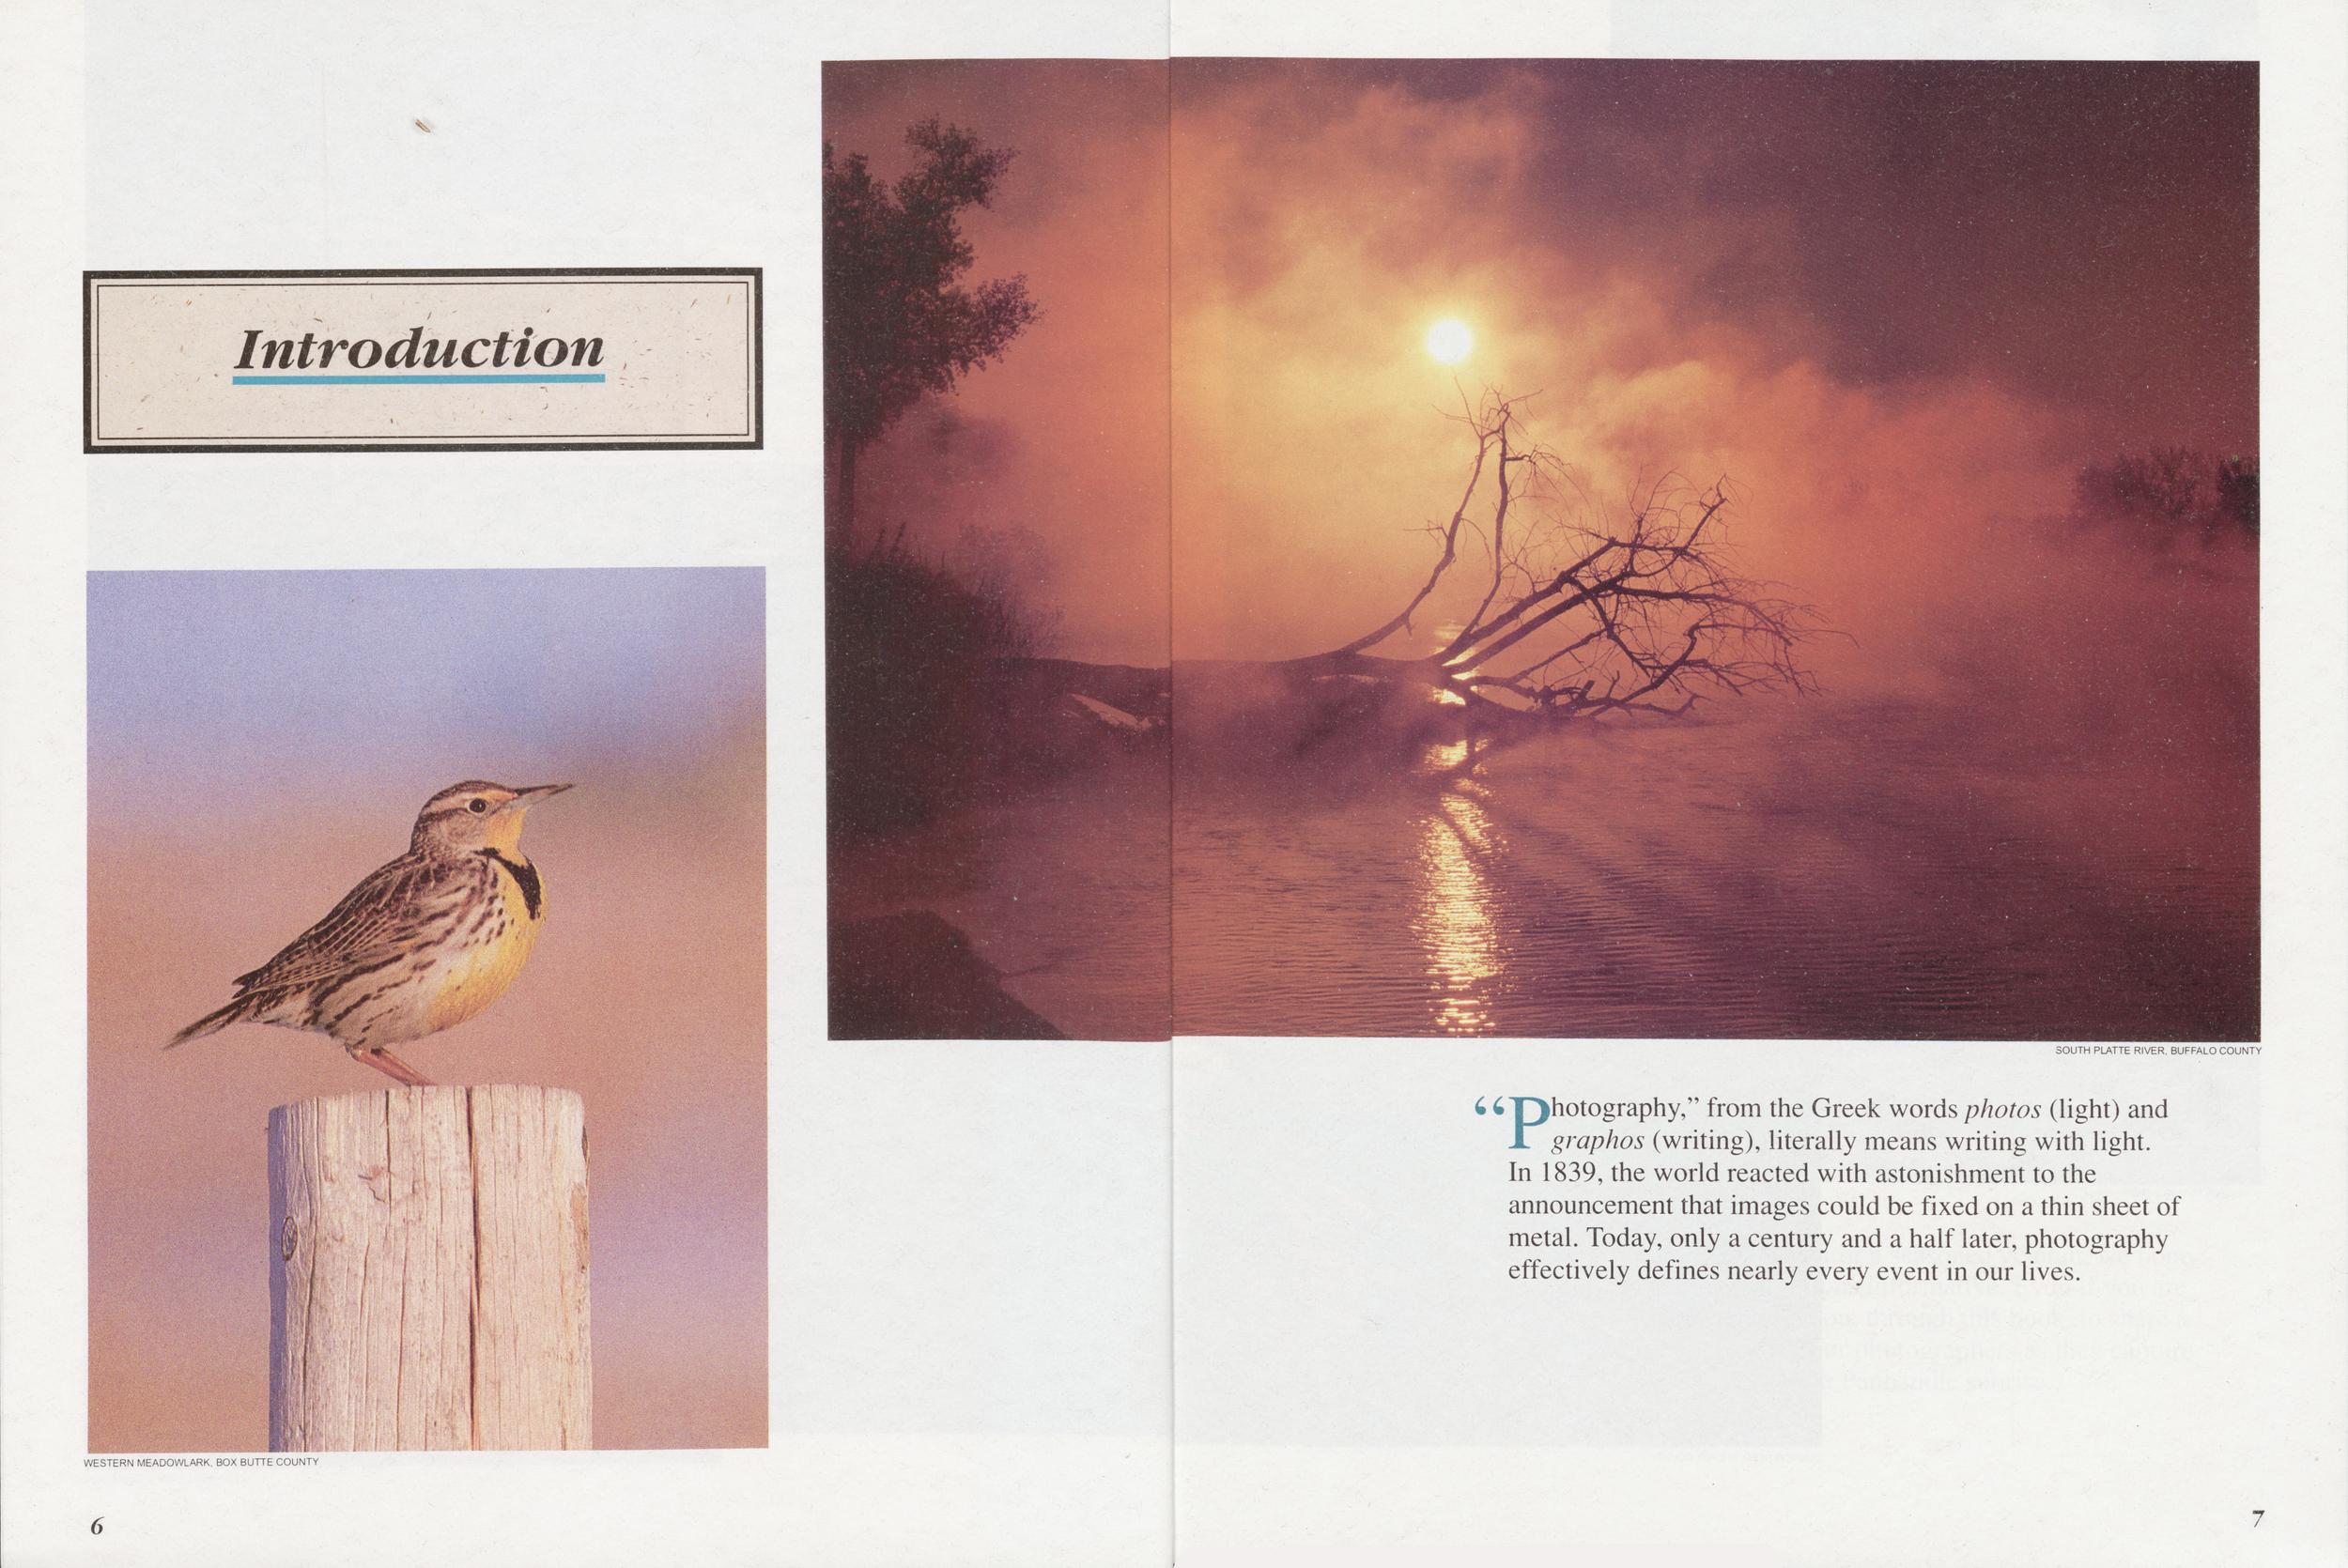
WESTERN MEADOWLARK, BOX BUTTE COUNTY
SOUTH PLATTE RIVER, BUFFALO COUNTY
"Photography," from the Greek words photos (light) and graphos (writing), literally means writing with light. In 1839, the world reacted with astonishment to the announcement that images could be fixed on a thin sheet of metal. Today, only a century and a half later, photography effectively defines nearly every event in our lives.
6 7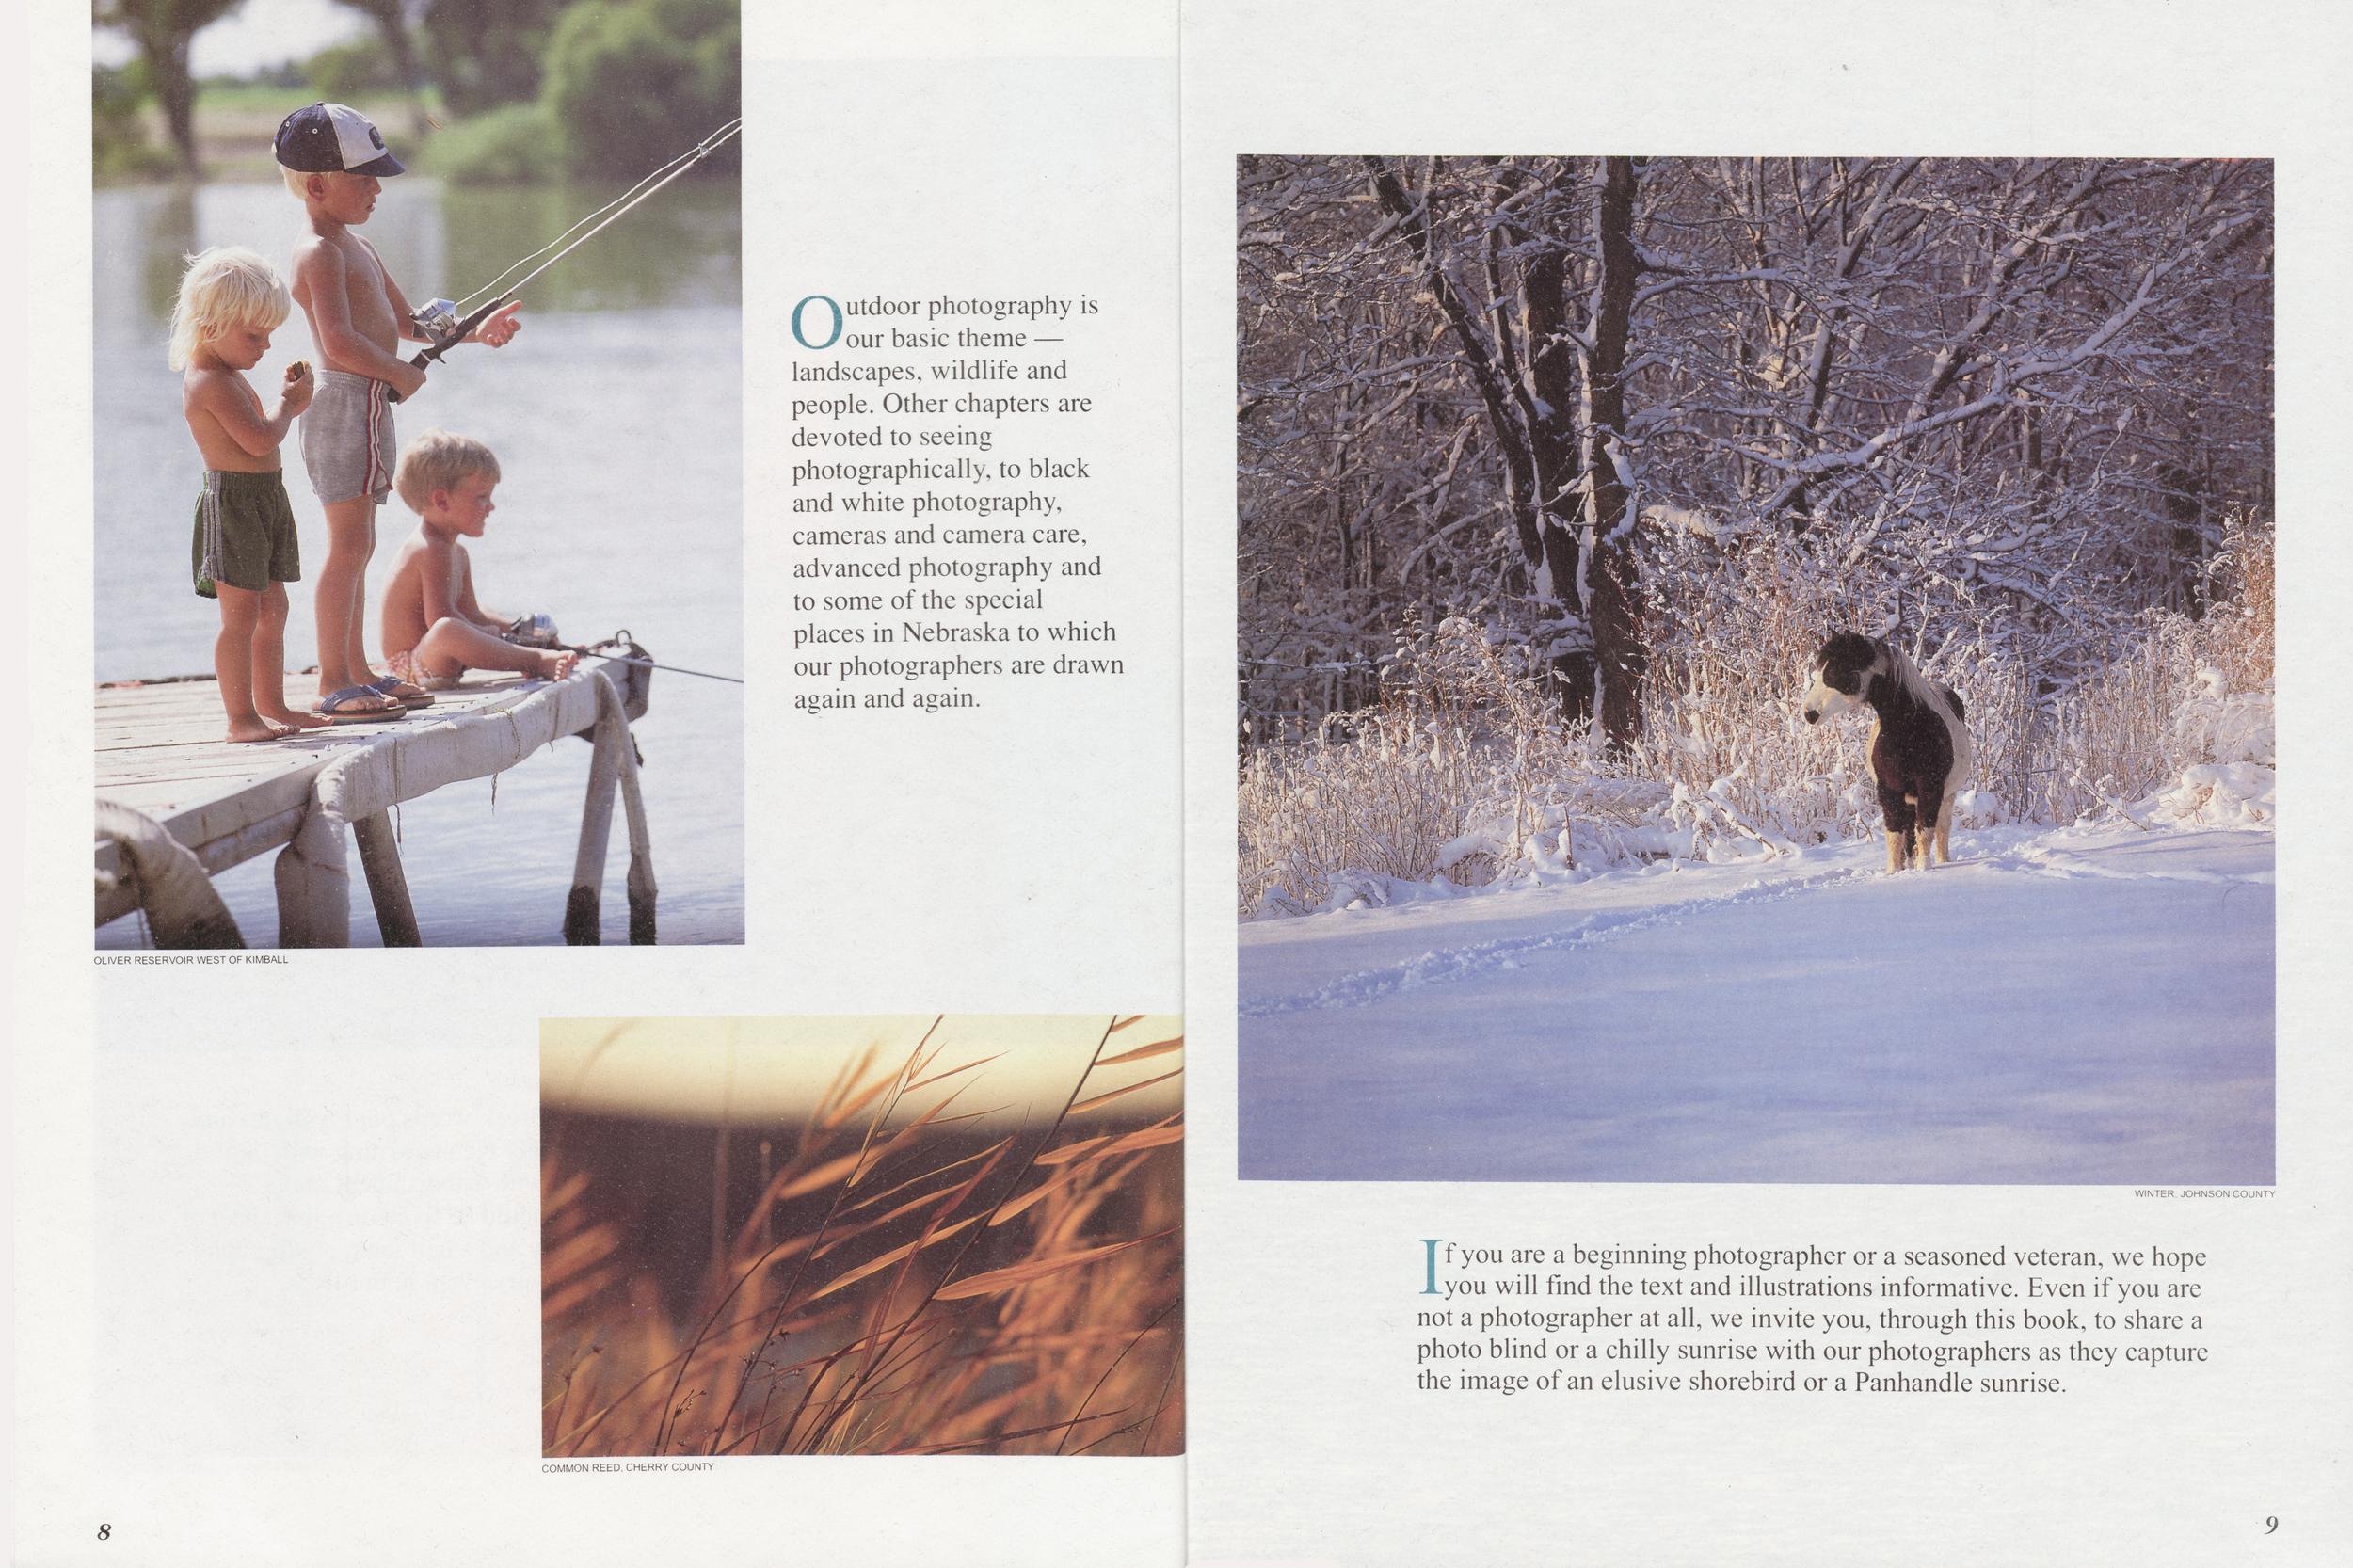
OLIVER RESERVOIR WEST OF KIMBALL
Outdoor photography is our basic theme landscapes, wildlife and people. Other chapters are devoted to seeing photographically, to black and white photography, cameras and camera care, advanced photography and to some of the special places in Nebraska to which our photographers are drawn again and again.
COMMON REED, CHERRY COUNTY
WINTER. JOHNSON COUNTY
If you are a beginning photographer or a seasoned veteran, we hope you will find the text and illustrations informative. Even if you are not a photographer at all, we invite you, through this book, to share a photo blind or a chilly sunrise with our photographers as they capture the image of an elusive shorebird or a Panhandle sunrise.
8 9
Photographing Nebraska
Seeing Photographically
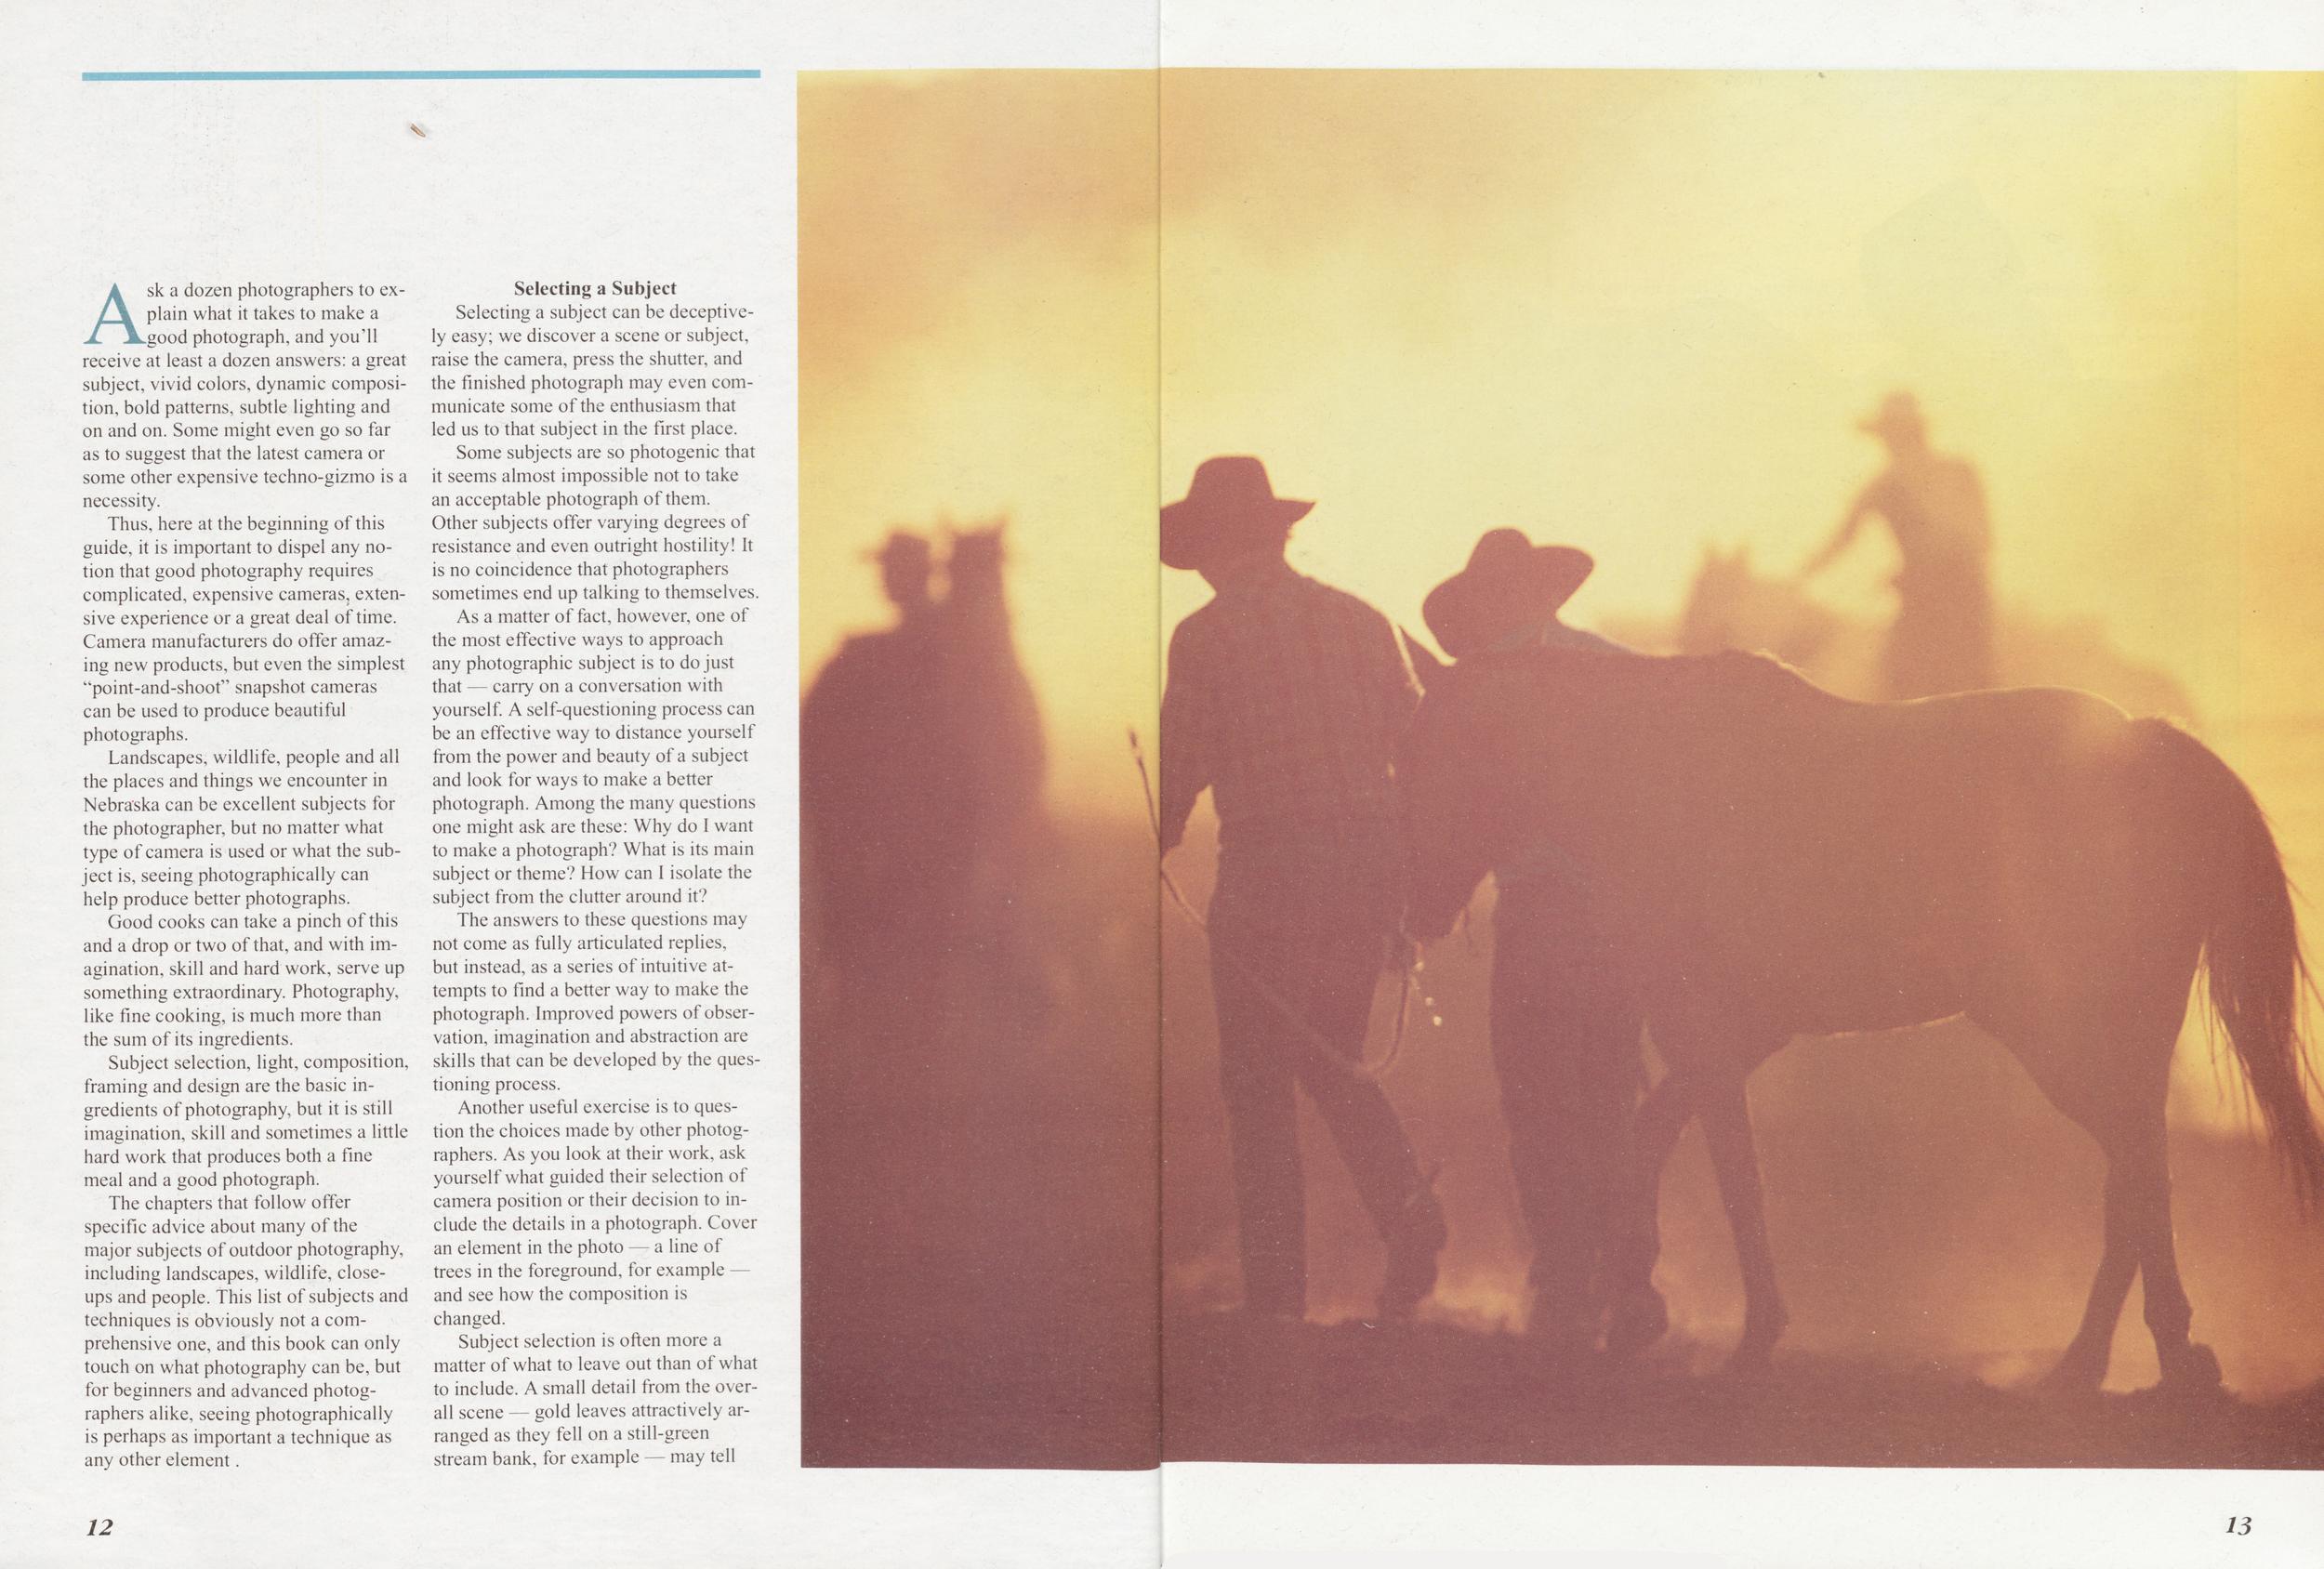
Ask a dozen photographers to explain what it takes to make a good photograph, and you'll receive at least a dozen answers: a great subject, vivid colors, dynamic composition, bold patterns, subtle lighting and on and on. Some might even go so far as to suggest that the latest camera or some other expensive techno-gizmo is a necessity.
Thus, here at the beginning of this guide, it is important to dispel any notion that good photography requires complicated, expensive cameras, extensive experience or a great deal of time. Camera manufacturers do offer amazing new products, but even the simplest "point-and-shoof' snapshot cameras can be used to produce beautiful photographs.
Landscapes, wildlife, people and all the places and things we encounter in Nebraska can be excellent subjects for the photographer, but no matter what type of camera is used or what the subject is, seeing photographically can help produce better photographs.
Good cooks can take a pinch of this and a drop or two of that, and with imagination, skill and hard work, serve up something extraordinary. Photography, like fine cooking, is much more than the sum of its ingredients.
Subject selection, light, composition, framing and design are the basic ingredients of photography, but it is still imagination, skill and sometimes a little hard work that produces both a fine meal and a good photograph.
The chapters that follow offer specific advice about many of the major subjects of outdoor photography, including landscapes, wildlife, close-ups and people. This list of subjects and techniques is obviously not a comprehensive one, and this book can only touch on what photography can be, but for beginners and advanced photographers alike, seeing photographically is perhaps as important a technique as any other element.
Selecting a SubjectSelecting a subject can be deceptively easy; we discover a scene or subject, raise the camera, press the shutter, and the finished photograph may even communicate some of the enthusiasm that led us to that subject in the first place.
Some subjects are so photogenic that it seems almost impossible not to take an acceptable photograph of them. Other subjects offer varying degrees of resistance and even outright hostility! It is no coincidence that photographers sometimes end up talking to themselves.
As a matter of fact, however, one of the most effective ways to approach any photographic subject is to do just that — carry on a conversation with yourself. A self-questioning process can be an effective way to distance yourself from the power and beauty of a subject and look for ways to make a better photograph. Among the many questions one might ask are these: Why do I want to make a photograph? What is its main subject or theme? How can I isolate the subject from the clutter around it?
The answers to these questions may not come as fully articulated replies, but instead, as a series of intuitive attempts to find a better way to make the photograph. Improved powers of observation, imagination and abstraction are skills that can be developed by the questioning process.
Another useful exercise is to question the choices made by other photographers. As you look at their work, ask yourself what guided their selection of camera position or their decision to include the details in a photograph. Cover an element in the photo — a line of trees in the foreground, for example and see how the composition is changed.
Subject selection is often more a matter of what to leave out than of what to include. A small detail from the overall scene — gold leaves attractively arranged as they fell on a still-green stream bank, for example may tell
 The Right Angle
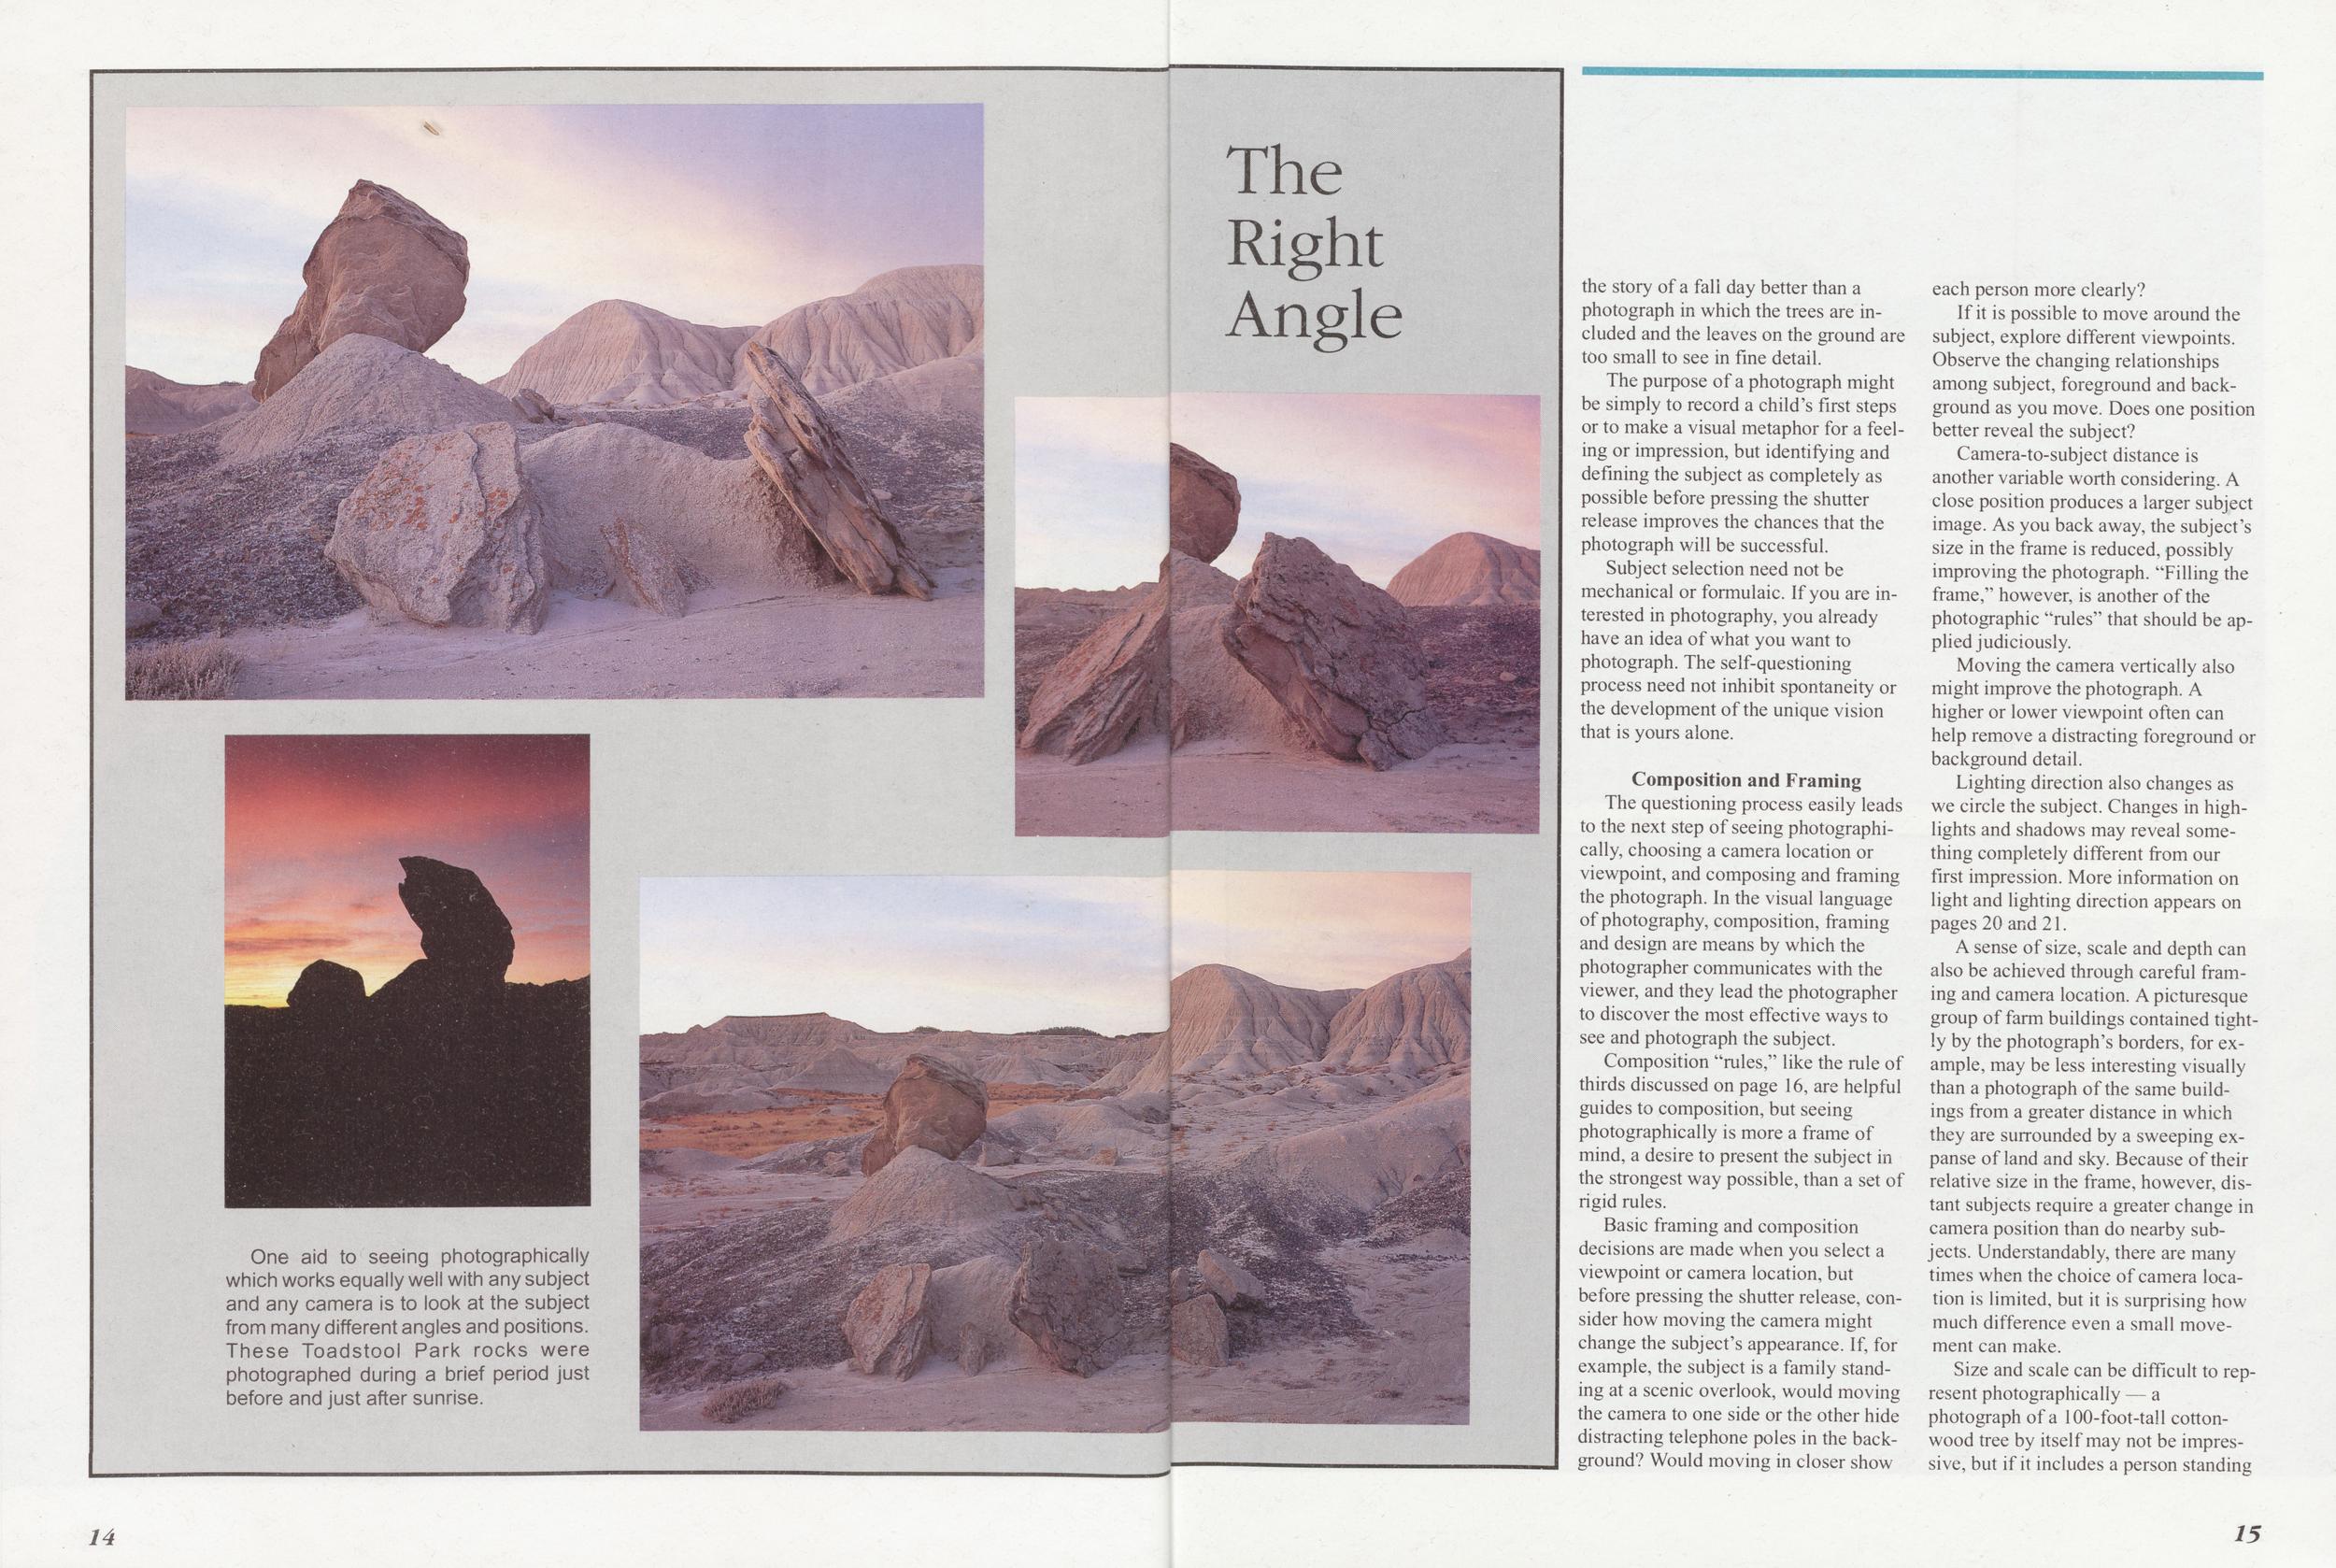
One aid to seeing photographically which works equally well with any subject and any camera is to look at the subject from many different angles and positions. These Toadstool Park rocks were photographed during a brief period just before and just after sunrise.
the story of a fall day better than a photograph in which the trees are included and the leaves on the ground are too small to see in fine detail.
The purpose of a photograph might be simply to record a child's first steps or to make a visual metaphor for a feeling or impression, but identifying and defining the subject as completely as possible before pressing the shutter release improves the chances that the photograph will be successful.
Subject selection need not be mechanical or formulaic. If you are interested in photography, you already have an idea of what you want to photograph. The self-questioning process need not inhibit spontaneity or the development of the unique vision that is yours alone.
Composition and FramingThe questioning process easily leads to the next step of seeing photographically, choosing a camera location or viewpoint, and composing and framing the photograph. In the visual language of photography, composition, framing and design are means by which the photographer communicates with the viewer, and they lead the photographer to discover the most effective ways to see and photograph the subject.
Composition "rules," like the rule of thirds discussed on page 16, are helpful guides to composition, but seeing photographically is more a frame of mind, a desire to present the subject in the strongest way possible, than a set of rigid rules.
Basic framing and composition decisions are made when you select a viewpoint or camera location, but before pressing the shutter release, consider how moving the camera might change the subject's appearance. If, for example, the subject is a family standing at a scenic overlook, would moving the camera to one side or the other hide distracting telephone poles in the background? Would moving in closer show each person more clearly?
If it is possible to move around the subject, explore different viewpoints. Observe the changing relationships among subject, foreground and background as you move. Does one position better reveal the subject?
Camera-to-subject distance is another variable worth considering. A close position produces a larger subject image. As you back away, the subject's size in the frame is reduced, possibly improving the photograph. "Filling the frame," however, is another of the photographic "rules" that should be applied judiciously.
Moving the camera vertically also might improve the photograph. A higher or lower viewpoint often can help remove a distracting foreground or background detail.
Lighting direction also changes as we circle the subject. Changes in highlights and shadows may reveal something completely different from our first impression. More information on light and lighting direction appears on pages 20 and 21.
A sense of size, scale and depth can also be achieved through careful framing and camera location. A picturesque group of farm buildings contained tightly by the photograph's borders, for example, may be less interesting visually than a photograph of the same buildings from a greater distance in which they are surrounded by a sweeping expanse of land and sky. Because of their relative size in the frame, however, distant subjects require a greater change in camera position than do nearby subjects. Understandably, there are many times when the choice of camera location is limited, but it is surprising how much difference even a small movement can make.
Size and scale can be difficult to represent photographically — a photograph of a 100-foot-tall cottonwood tree by itself may not be impressive, but if it includes a person standing
14 15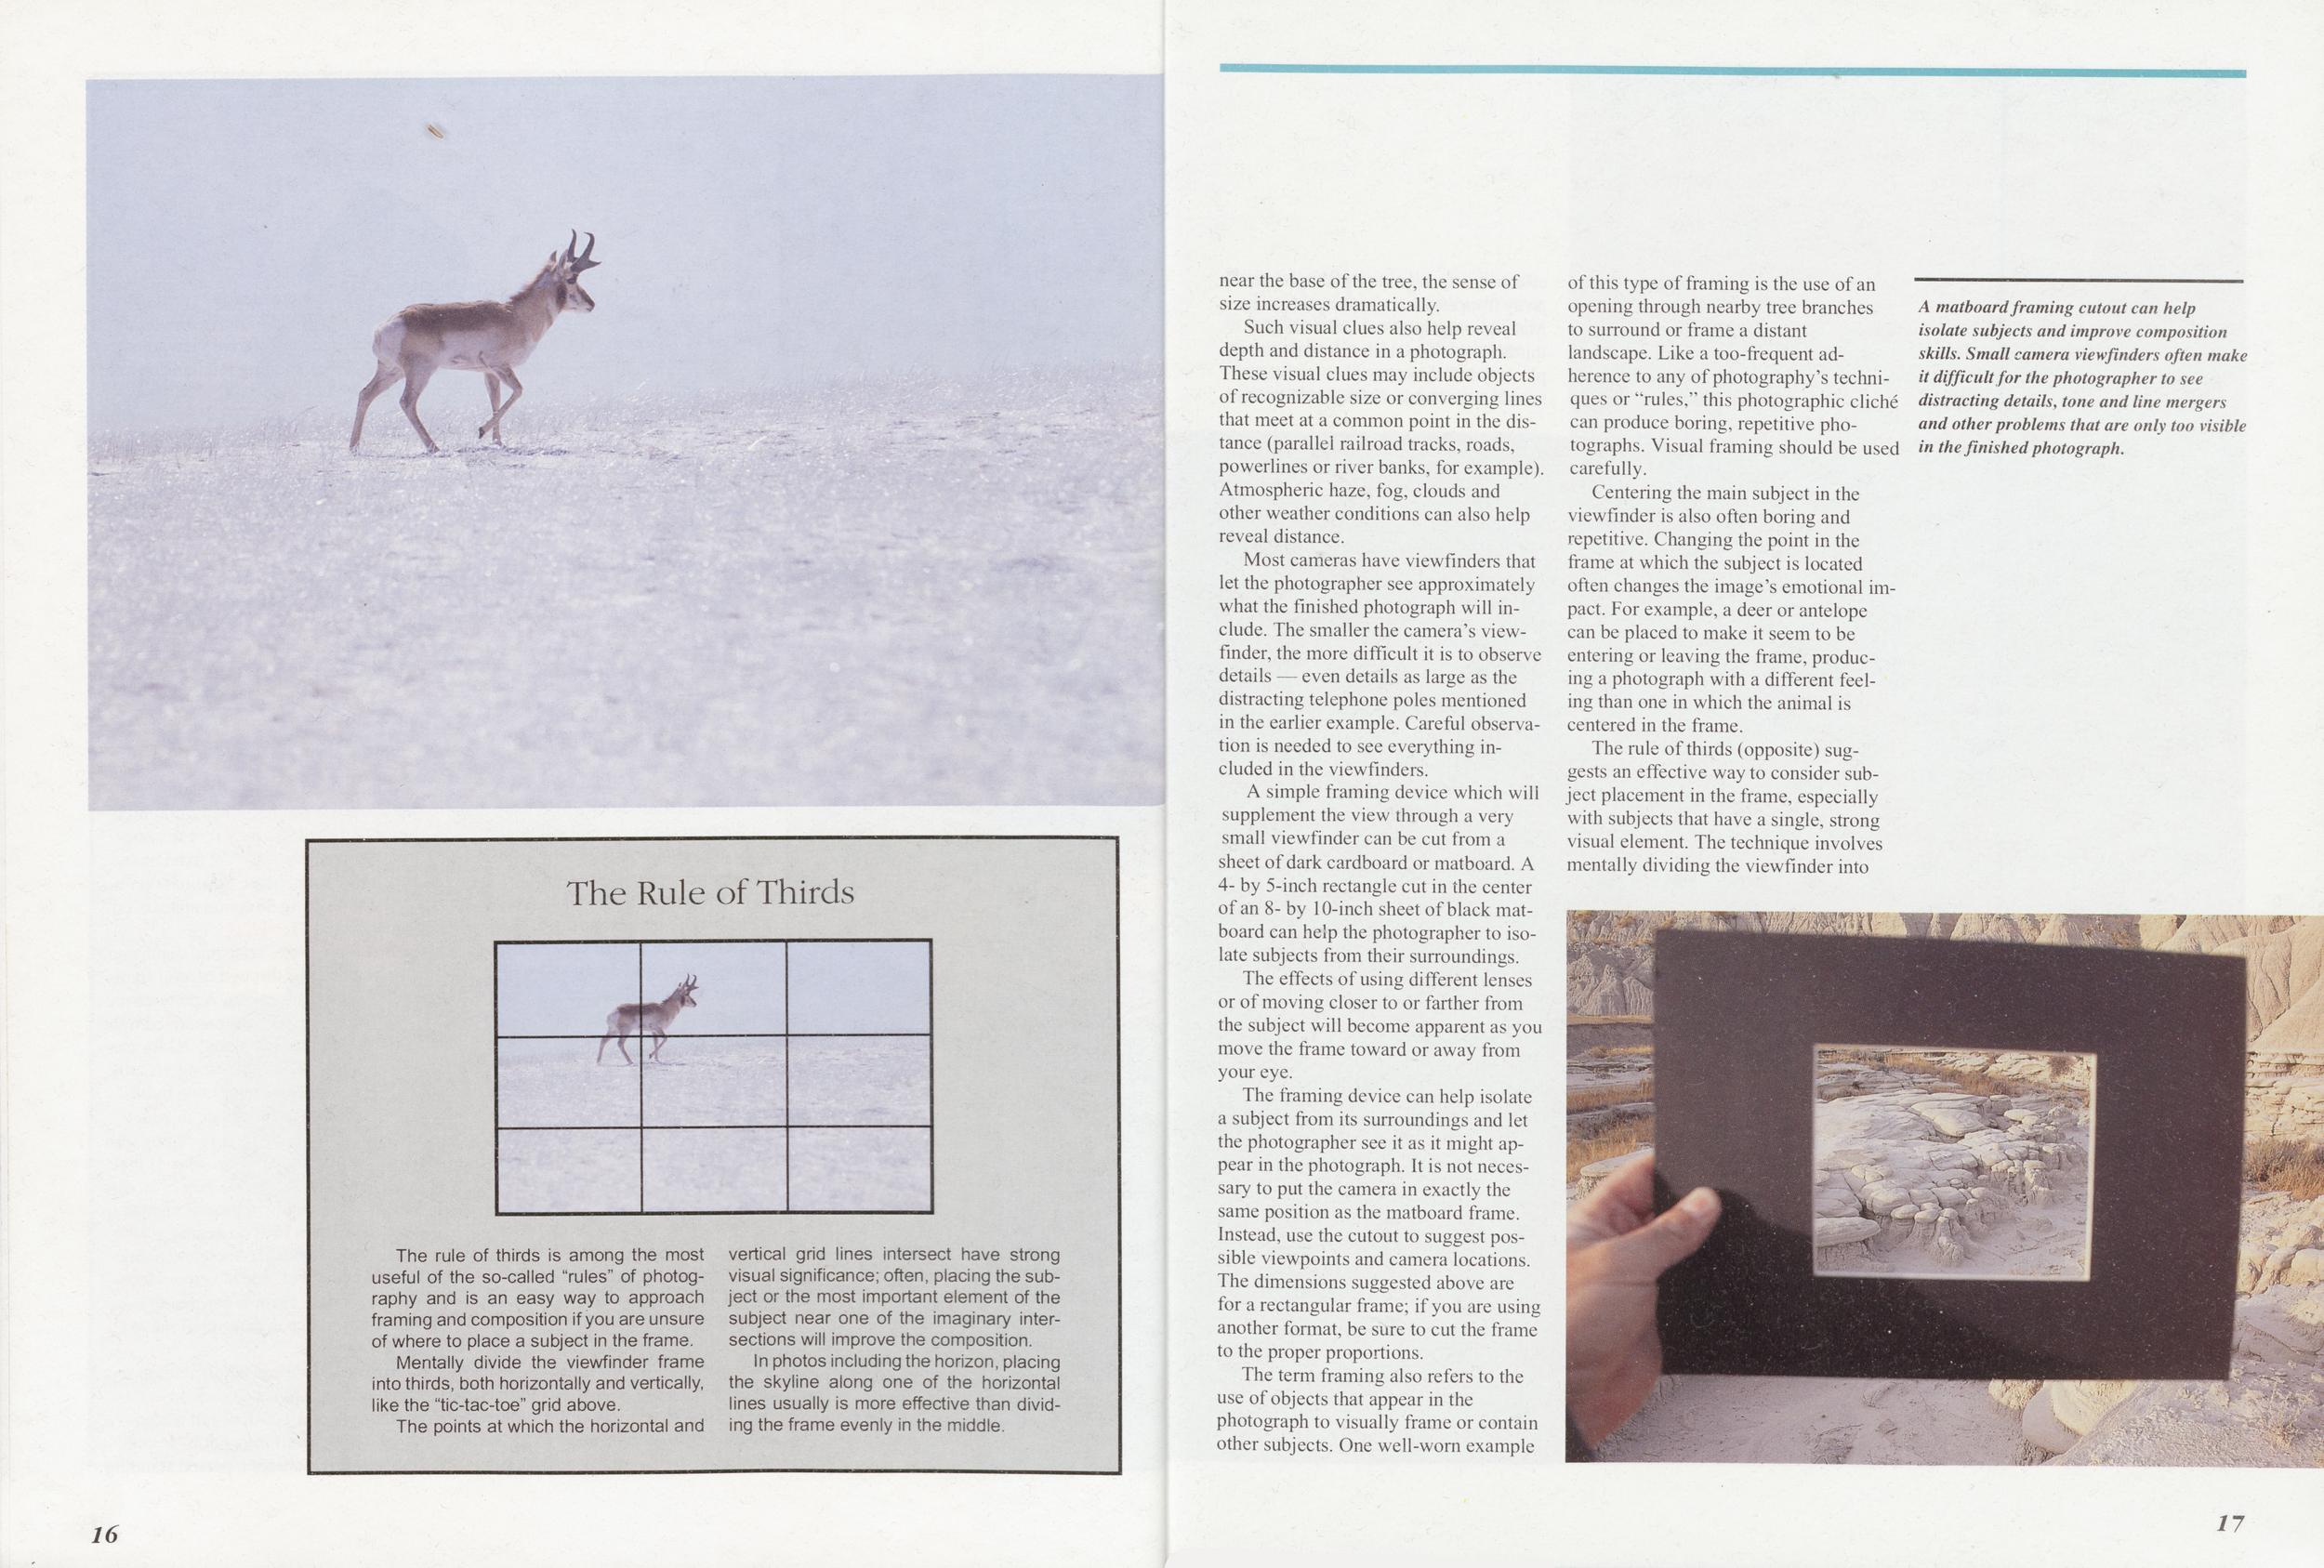
The rule of thirds is among the most useful of the so-called "rules" of photography and is an easy way to approach framing and composition if you are unsure of where to place a subject in the frame. Mentally divide the viewfinder frame into thirds, both horizontally and vertically, like the "tic-tac-toe" grid above. The points at which the horizontal and vertical grid lines intersect have strong visual significance; often, placing the subject or the most important element of the subject near one of the imaginary intersections will improve the composition. In photos including the horizon, placing the skyline along one of the horizontal lines usually is more effective than dividing the frame evenly in the middle.
near the base of the tree, the sense of size increases dramatically.
Such visual clues also help reveal depth and distance in a photograph. These visual clues may include objects of recognizable size or converging lines that meet at a common point in the distance (parallel railroad tracks, roads, powerlines or river banks, for example). Atmospheric haze, fog, clouds and other weather conditions can also help reveal distance.
Most cameras have viewfinders that let the photographer see approximately what the finished photograph will include. The smaller the camera's viewfinder, the more difficult it is to observe details — even details as large as the distracting telephone poles mentioned in the earlier example. Careful observation is needed to see everything included in the viewfinders.
A simple framing device which will supplement the view through a very small viewfinder can be cut from a sheet of dark cardboard or matboard. A 4- by 5-inch rectangle cut in the center of an 8- by 10-inch sheet of black matboard can help the photographer to isolate subjects from their surroundings.
The effects of using different lenses or of moving closer to or farther from the subject will become apparent as you move the frame toward or away from your eye.
The framing device can help isolate a subject from its surroundings and let the photographer see it as it might appear in the photograph. It is not necessary to put the camera in exactly the same position as the matboard frame. Instead, use the cutout to suggest possible viewpoints and camera locations. The dimensions suggested above are for a rectangular frame; if you are using another format, be sure to cut the frame to the proper proportions.
The term framing also refers to the use of objects that appear in the photograph to visually frame or contain other subjects. One well-worn example of this type of framing is the use of an opening through nearby tree branches to surround or frame a distant landscape. Like a too-frequent adherence to any of photography's techniques or "rules," this photographic cliche can produce boring, repetitive photographs. Visual framing should be used carefully.
Centering the main subject in the viewfinder is also often boring and repetitive. Changing the point in the frame at which the subject is located often changes the image's emotional impact. For example, a deer or antelope can be placed to make it seem to be entering or leaving the frame, producing a photograph with a different feeling than one in which the animal is centered in the frame.
The rule of thirds (opposite) suggests an effective way to consider subject placement in the frame, especially with subjects that have a single, strong visual element. The technique involves mentally dividing the viewfinder into
A matboard framing cutout can help isolate subjects and improve composition skills. Small camera viewfinders often make it difficult for the photographer to see distracting details, tone and line mergers and other problems that are only too visible in the finished photograph.
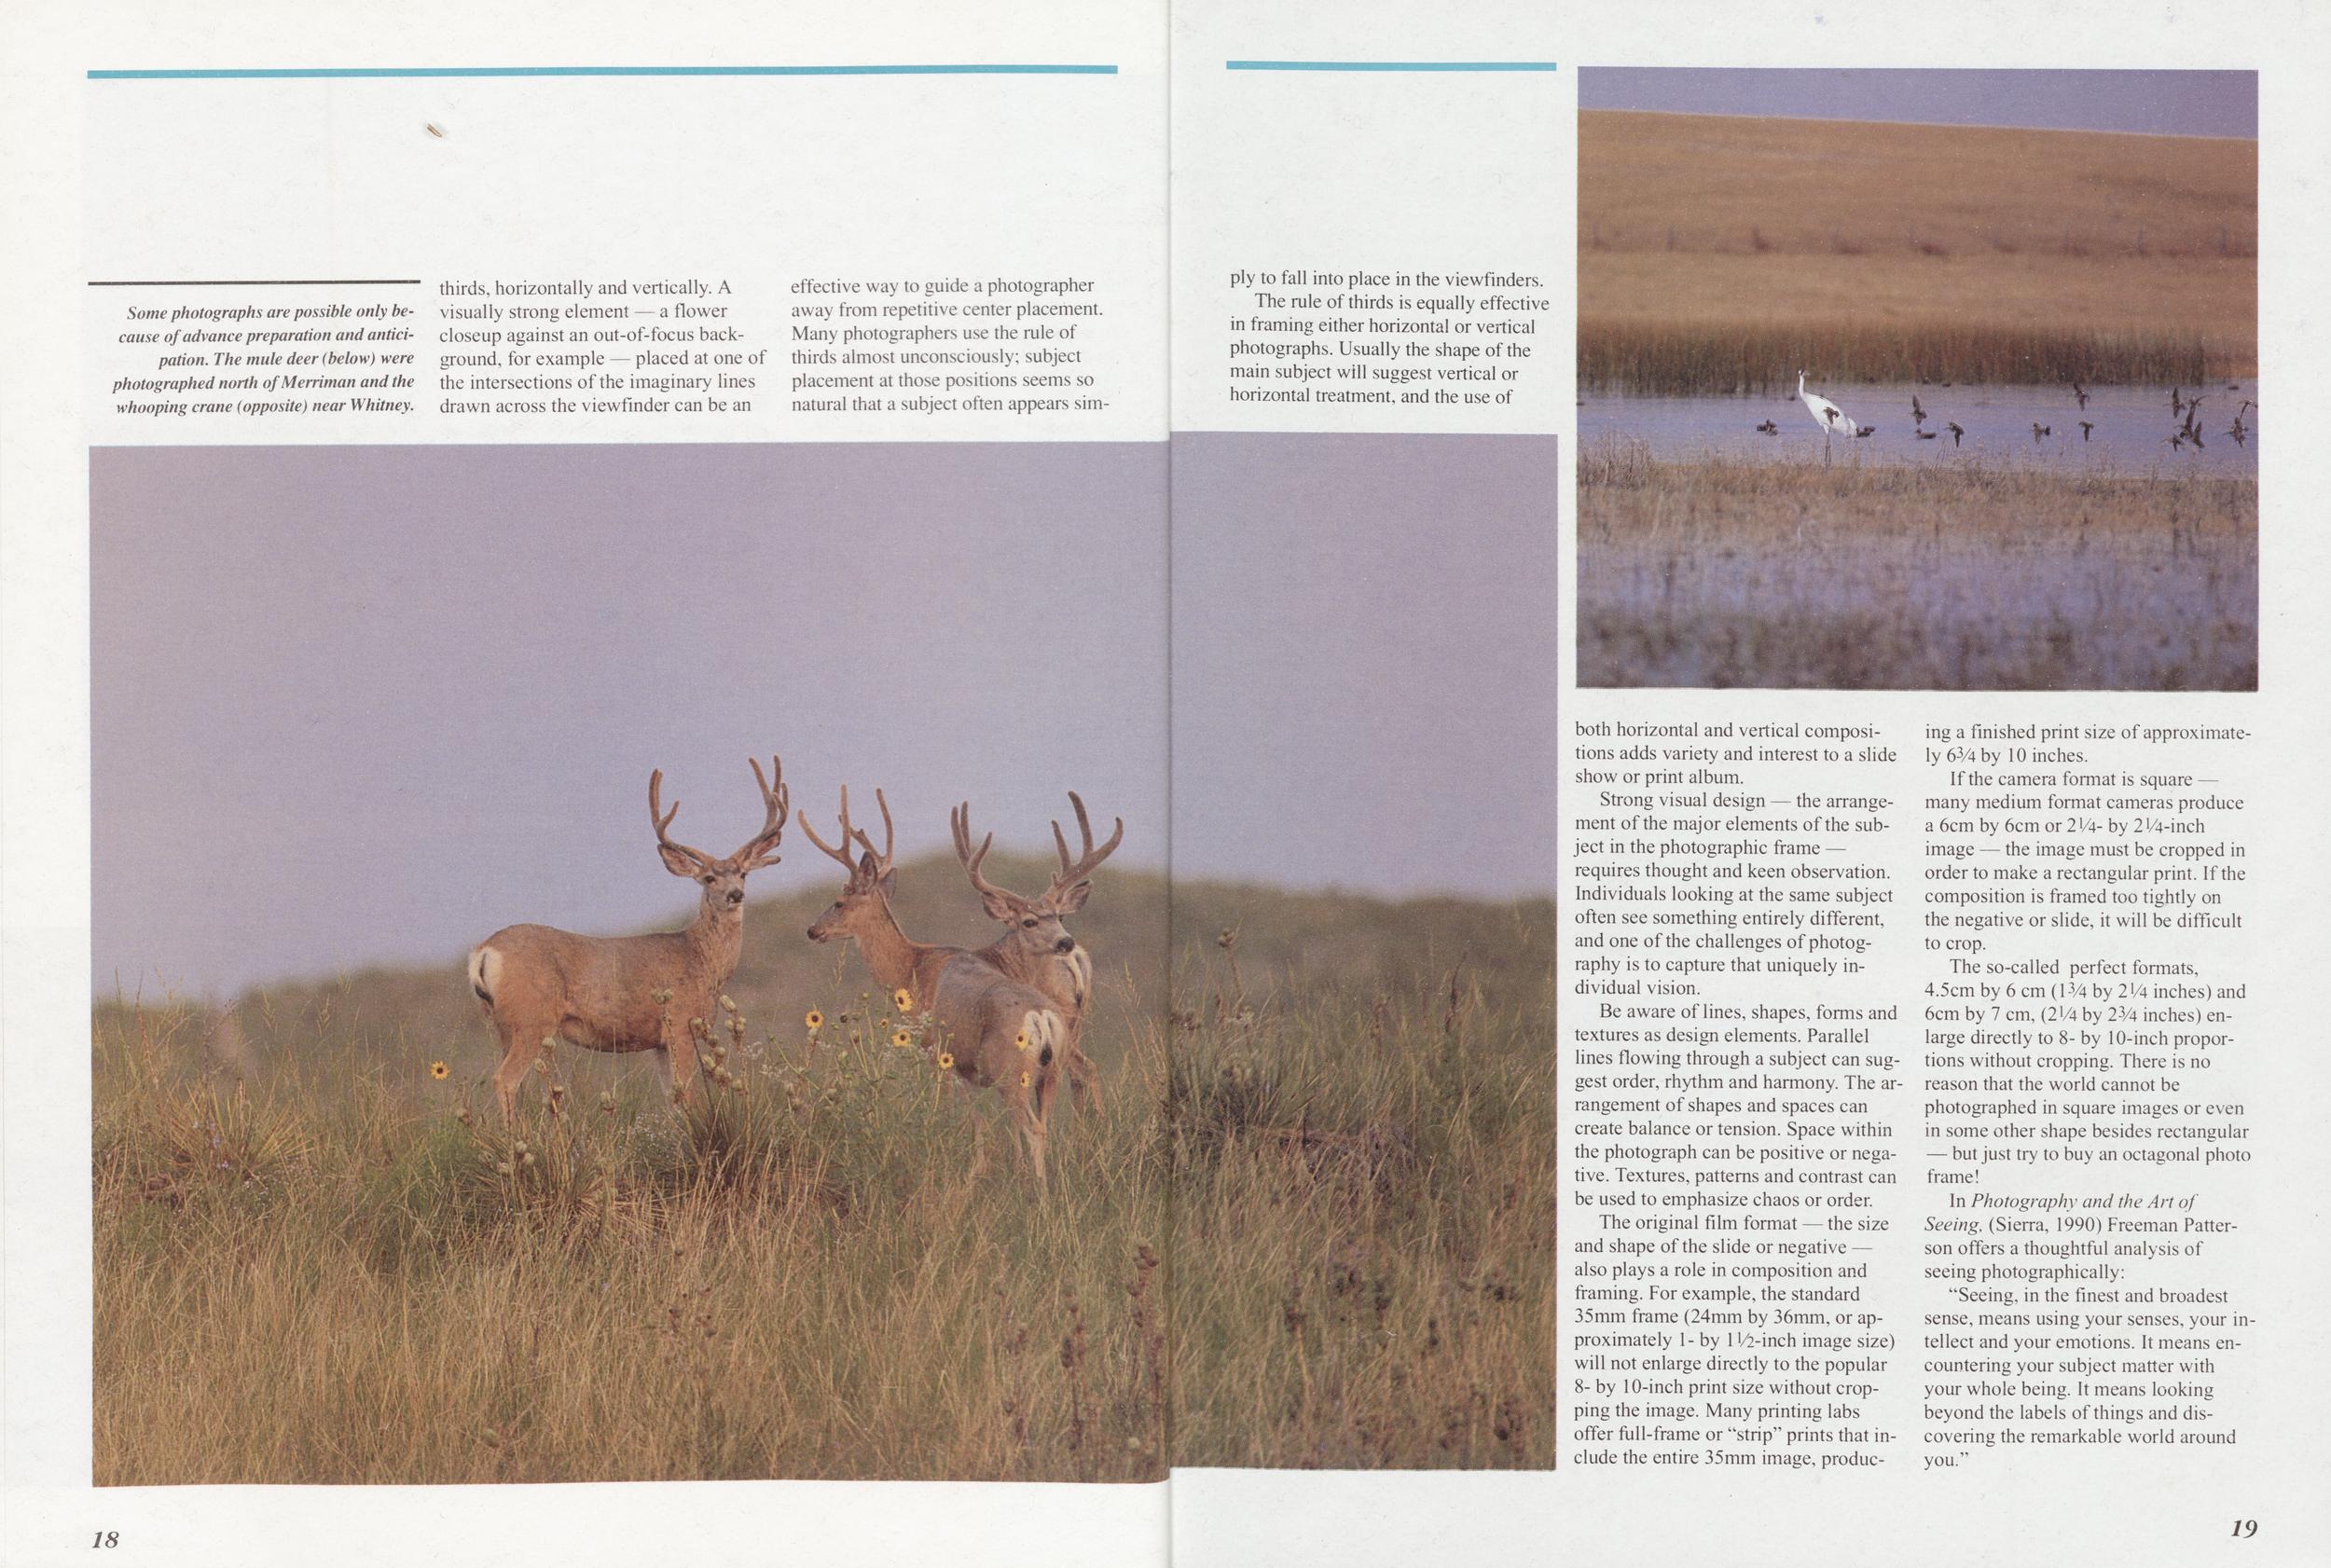
Some photographs are possible only because of advance preparation and anticipation. The mule deer (below) were photographed north ofMerriman and the whooping crane (opposite) near Whitney.
thirds, horizontally and vertically. A visually strong element — a flower closeup against an out-of-focus background, for example — placed at one of the intersections of the imaginary lines drawn across the viewfinder can be an effective way to guide a photographer away from repetitive center placement. Many photographers use the rule of thirds almost unconsciously; subject placement at those positions seems so natural that a subject often appears simply to fall into place in the viewfinders.
The rule of thirds is equally effective in framing either horizontal or vertical photographs. Usually the shape of the main subject will suggest vertical or horizontal treatment, and the use of both horizontal and vertical compositions adds variety and interest to a slide show or print album.
Strong visual design — the arrangement of the major elements of the subject in the photographic frame — requires thought and keen observation. Individuals looking at the same subject often see something entirely different, and one of the challenges of photography is to capture that uniquely individual vision.
Be aware of lines, shapes, forms and textures as design elements. Parallel lines flowing through a subject can suggest order, rhythm and harmony. The arrangement of shapes and spaces can create balance or tension. Space within the photograph can be positive or negative. Textures, patterns and contrast can be used to emphasize chaos or order.
The original film format — the size and shape of the slide or negative also plays a role in composition and framing. For example, the standard 35mm frame (24mm by 36mm, or approximately 1 - by 1 1/2-inch image size) will not enlarge directly to the popular 8- by 10-inch print size without cropping the image. Many printing labs offer full-frame or "strip" prints that include the entire 35mm image, producing a finished print size of approximate- ly 63 /4 by 10 inches.
If the camera format is square many medium format cameras produce a 6cm by 6cm or 2 Va- by 2 /4-inch image — the image must be cropped in order to make a rectangular print. If the composition is framed too tightly on the negative or slide, it will be difficult to crop.
The so-called perfect formats, 4.5cm by 6 cm (l3/4 by 21/4 inches) and 6cm by 7 cm, (21/4 by 23/4 inches) enlarge directly to 8- by 10-inch proportions without cropping. There is no reason that the world cannot be photographed in square images or even in some other shape besides rectangular — but just try to buy an octagonal photo frame!
In Photography and the Art of Seeing, (Sierra, 1990) Freeman Patterson offers a thoughtful analysis of seeing photographically:
"Seeing, in the finest and broadest sense, means using your senses, your intellect and your emotions. It means encountering your subject matter with your whole being. It means looking beyond the labels of things and discovering the remarkable world around you."
18 19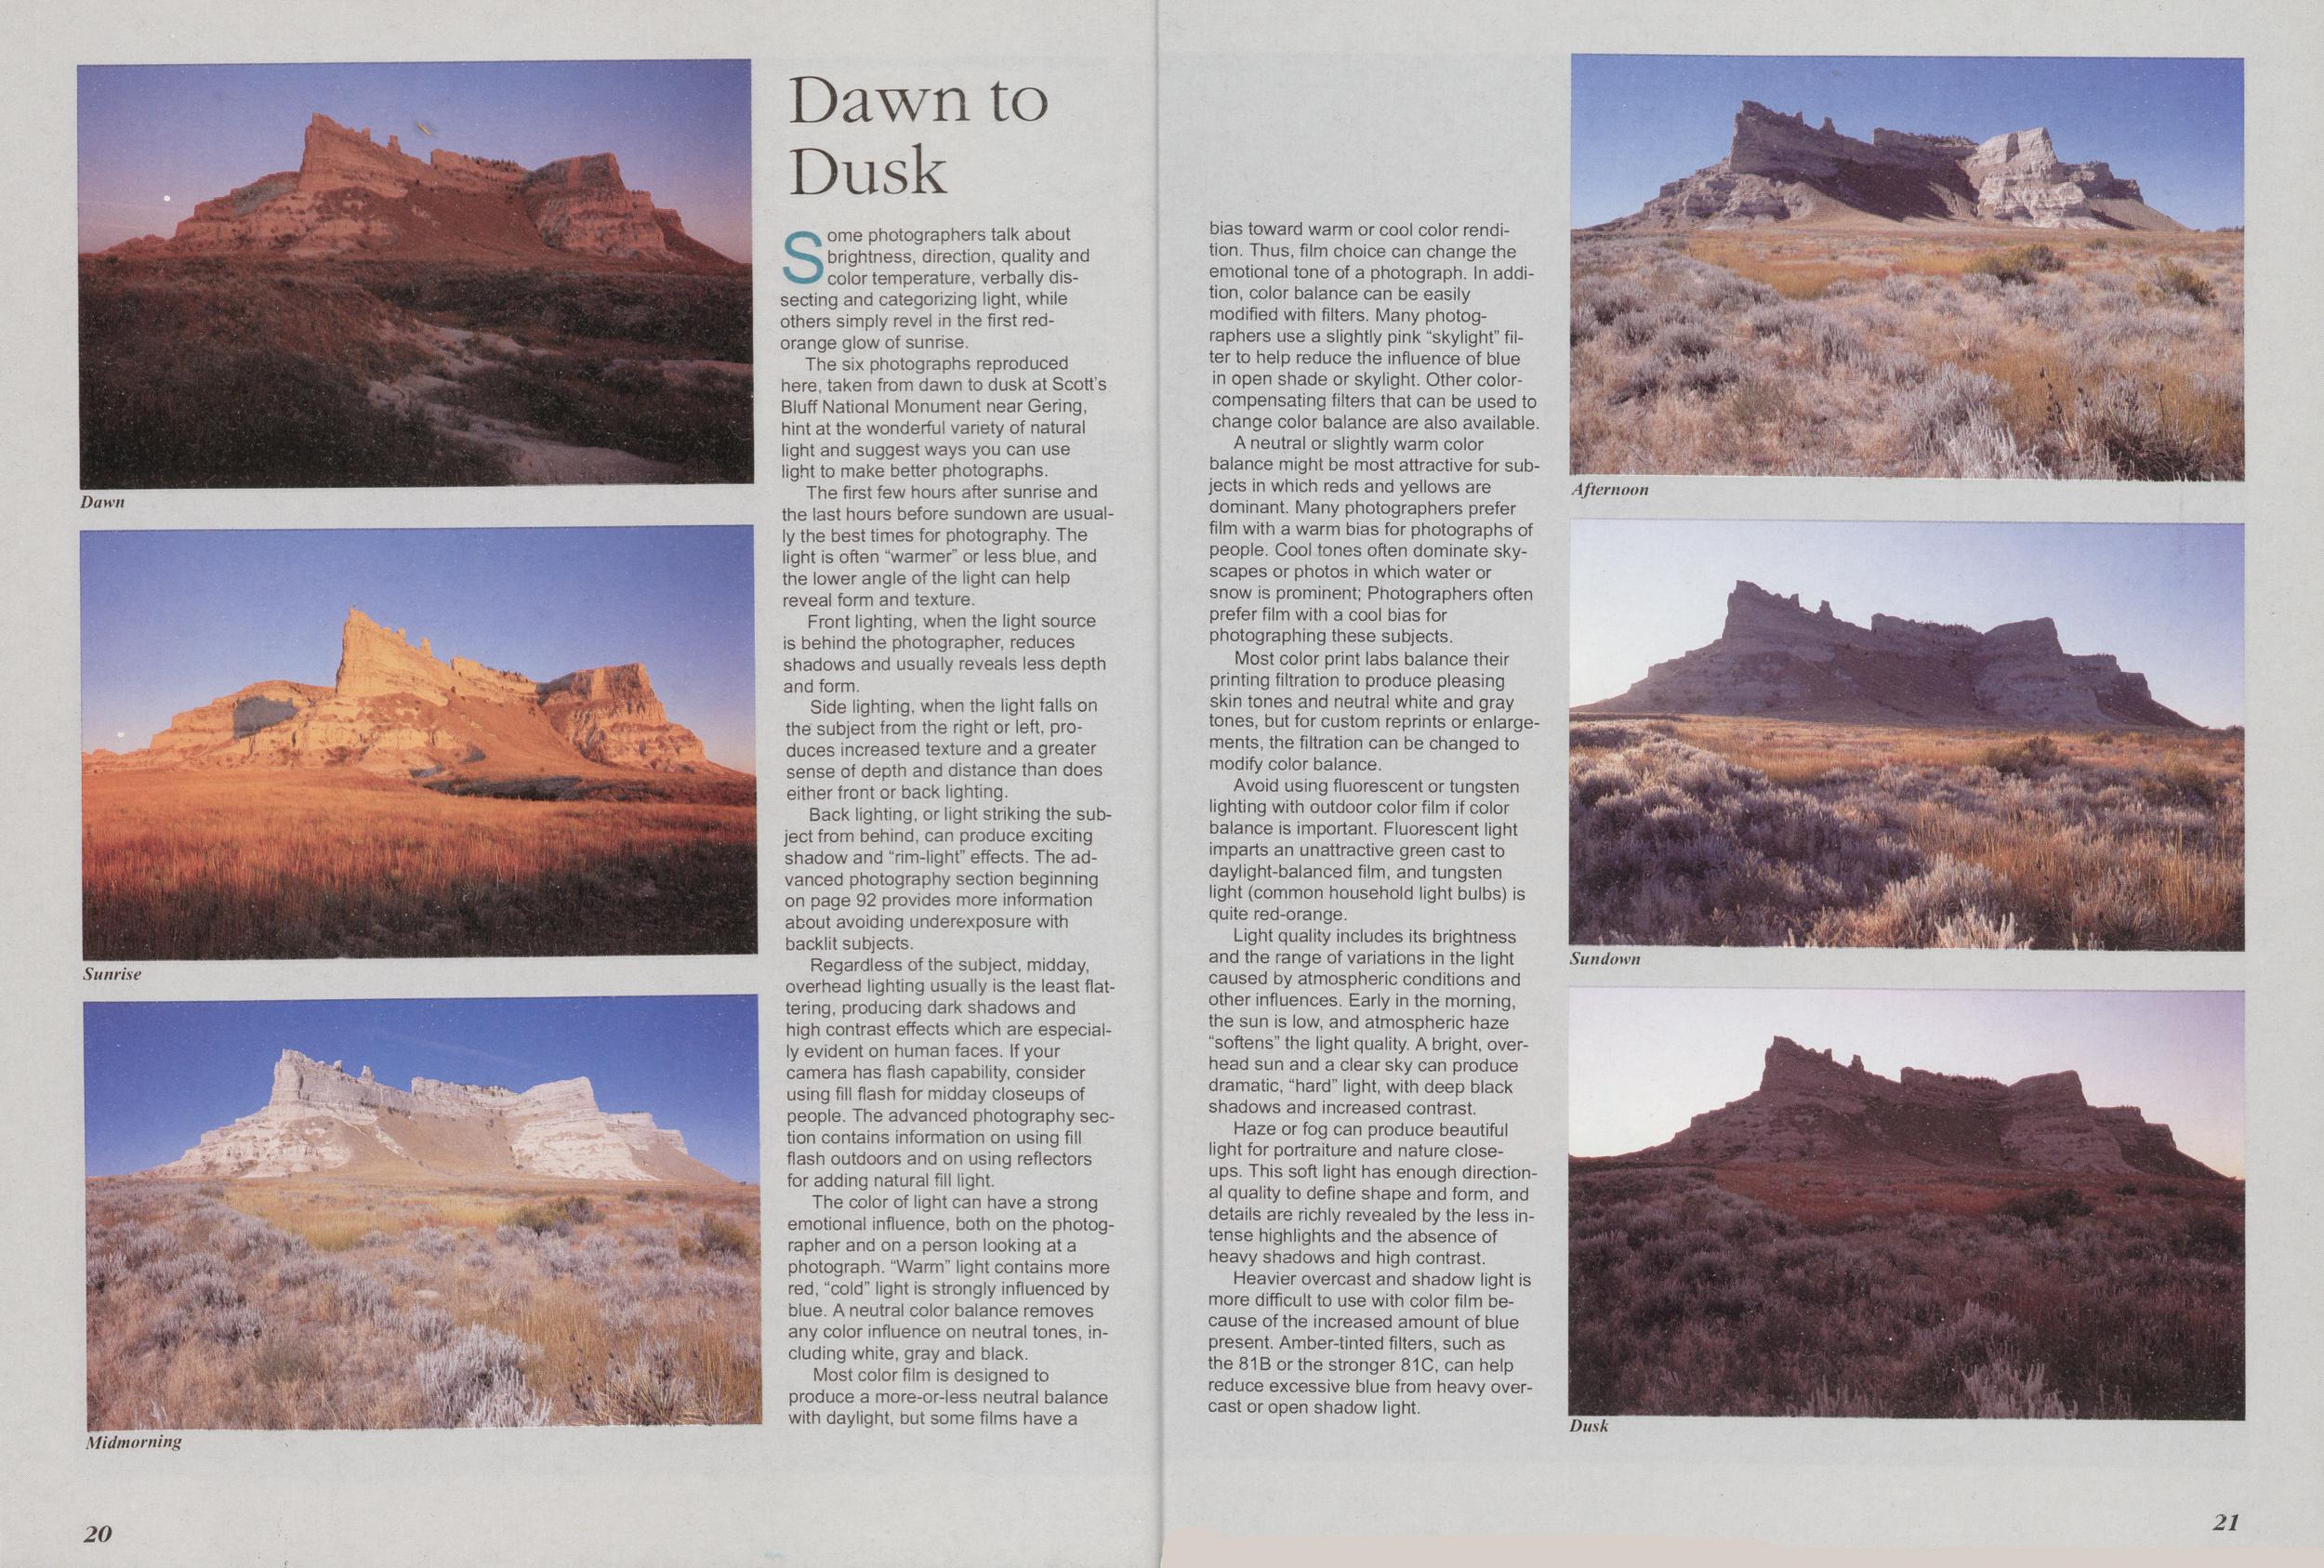
Dawn
Sunrise
Midmorning
Dawn to Dusk
Some photographers talk about brightness, direction, quality and color temperature, verbally dissecting and categorizing light, while others simply revel in the first redorange glow of sunrise.
The six photographs reproduced here, taken from dawn to dusk at Scott's Bluff National Monument near Gering, hint at the wonderful variety of natural light and suggest ways you can use light to make better photographs.
The first few hours after sunrise and the last hours before sundown are usually the best times for photography. The light is often "warmer" or less blue, and the lower angle of the light can help reveal form and texture.
Front lighting, when the light source is behind the photographer, reduces shadows and usually reveals less depth and form.
Side lighting, when the light falls on the subject from the right or left, produces increased texture and a greater sense of depth and distance than does either front or back lighting.
Back lighting, or light striking the subject from behind, can produce exciting shadow and "rim-light" effects. The advanced photography section beginning on page 92 provides more information about avoiding underexposure with backlit subjects.
Regardless of the subject, midday, overhead lighting usually is the least flattering, producing dark shadows and high contrast effects which are especially evident on human faces. If your camera has flash capability, consider using fill flash for midday closeups of people. The advanced photography section contains information on using fill flash outdoors and on using reflectors for adding natural fill light.
The color of light can have a strong emotional influence, both on the photographer and on a person looking at a photograph. "Warm" light contains more red, "cold" light is strongly influenced by blue. A neutral color balance removes any color influence on neutral tones, including white, gray and black.
Most color film is designed to produce a more-or-less neutral balance with daylight, but some films have a bias toward warm or cool color rendition. Thus, film choice can change the emotional tone of a photograph. In addition, color balance can be easily modified with filters. Many photographers use a slightly pink "skylight" filter to help reduce the influence of blue in open shade or skylight. Other color-compensating filters that can be used to change color balance are also available.
A neutral or slightly warm color balance might be most attractive for subjects in which reds and yellows are dominant. Many photographers prefer film with a warm bias for photographs of people. Cool tones often dominate skyscapes or photos in which water or snow is prominent; Photographers often prefer film with a cool bias for photographing these subjects.
Most color print labs balance their printing filtration to produce pleasing skin tones and neutral white and gray tones, but for custom reprints or enlargements, the filtration can be changed to modify color balance.
Avoid using fluorescent or tungsten lighting with outdoor color film if color balance is important. Fluorescent light imparts an unattractive green cast to daylight-balanced film, and tungsten light (common household light bulbs) is quite red-orange.
Light quality includes its brightness and the range of variations in the light caused by atmospheric conditions and other influences. Early in the morning, the sun is low, and atmospheric haze "softens" the light quality. A bright, overhead sun and a clear sky can produce dramatic, "hard" light, with deep black shadows and increased contrast.
Haze or fog can produce beautiful light for portraiture and nature closeups. This soft light has enough directional quality to define shape and form, and details are richly revealed by the less intense highlights and the absence of heavy shadows and high contrast.
Heavier overcast and shadow light is more difficult to use with color film because of the increased amount of blue present. Amber-tinted filters, such as the 81B or the stronger 81C, can help reduce excessive blue from heavy overcast or open shadow light.
Afternoon
Sundown
Dusk
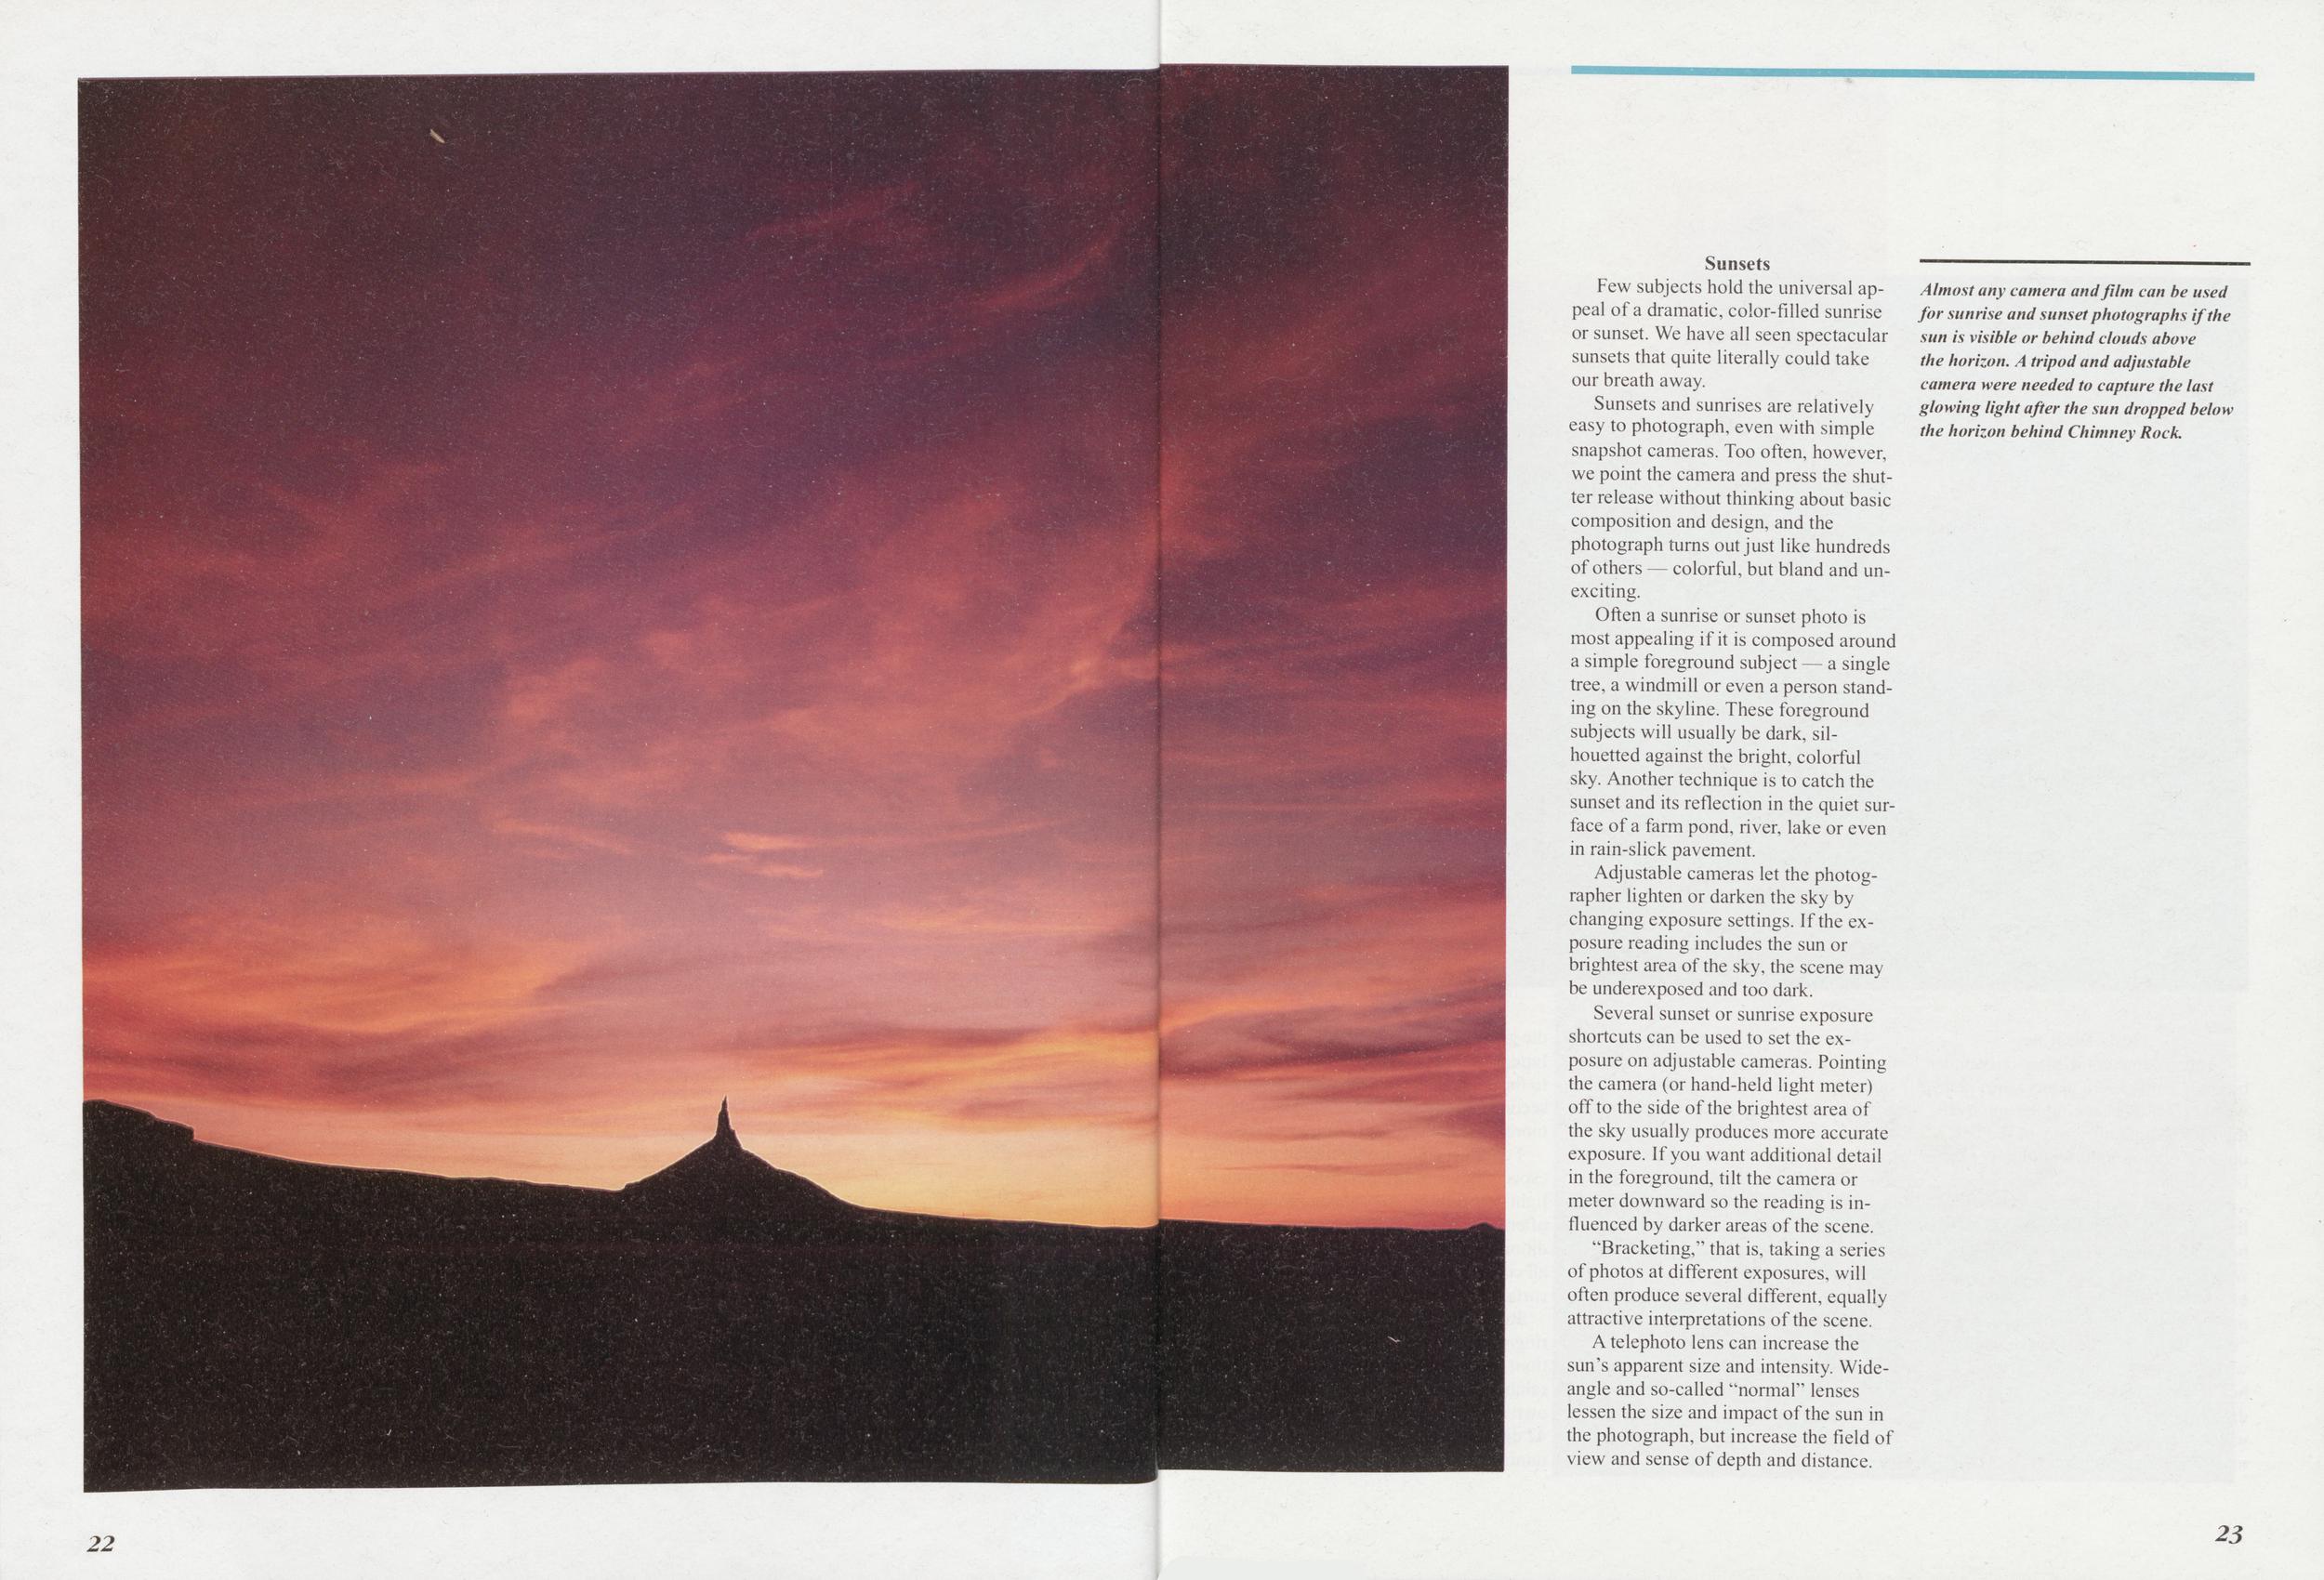
Almost any camera and film can be used for sunrise and sunset photographs if the sun is visible or behind clouds above the horizon. A tripod and adjustable camera were needed to capture the last glowing light after the sun dropped below the horizon behind Chimney Rock.
Few subjects hold the universal appeal of a dramatic, color-filled sunrise or sunset. We have all seen spectacular sunsets that quite literally could take our breath away.
Sunsets and sunrises are relatively easy to photograph, even with simple snapshot cameras. Too often, however, we point the camera and press the shutter release without thinking about basic composition and design, and the photograph turns out just like hundreds of others — colorful, but bland and unexciting.
Often a sunrise or sunset photo is most appealing if it is composed around a simple foreground subject — a single tree, a windmill or even a person standing on the skyline. These foreground subjects will usually be dark, silhouetted against the bright, colorful sky. Another technique is to catch the sunset and its reflection in the quiet surface of a farm pond, river, lake or even in rain-slick pavement.
Adjustable cameras let the photographer lighten or darken the sky by changing exposure settings. If the exposure reading includes the sun or brightest area of the sky, the scene may be underexposed and too dark.
Several sunset or sunrise exposure shortcuts can be used to set the exposure on adjustable cameras. Pointing the camera (or hand-held light meter) off to the side of the brightest area of the sky usually produces more accurate exposure. If you want additional detail in the foreground, tilt the camera or meter downward so the reading is influenced by darker areas of the scene.
"Bracketing," that is, taking a series of photos at different exposures, will often produce several different, equally attractive interpretations of the scene.
A telephoto lens can increase the sun's apparent size and intensity. Wide-angle and so-called "normal" lenses lessen the size and impact of the sun in the photograph, but increase the field of view and sense of depth and distance.
23 22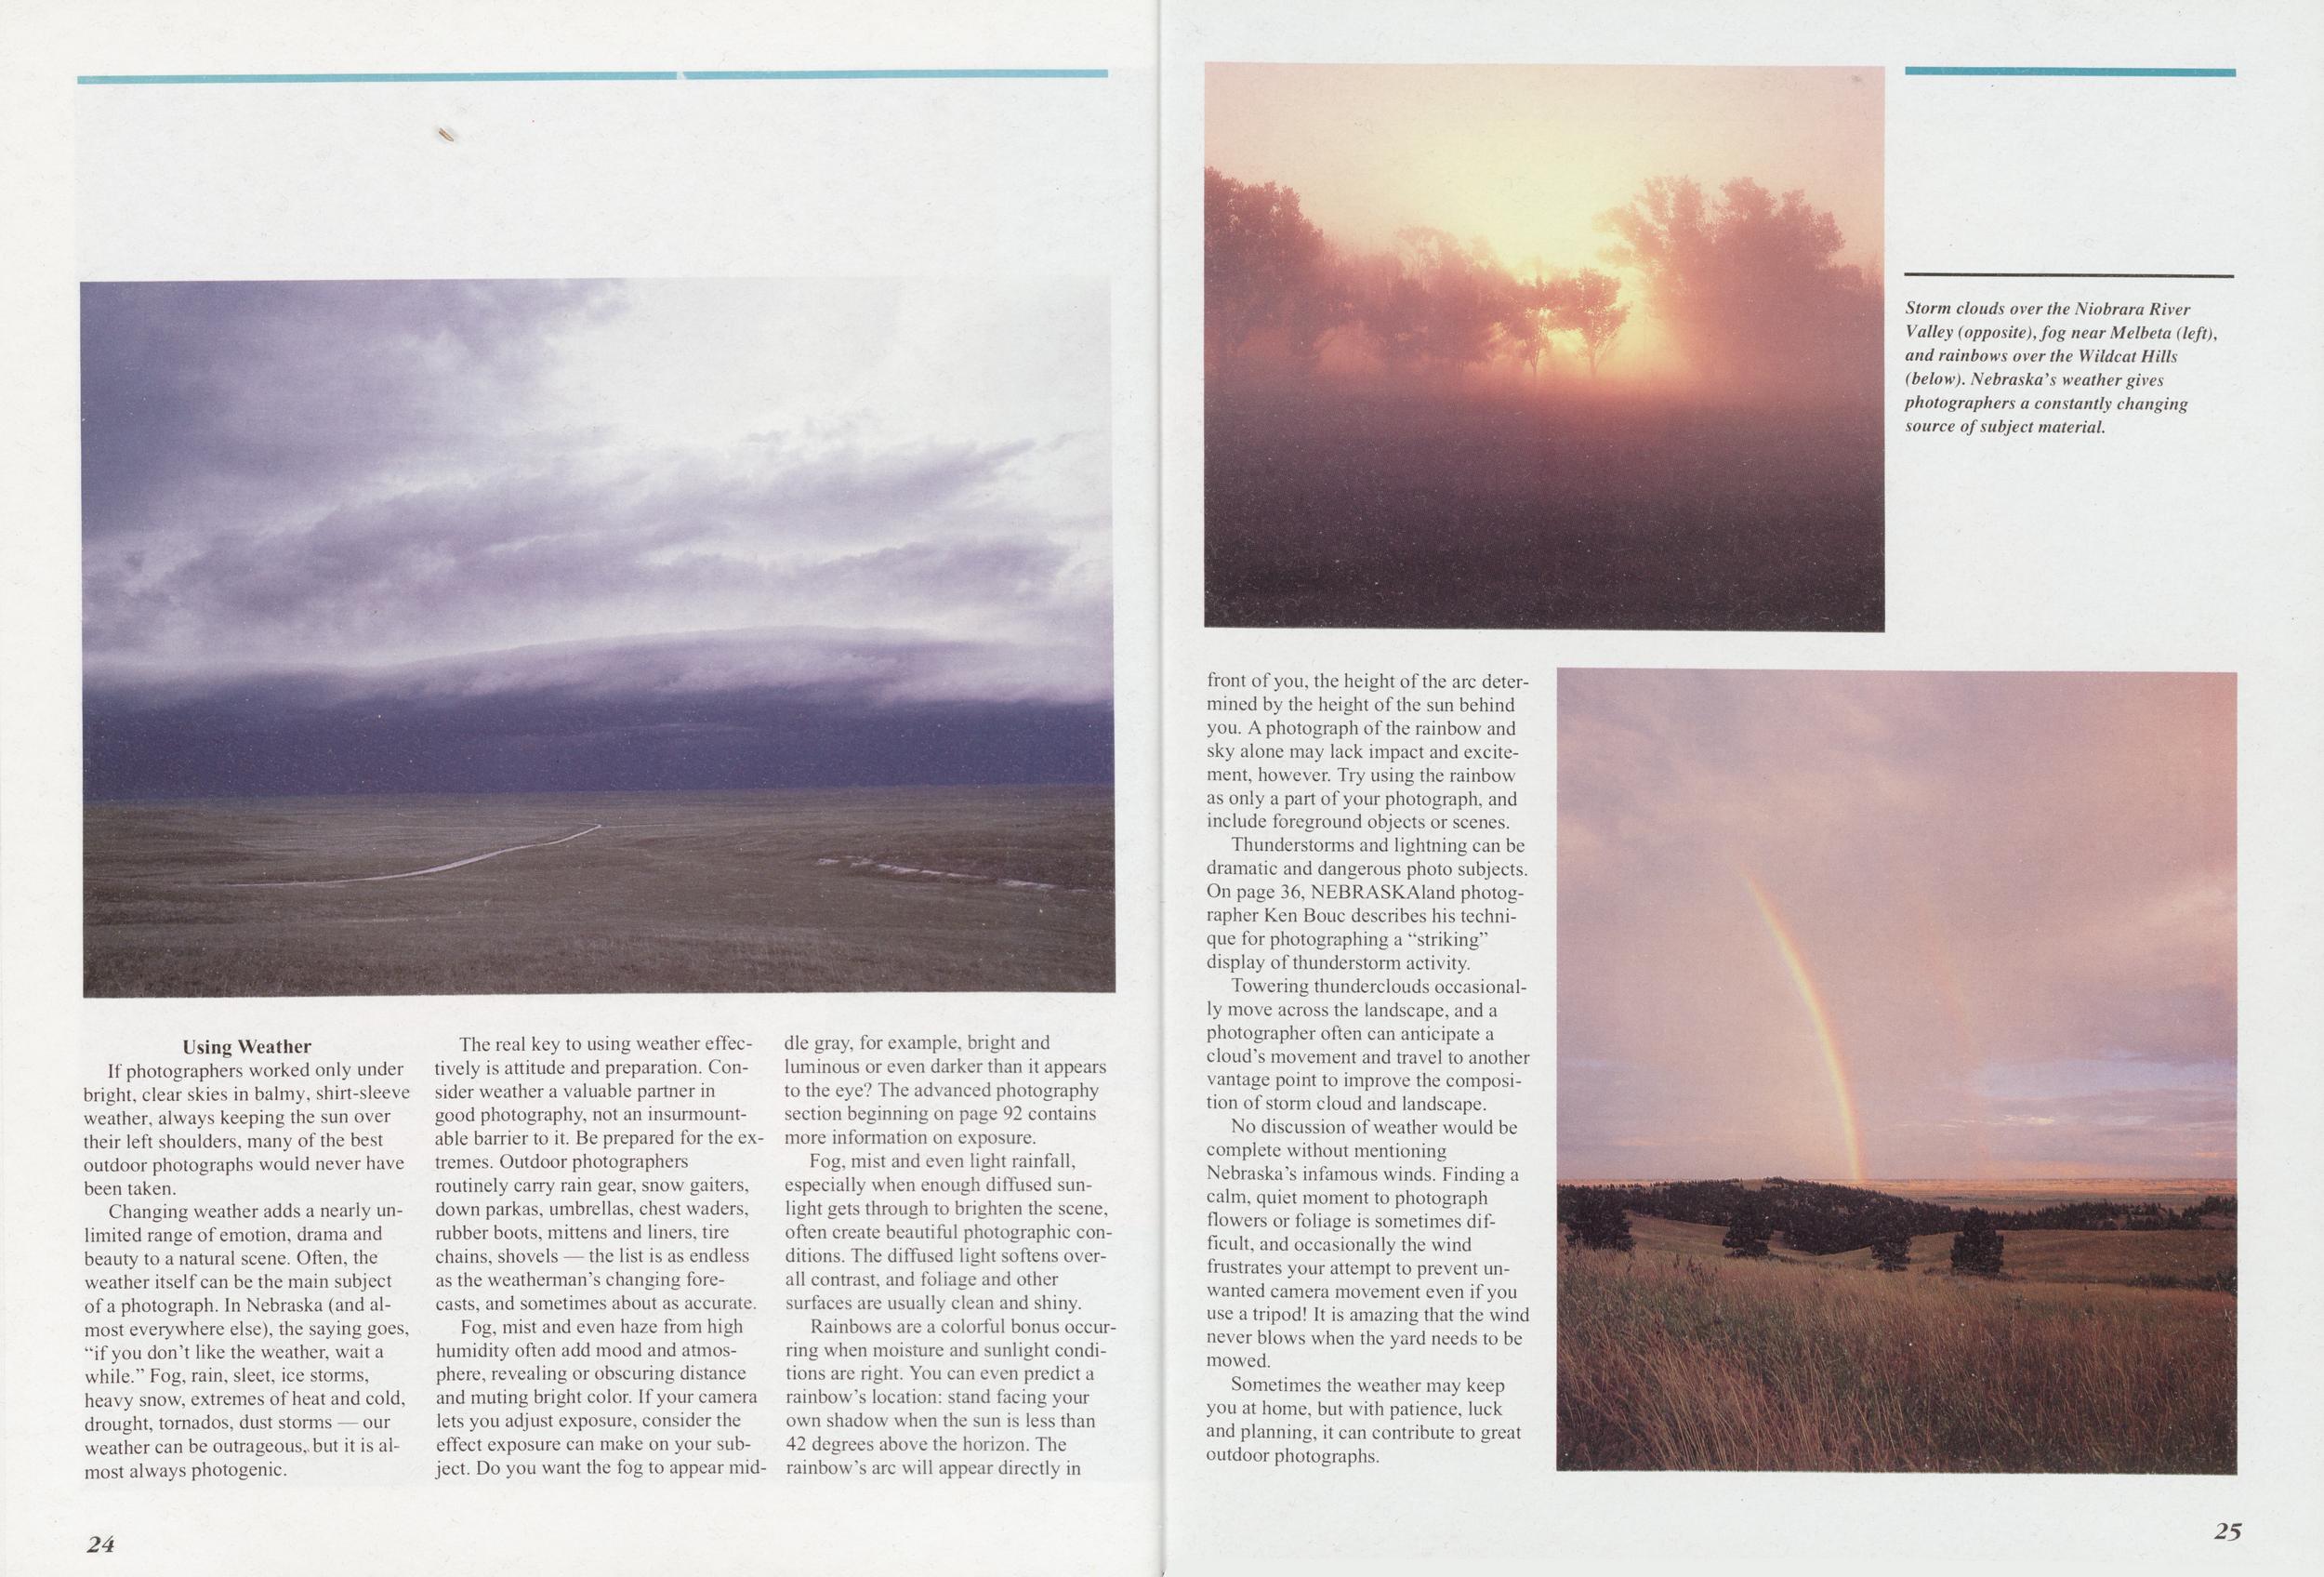
If photographers worked only under bright, clear skies in balmy, shirt-sleeve weather, always keeping the sun over their left shoulders, many of the best outdoor photographs would never have been taken.
Changing weather adds a nearly unlimited range of emotion, drama and beauty to a natural scene. Often, the weather itself can be the main subject of a photograph. In Nebraska (and almost everywhere else), the saying goes, 4 if you don't like the weather, wait a while." Fog, rain, sleet, ice storms, heavy snow, extremes of heat and cold, drought, tornados, dust storms our weather can be outrageous, but it is almost always photogenic.
The real key to using weather effectively is attitude and preparation. Consider weather a valuable partner in good photography, not an insurmountable barrier to it. Be prepared for the extremes. Outdoor photographers routinely carry rain gear, snow gaiters, down parkas, umbrellas, chest waders, rubber boots, mittens and liners, tire chains, shovels — the list is as endless as the weatherman's changing forecasts, and sometimes about as accurate.
Fog, mist and even haze from high humidity often add mood and atmosphere, revealing or obscuring distance and muting bright color. If your camera lets you adjust exposure, consider the effect exposure can make on your subject. Do you want the fog to appear middle gray, for example, bright and luminous or even darker than it appears to the eye? The advanced photography section beginning on page 92 contains more information on exposure.
Fog, mist and even light rainfall, especially when enough diffused sunlight gets through to brighten the scene, often create beautiful photographic conditions. The diffused light softens overall contrast, and foliage and other surfaces are usually clean and shiny.
Rainbows are a colorful bonus occurring when moisture and sunlight conditions are right. You can even predict a rainbow's location: stand facing your own shadow when the sun is less than 42 degrees above the horizon. The rainbow's arc will appear directly in front of you, the height of the arc determined by the height of the sun behind you. A photograph of the rainbow and sky alone may lack impact and excitement, however. Try using the rainbow as only a part of your photograph, and include foreground objects or scenes.
Thunderstorms and lightning can be dramatic and dangerous photo subjects. On page 36, NEBRASKAland photographer Ken Bouc describes his technique for photographing a "striking" display of thunderstorm activity.
Towering thunderclouds occasionally move across the landscape, and a photographer often can anticipate a cloud's movement and travel to another vantage point to improve the composition of storm cloud and landscape.
No discussion of weather would be complete without mentioning Nebraska's infamous winds. Finding a calm, quiet moment to photograph flowers or foliage is sometimes difficult, and occasionally the wind frustrates your attempt to prevent unwanted camera movement even if you use a tripod! It is amazing that the wind never blows when the yard needs to be mowed.
Sometimes the weather may keep you at home, but with patience, luck and planning, it can contribute to great outdoor photographs.
Storm clouds over the Niobrara River Valley (opposite), fog near Melbeta (left), and rainbows over the Wildcat Hills (below). Nebraska's weather gives photographers a constantly changing source of subject material.
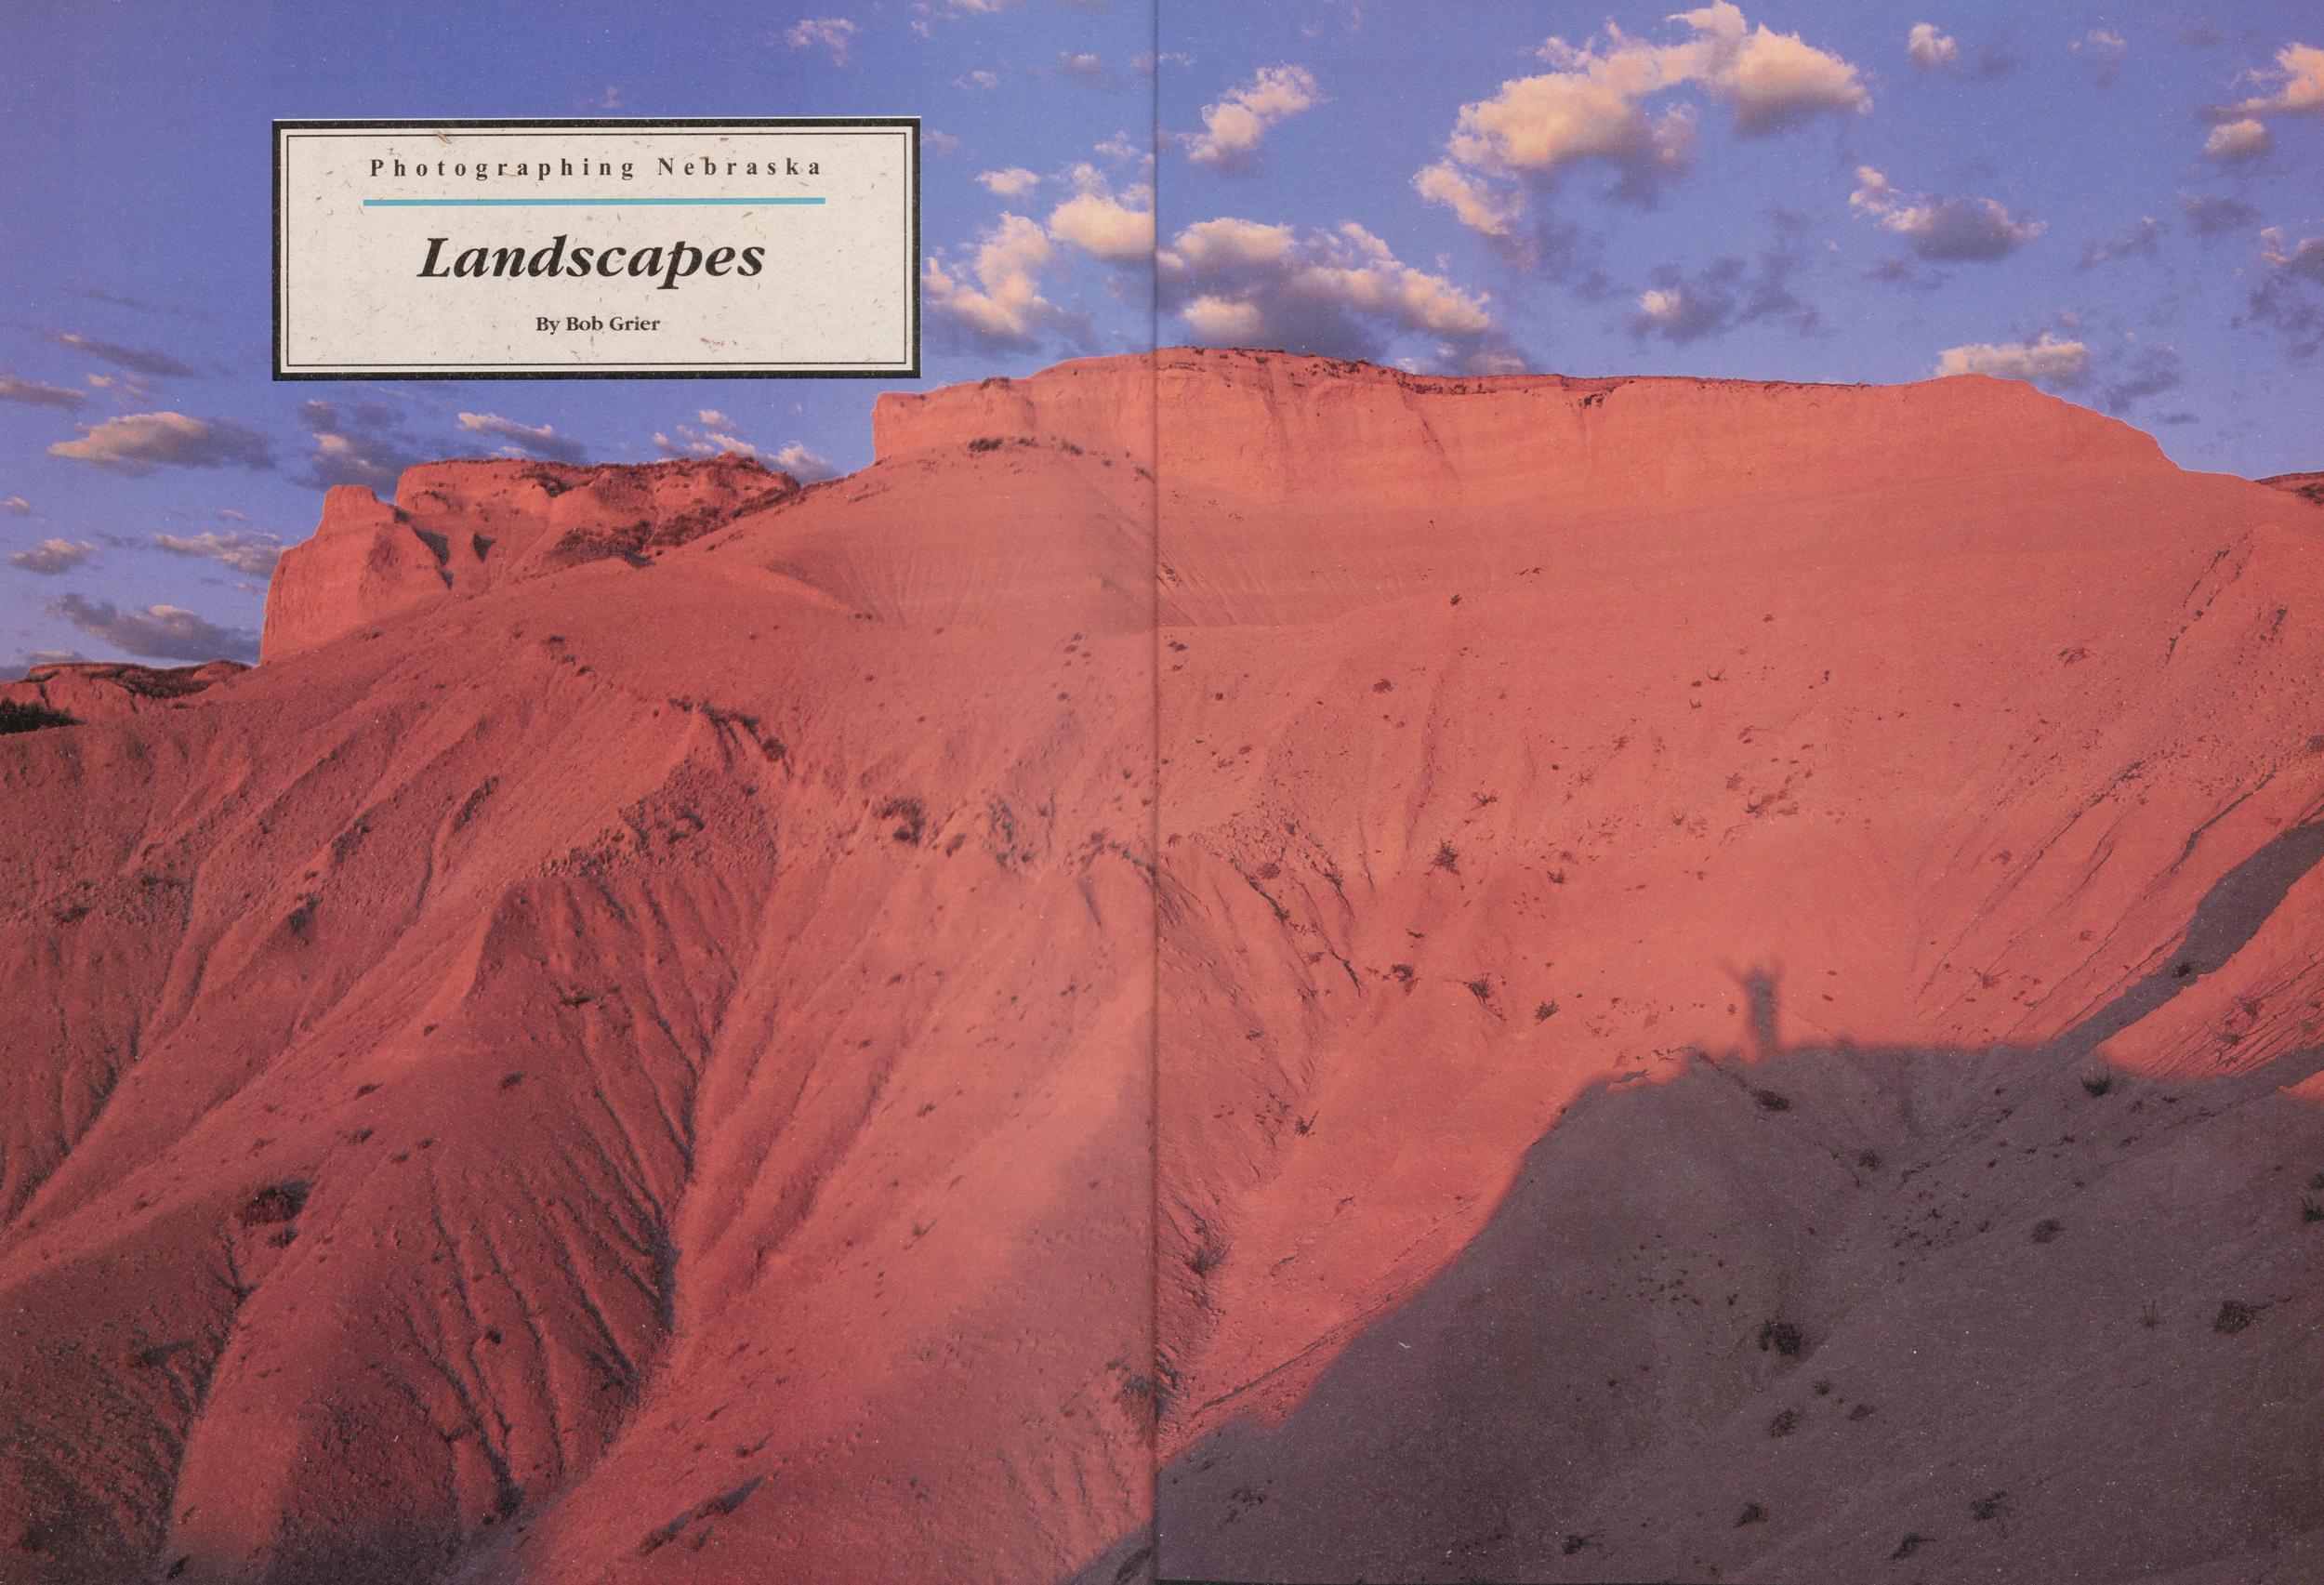
Photographing Nebraska
Landscapes
Defined literally, landscape photographs are portraits of the land. But what in that definition accounts for the drama, beauty and the myriad other elements we react to so strongly in a well-executed landscape photograph?
Ansel Adams, one of America's most renowned landscape photographers, responded to a question about why so few of his famed photographs included people, by asserting that all photographs contain at least two people, the photographer and the viewer. When we react strongly enough to a landscape to attempt to make a photograph of it, we add something of ourselves to the landscape we try to record. That personal response — in the photographer and later in the viewer is among the things that make landscape photography exciting.
Perhaps all photographers dream of traveling to exotic places filled with dramatic landscapes, but more often it is the familiar, close-to-home subjects that produce our best photographs. Landscape subjects are everywhere, limited only by our own idea of what a landscape should be. Epic vistas, sweeping horizons and vast expanses of forest and field are only a small part of what landscape photography can be. Nebraska's surprising geographic diversity makes the state a fertile field for the landscape photographer.
The powerful, all-inclusive image of richly detailed topography under a magnificent composition of clouds and sky is elusive and difficult to capture, but even the most mundane landscapes often hold details worthy of a photograph and are, in effect, landscapes within a landscape.
Look for beauty within the overall landscape, hone your imagination and photographic skills on available subjects and be ready when the gods of weather, light and form conspire to present that powerful, all-encompassing image.
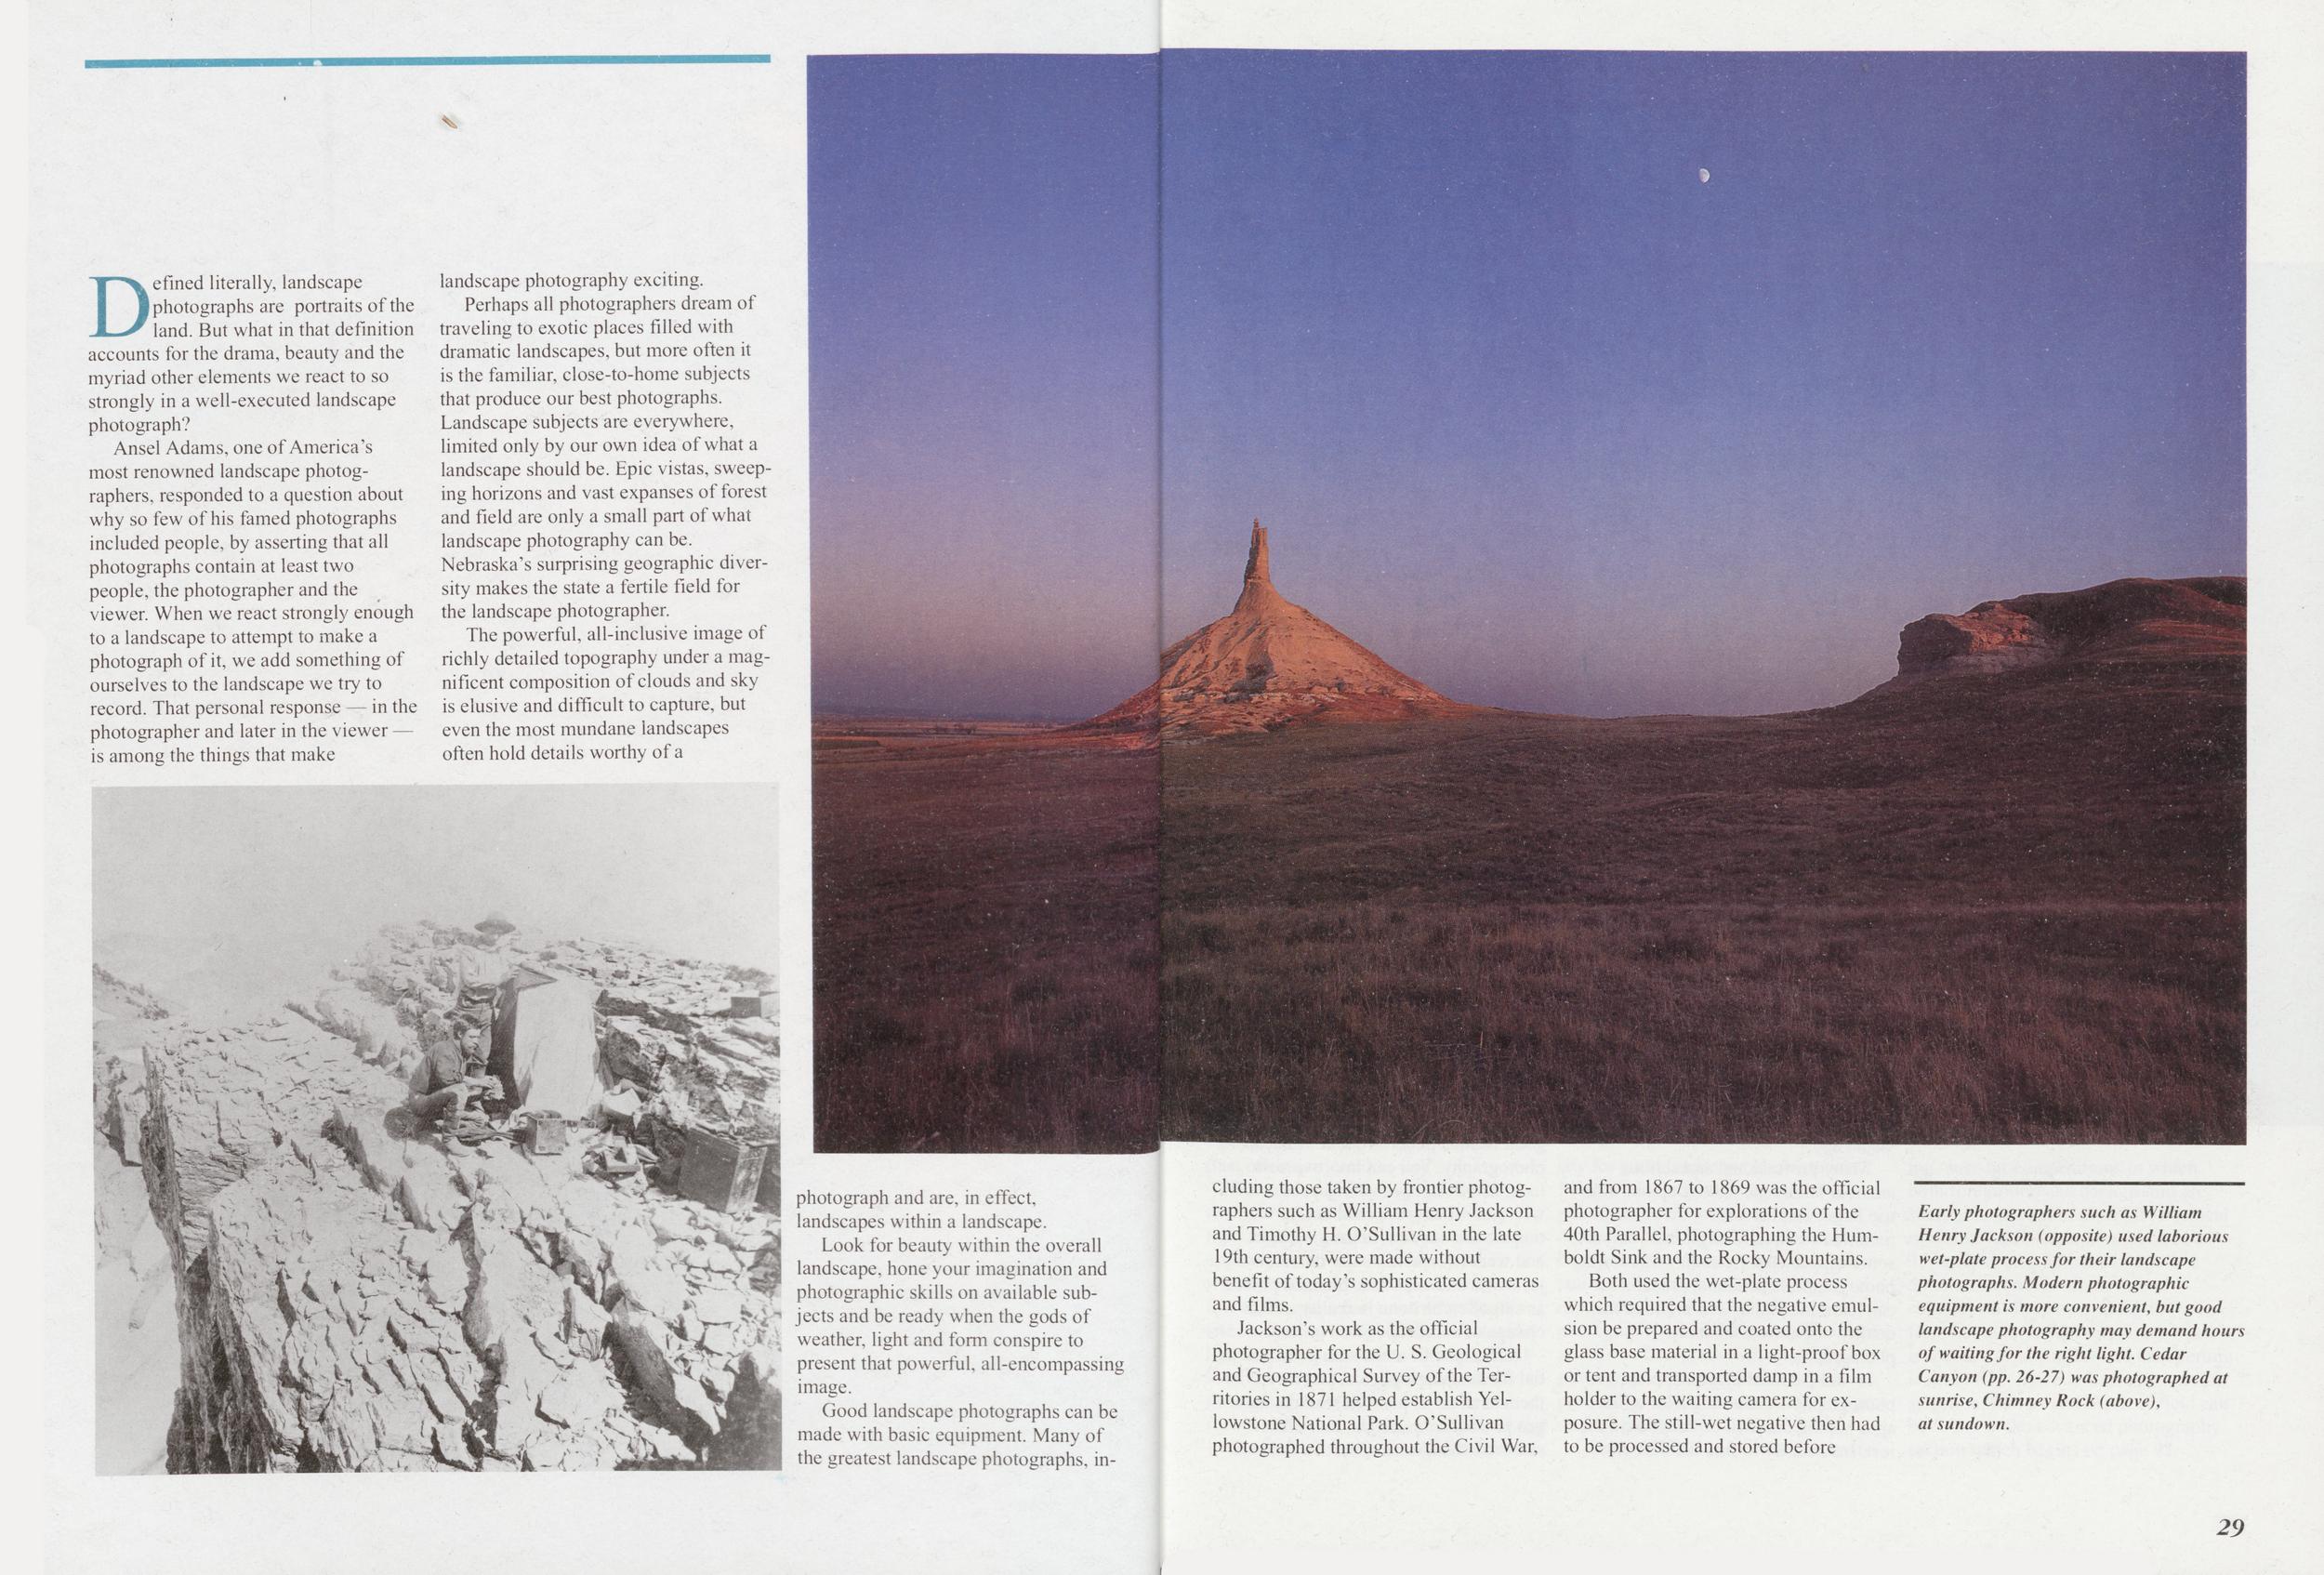
Good landscape photographs can be made with basic equipment. Many of the greatest landscape photographs, including those taken by frontier photographers such as William Henry Jackson and Timothy H. O'Sullivan in the late 19th century, were made without benefit of today's sophisticated cameras and films.
Jackson's work as the official photographer for the U. S. Geological and Geographical Survey of the Territories in 1871 helped establish Yellowstone National Park. O'Sullivan photographed throughout the Civil War, and from 1867 to 1869 was the official photographer for explorations of the 40th Parallel, photographing the Humboldt Sink and the Rocky Mountains.
Early photographers such as William Henry Jackson (opposite) used laborious wet-plate process for their landscape photographs. Modern photographic equipment is more convenient, but good landscape photography may demand hours of waiting for the right light. Cedar Canyon (pp. 26-27) was photographed at sunrise, Chimney Rock (above), at sundown.
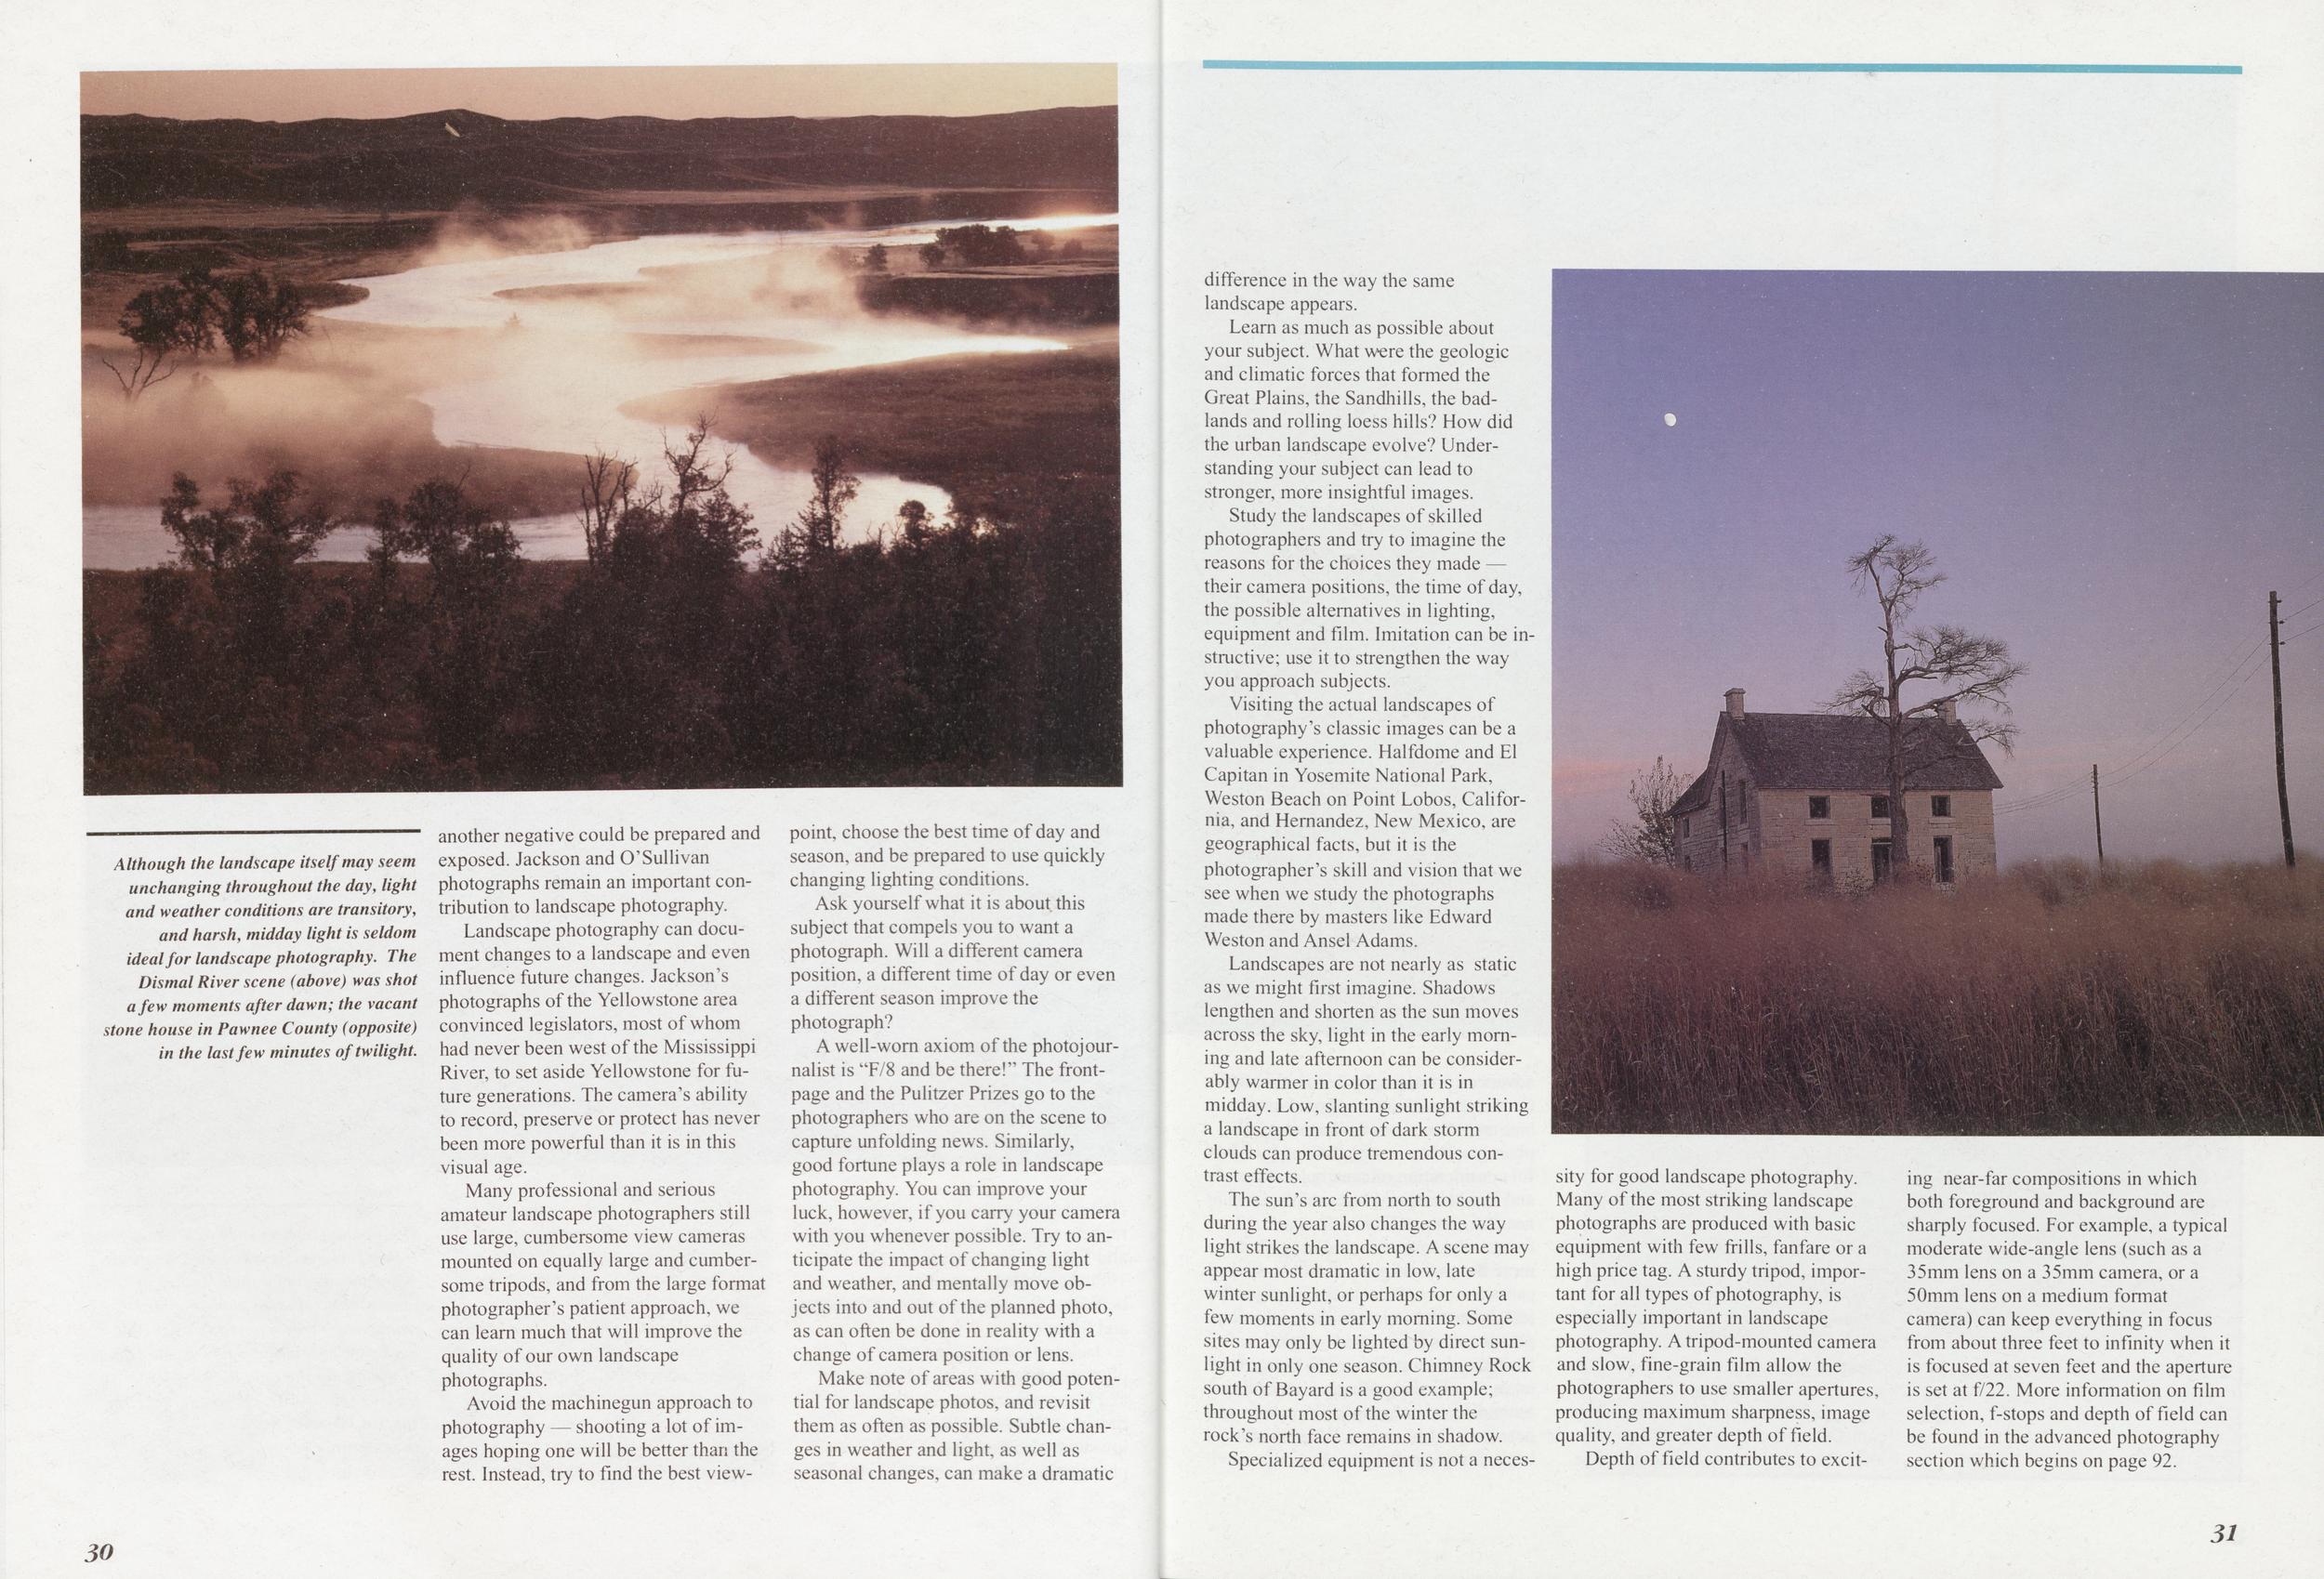
Although the landscape itself may seem unchanging throughout the day, light and weather conditions are transitory, and harsh, midday light is seldom ideal for landscape photography. The Dismal River scene (above) was shot a few moments after dawn; the vacant stone house in Pawnee County (opposite) in the last few minutes of twilight.
Landscape photography can document changes to a landscape and even influence future changes. Jackson's photographs of the Yellowstone area convinced legislators, most of whom had never been west of the Mississippi River, to set aside Yellowstone for future generations. The camera's ability to record, preserve or protect has never been more powerful than it is in this visual age.
Many professional and serious amateur landscape photographers still use large, cumbersome view cameras mounted on equally large and cumbersome tripods, and from the large format photographer's patient approach, we can learn much that will improve the quality of our own landscape photographs.
Avoid the machinegun approach to photography — shooting a lot of images hoping one will be better than the rest. Instead, try to find the best viewpoint, choose the best time of day and season, and be prepared to use quickly changing lighting conditions.
Ask yourself what it is about this subject that compels you to want a photograph. Will a different camera position, a different time of day or even a different season improve the photograph?
A well-worn axiom of the photojournalist is "F/8 and be there!'' The frontpage and the Pulitzer Prizes go to the photographers who are on the scene to capture unfolding news. Similarly, good fortune plays a role in landscape photography. You can improve your luck, however, if you carry your camera with you whenever possible. Try to anticipate the impact of changing light and weather, and mentally move objects into and out of the planned photo, as can often be done in reality with a change of camera position or lens.
Make note of areas with good potential for landscape photos, and revisit them as often as possible. Subtle changes in weather and light, as well as seasonal changes, can make a dramatic difference in the way the same landscape appears.
Learn as much as possible about your subject. What were the geologic and climatic forces that formed the Great Plains, the Sandhills, the badlands and rolling loess hills? How did the urban landscape evolve? Understanding your subject can lead to stronger, more insightful images.
Study the landscapes of skilled photographers and try to imagine the reasons for the choices they made — their camera positions, the time of day, the possible alternatives in lighting, equipment and film. Imitation can be instructive; use it to strengthen the way you approach subjects.
Visiting the actual landscapes of photography's classic images can be a valuable experience. Halfdome and El Capitan in Yosemite National Park, Weston Beach on Point Lobos, California, and Hernandez, New Mexico, are geographical facts, but it is the photographer's skill and vision that we see when we study the photographs made there by masters like Edward Weston and Ansel Adams.
Landscapes are not nearly as static as we might first imagine. Shadows lengthen and shorten as the sun moves across the sky, light in the early morning and late afternoon can be considerably warmer in color than it is in midday. Low, slanting sunlight striking a landscape in front of dark storm clouds can produce tremendous contrast effects.
The sun's arc from north to south during the year also changes the way light strikes the landscape. A scene may appear most dramatic in low, late winter sunlight, or perhaps for only a few moments in early morning. Some sites may only be lighted by direct sunlight in only one season. Chimney Rock south of Bayard is a good example; throughout most of the winter the rock's north face remains in shadow.
Specialized equipment is not a necessity for good landscape photography. Many of the most striking landscape photographs are produced with basic equipment with few frills, fanfare or a high price tag. A sturdy tripod, important for all types of photography, is especially important in landscape photography. A tripod-mounted camera and slow, fine-grain film allow the photographers to use smaller apertures, producing maximum sharpness, image quality, and greater depth of field.
Depth of field contributes to exciting near-far compositions in which both foreground and background are sharply focused. For example, a typical moderate wide-angle lens (such as a 35mm lens on a 35mm camera, or a 50mm lens on a medium format camera) can keep everything in focus from about three feet to infinity when it is focused at seven feet and the aperture is set at f/22. More information on film selection, f-stops and depth of field can be found in the advanced photography section which begins on page 92.
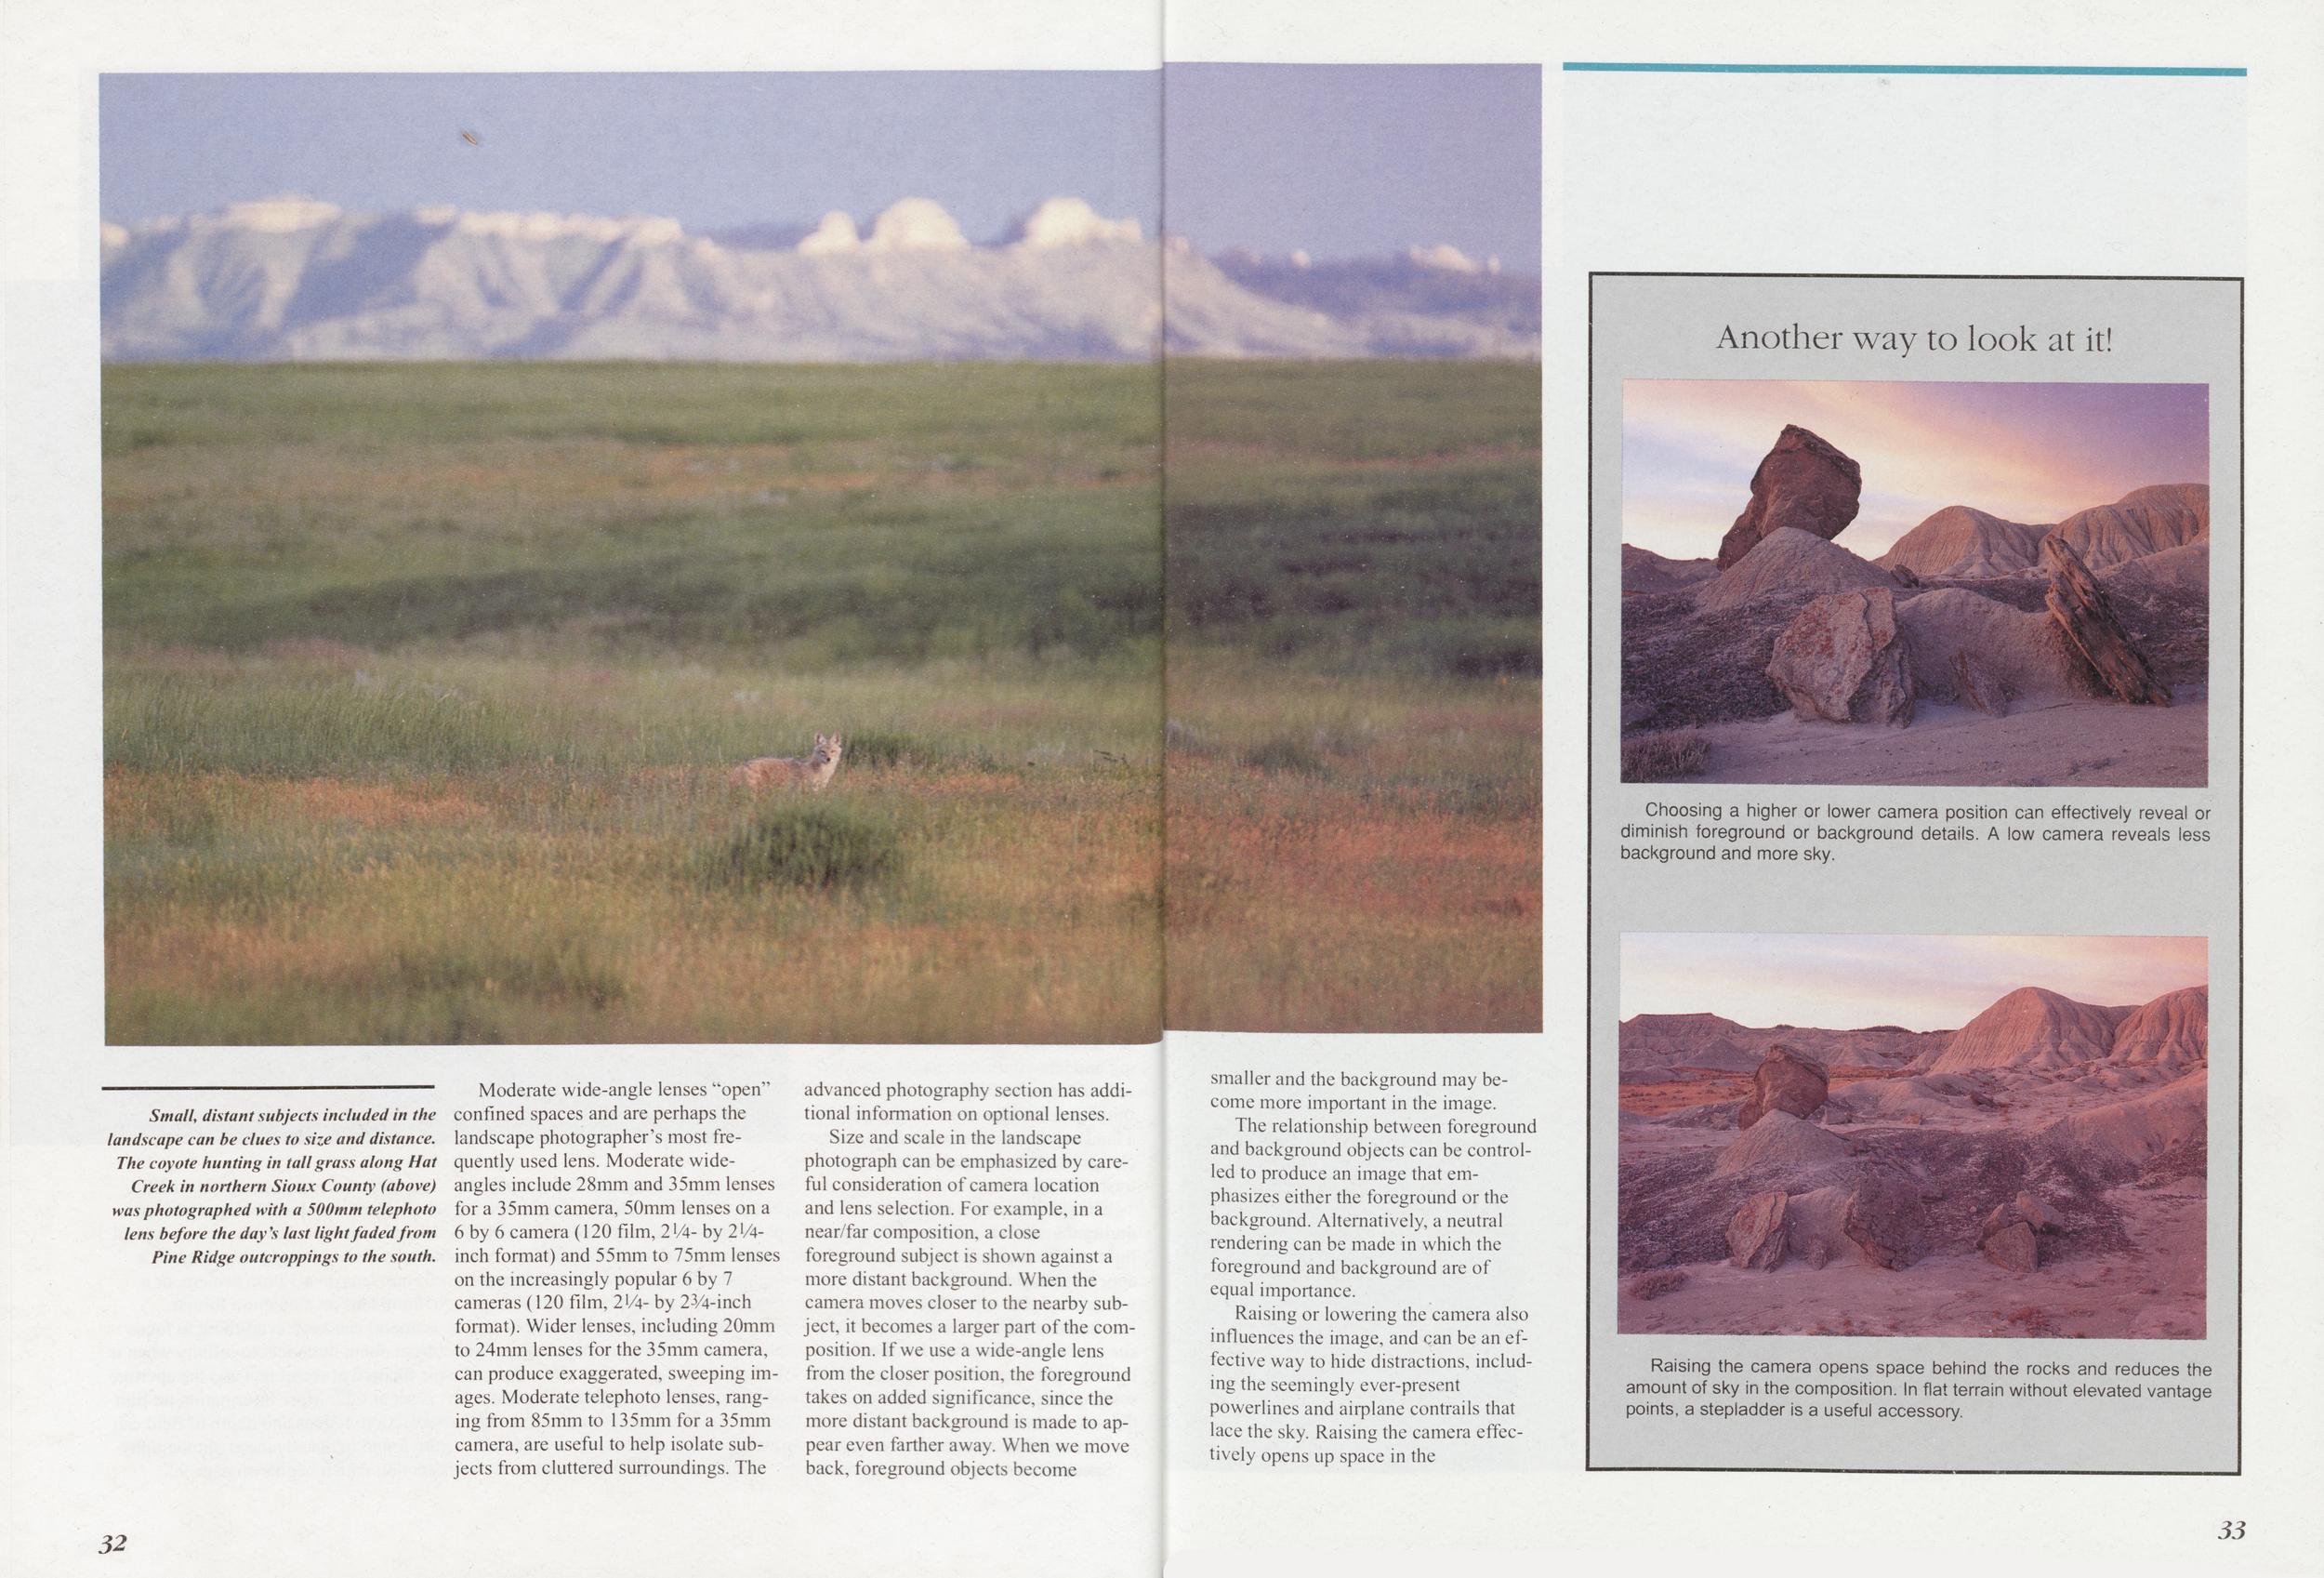
Small, distant subjects included in the landscape can be clues to size and distance. The coyote hunting in tall grass along Hat Creek in northern Sioux County (above) was photographed with a 500mm telephoto lens before the day's last light faded from Pine Ridge outcroppings to the south.
Moderate wide-angle lenses "open" confined spaces and are perhaps the landscape photographer's most frequently used lens. Moderate wideangles include 28mm and 35mm lenses for a 35mm camera, 50mm lenses on a 6 by 6 camera (120 film, 21/4- by 21/4-inch format) and 55mm to 75mm lenses on the increasingly popular 6 by 7 cameras (120 film, 21/4- by 23/4-inch format). Wider lenses, including 20mm to 24mm lenses for the 35mm camera, can produce exaggerated, sweeping images. Moderate telephoto lenses, ranging from 85mm to 135mm for a 35mm camera, are useful to help isolate subjects from cluttered surroundings. The advanced photography section has additional information on optional lenses.
Size and scale in the landscape photograph can be emphasized by careful consideration of camera location and lens selection. For example, in a near/far composition, a close foreground subject is shown against a more distant background. When the camera moves closer to the nearby subject, it becomes a larger part of the composition. If we use a wide-angle lens from the closer position, the foreground takes on added significance, since the more distant background is made to appear even farther away. When we move back, foreground objects become smaller and the background may become more important in the image.
The relationship between foreground and background objects can be controlled to produce an image that emphasizes either the foreground or the background. Alternatively, a neutral rendering can be made in which the foreground and background are of equal importance.
Raising or lowering the camera also influences the image, and can be an effective way to hide distractions, including the seemingly ever-present powerlines and airplane contrails that lace the sky. Raising the camera effectively opens up space in the
Choosing a higher or lower camera position can effectively reveal or diminish foreground or background details. A low camera reveals less background and more sky.
Raising the camera opens space behind the rocks and reduces the amount of sky in the composition. In flat terrain without elevated vantage points, a stepladder is a useful accessory.
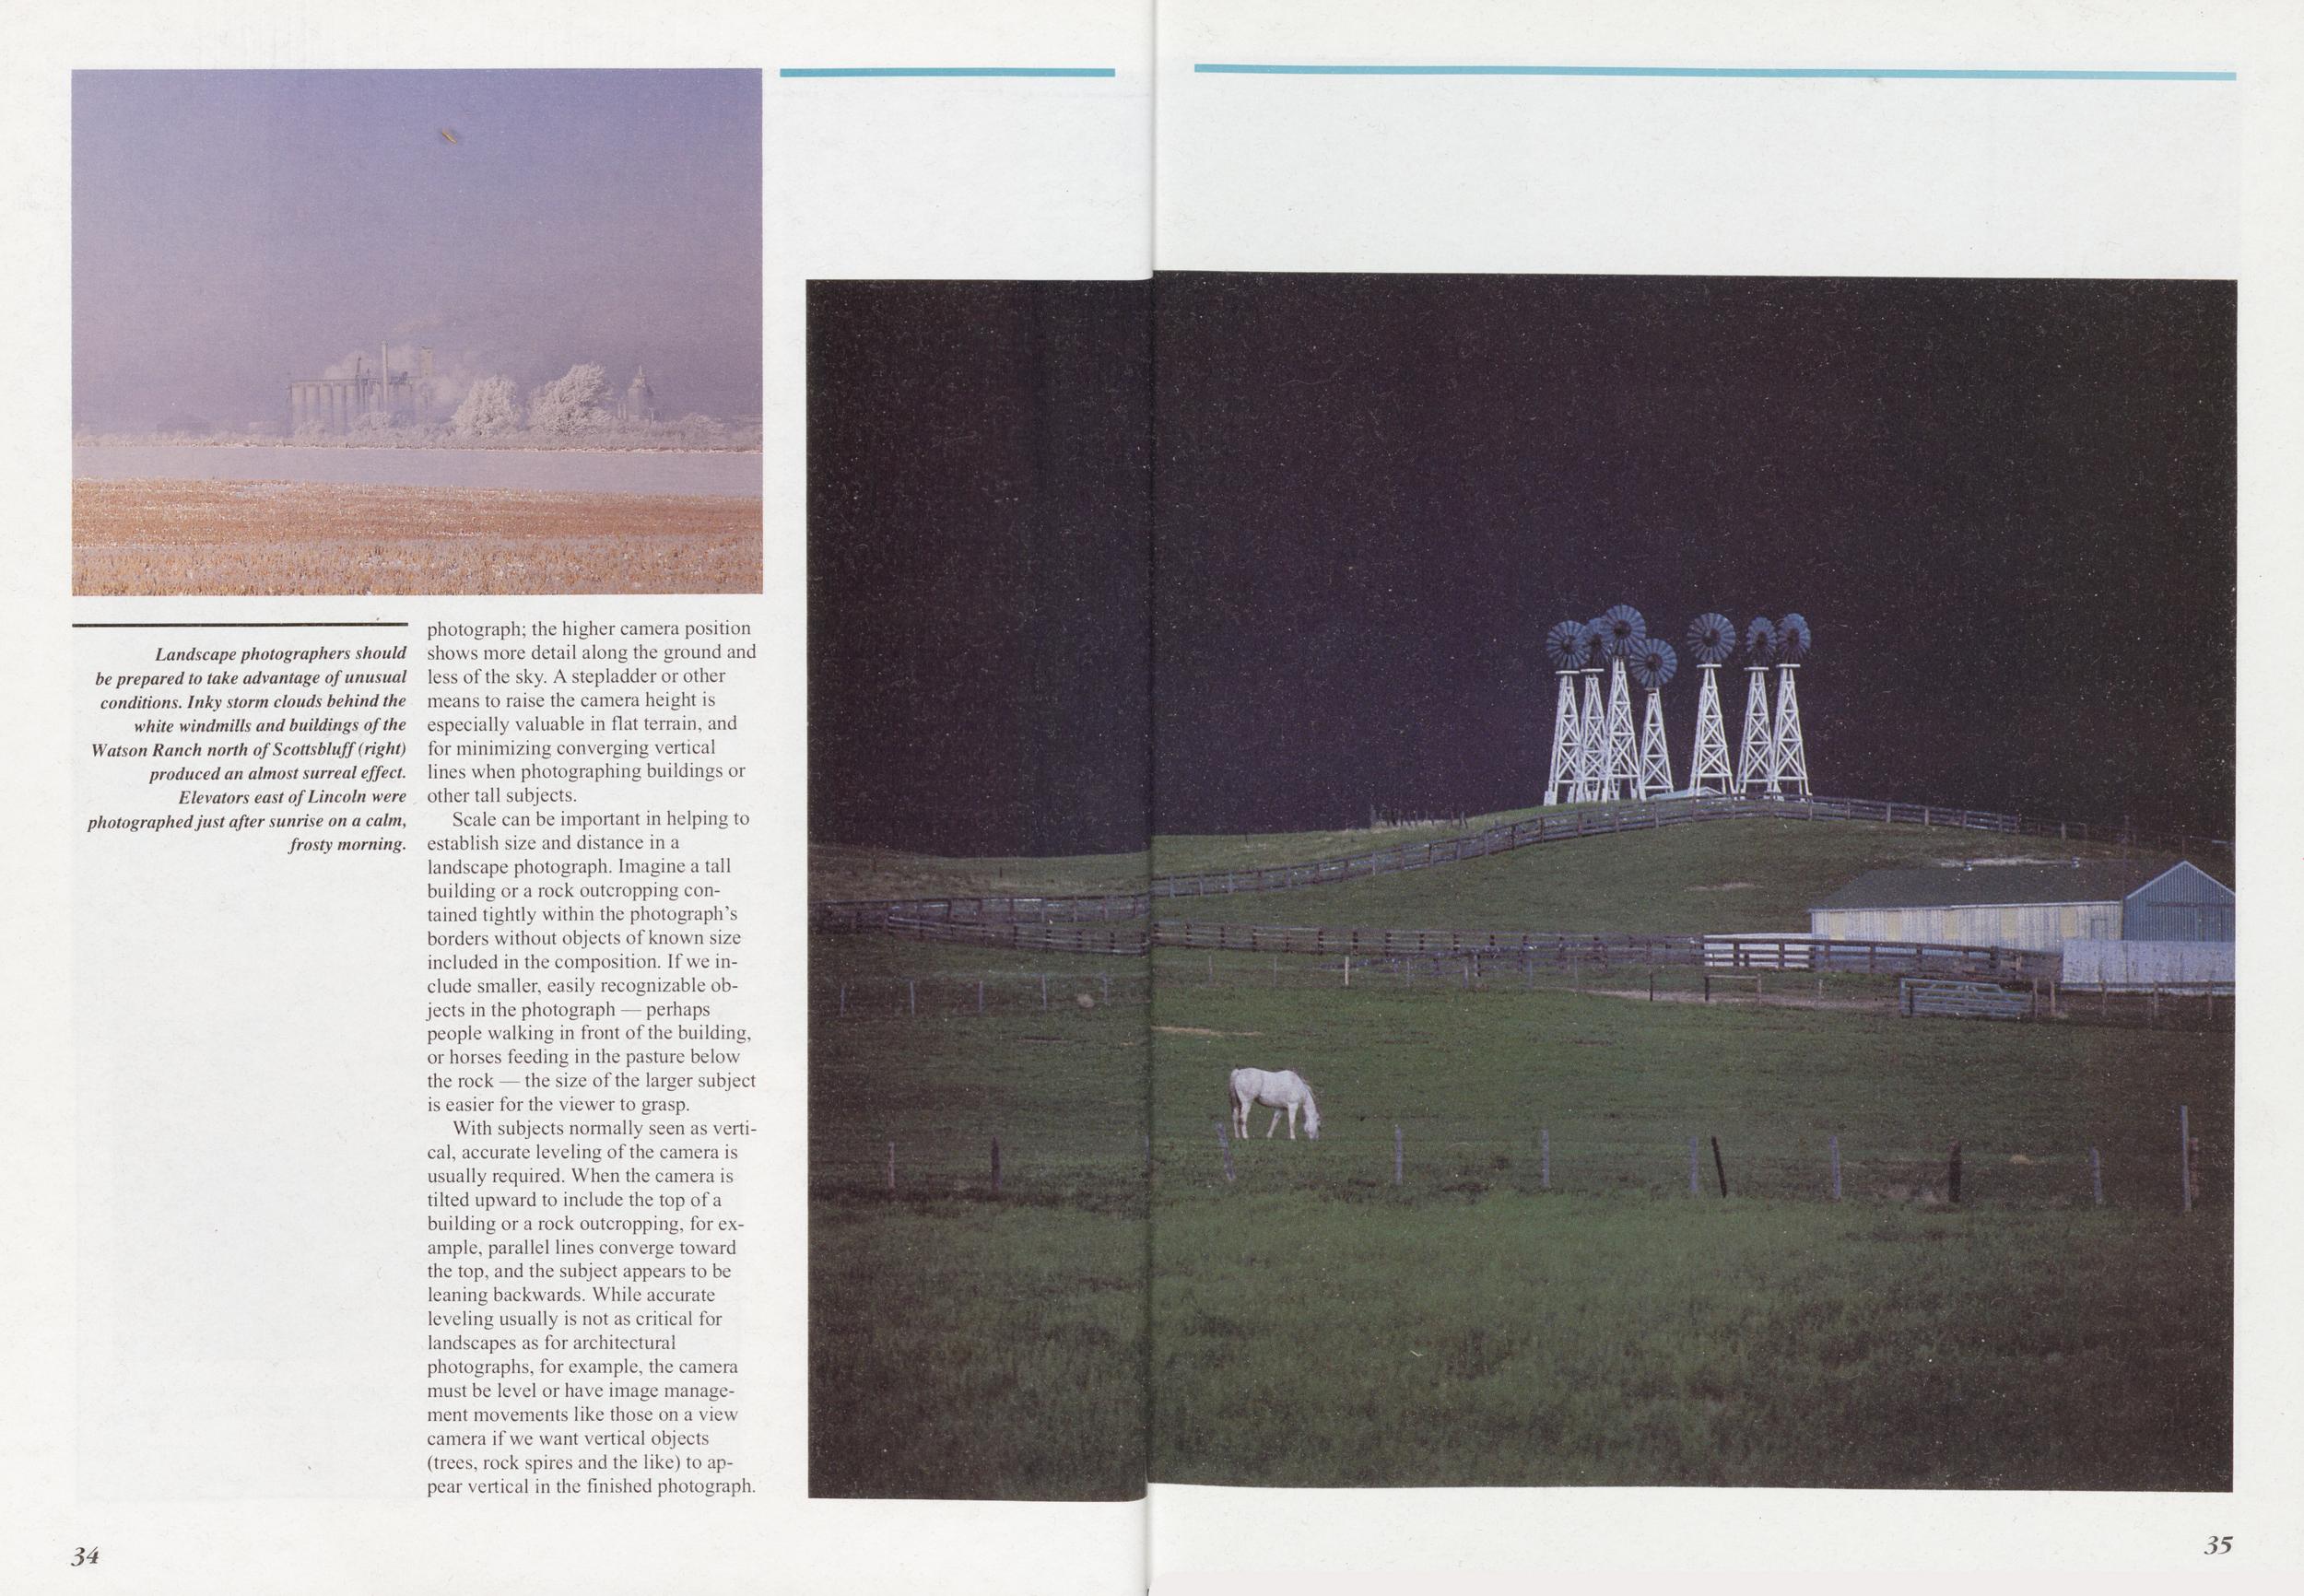
Landscape photographers should be prepared to take advantage of unusual conditions. Inky storm clouds behind the white windmills and buildings of the Watson Ranch north of Scottsbluff (right) produced an almost surreal effect. Elevators east of Lincoln were photographed just after sunrise on a calm frosty morning.
photograph; the higher camera position shows more detail along the ground and less of the sky. A stepladder or other means to raise the camera height is especially valuable in flat terrain, and for minimizing converging vertical lines when photographing buildings or other tall subjects.
Scale can be important in helping to establish size and distance in a landscape photograph. Imagine a tall building or a rock outcropping contained tightly within the photograph's borders without objects of known size included in the composition. If we include smaller, easily recognizable objects in the photograph — perhaps people walking in front of the building, or horses feeding in the pasture below the rock — the size of the larger subject is easier for the viewer to grasp.
With subjects normally seen as vertical, accurate leveling of the camera is usually required. When the camera is tilted upward to include the top of a building or a rock outcropping, for example, parallel lines converge toward the top, and the subject appears to be leaning backwards. While accurate leveling usually is not as critical for landscapes as for architectural photographs, for example, the camera must be level or have image management movements like those on a view camera if we want vertical objects (trees, rock spires and the like) to appear vertical in the finished photograph.
Sheer excitement about a subject often makes good photography more difficult. For example, when we approach a subject, our eyes are continually scanning, adding details to our memories. A photograph represents a single moment in time. It is completely self-contained, and no other sensory information is available. A viewer not present when the image was captured lacks the additional supporting details that sometimes make the photograph important only to the photographer, a situation similar in effect to using two or three-word sentences to explain a complex idea.
Try to visualize a completed photograph as you study the landscape subject: will the image contain enough information to stand on its own? Previsualization, the ability to see the completed image mentally before the film is exposed, is a powerful tool.
Obviously, a photographer cannot anticipate lightning and release the shutter at just the right instant. Most night photos of lightning are time exposures, shot with shutters held open on "B" while lightning bolts flash.
Lightning is many times brighter than the brightest value film can record, so it looks equally brilliant through a wide range of apertures. Relative brightness of the rest of the scene, however, is influenced by aperture and exposure time. This is apparent in foreground detail in this photo, taken in near-darkness. Allowing the number of strikes to govern length of exposure will yield a variety of renditions of foreground and sky, since lightning occurs at varying intervals. This photo, a purposely long exposure to record several lightning bolts, is one of 12 frames, all exposed at f/8 or f/11 for varying lengths of time.
A photo of nothing but lightning bolts might sound interesting, but a landscape associated with the storm is needed for perspective. Making the exposures to record the lightning is relatively easy. Locating and recording a setting to go along with the lightning is often much more difficult.
For safety's sake, shoot only distant lightning, and be ready to vacate your vantage point quickly if the storm approaches.
— Ken BoucLuck certainly favors the well prepared landscape photographer. Stormy weather can offer a striking photograph, or it might merely soak the photographer and his equipment. Hearing a nearby rattlesnake helps refocus the photographer's attention from a distant landscape to his or her immediate surroundings very quickly. Common sense and a healthy respect for life and limb belong in every photographer's kit along with lens cleaning fluid and tissue, a jeweler's screwdriver set for smaller camera screws and a small adjustable wrench to tighten tripod leg bolts.
A plastic bag large enough to cover a tripod-mounted camera is useful to have along for use in light, intermittent rainfall. Many varieties of camera packs for field photography are available in all sizes and price ranges.
Most land in Nebraska is privately owned, and permission is required to enter private land for any purpose, including photography. Landowners are often quick to help anyone interested in taking photographs, however, and their suggestions often lead to other potential subjects.
Great photographs might be as close as your own backyard or just down the street or highway. Nebraska includes a tremendous variety of landscape subjects between the Missouri River and the west's shortgrass prairies. "The Photographer's Trail," beginning on page 108, suggests several locations favored by NEBRASKAland Magazine photographers.
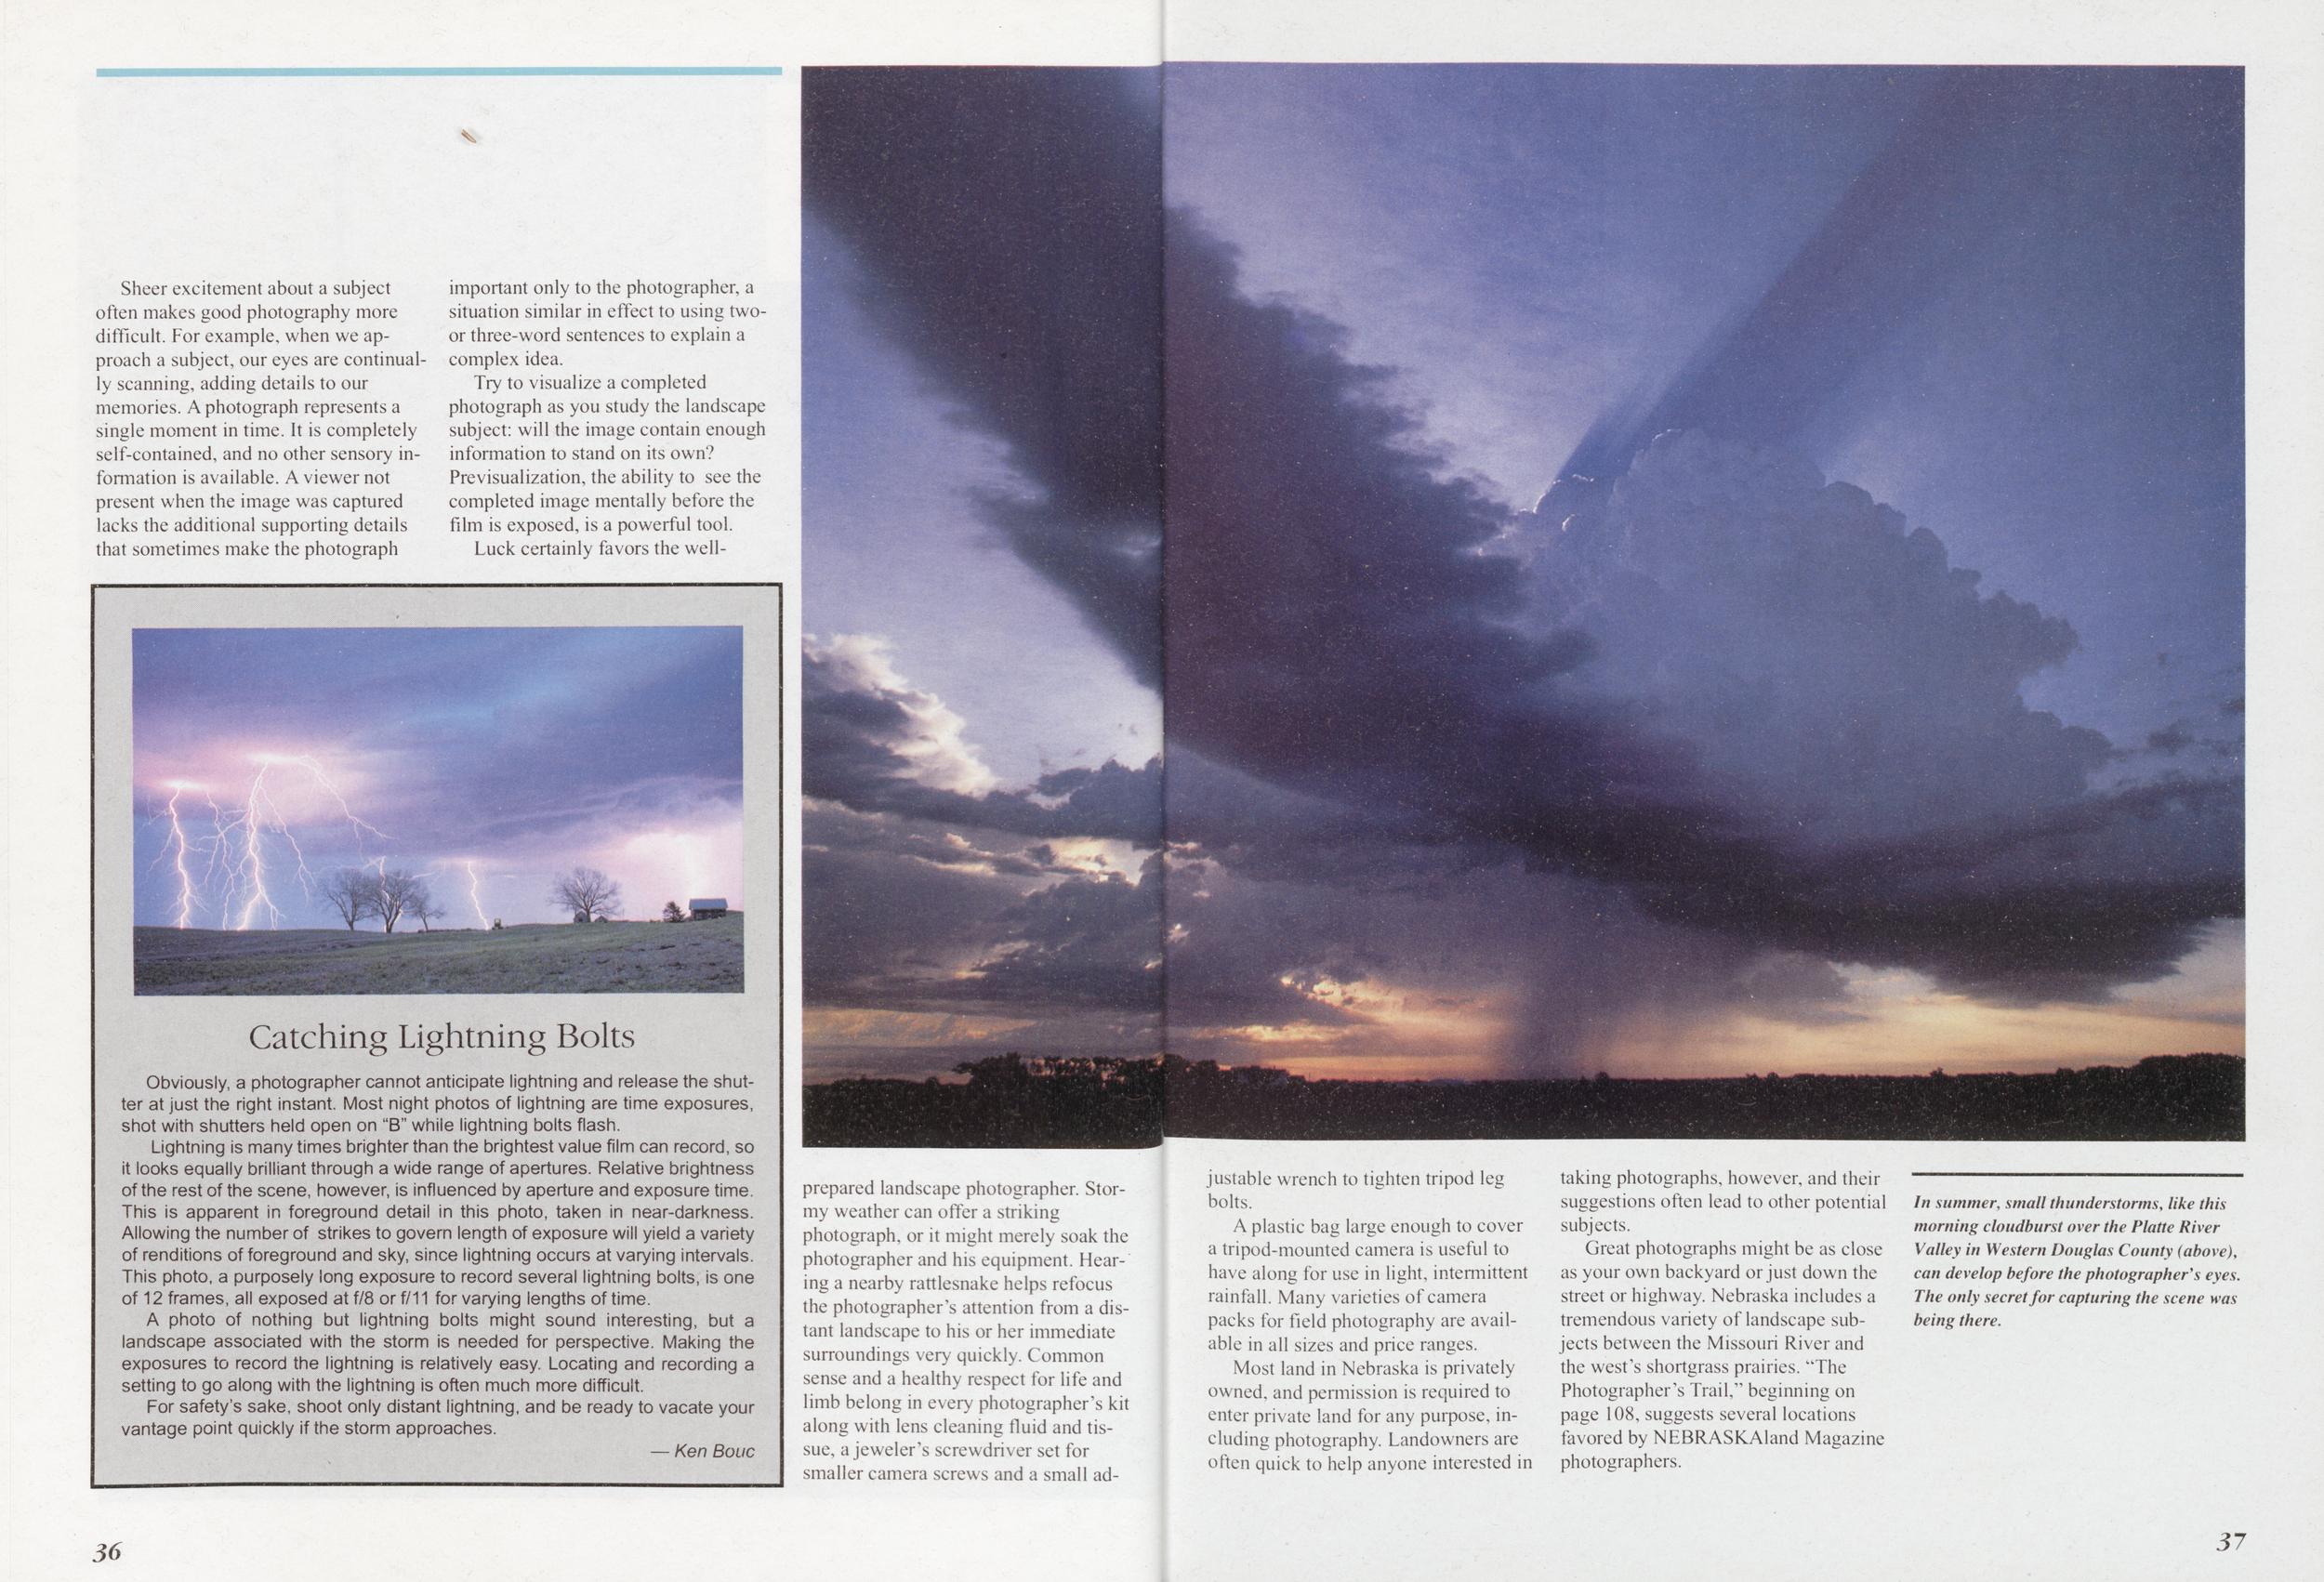
In summer, small thunderstorms, like this morning cloudburst over the Platte River Valley in Western Douglas County (above), can develop before the photographer's eyes. The only secret for capturing the scene was being there.
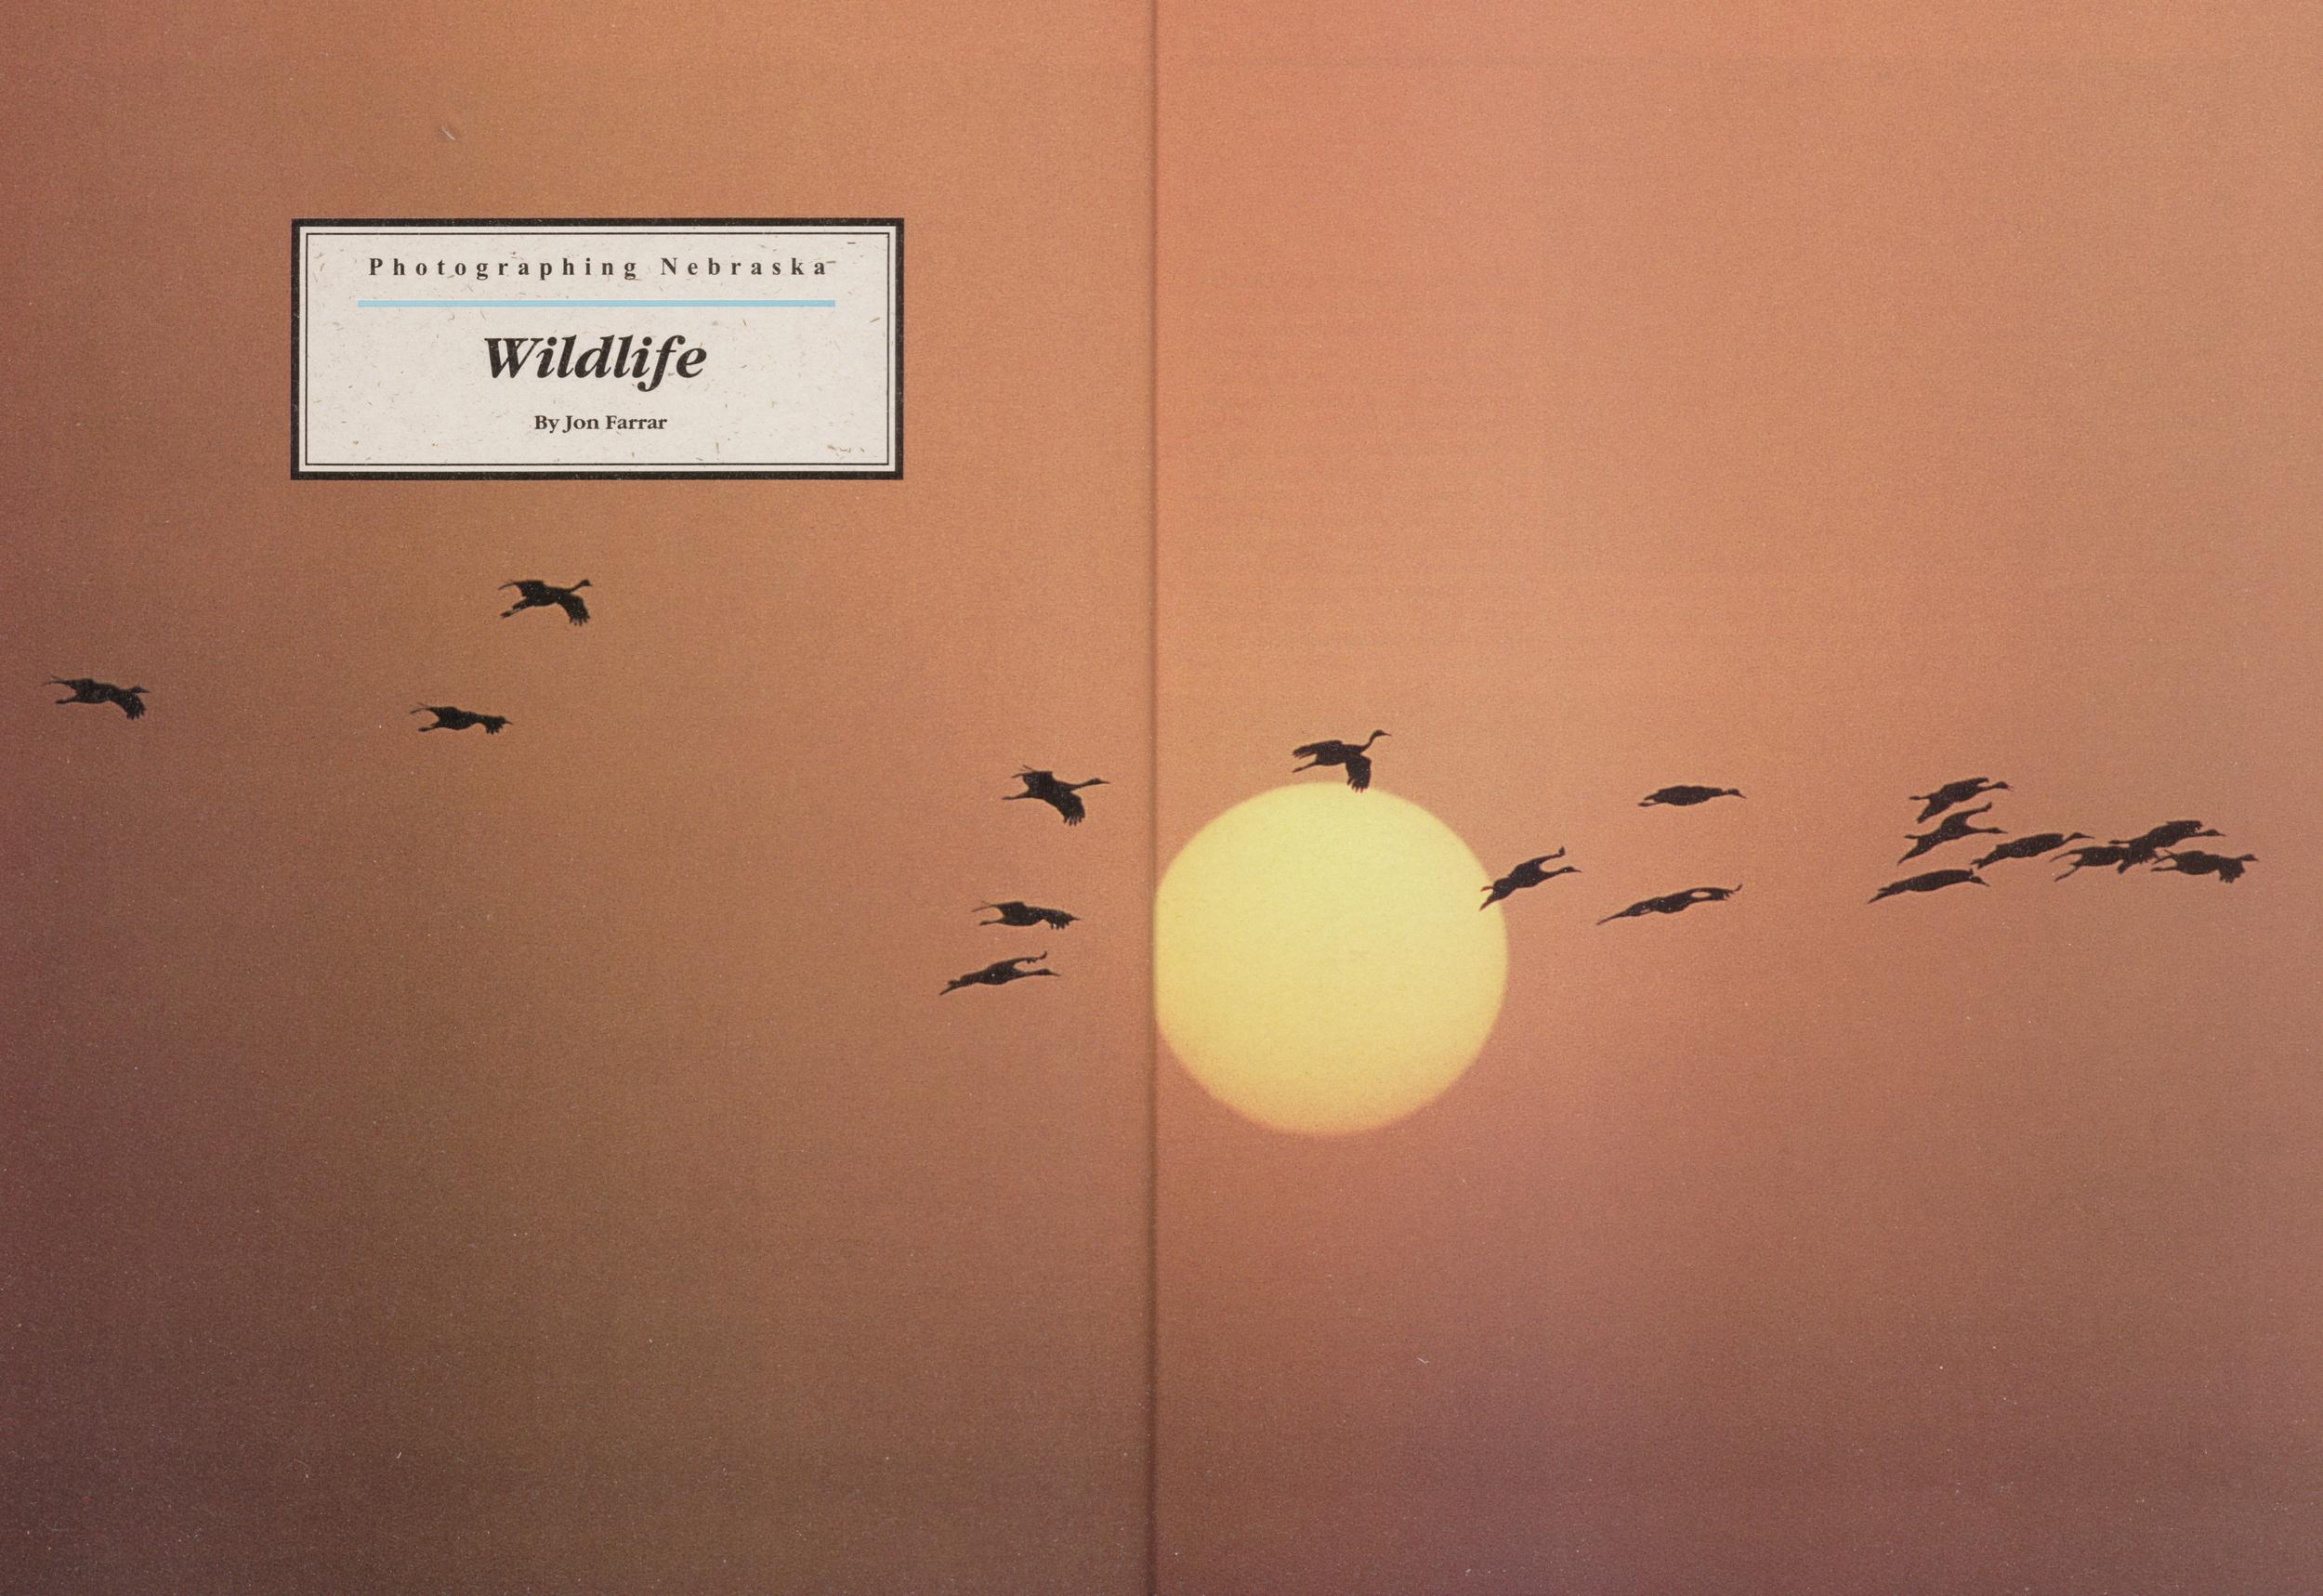
Photographing Nebraska
Wildlife
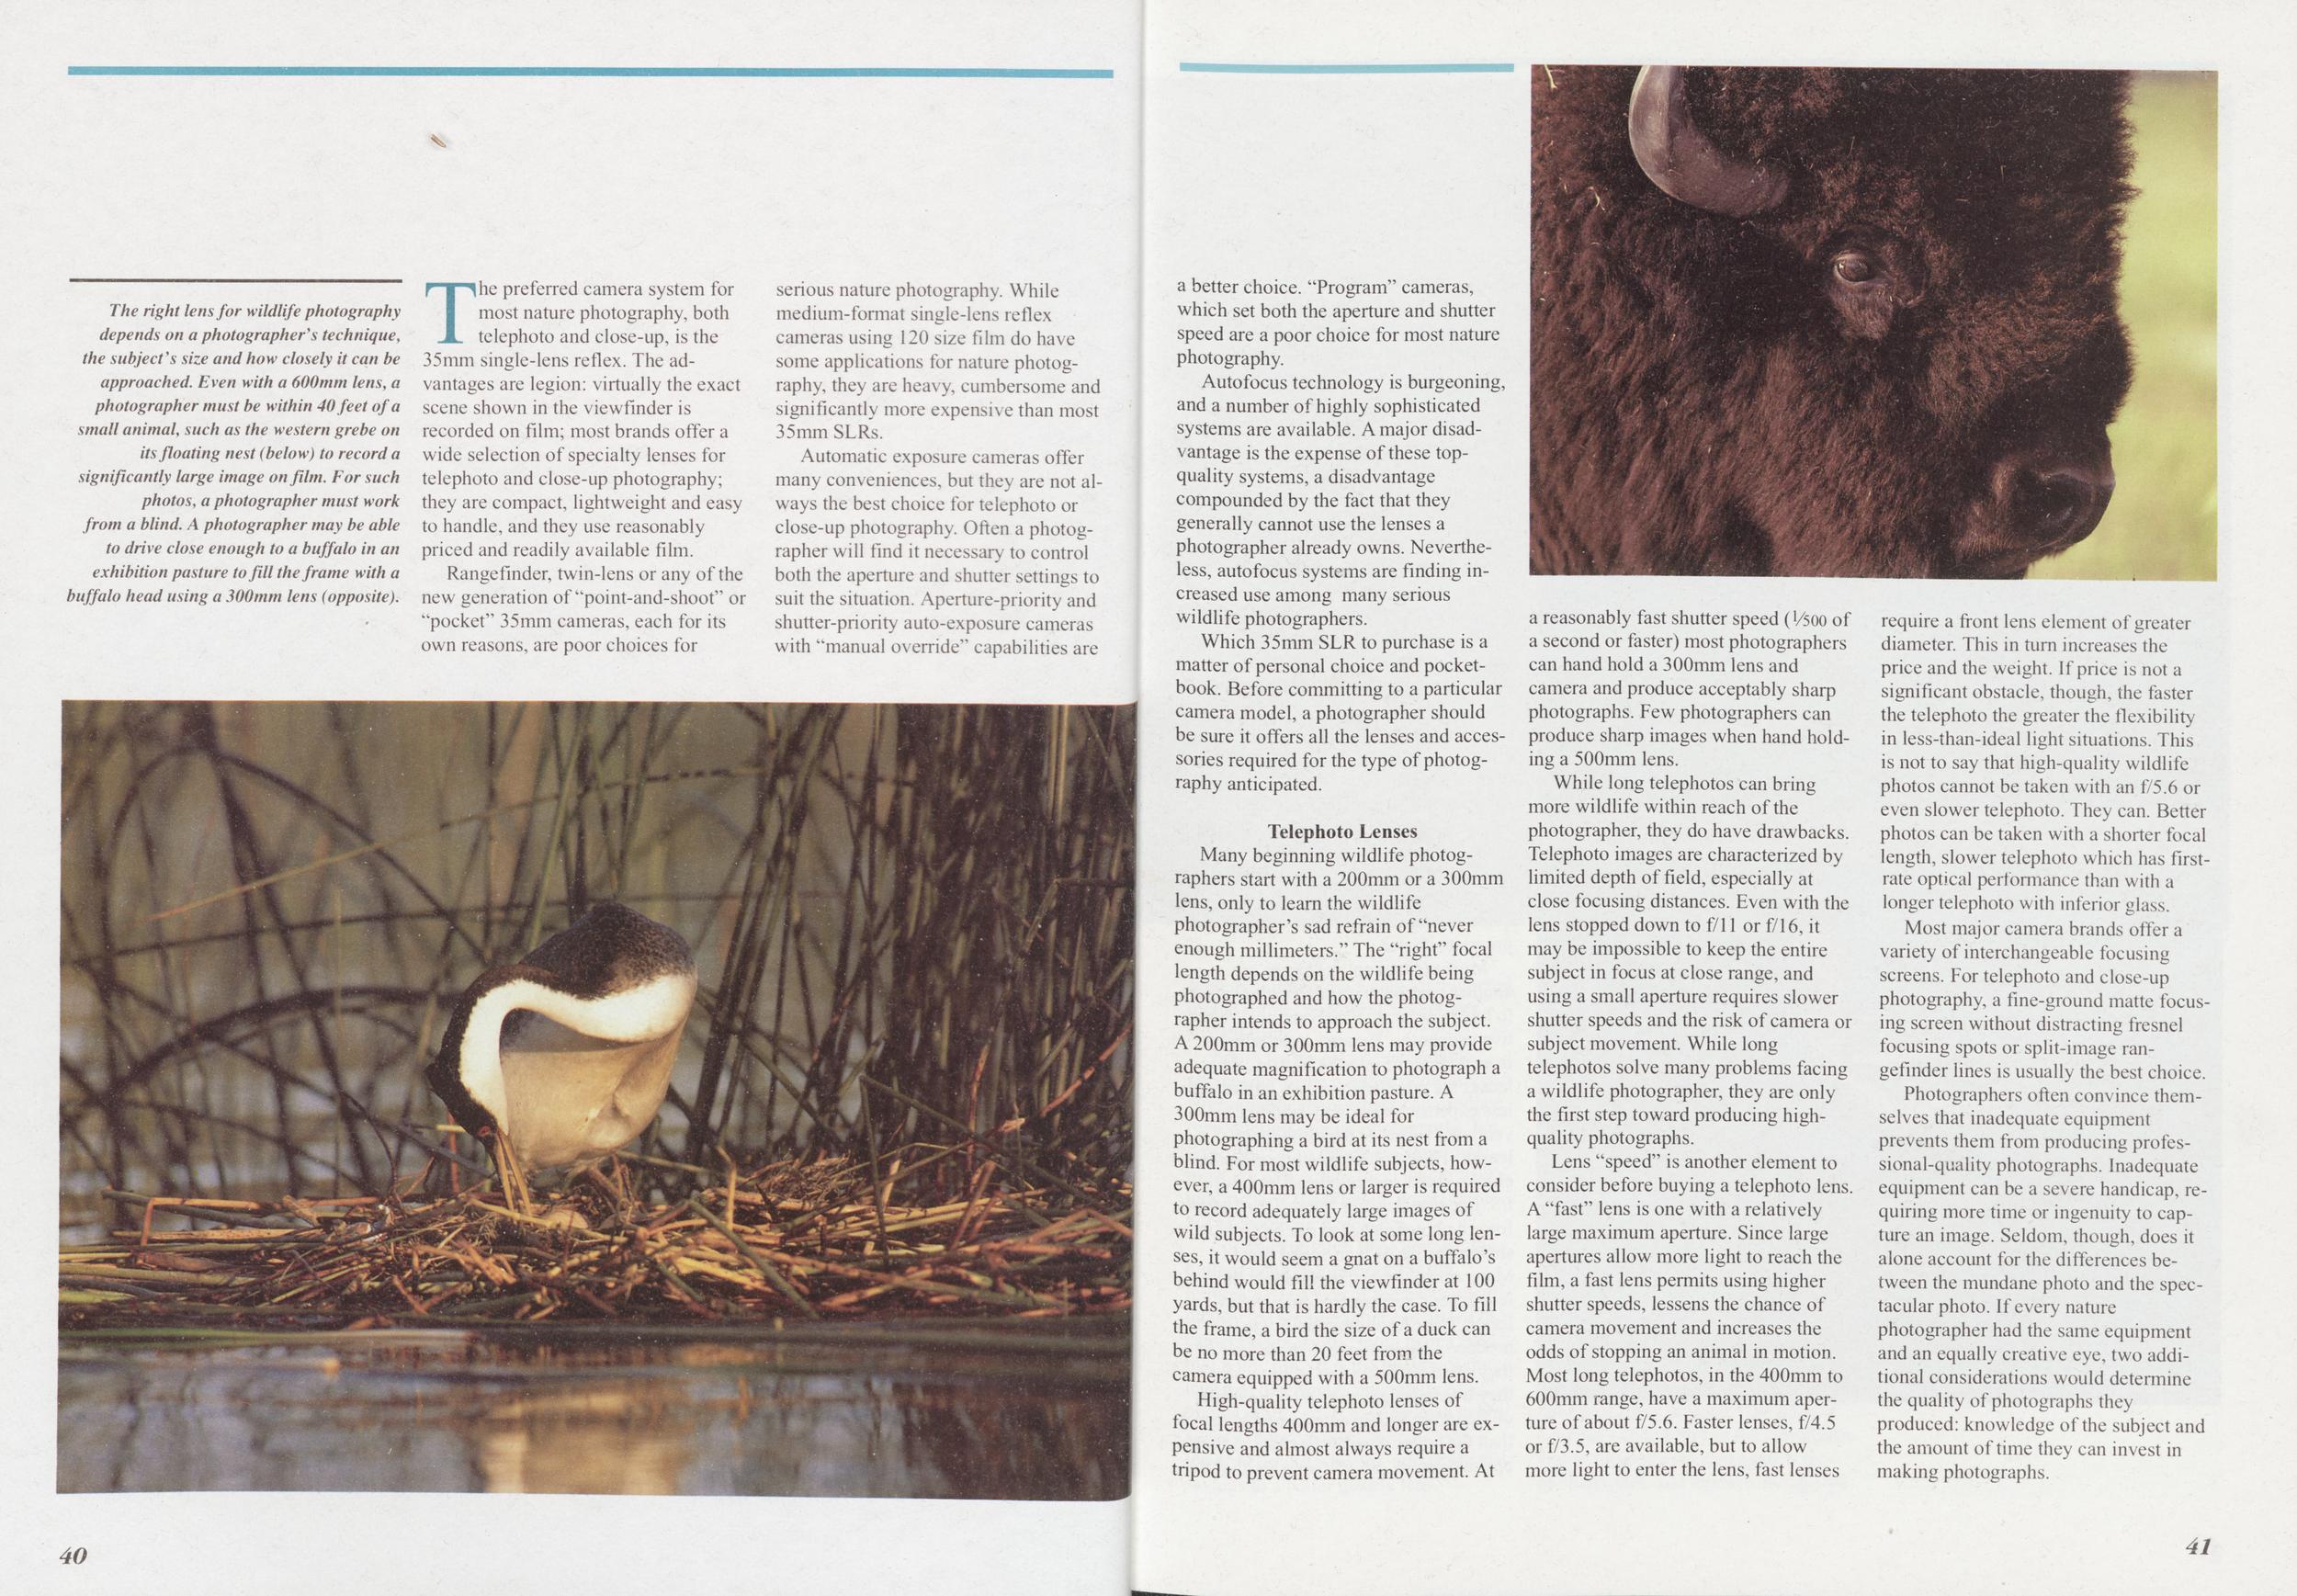
The right lens for wildlife photography depends on a photographer's technique, the subject's size and how closely it can be approached. Even with a 600mm lens, a photographer must be within 40 feet of a small animal, such as the western grebe on its floating nest (below) to record a significantly large image on film. For such photos, a photographer must work from a blind. A photographer may be able to drive close enough to a buffalo in an exhibition pasture to fill the frame with a buffalo head using a 300mm lens (opposite).
The preferred camera system for most nature photography, both telephoto and close-up, is the 35mm single-lens reflex. The advantages are legion: virtually the exact scene shown in the viewfinder is recorded on film; most brands offer a wide selection of specialty lenses for telephoto and close-up photography; they are compact, lightweight and easy to handle, and they use reasonably priced and readily available film.
Range finder, twin-lens or any of the new generation of "point-and-shoot" or "pocket" 35mm cameras, each for its own reasons, are poor choices for serious nature photography. While medium-format single-lens reflex cameras using 120 size film do have some applications for nature photography, they are heavy, cumbersome and significantly more expensive than most 35mm SLRs.
Automatic exposure cameras offer many conveniences, but they are not always the best choice for telephoto or close-up photography. Often a photographer will find it necessary to control both the aperture and shutter settings to suit the situation. Aperture-priority and shutter-priority auto-exposure cameras with "manual override" capabilities are a better choice. "Program" cameras, which set both the aperture and shutter speed are a poor choice for most nature photography.
Autofocus technology is burgeoning, and a number of highly sophisticated systems are available. A major disadvantage is the expense of these topquality systems, a disadvantage compounded by the fact that they generally cannot use the lenses a photographer already owns. Nevertheless, autofocus systems are finding increased use among many serious wildlife photographers.
Which 35mm SLR to purchase is a matter of personal choice and pocketbook. Before committing to a particular camera model, a photographer should be sure it offers all the lenses and accessories required for the type of photography anticipated.
Telephoto LensesMany beginning wildlife photographers start with a 200mm or a 300mm lens, only to learn the wildlife photographer's sad refrain of "never enough millimeters." The "right" focal length depends on the wildlife being photographed and how the photographer intends to approach the subject. A 200mm or 300mm lens may provide adequate magnification to photograph a buffalo in an exhibition pasture. A 300mm lens may be ideal for photographing a bird at its nest from a blind. For most wildlife subjects, however, a 400mm lens or larger is required to record adequately large images of wild subjects. To look at some long lenses, it would seem a gnat on a buffalo's behind would fill the viewfinder at 100 yards, but that is hardly the case. To fill the frame, a bird the size of a duck can be no more than 20 feet from the camera equipped with a 500mm lens.
High-quality telephoto lenses of focal lengths 400mm and longer are expensive and almost always require a tripod to prevent camera movement. At a reasonably fast shutter speed (Vsoo of a second or faster) most photographers can hand hold a 300mm lens and camera and produce acceptably sharp photographs. Few photographers can produce sharp images when hand holding a 500mm lens.
While long telephotos can bring more wildlife within reach of the photographer, they do have drawbacks. Telephoto images are characterized by limited depth of field, especially at close focusing distances. Even with the lens stopped down to f/11 or f/16, it may be impossible to keep the entire subject in focus at close range, and using a small aperture requires slower shutter speeds and the risk of camera or subject movement. While long telephotos solve many problems facing a wildlife photographer, they are only the first step toward producing high-quality photographs.
Lens "speed" is another element to consider before buying a telephoto lens. A "fast" lens is one with a relatively large maximum aperture. Since large apertures allow more light to reach the film, a fast lens permits using higher shutter speeds, lessens the chance of camera movement and increases the odds of stopping an animal in motion. Most long telephotos, in the 400mm to 600mm range, have a maximum aperture of about f/5.6. Faster lenses, f/4.5 or f/3.5, are available, but to allow more light to enter the lens, fast lenses require a front lens element of greater diameter. This in turn increases the price and the weight. If price is not a significant obstacle, though, the faster the telephoto the greater the flexibility in less-than-ideal light situations. This is not to say that high-quality wildlife photos cannot be taken with an f/5.6 or even slower telephoto. They can. Better photos can be taken with a shorter focal length, slower telephoto which has firstrate optical performance than with a longer telephoto with inferior glass.
Most major camera brands offer a variety of interchangeable focusing screens. For telephoto and close-up photography, a fine-ground matte focusing screen without distracting fresnel focusing spots or split-image rangefinder lines is usually the best choice.
Photographers often convince themselves that inadequate equipment prevents them from producing professional-quality photographs. Inadequate equipment can be a severe handicap, requiring more time or ingenuity to capture an image. Seldom, though, does it alone account for the differences between the mundane photo and the spectacular photo. If every nature photographer had the same equipment and an equally creative eye, two additional considerations would determine the quality of photographs they produced: knowledge of the subject and the amount of time they can invest in making photographs.
There are alternatives to fast, high-quality, expensive telephoto lenses. Teleconverters, auxiliary lenses mounted between the camera body and the prime lens, increase magnification. A 2X teleconverter, for example, transforms a 100mm lens to a 200mm lens. Teleconverters used in conjunction with lenses are smaller, lighter and less expensive than comparable fixed focal length lenses. Inexpensive teleconverters, though, should be avoided. A teleconverter not designed to couple with a particular camera and lens, may not produce acceptable photos. More expensive teleconverters coupled with specific camera and lens combinations can produce photographs of acceptable quality, but even so, light transmission decreases as much as one or two stops, meaning a f/5.6 lens may become an f/11 lens when coupled with a 2X converter. Fixed focal length lenses are always best, but if cost, size and weight are primary considerations, a good quality teleconverter may be an appropriate choice.
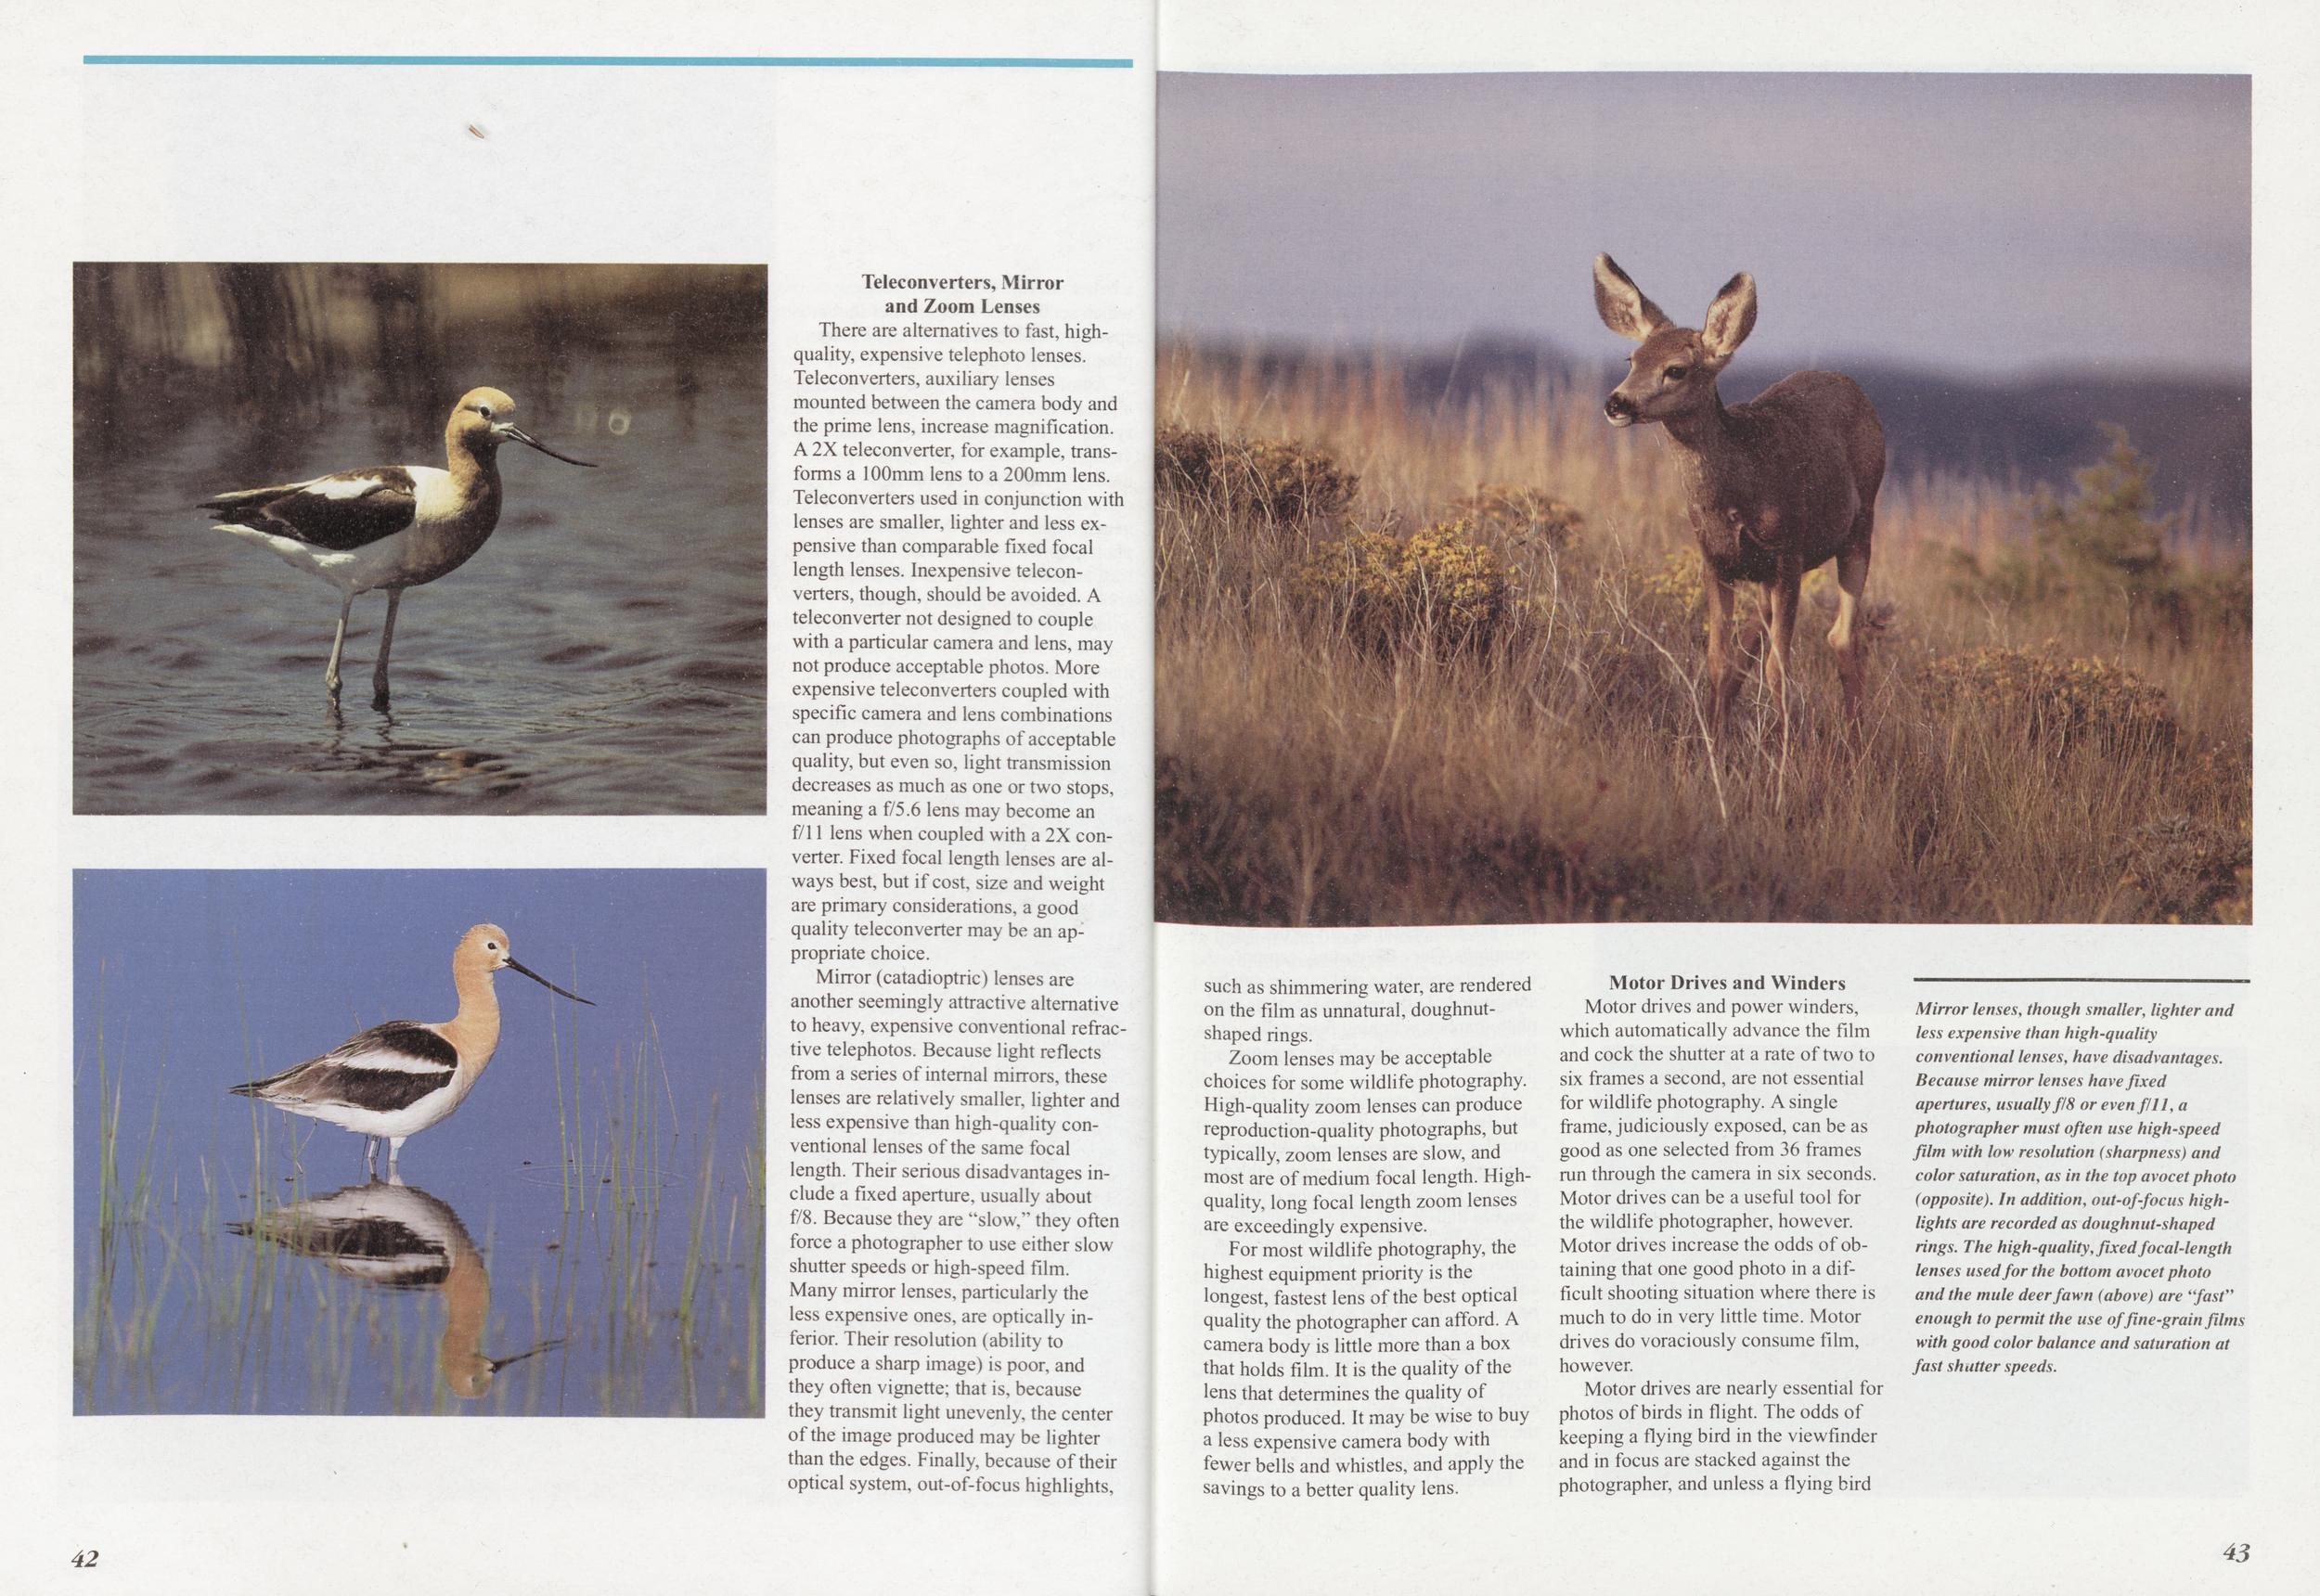
Mirror (catadioptric) lenses are another seemingly attractive alternative to heavy, expensive conventional refractive telephotos. Because light reflects from a series of internal mirrors, these lenses are relatively smaller, lighter and less expensive than high-quality conventional lenses of the same focal length. Their serious disadvantages include a fixed aperture, usually about f/8. Because they are "slow," they often force a photographer to use either slow shutter speeds or high-speed film. Many mirror lenses, particularly the less expensive ones, are optically inferior. Their resolution (ability to produce a sharp image) is poor, and they often vignette; that is, because they transmit light unevenly, the center of the image produced may be lighter than the edges. Finally, because of their optical system, out-of-focus highlights, such as shimmering water, are rendered on the film as unnatural, doughnut-shaped rings.
Zoom lenses may be acceptable choices for some wildlife photography. High-quality zoom lenses can produce reproduction-quality photographs, but typically, zoom lenses are slow, and most are of medium focal length. High-quality, long focal length zoom lenses are exceedingly expensive.
For most wildlife photography, the highest equipment priority is the longest, fastest lens of the best optical quality the photographer can afford. A camera body is little more than a box that holds film. It is the quality of the lens that determines the quality of photos produced. It may be wise to buy a less expensive camera body with fewer bells and whistles, and apply the savings to a better quality lens.
Motor Drives and WindersMotor drives and power winders, which automatically advance the film and cock the shutter at a rate of two to six frames a second, are not essential for wildlife photography. A single frame, judiciously exposed, can be as good as one selected from 36 frames run through the camera in six seconds. Motor drives can be a useful tool for the wildlife photographer, however. Motor drives increase the odds of obtaining that one good photo in a difficult shooting situation where there is much to do in very little time. Motor drives do voraciously consume film, however.
Mirror lenses, though smaller, lighter and less expensive than high-quality conventional lenses, have disadvantages. Because mirror lenses have fixed apertures, usually f 18 or even fill, a photographer must often use high-speed film with low resolution (sharpness) and color saturation, as in the top avocet photo (opposite). In addition, out-of-focus highlights are recorded as doughnut-shaped rings. The high-quality, fixed focal-length lenses used for the bottom avocet photo and the mule deer fawn (above) are "fast" enough to permit the use of fine-grain films with good color balance and saturation at fast shutter speeds.
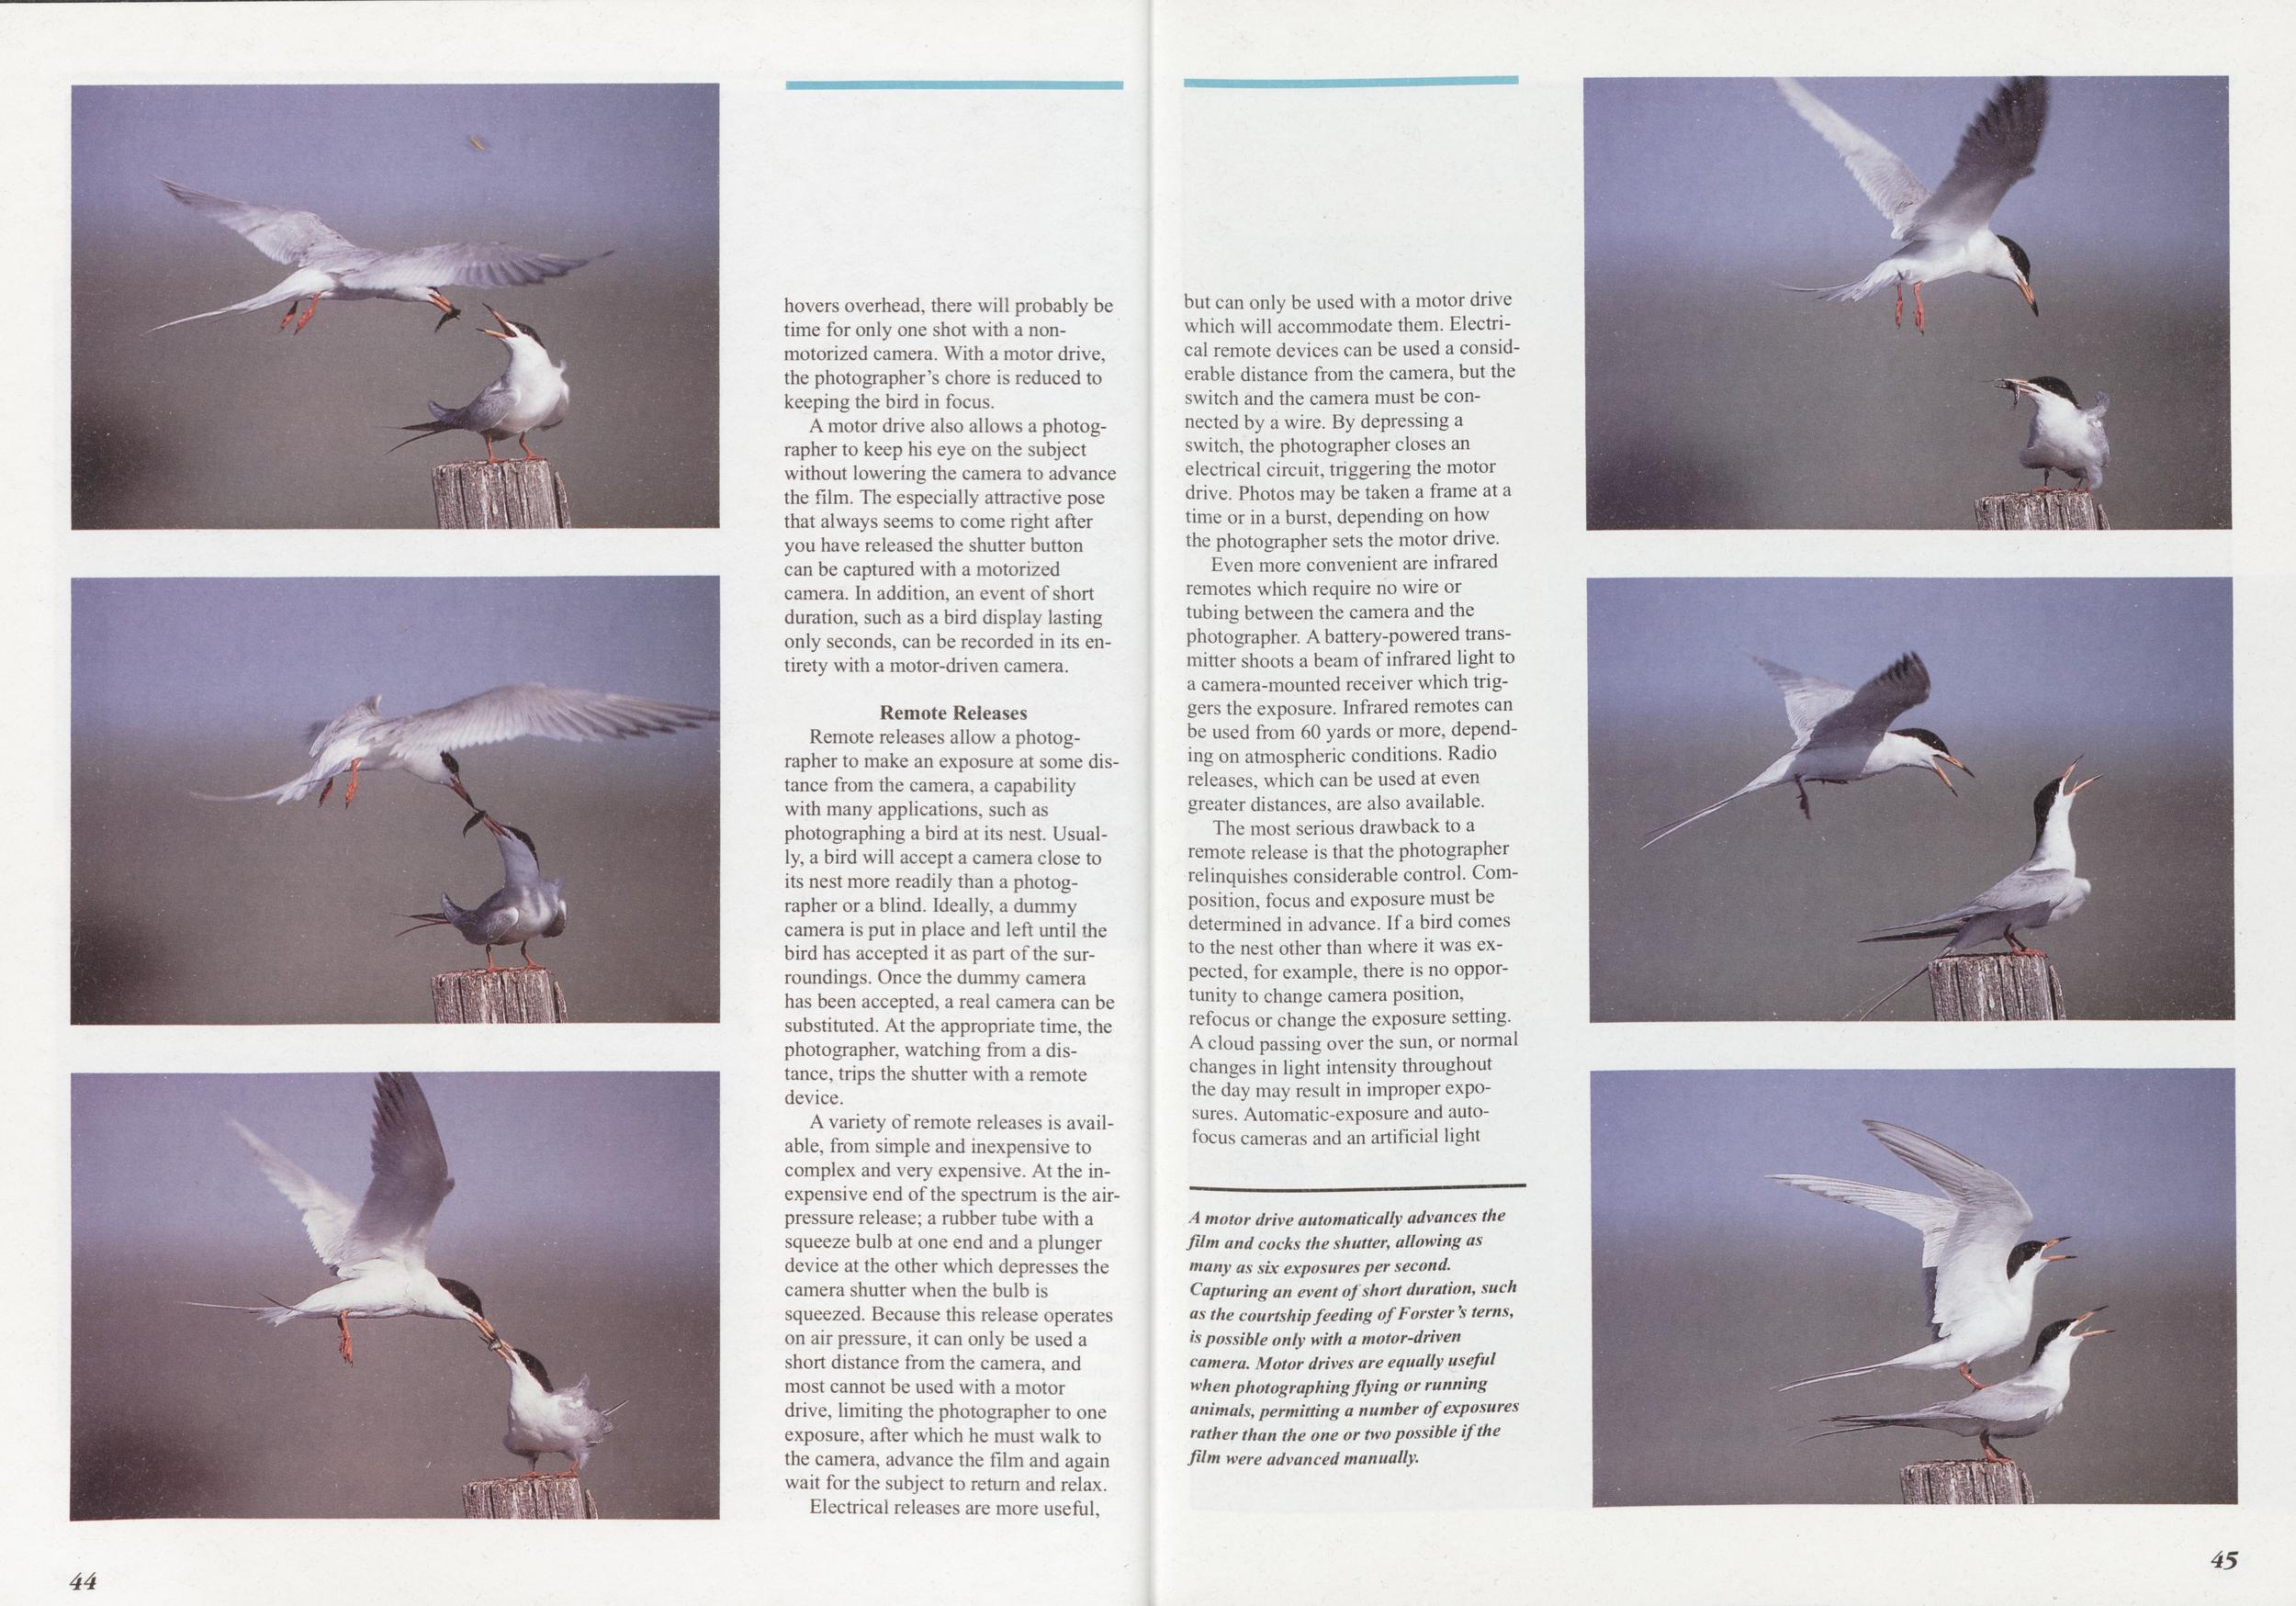
A motor drive also allows a photographer to keep his eye on the subject without lowering the camera to advance the film. The especially attractive pose that always seems to come right after you have released the shutter button can be captured with a motorized camera. In addition, an event of short duration, such as a bird display lasting only seconds, can be recorded in its entirety with a motor-driven camera.
Remote ReleasesRemote releases allow a photographer to make an exposure at some distance from the camera, a capability with many applications, such as photographing a bird at its nest. Usually, a bird will accept a camera close to its nest more readily than a photographer or a blind. Ideally, a dummy camera is put in place and left until the bird has accepted it as part of the surroundings. Once the dummy camera has been accepted, a real camera can be substituted. At the appropriate time, the photographer, watching from a distance, trips the shutter with a remote device.
A variety of remote releases is available, from simple and inexpensive to complex and very expensive. At the inexpensive end of the spectrum is the airpressure release; a rubber tube with a squeeze bulb at one end and a plunger device at the other which depresses the camera shutter when the bulb is squeezed. Because this release operates on air pressure, it can only be used a short distance from the camera, and most cannot be used with a motor drive, limiting the photographer to one exposure, after which he must walk to the camera, advance the film and again wait for the subject to return and relax.
Electrical releases are more useful, but can only be used with a motor drive which will accommodate them. Electrical remote devices can be used a considerable distance from the camera, but the switch and the camera must be connected by a wire. By depressing a switch, the photographer closes an electrical circuit, triggering the motor drive. Photos may be taken a frame at a time or in a burst, depending on how the photographer sets the motor drive.
Even more convenient are infrared remotes which require no wire or tubing between the camera and the photographer. A battery-powered transmitter shoots a beam of infrared light to a camera-mounted receiver which triggers the exposure. Infrared remotes can be used from 60 yards or more, depending on atmospheric conditions. Radio releases, which can be used at even greater distances, are also available.
The most serious drawback to a remote release is that the photographer relinquishes considerable control. Composition, focus and exposure must be determined in advance. If a bird comes to the nest other than where it was expected, for example, there is no opportunity to change camera position, refocus or change the exposure setting. A cloud passing over the sun, or normal changes in light intensity throughout the day may result in improper exposures. Automatic-exposure and autofocus cameras and an artificial light
A motor drive automatically advances the film and cocks the shutter, allowing as many as six exposures per second. Capturing an event of short duration, such as the courtship feeding ofForster 's terns, is possible only with a motor-driven camera. Motor drives are equally useful when photographing flying or running animals, permitting a number of exposures rather than the one or two possible if the film were advanced manually.
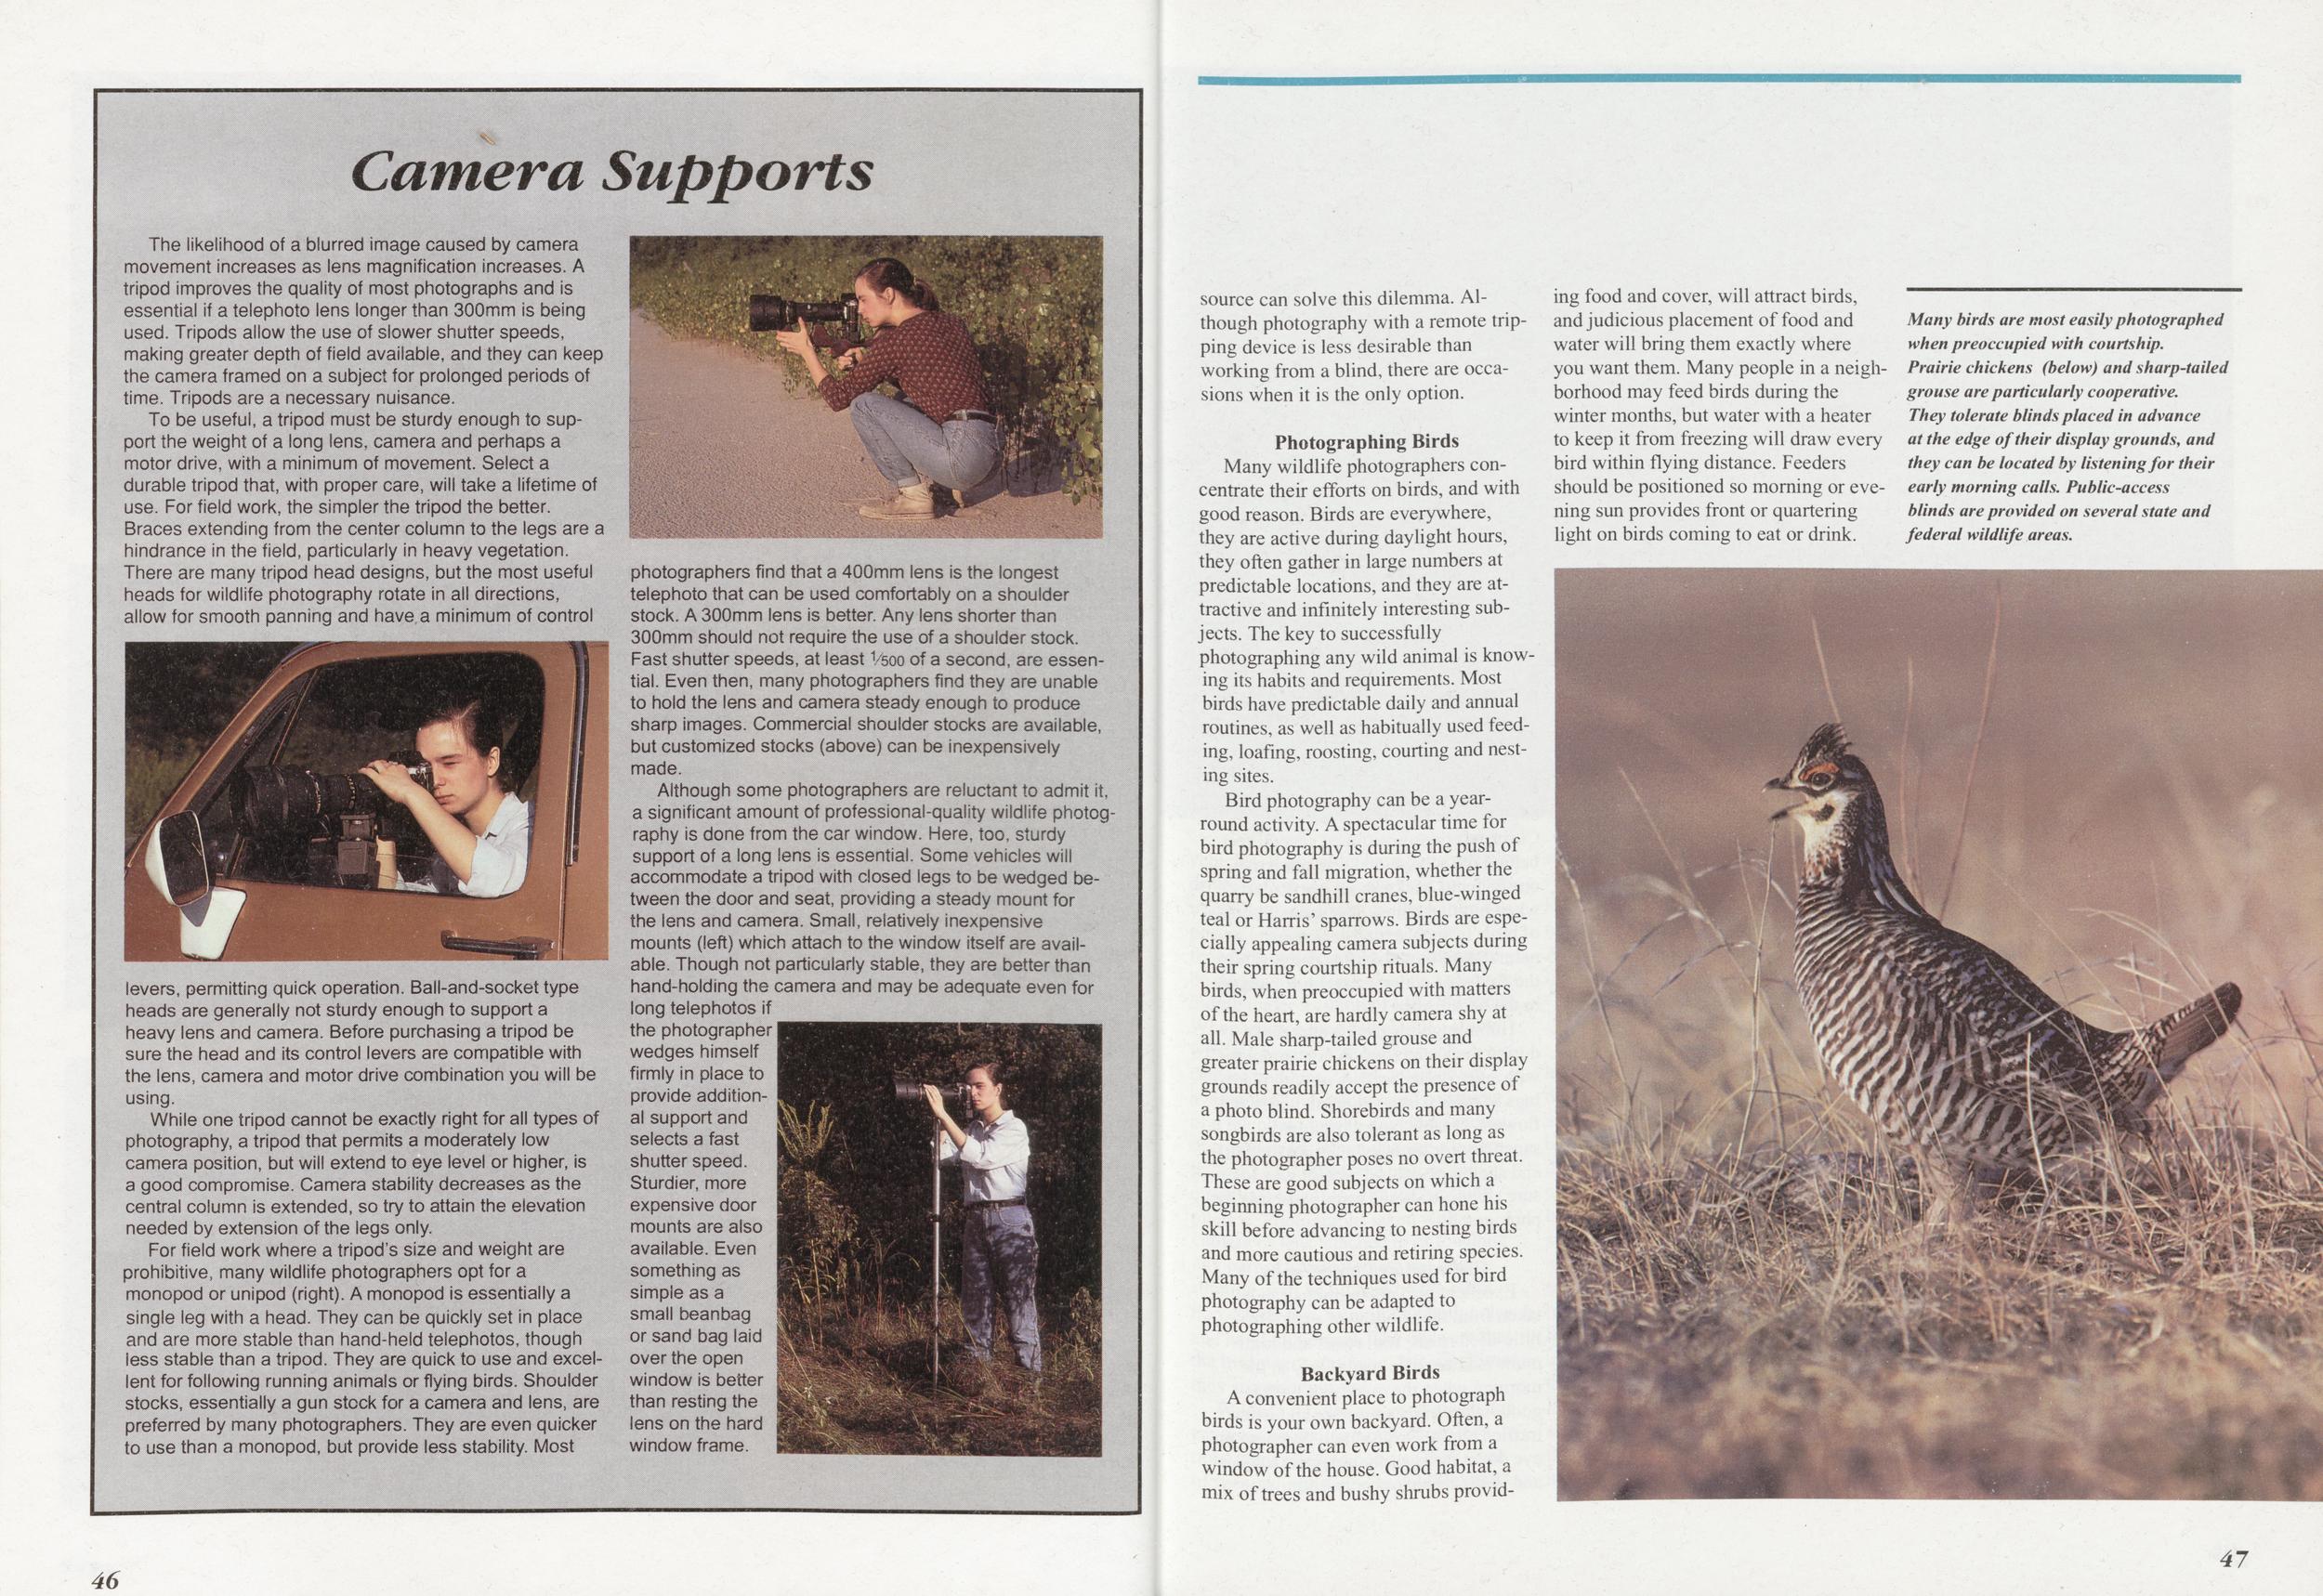
Camera Supports
The likelihood of a blurred image caused by camera movement increases as lens magnification increases. A tripod improves the quality of most photographs and is essential if a telephoto lens longer than 300mm is being used. Tripods allow the use of slower shutter speeds, making greater depth of field available, and they can keep the camera framed on a subject for prolonged periods of time. Tripods are a necessary nuisance.
To be useful, a tripod must be sturdy enough to support the weight of a long lens, camera and perhaps a motor drive, with a minimum of movement. Select a durable tripod that, with proper care, will take a lifetime of use. For field work, the simpler the tripod the better. Braces extending from the center column to the legs are a hindrance in the field, particularly in heavy vegetation. There are many tripod head designs, but the most useful heads for wildlife photography rotate in all directions, allow for smooth panning and have a minimum of control levers, permitting quick operation. Ball-and-socket type heads are generally not sturdy enough to support a heavy lens and camera. Before purchasing a tripod be sure the head and its control levers are compatible with the lens, camera and motor drive combination you will be using.
While one tripod cannot be exactly right for all types of photography, a tripod that permits a moderately low camera position, but will extend to eye level or higher, is a good compromise. Camera stability decreases as the central column is extended, so try to attain the elevation needed by extension of the legs only.
For field work where a tripod's size and weight are prohibitive, many wildlife photographers opt for a monopod or unipod (right). A monopod is essentially a single leg with a head. They can be quickly set in place and are more stable than hand-held telephotos, though less stable than a tripod. They are quick to use and excellent for following running animals or flying birds. Shoulder stocks, essentially a gun stock for a camera and lens, are preferred by many photographers. They are even quicker to use than a monopod, but provide less stability. Most photographers find that a 400mm lens is the longest telephoto that can be used comfortably on a shoulder stock. A 300mm lens is better. Any lens shorter than 300mm should not require the use of a shoulder stock. Fast shutter speeds, at least Vsoo of a second, are essential. Even then, many photographers find they are unable to hold the lens and camera steady enough to produce sharp images. Commercial shoulder stocks are available, but customized stocks (above) can be inexpensively made.
Although some photographers are reluctant to admit it, a significant amount of professional-quality wildlife photography is done from the car window. Here, too, sturdy support of a long lens is essential. Some vehicles will accommodate a tripod with closed legs to be wedged between the door and seat, providing a steady mount for the lens and camera. Small, relatively inexpensive mounts (left) which attach to the window itself are available. Though not particularly stable, they are better than hand-holding the camera and may be adequate even for long telephotos if the photographer wedges himself firmly in place to provide additional support and selects a fast shutter speed. Sturdier, more expensive door mounts are also available. Even something as simple as a small beanbag or sand bag laid over the open window is better than resting the lens on the hard window frame.
source can solve this dilemma. Although photography with a remote tripping device is less desirable than working from a blind, there are occasions when it is the only option.
Photographing BirdsMany wildlife photographers concentrate their efforts on birds, and with good reason. Birds are everywhere, they are active during daylight hours, they often gather in large numbers at predictable locations, and they are attractive and infinitely interesting subjects. The key to successfully photographing any wild animal is knowing its habits and requirements. Most birds have predictable daily and annual routines, as well as habitually used feeding, loafing, roosting, courting and nesting sites.
Bird photography can be a year-round activity. A spectacular time for bird photography is during the push of spring and fall migration, whether the quarry be sandhill cranes, blue-winged teal or Harris' sparrows. Birds are especially appealing camera subjects during their spring courtship rituals. Many birds, when preoccupied with matters of the heart, are hardly camera shy at all. Male sharp-tailed grouse and greater prairie chickens on their display grounds readily accept the presence of a photo blind. Shorebirds and many songbirds are also tolerant as long as the photographer poses no overt threat. These are good subjects on which a beginning photographer can hone his skill before advancing to nesting birds and more cautious and retiring species. Many of the techniques used for bird photography can be adapted to photographing other wildlife.
Backyard BirdsA convenient place to photograph birds is your own backyard. Often, a photographer can even work from a window of the house. Good habitat, a mix of trees and bushy shrubs providing food and cover, will attract birds, and judicious placement of food and water will bring them exactly where you want them. Many people in a neighborhood may feed birds during the winter months, but water with a heater to keep it from freezing will draw every bird within flying distance. Feeders should be positioned so morning or evening sun provides front or quartering light on birds coming to eat or drink.
Many birds are most easily photographed when preoccupied with courtship. Prairie chickens (below) and sharp-tailed grouse are particularly cooperative. They tolerate blinds placed in advance at the edge of their display grounds, and they can be located by listening for their early morning calls. Public-access blinds are provided on several state and federal wildlife areas.
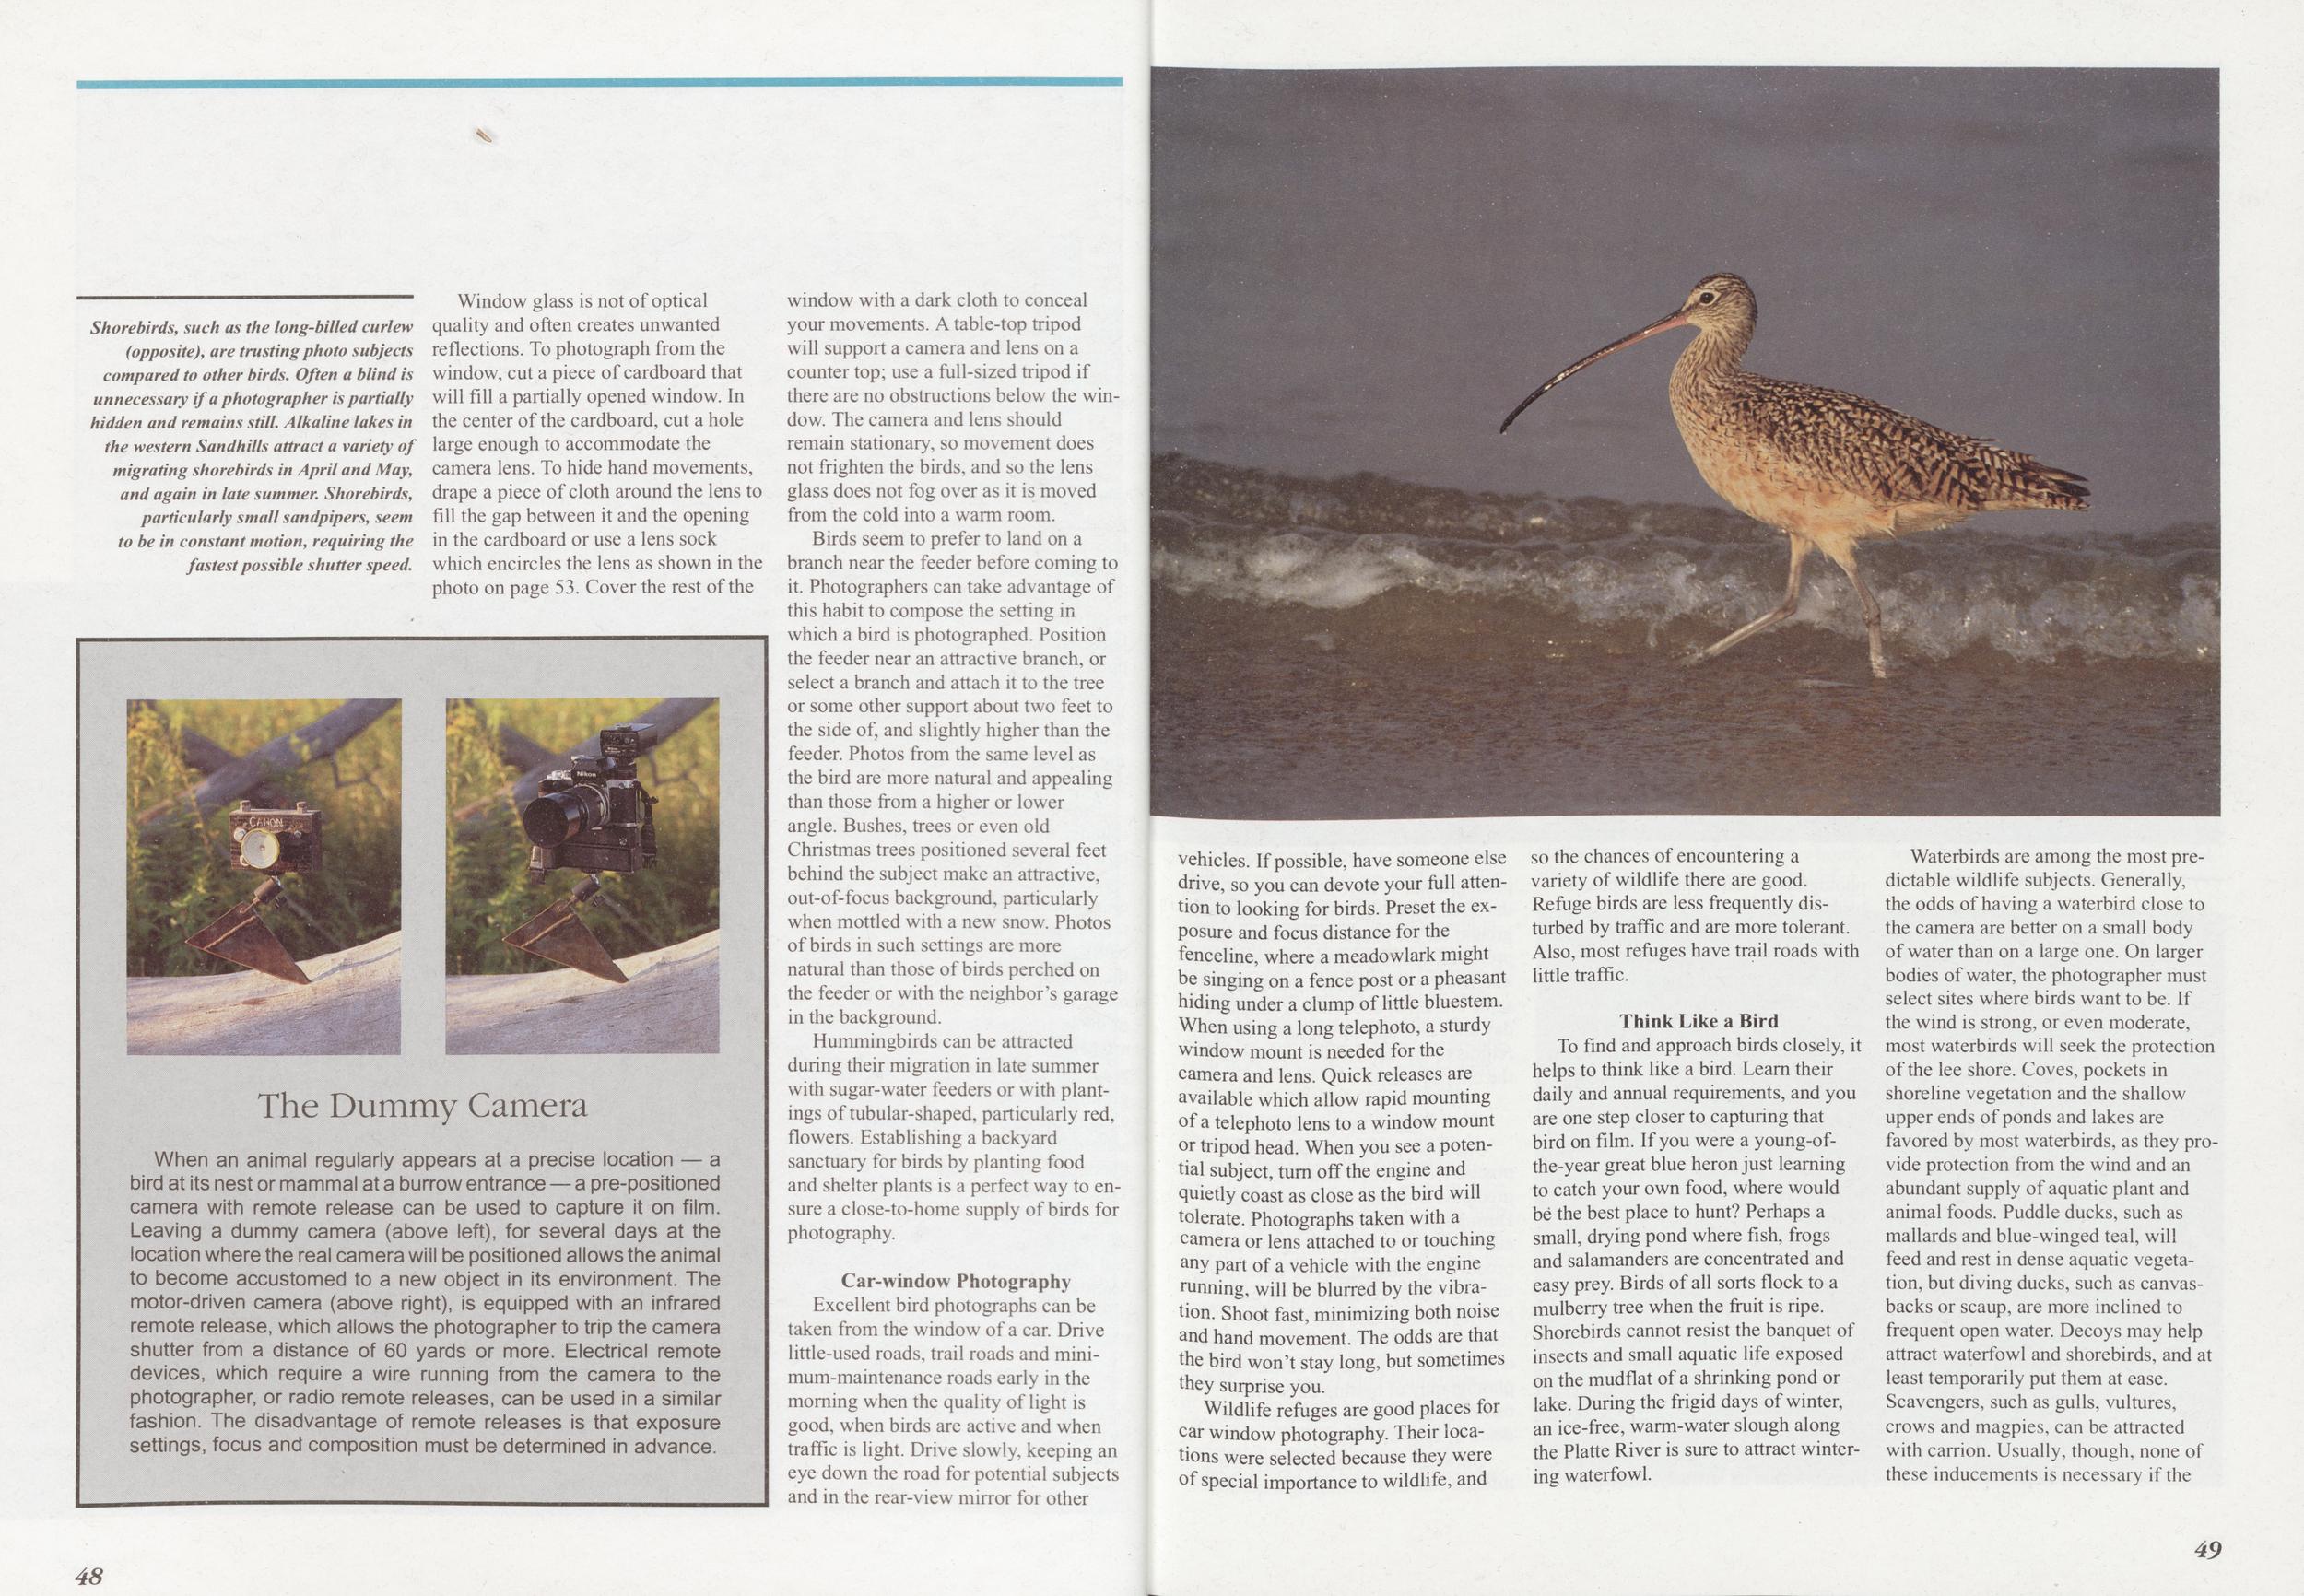
Shorebirds, such as the long-billed curlew (opposite), are trusting photo subjects compared to other birds. Often a blind is unnecessary if a photographer is partially hidden and remains still. Alkaline lakes in the western Sandhills attract a variety of migrating shorebirds in April and May, and again in late summer. Shorebirds, particularly small sandpipers, seem to be in constant motion, requiring the fastest possible shutter speed.
When an animal regularly appears at a precise location — a bird at its nest or mammal at a burrow entrance — a pre-positioned camera with remote release can be used to capture it on film. Leaving a dummy camera (above left), for several days at the location where the real camera will be positioned allows the animal to become accustomed to a new object in its environment. The motor-driven camera (above right), is equipped with an infrared remote release, which allows the photographer to trip the camera shutter from a distance of 60 yards or more. Electrical remote devices, which require a wire running from the camera to the photographer, or radio remote releases, can be used in a similar fashion. The disadvantage of remote releases is that exposure settings, focus and composition must be determined in advance.
Window glass is not of optical quality and often creates unwanted reflections. To photograph from the window, cut a piece of cardboard that will fill a partially opened window. In the center of the cardboard, cut a hole large enough to accommodate the camera lens. To hide hand movements, drape a piece of cloth around the lens to fill the gap between it and the opening in the cardboard or use a lens sock which encircles the lens as shown in the photo on page 53. Cover the rest of the window with a dark cloth to conceal your movements. A table-top tripod will support a camera and lens on a counter top; use a full-sized tripod if there are no obstructions below the window. The camera and lens should remain stationary, so movement does not frighten the birds, and so the lens glass does not fog over as it is moved from the cold into a warm room.
Birds seem to prefer to land on a branch near the feeder before coming to it. Photographers can take advantage of this habit to compose the setting in which a bird is photographed. Position the feeder near an attractive branch, or select a branch and attach it to the tree or some other support about two feet to the side of, and slightly higher than the feeder. Photos from the same level as the bird are more natural and appealing than those from a higher or lower angle. Bushes, trees or even old Christmas trees positioned several feet behind the subject make an attractive, out-of-focus background, particularly when mottled with a new snow. Photos of birds in such settings are more natural than those of birds perched on the feeder or with the neighbor's garage in the background.
Hummingbirds can be attracted during their migration in late summer with sugar-water feeders or with plantings of tubular-shaped, particularly red, flowers. Establishing a backyard sanctuary for birds by planting food and shelter plants is a perfect way to ensure a close-to-home supply of birds for photography.
Car-window PhotographyExcellent bird photographs can be taken from the window of a car. Drive little-used roads, trail roads and minimum-maintenance roads early in the morning when the quality of light is good, when birds are active and when traffic is light. Drive slowly, keeping an eye down the road for potential subjects and in the rear-view mirror for other vehicles. If possible, have someone else drive, so you can devote your full attention to looking for birds. Preset the exposure and focus distance for the fenceline, where a meadowlark might be singing on a fence post or a pheasant hiding under a clump of little bluestem. When using a long telephoto, a sturdy window mount is needed for the camera and lens. Quick releases are available which allow rapid mounting of a telephoto lens to a window mount or tripod head. When you see a potential subject, turn off the engine and quietly coast as close as the bird will tolerate. Photographs taken with a camera or lens attached to or touching any part of a vehicle with the engine running, will be blurred by the vibration. Shoot fast, minimizing both noise and hand movement. The odds are that the bird won't stay long, but sometimes they surprise you.
Wildlife refuges are good places for car window photography. Their locations were selected because they were of special importance to wildlife, and so the chances of encountering a variety of wildlife there are good. Refuge birds are less frequently disturbed by traffic and are more tolerant. Also, most refuges have trail roads with little traffic.
Think Like a BirdTo find and approach birds closely, it helps to think like a bird. Learn their daily and annual requirements, and you are one step closer to capturing that bird on film. If you were a young-of-the-year great blue heron just learning to catch your own food, where would be the best place to hunt? Perhaps a small, drying pond where fish, frogs and salamanders are concentrated and easy prey. Birds of all sorts flock to a mulberry tree when the fruit is ripe. Shorebirds cannot resist the banquet of insects and small aquatic life exposed on the mudflat of a shrinking pond or lake. During the frigid days of winter, an ice-free, warm-water slough along the Platte River is sure to attract wintering waterfowl.
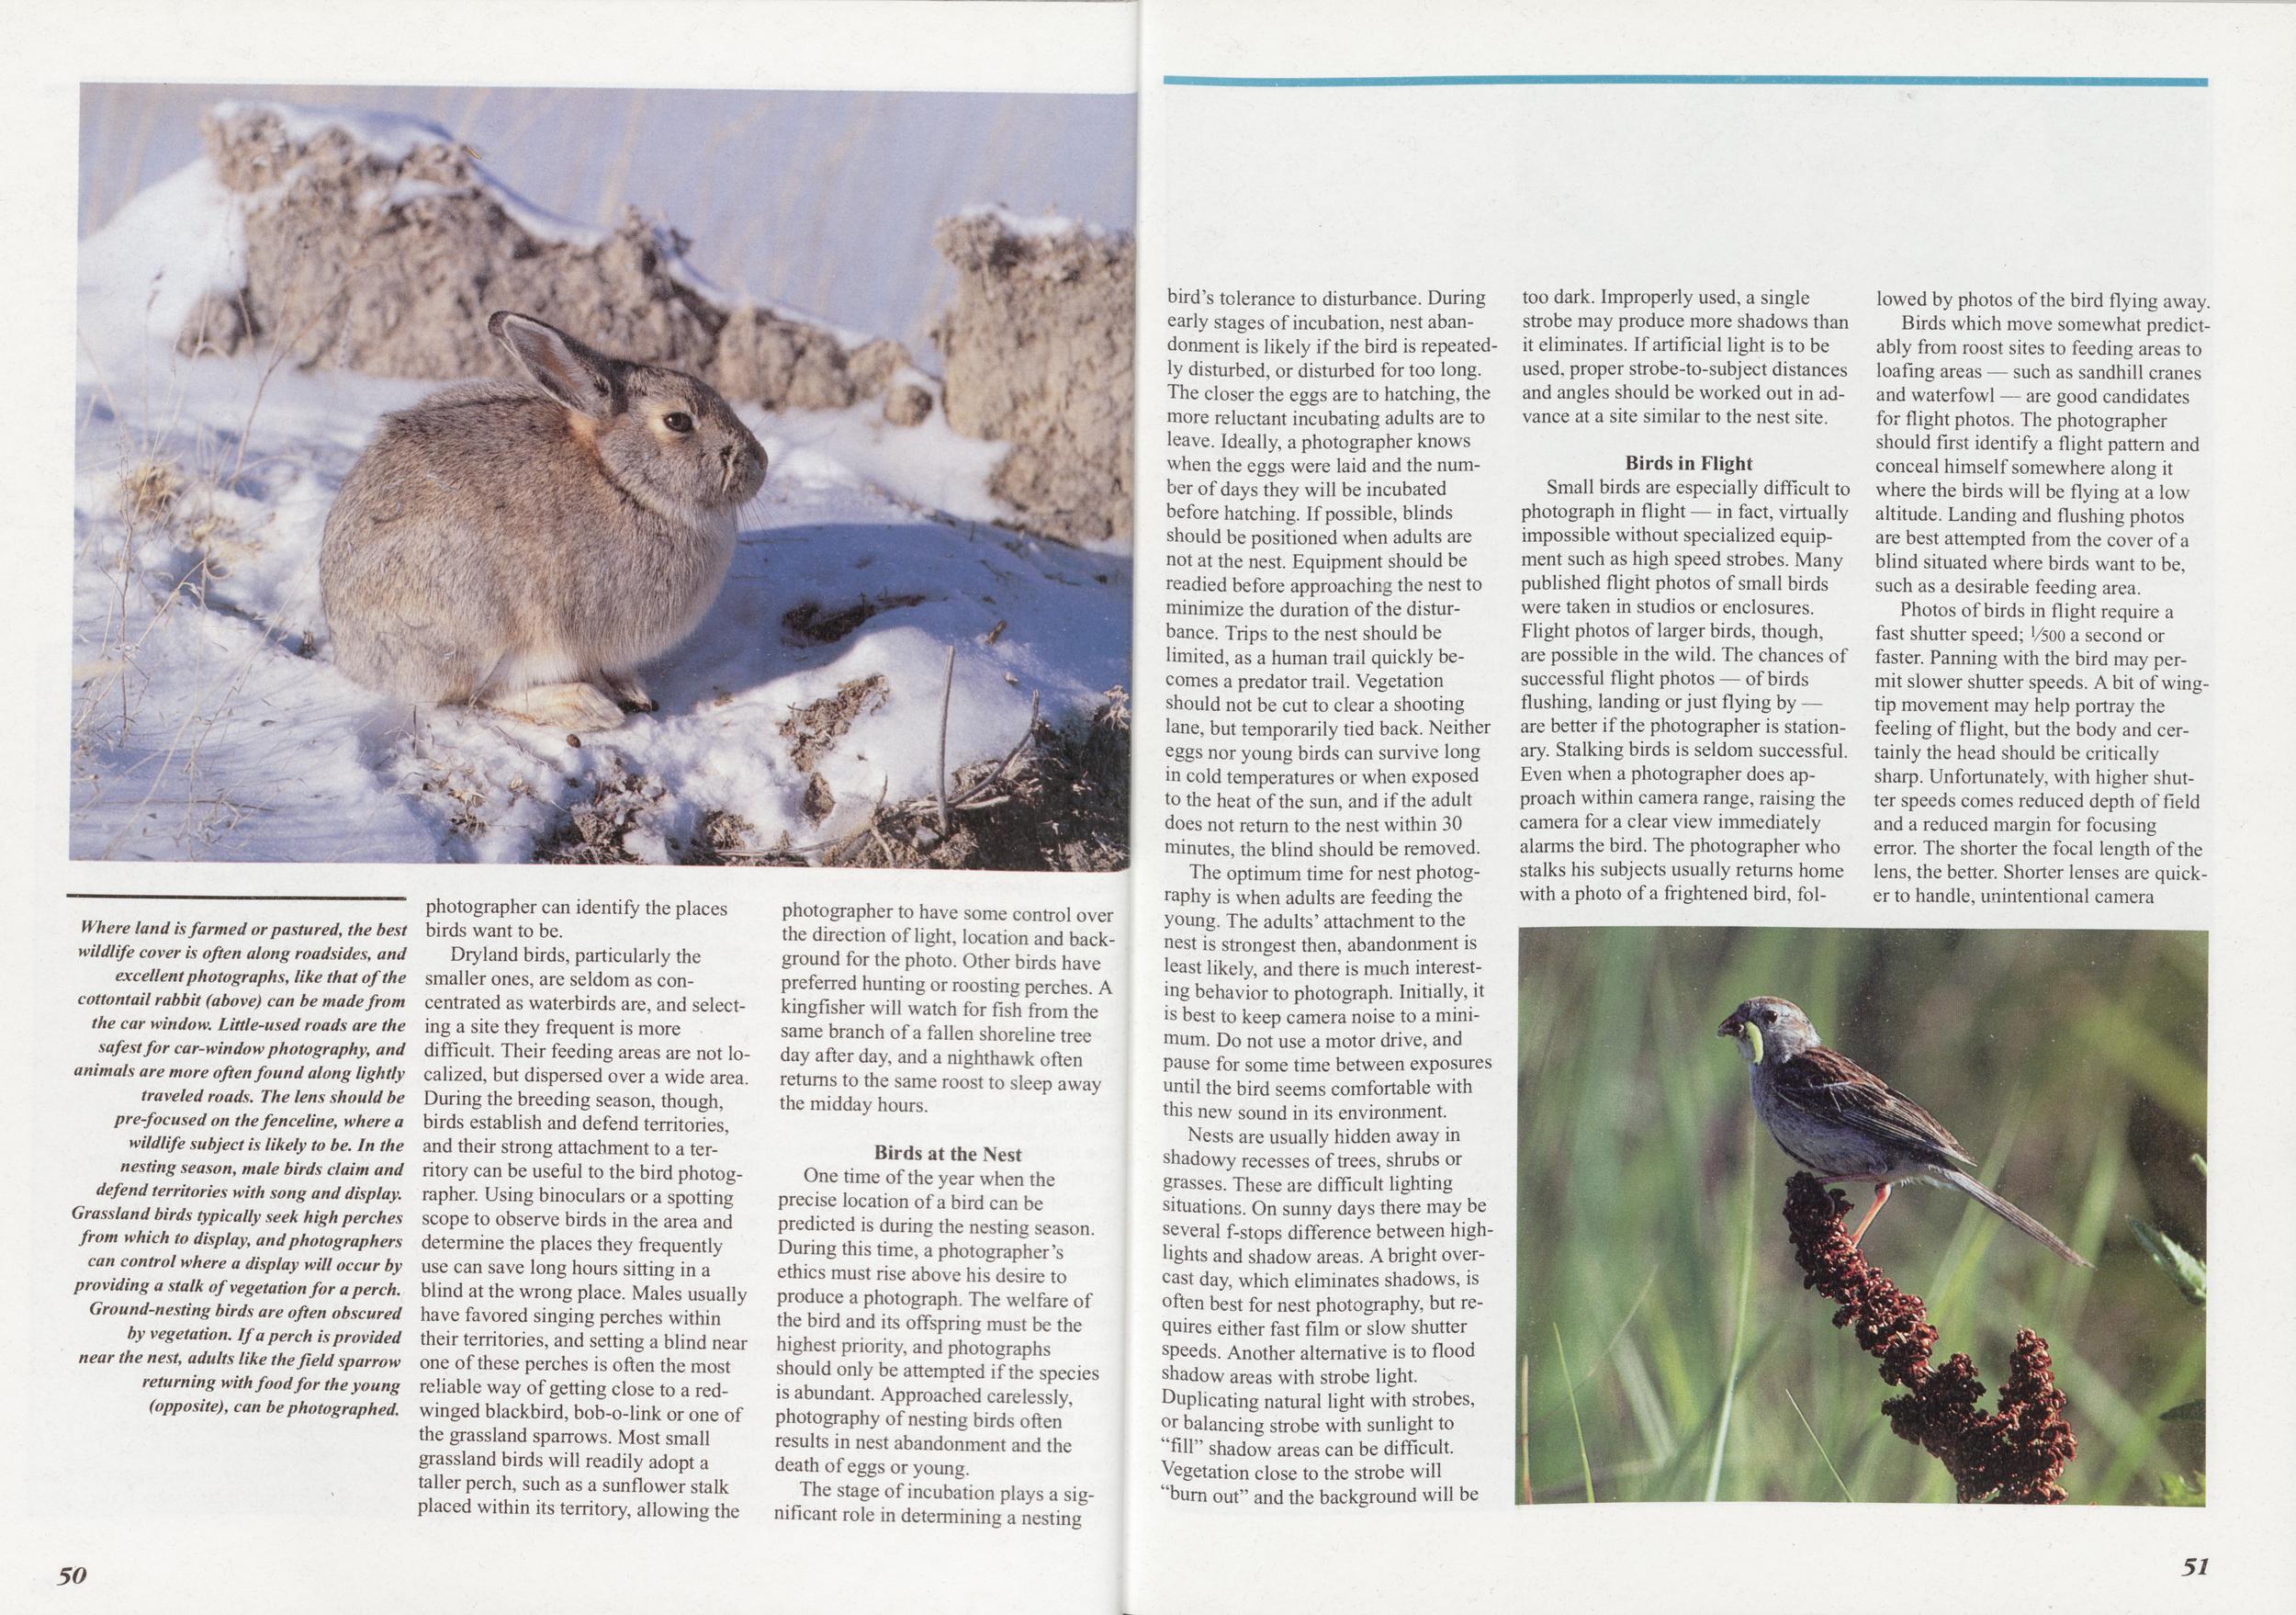
Where land is farmed or pastured, the best wildlife cover is often along roadsides, and excellent photographs, like that of the cottontail rabbit (above) can be made from the car window. Little-used roads are the safest for car-window photography, and animals are more often found along lightly traveled roads. The lens should be pre-focused on the fenceline, where a wildlife subject is likely to be. In the nesting season, male birds claim and defend territories with song and display. Grassland birds typically seek high perches from which to display, and photographers can control where a display will occur by providing a stalk of vegetation for a perch. Ground-nesting birds are often obscured by vegetation. If a perch is provided near the nest, adults like the field sparrow returning with food for the young (opposite), can be photographed.
Dryland birds, particularly the smaller ones, are seldom as concentrated as waterbirds are, and selecting a site they frequent is more difficult. Their feeding areas are not localized, but dispersed over a wide area. During the breeding season, though, birds establish and defend territories, and their strong attachment to a territory can be useful to the bird photographer. Using binoculars or a spotting scope to observe birds in the area and determine the places they frequently use can save long hours sitting in a blind at the wrong place. Males usually have favored singing perches within their territories, and setting a blind near one of these perches is often the most reliable way of getting close to a redwinged blackbird, bob-o-link or one of the grassland sparrows. Most small grassland birds will readily adopt a taller perch, such as a sunflower stalk placed within its territory, allowing the photographer to have some control over the direction of light, location and background for the photo. Other birds have preferred hunting or roosting perches. A kingfisher will watch for fish from the same branch of a fallen shoreline tree day after day, and a nighthawk often returns to the same roost to sleep away the midday hours.
Birds at the NestOne time of the year when the precise location of a bird can be predicted is during the nesting season. During this time, a photographer's ethics must rise above his desire to produce a photograph. The welfare of the bird and its offspring must be the highest priority, and photographs should only be attempted if the species is abundant. Approached carelessly, photography of nesting birds often results in nest abandonment and the death of eggs or young.
The stage of incubation plays a significant role in determining a nesting bird's tolerance to disturbance. During early stages of incubation, nest abandonment is likely if the bird is repeatedly disturbed, or disturbed for too long. The closer the eggs are to hatching, the more reluctant incubating adults are to leave. Ideally, a photographer knows when the eggs were laid and the number of days they will be incubated before hatching. If possible, blinds should be positioned when adults are not at the nest. Equipment should be readied before approaching the nest to minimize the duration of the disturbance. Trips to the nest should be limited, as a human trail quickly becomes a predator trail. Vegetation should not be cut to clear a shooting lane, but temporarily tied back. Neither eggs nor young birds can survive long in cold temperatures or when exposed to the heat of the sun, and if the adult does not return to the nest within 30 minutes, the blind should be removed.
The optimum time for nest photography is when adults are feeding the young. The adults' attachment to the nest is strongest then, abandonment is least likely, and there is much interesting behavior to photograph. Initially, it is best to keep camera noise to a minimum. Do not use a motor drive, and pause for some time between exposures until the bird seems comfortable with this new sound in its environment.
Nests are usually hidden away in shadowy recesses of trees, shrubs or grasses. These are difficult lighting situations. On sunny days there may be several f-stops difference between highlights and shadow areas. A bright overcast day, which eliminates shadows, is often best for nest photography, but requires either fast film or slow shutter speeds. Another alternative is to flood shadow areas with strobe light. Duplicating natural light with strobes, or balancing strobe with sunlight to "fill" shadow areas can be difficult. Vegetation close to the strobe will burn out" and the background will be too dark. Improperly used, a single strobe may produce more shadows than it eliminates. If artificial light is to be used, proper strobe-to-subject distances and angles should be worked out in advance at a site similar to the nest site.
Birds in FlightSmall birds are especially difficult to photograph in flight — in fact, virtually impossible without specialized equipment such as high speed strobes. Many published flight photos of small birds were taken in studios or enclosures. Flight photos of larger birds, though, are possible in the wild. The chances of successful flight photos — of birds flushing, landing or just flying by are better if the photographer is stationary. Stalking birds is seldom successful. Even when a photographer does approach within camera range, raising the camera for a clear view immediately alarms the bird. The photographer who stalks his subjects usually returns home with a photo of a frightened bird, followed by photos of the bird flying away.
Birds which move somewhat predictably from roost sites to feeding areas to loafing areas — such as sandhill cranes and waterfowl — are good candidates for flight photos. The photographer should first identify a flight pattern and conceal himself somewhere along it where the birds will be flying at a low altitude. Landing and flushing photos are best attempted from the cover of a blind situated where birds want to be, such as a desirable feeding area.
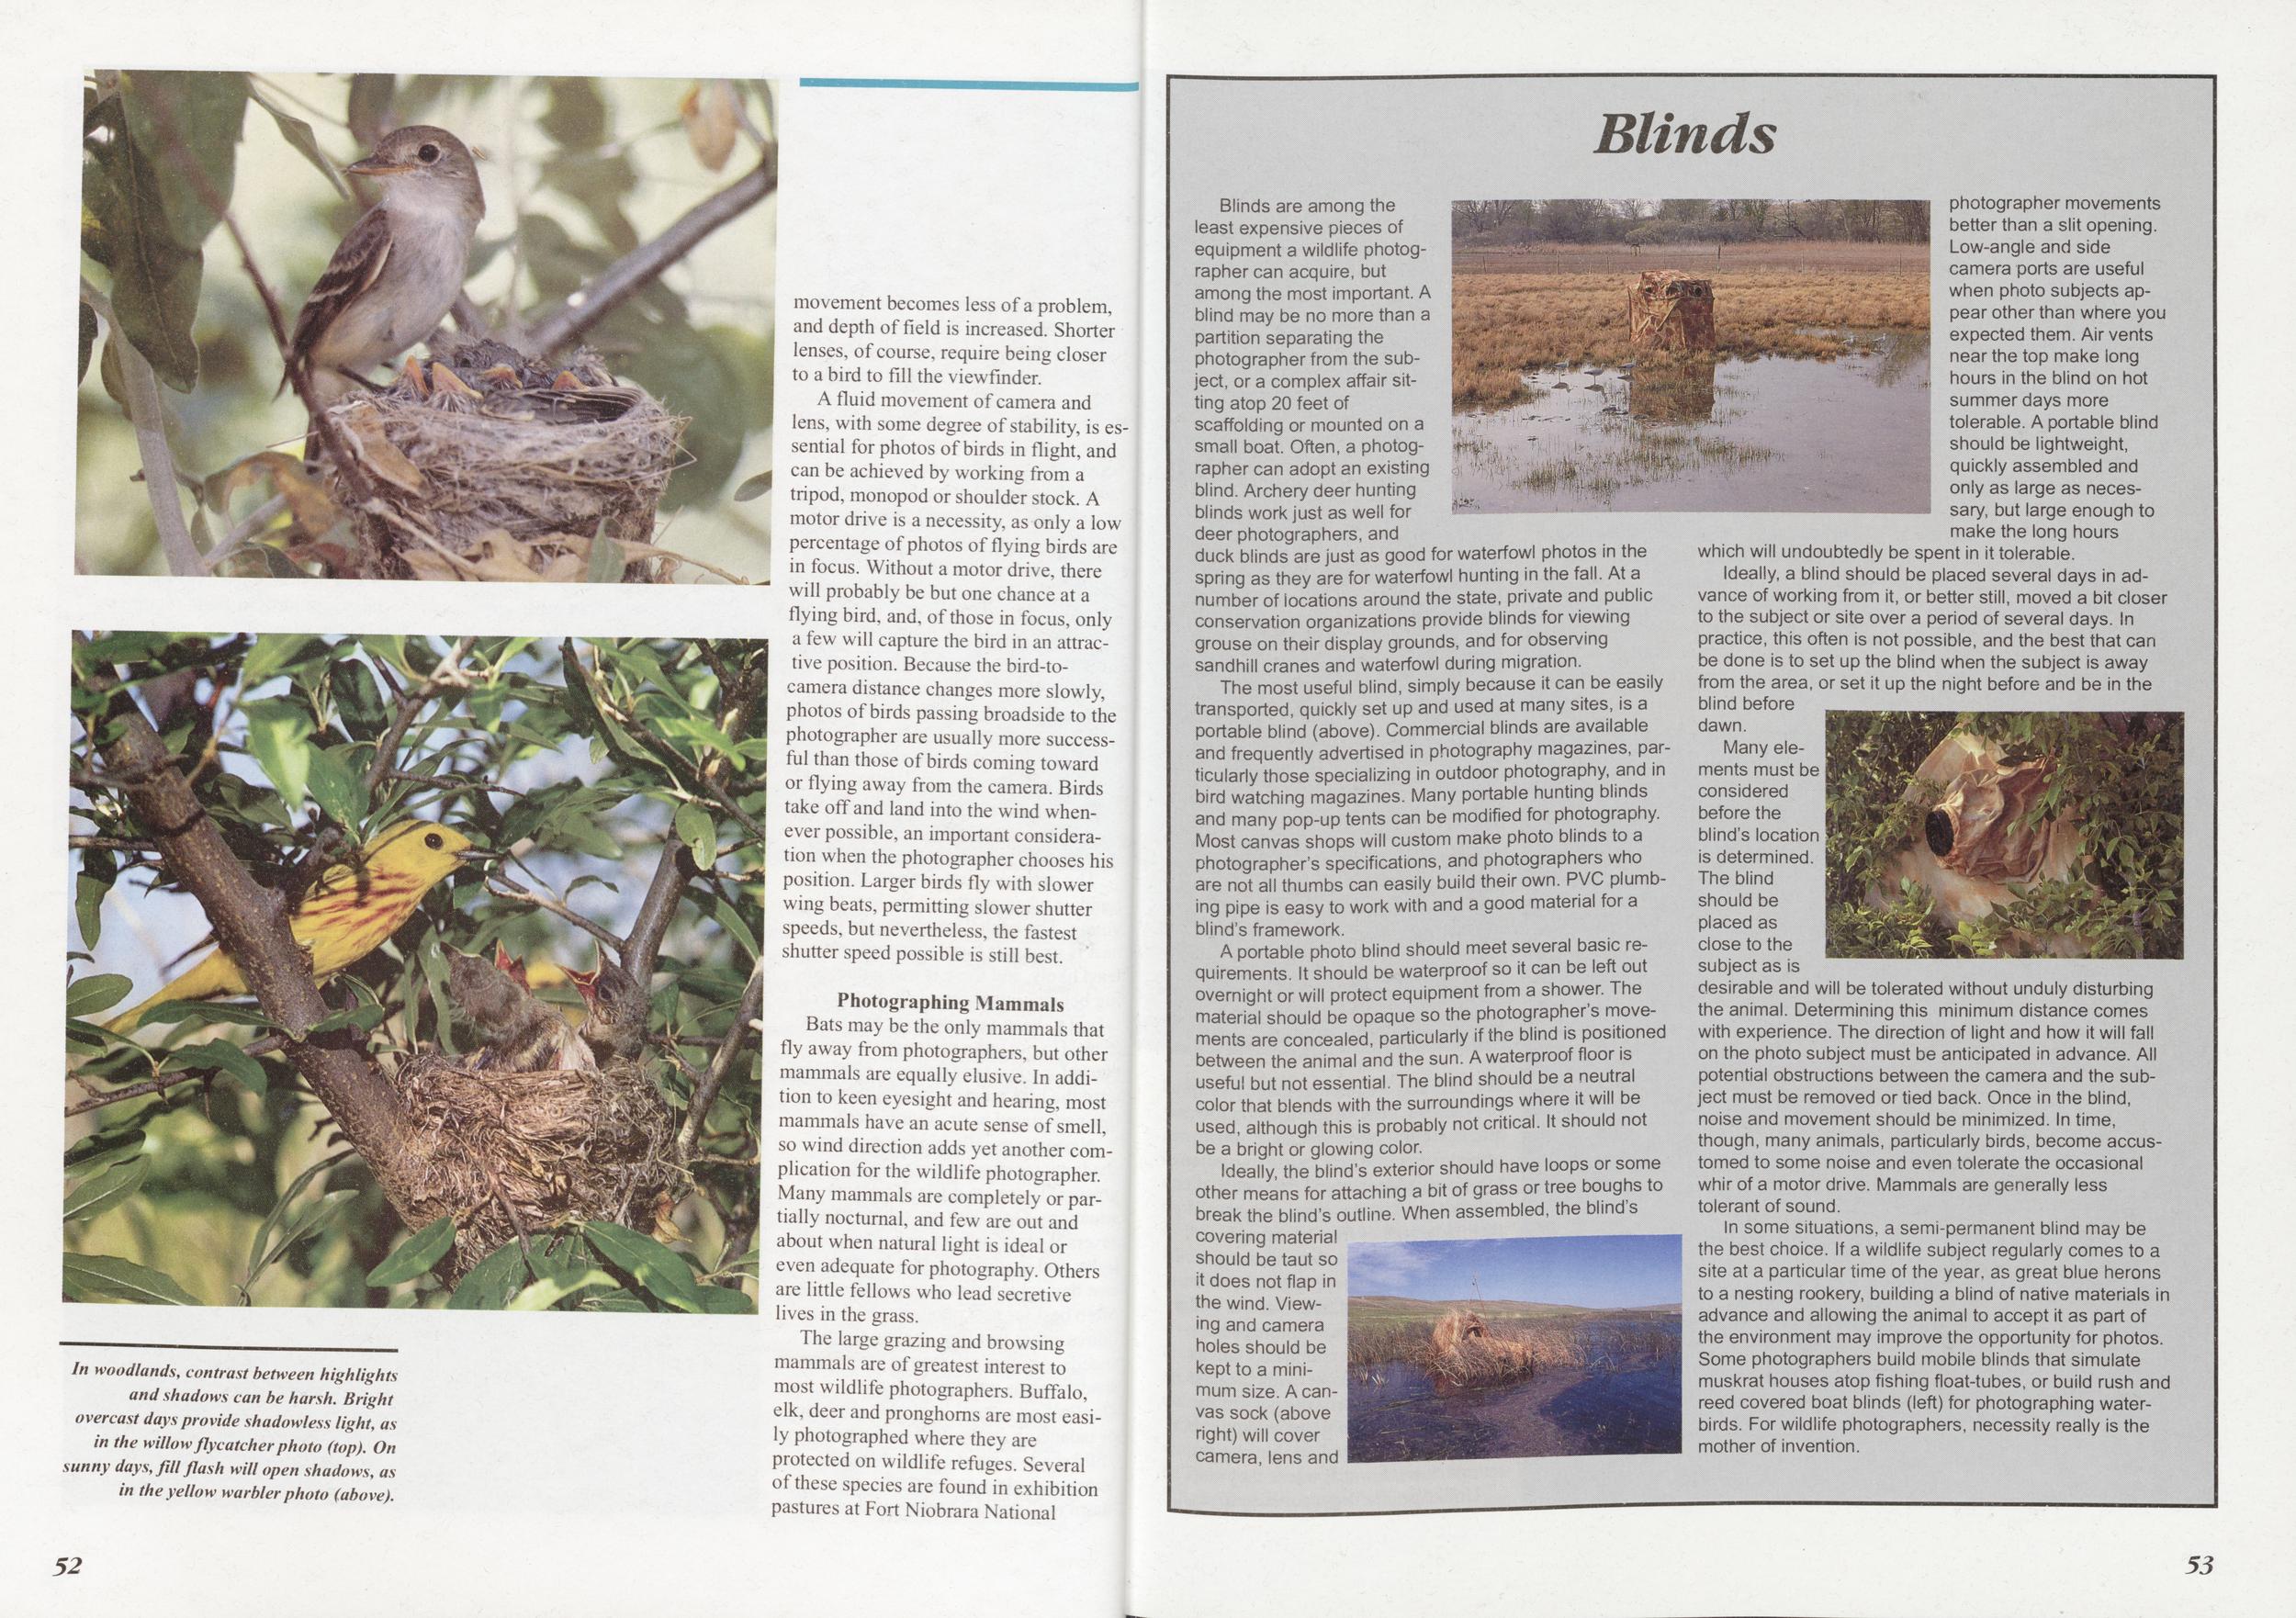
In woodlands, contrast between highlights and shadows can be harsh. Bright overcast days provide shadowless light, as in the willow flycatcher photo (top). On sunny days, fill flash will open shadows, as in the yellow warbler photo (above).
A fluid movement of camera and lens, with some degree of stability, is essential for photos of birds in flight, and can be achieved by working from a tripod, monopod or shoulder stock. A motor drive is a necessity, as only a low percentage of photos of flying birds are in focus. Without a motor drive, there will probably be but one chance at a flying bird, and, of those in focus, only a few will capture the bird in an attractive position. Because the bird-to-camera distance changes more slowly, photos of birds passing broadside to the photographer are usually more successful than those of birds coming toward or flying away from the camera. Birds take off and land into the wind whenever possible, an important consideration when the photographer chooses his position. Larger birds fly with slower wing beats, permitting slower shutter speeds, but nevertheless, the fastest shutter speed possible is still best.
Photographing MammalsBats may be the only mammals that fly away from photographers, but other mammals are equally elusive. In addition to keen eyesight and hearing, most mammals have an acute sense of smell, so wind direction adds yet another complication for the wildlife photographer. Many mammals are completely or partially nocturnal, and few are out and about when natural light is ideal or even adequate for photography. Others are little fellows who lead secretive lives in the grass.
The large grazing and browsing mammals are of greatest interest to most wildlife photographers. Buffalo, elk, deer and pronghoms are most easily photographed where they are protected on wildlife refuges. Several of these species are found in exhibition pastures at Fort Niobrara National
Blinds
Blinds are among the least expensive pieces of equipment a wildlife photographer can acquire, but among the most important. A blind may be no more than a partition separating the photographer from the subject, or a complex affair sitting atop 20 feet of scaffolding or mounted on a small boat. Often, a photographer can adopt an existing blind. Archery deer hunting blinds work just as well for deer photographers, and duck blinds are just as good for waterfowl photos in the spring as they are for waterfowl hunting in the fall. At a number of locations around the state, private and public conservation organizations provide blinds for viewing grouse on their display grounds, and for observing sandhill cranes and waterfowl during migration.
The most useful blind, simply because it can be easily transported, quickly set up and used at many sites, is a portable blind (above). Commercial blinds are available and frequently advertised in photography magazines, particularly those specializing in outdoor photography, and in bird watching magazines. Many portable hunting blinds and many pop-up tents can be modified for photography. Most canvas shops will custom make photo blinds to a photographer's specifications, and photographers who are not all thumbs can easily build their own. PVC plumbing pipe is easy to work with and a good material for a blind's framework.
A portable photo blind should meet several basic requirements. It should be waterproof so it can be left out overnight or will protect equipment from a shower. The material should be opaque so the photographer's movements are concealed, particularly if the blind is positioned between the animal and the sun. A waterproof floor is useful but not essential. The blind should be a neutral color that blends with the surroundings where it will be used, although this is probably not critical. It should not be a bright or glowing color.
Ideally, the blind's exterior should have loops or some other means for attaching a bit of grass or tree boughs to break the blind's outline. When assembled, the blind's covering material should be taut so it does not flap in the wind. Viewing and camera holes should be kept to a minimum size. A canvas sock(above right) will cover camera, lens and photographer movements better than a slit opening. Low-angle and side camera ports are useful when photo subjects appear other than where you expected them. Air vents near the top make long hours in the blind on hot summer days more tolerable. A portable blind should be lightweight, quickly assembled and only as large as necessary, but large enough to make the long hours which will undoubtedly be spent in it tolerable.
Ideally, a blind should be placed several days in advance of working from it, or better still, moved a bit closer to the subject or site over a period of several days. In practice, this often is not possible, and the best that can be done is to set up the blind when the subject is away from the area, or set it up the night before and be in the blind before dawn.
Many elements must be considered before the blind's location is determined. The blind should be placed as close to the subject as is desirable and will be tolerated without unduly disturbing the animal. Determining this minimum distance comes with experience. The direction of light and how it will fall on the photo subject must be anticipated in advance. All potential obstructions between the camera and the subject must be removed or tied back. Once in the blind, noise and movement should be minimized. In time, though, many animals, particularly birds, become accustomed to some noise and even tolerate the occasional whir of a motor drive. Mammals are generally less tolerant of sound.
In some situations, a semi-permanent blind may be the best choice. If a wildlife subject regularly comes to a site at a particular time of the year, as great blue herons to a nesting rookery, building a blind of native materials in advance and allowing the animal to accept it as part of the environment may improve the opportunity for photos. Some photographers build mobile blinds that simulate muskrat houses atop fishing float-tubes, or build rush and reed covered boat blinds (left) for photographing waterbirds. For wildlife photographers, necessity really is the mother of invention.
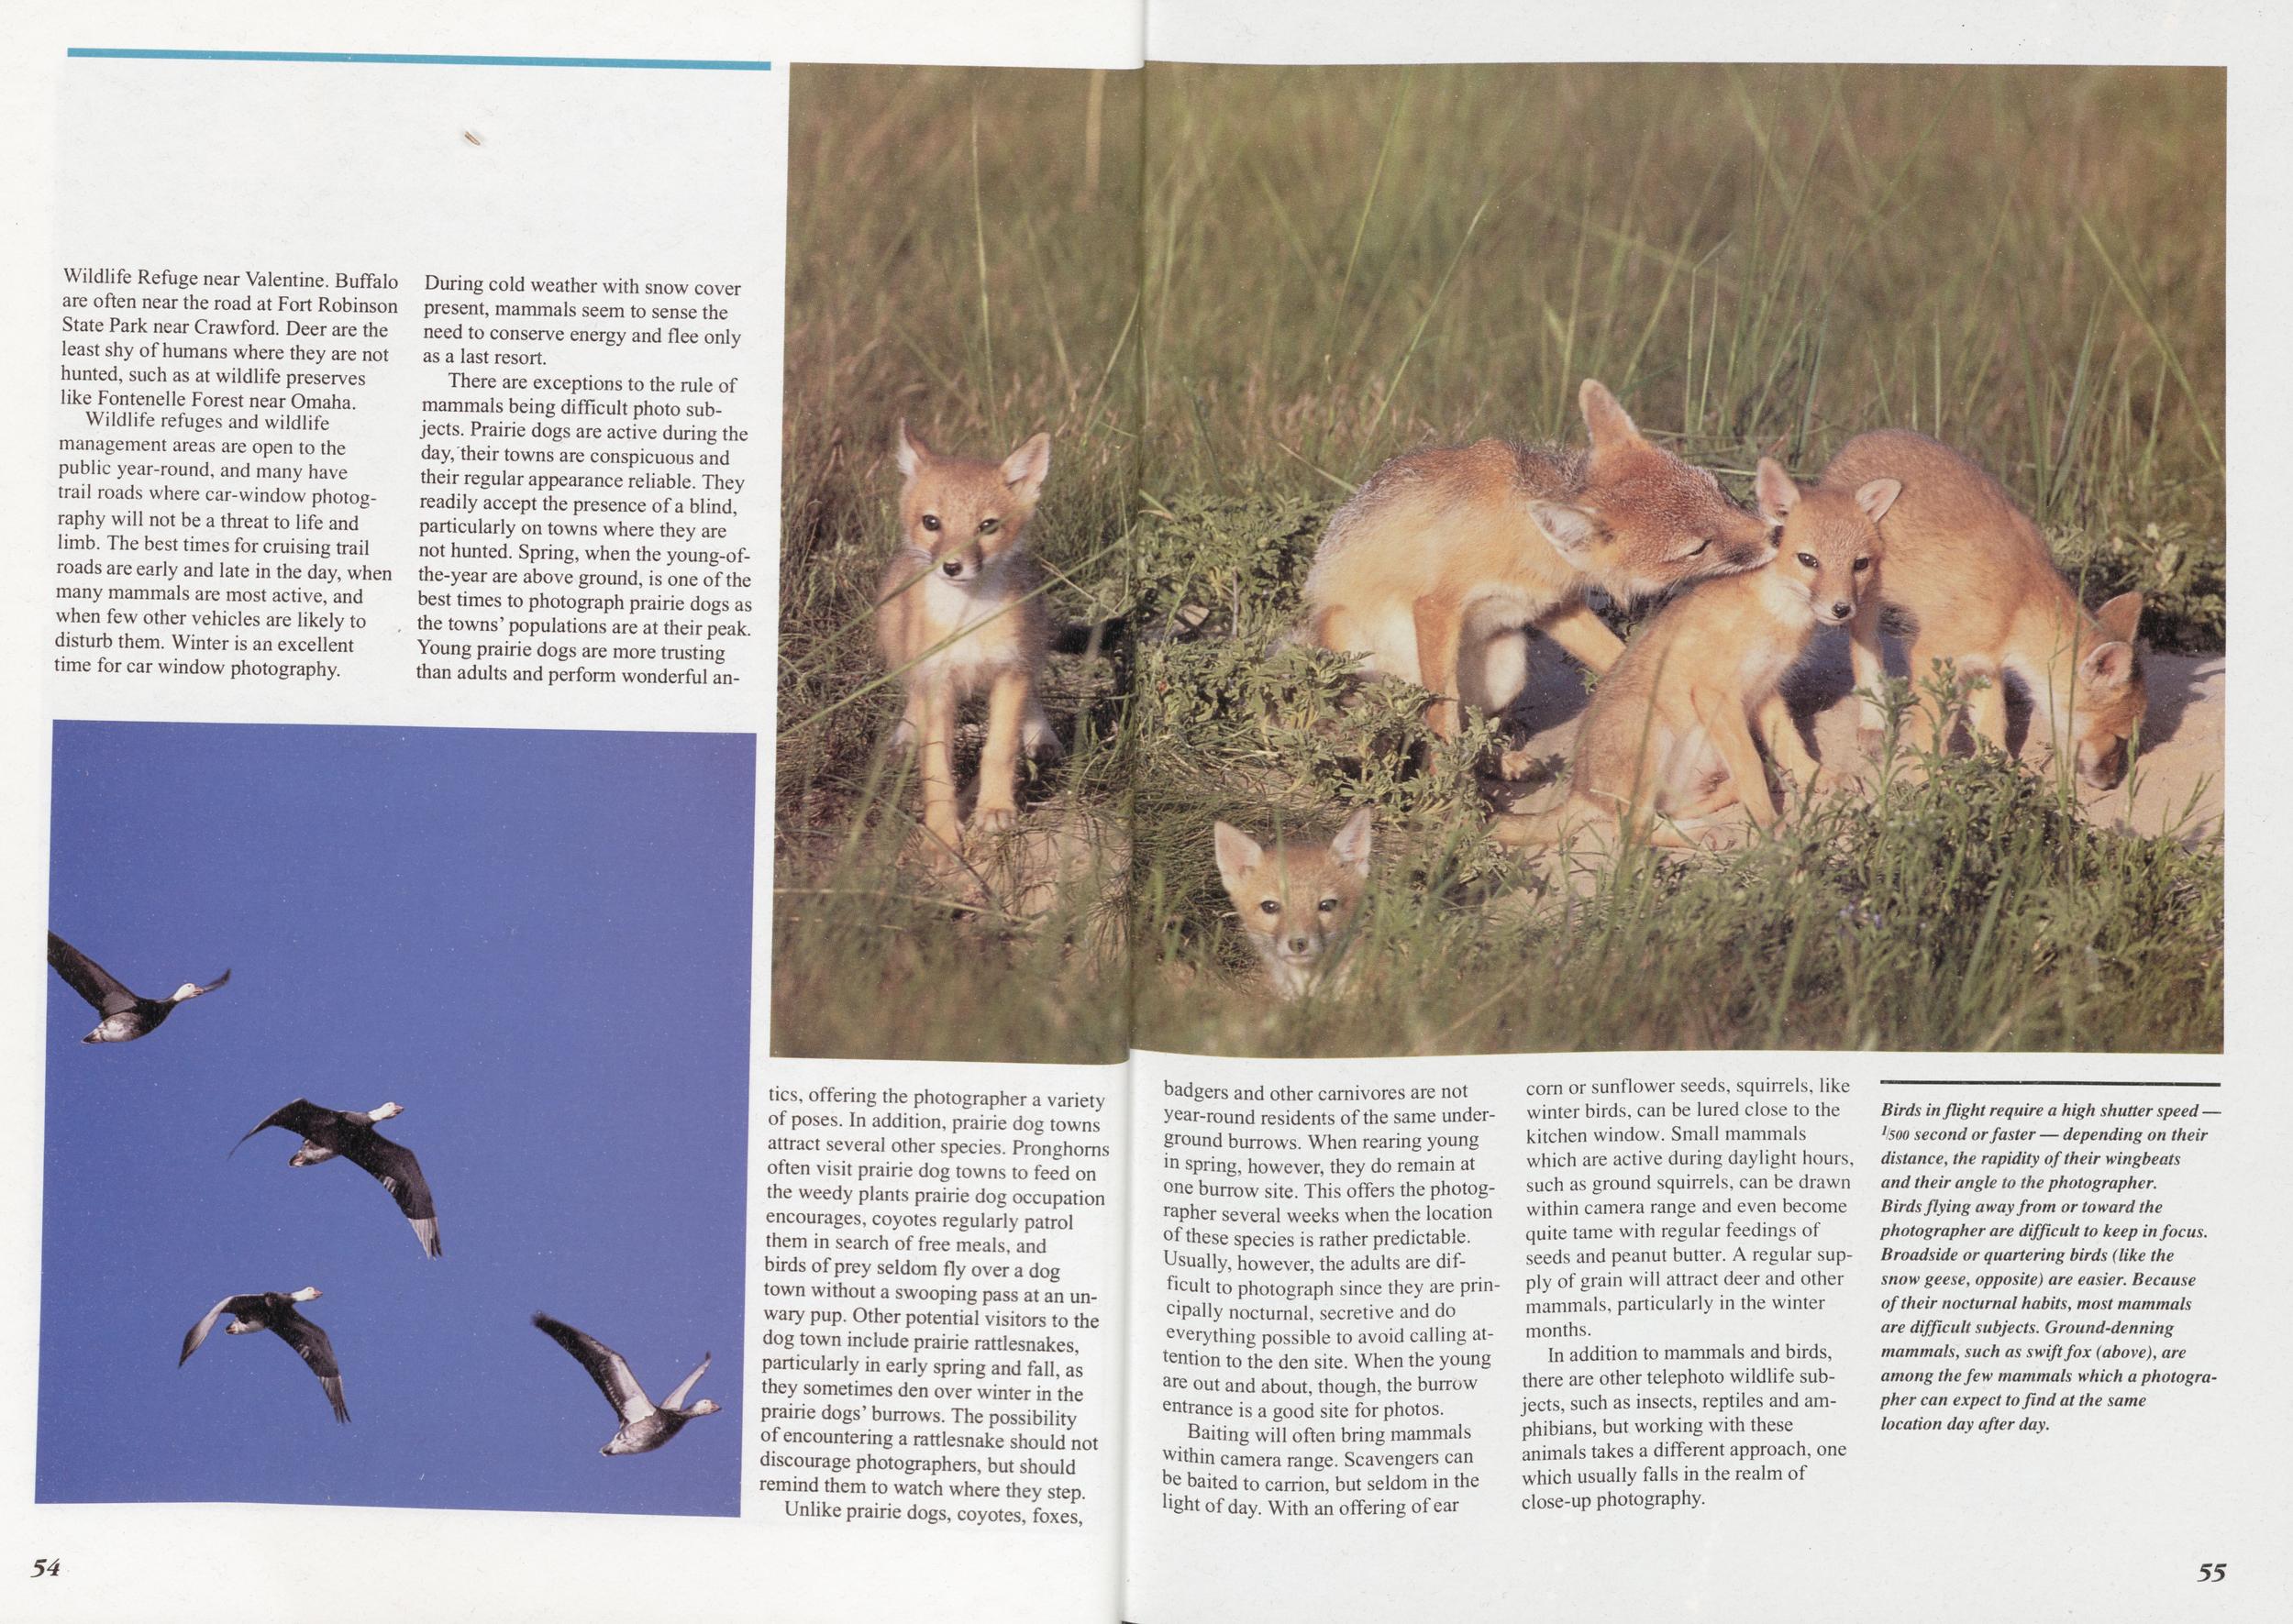
Wildlife Refuge near Valentine. Buffalo are often near the road at Fort Robinson State Park near Crawford. Deer are the least shy of humans where they are not hunted, such as at wildlife preserves like Fontenelle Forest near Omaha.
Wildlife refuges and wildlife management areas are open to the public year-round, and many have trail roads where car-window photography will not be a threat to life and limb. The best times for cruising trail roads are early and late in the day, when many mammals are most active, and when few other vehicles are likely to disturb them. Winter is an excellent time for car window photography. During cold weather with snow cover present, mammals seem to sense the need to conserve energy and flee only as a last resort.
There are exceptions to the rule of mammals being difficult photo subjects. Prairie dogs are active during the day, their towns are conspicuous and their regular appearance reliable. They readily accept the presence of a blind, particularly on towns where they are not hunted. Spring, when the young-of-the-year are above ground, is one of the best times to photograph prairie dogs as the towns' populations are at their peak. Young prairie dogs are more trusting than adults and perform wonderful antics, offering the photographer a variety of poses. In addition, prairie dog towns attract several other species. Pronghorns often visit prairie dog towns to feed on the weedy plants prairie dog occupation encourages, coyotes regularly patrol them in search of free meals, and birds of prey seldom fly over a dog town without a swooping pass at an unwary pup. Other potential visitors to the dog town include prairie rattlesnakes, particularly in early spring and fall, as they sometimes den over winter in the prairie dogs' burrows. The possibility of encountering a rattlesnake should not discourage photographers, but should remind them to watch where they step.
Unlike prairie dogs, coyotes, foxes, badgers and other carnivores are not year-round residents of the same underground burrows. When rearing young in spring, however, they do remain at one burrow site. This offers the photographer several weeks when the location of these species is rather predictable. Usually, however, the adults are difficult to photograph since they are prinoipally nocturnal, secretive and do everything possible to avoid calling attention to the den site. When the young are out and about, though, the burrow entrance is a good site for photos.
Baiting will often bring mammals within camera range. Scavengers can be baited to carrion, but seldom in the light of day. With an offering of ear corn or sunflower seeds, squirrels, like winter birds, can be lured close to the kitchen window. Small mammals which are active during daylight hours, such as ground squirrels, can be drawn within camera range and even become quite tame with regular feedings of seeds and peanut butter. A regular supply of grain will attract deer and other mammals, particularly in the winter months.
In addition to mammals and birds, there are other telephoto wildlife subjects, such as insects, reptiles and amphibians, but working with these animals takes a different approach, one which usually falls in the realm of close-up photography.
Birds inflight require a high shutter speed li500 second or faster — depending on their distance, the rapidity of their wingbeats and their angle to the photographer. Birds flying away from or toward the photographer are difficult to keep in focus. Broadside or quartering birds (like the snow geese, opposite) are easier. Because of their nocturnal habits, most mammals are difficult subjects. Ground-denning mammals, such as swift fox (above), are among the few mammals which a photographer can expect to find at the same location day after day.
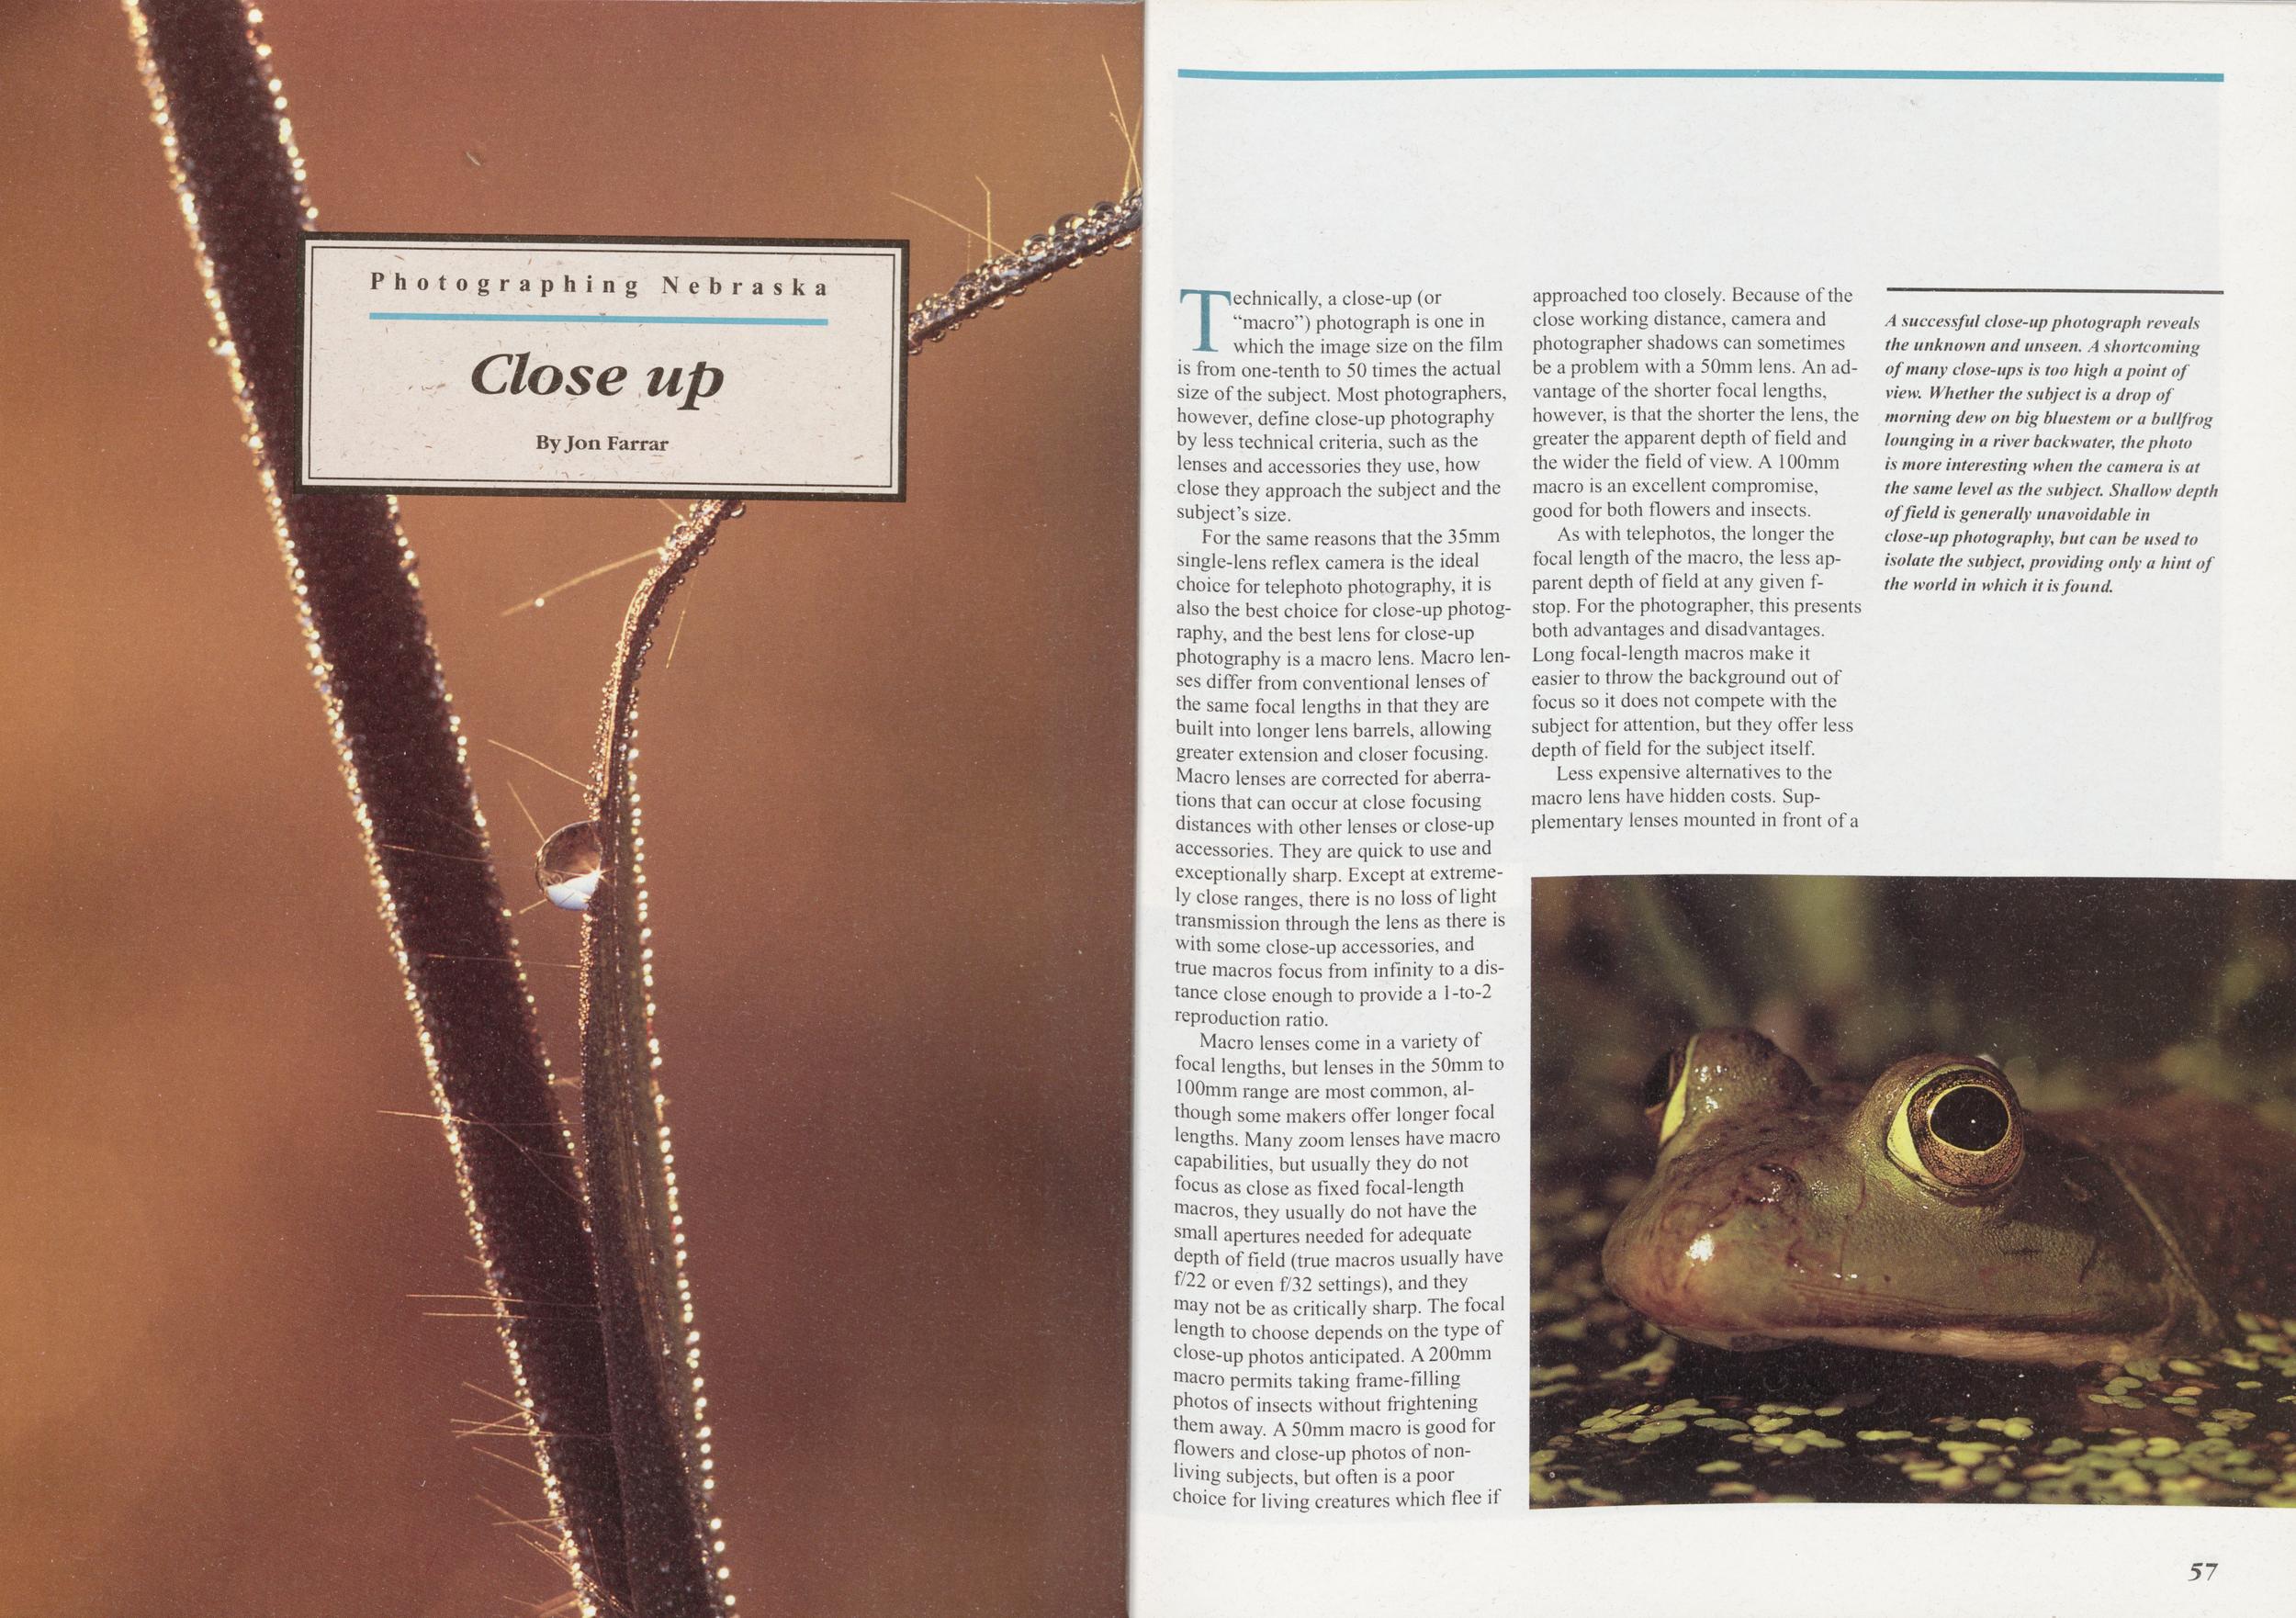
Photographing Nebraska
Close up
Technically, a close-up (or "macro") photograph is one in which the image size on the film is from one-tenth to 50 times the actual size of the subject. Most photographers, however, define close-up photography by less technical criteria, such as the lenses and accessories they use, how close they approach the subject and the subject's size.
For the same reasons that the 35mm single-lens reflex camera is the ideal choice for telephoto photography, it is also the best choice for close-up photography, and the best lens for close-up photography is a macro lens. Macro lenses differ from conventional lenses of the same focal lengths in that they are built into longer lens barrels, allowing greater extension and closer focusing. Macro lenses are corrected for aberrations that can occur at close focusing distances with other lenses or close-up accessories. They are quick to use and exceptionally sharp. Except at extremely close ranges, there is no loss of light transmission through the lens as there is with some close-up accessories, and true macros focus from infinity to a distance close enough to provide a l-to-2 reproduction ratio.
Macro lenses come in a variety of focal lengths, but lenses in the 50mm to 100mm range are most common, although some makers offer longer focal lengths. Many zoom lenses have macro eapabilities, but usually they do not focus as close as fixed focal-length macros, they usually do not have the small apertures needed for adequate depth of field (true macros usually have f/22 or even f/32 settings), and they may not be as critically sharp. The focal length to choose depends on the type of close-up photos anticipated. A 200mm macro permits taking frame-filling Photos of insects without frightening mem away. A 50mm macro is good for flowers and close-up photos of nonliving subjects, but often is a poor choice for living creatures which flee if approached too closely. Because of the close working distance, camera and photographer shadows can sometimes be a problem with a 50mm lens. An advantage of the shorter focal lengths, however, is that the shorter the lens, the greater the apparent depth of field and the wider the field of view. A 100mm macro is an excellent compromise, good for both flowers and insects.
As with telephotos, the longer the focal length of the macro, the less apparent depth of field at any given stop. For the photographer, this presents both advantages and disadvantages. Long focal-length macros make it easier to throw the background out of focus so it does not compete with the subject for attention, but they offer less depth of field for the subject itself.
A successful close-up photograph reveals the unknown and unseen, A shortcoming of many close-ups is too high a point of view. Whether the subject is a drop of morning dew on big bluestem or a bullfrog lounging in a river backwater, the photo is more interesting when the camera is at the same level as the subject. Shallow depth of field is generally unavoidable in close-up photography, but can be used to isolate the subject, providing only a hint of the world in which it is found.
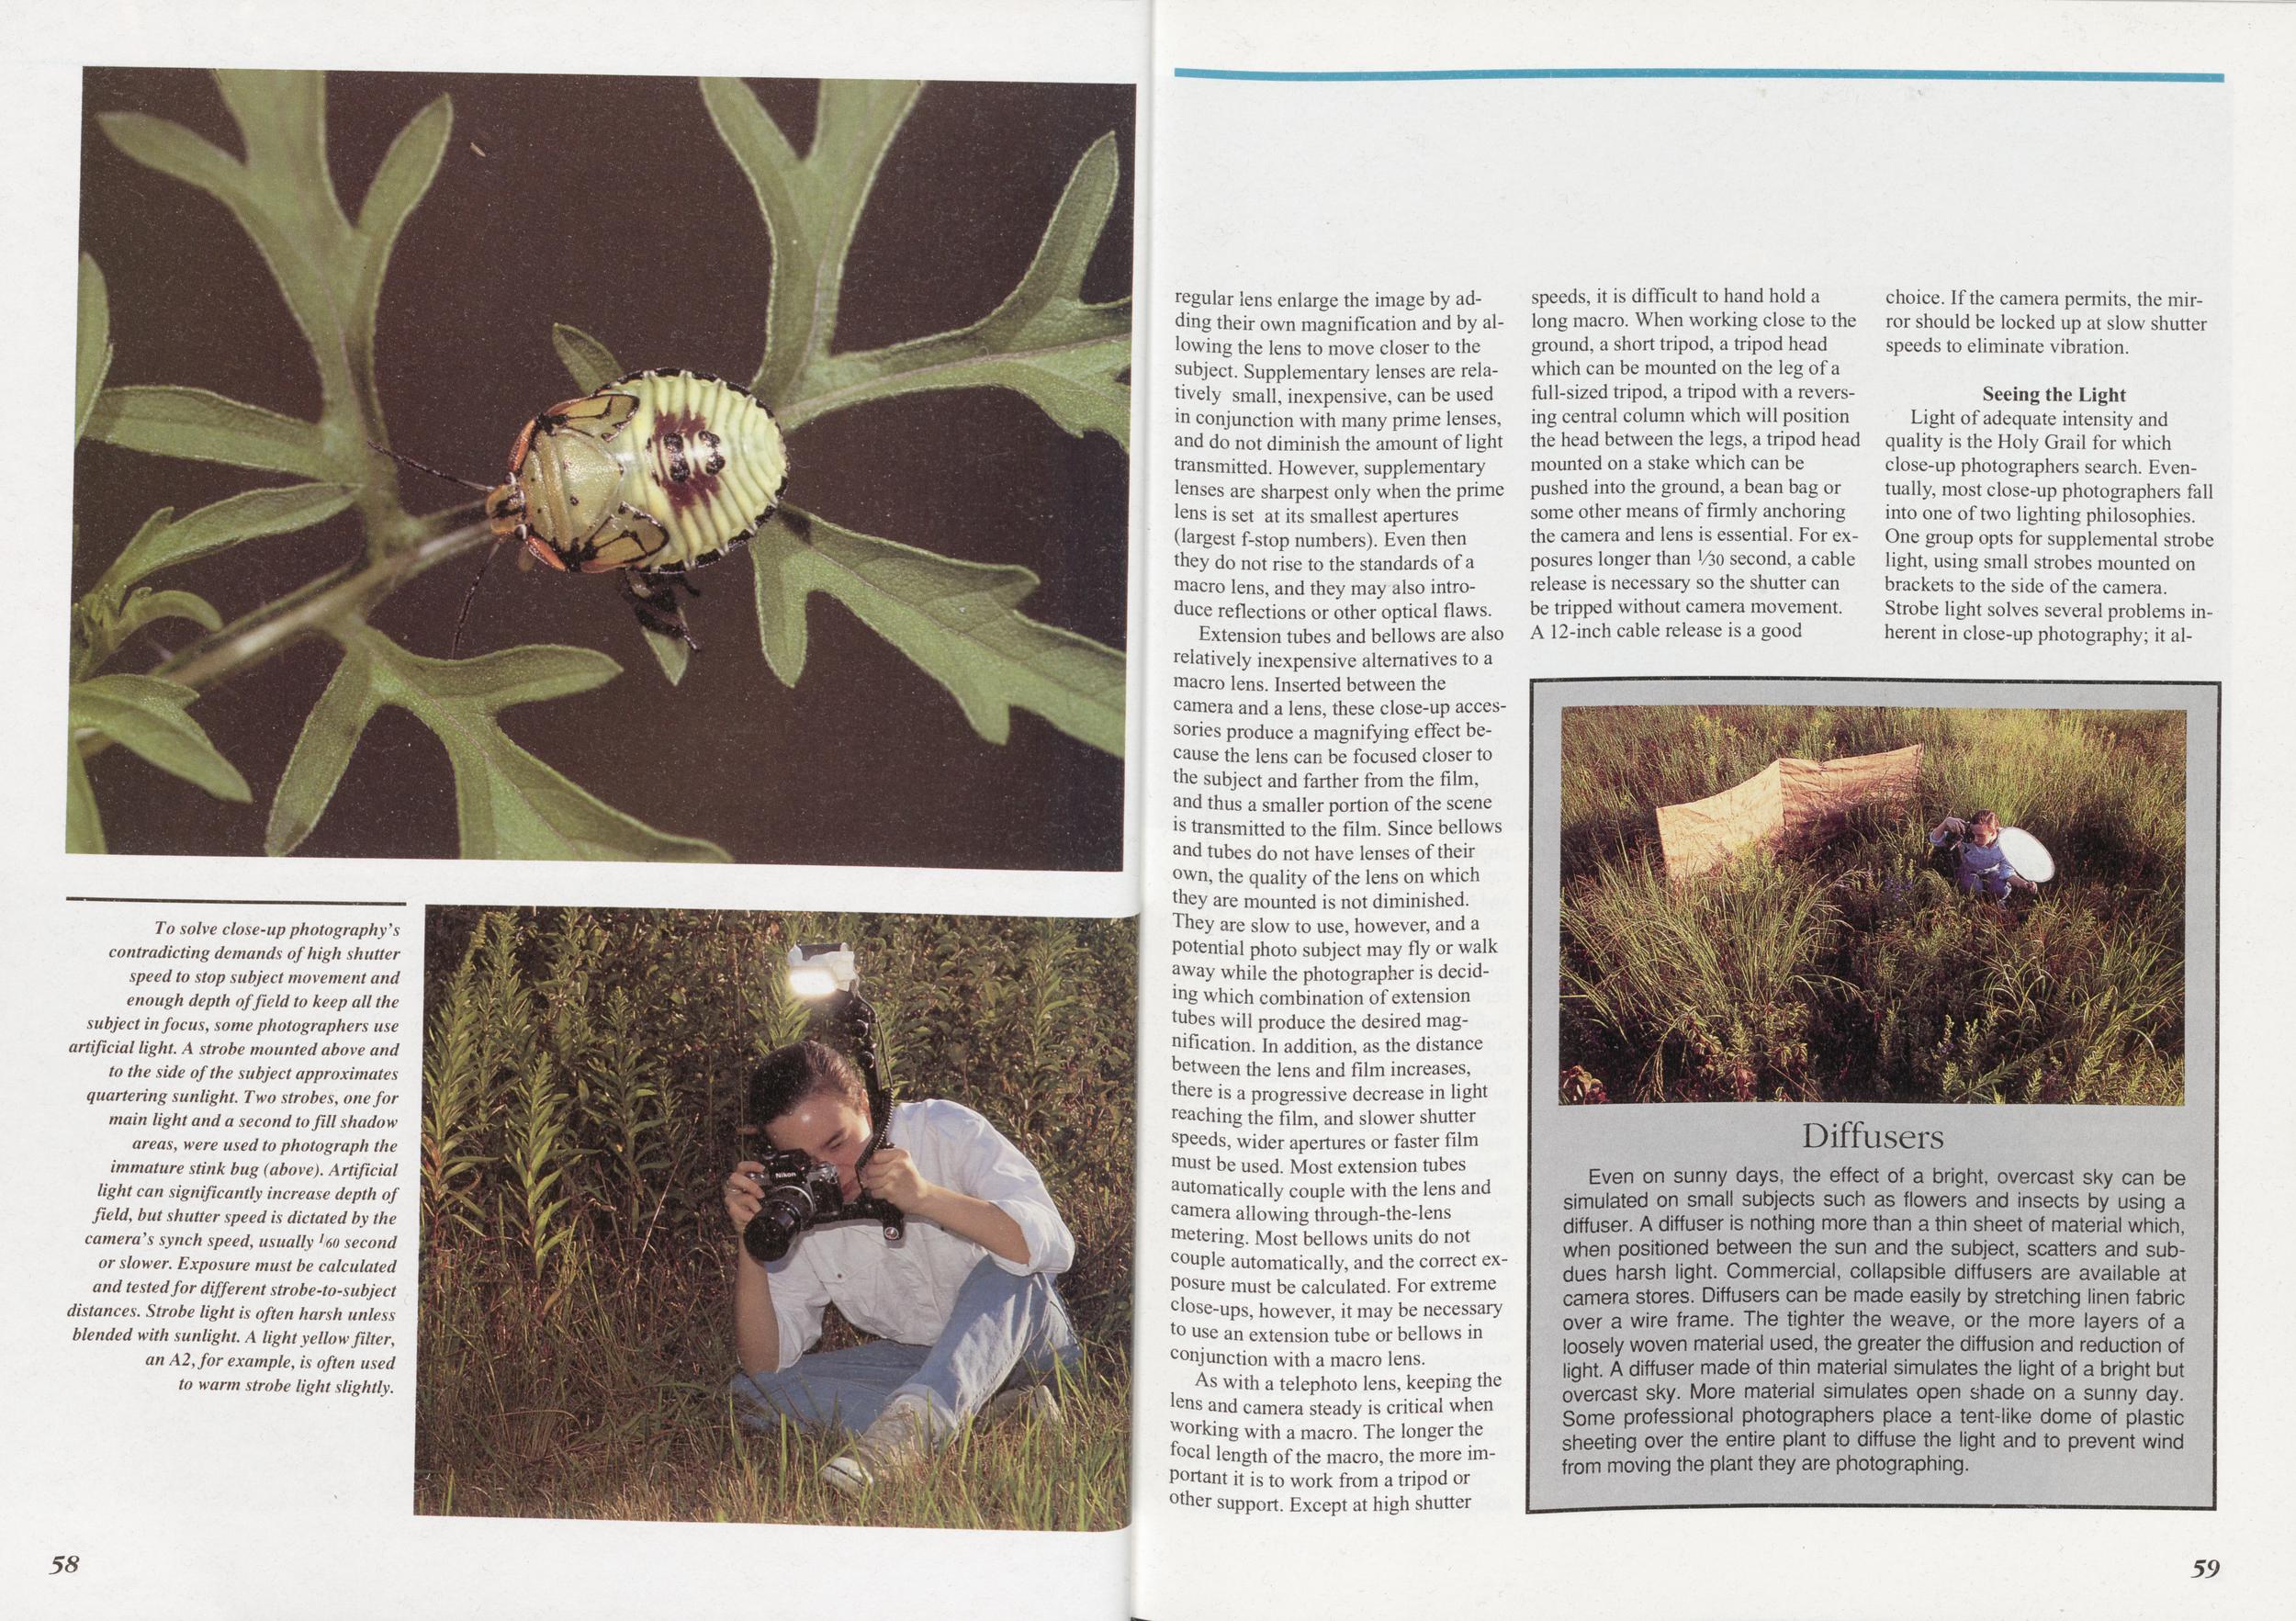
To solve close-up photography's contradicting demands of high shutter speed to stop subject movement and enough depth of field to keep all the subject in focus, some photographers use artificial light. A strobe mounted above and to the side of the subject approximates quartering sunlight. Two strobes, one for main light and a second to fill shadow areas, were used to photograph the immature stink bug (above). Artificial light can significantly increase depth of field, but shutter speed is dictated by the camera's synch speed, usually ]60 second or slower. Exposure must be calculated and tested for different strobe-to-subject distances. Strobe light is often harsh unless blended with sunlight. A light yellow filter, an A2,for example, is often used to warm strobe light slightly.
Extension tubes and bellows are also relatively inexpensive alternatives to a macro lens. Inserted between the camera and a lens, these close-up accessories produce a magnifying effect because the lens can be focused closer to the subject and farther from the film, and thus a smaller portion of the scene is transmitted to the film. Since bellows and tubes do not have lenses of their own, the quality of the lens on which they are mounted is not diminished. They are slow to use, however, and a Potential photo subject may fly or walk away while the photographer is deciding which combination of extension tubes will produce the desired magnification. In addition, as the distance between the lens and film increases, there is a progressive decrease in light reaching the film, and slower shutter speeds, wider apertures or faster film must be used. Most extension tubes automatically couple with the lens and camera allowing through-the-lens metering. Most bellows units do not couple automatically, and the correct exposure must be calculated. For extreme close-ups, however, it may be necessary to use an extension tube or bellows in conjunction with a macro lens.
As with a telephoto lens, keeping the lens and camera steady is critical when working with a macro. The longer the focal length of the macro, the more important it is to work from a tripod or other support. Except at high shutter speeds, it is difficult to hand hold a long macro. When working close to the ground, a short tripod, a tripod head which can be mounted on the leg of a full-sized tripod, a tripod with a reversing central column which will position the head between the legs, a tripod head mounted on a stake which can be pushed into the ground, a bean bag or some other means of firmly anchoring the camera and lens is essential. For exposures longer than I/30 second, a cable release is necessary so the shutter can be tripped without camera movement. A 12-inch cable release is a good choice. If the camera permits, the mirror should be locked up at slow shutter speeds to eliminate vibration.
Seeing the LightEven on sunny days, the effect of a bright, overcast sky can be simulated on small subjects such as flowers and insects by using a diffuser. A diffuser is nothing more than a thin sheet of material which, when positioned between the sun and the subject, scatters and subdues harsh light. Commercial, collapsible diffusers are available at camera stores. Diffusers can be made easily by stretching linen fabric over a wire frame. The tighter the weave, or the more layers of a loosely woven material used, the greater the diffusion and reduction of light. A diffuser made of thin material simulates the light of a bright but overcast sky. More material simulates open shade on a sunny day. Some professional photographers place a tent-like dome of plastic sheeting over the entire plant to diffuse the light and to prevent wind from moving the plant they are photographing.
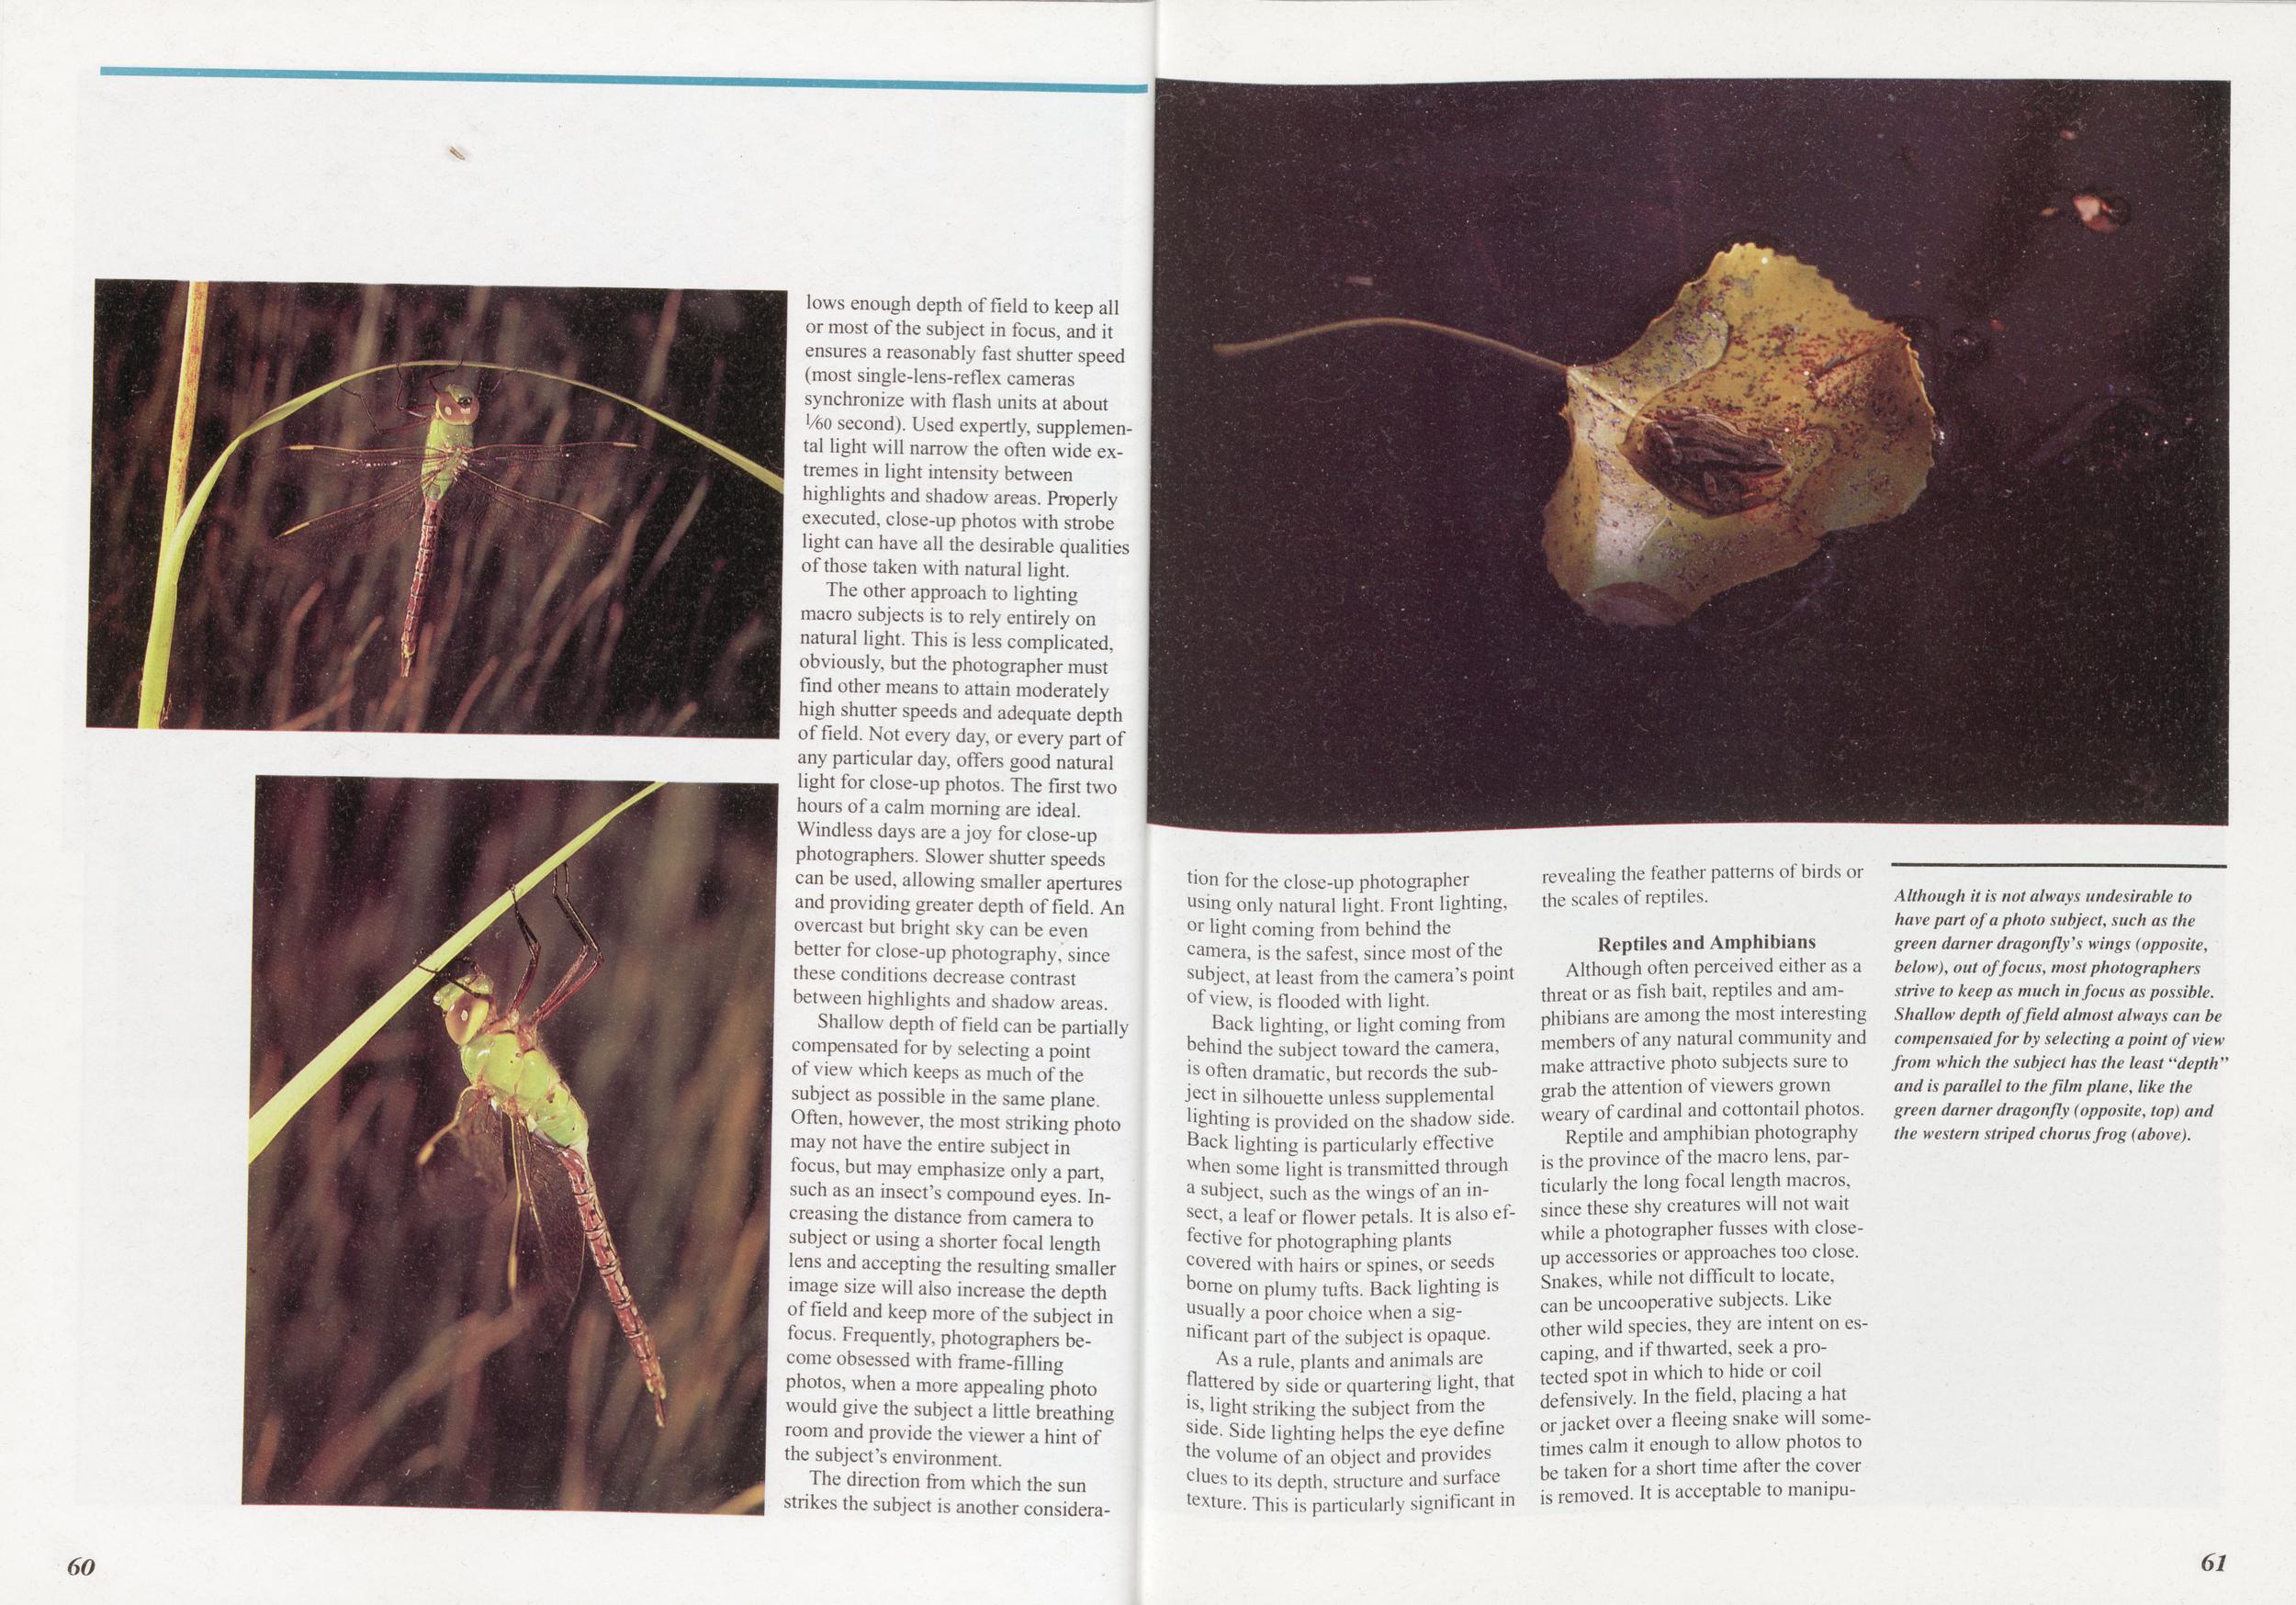
The other approach to lighting macro subjects is to rely entirely on natural light. This is less complicated, obviously, but the photographer must find other means to attain moderately high shutter speeds and adequate depth of field. Not every day, or every part of any particular day, offers good natural light for close-up photos. The first two hours of a calm morning are ideal. Windless days are a joy for close-up photographers. Slower shutter speeds can be used, allowing smaller apertures and providing greater depth of field. An overcast but bright sky can be even better for close-up photography, since these conditions decrease contrast between highlights and shadow areas.
Shallow depth of field can be partially compensated for by selecting a point of view which keeps as much of the subject as possible in the same plane. Often, however, the most striking photo may not have the entire subject in focus, but may emphasize only a part, such as an insect's compound eyes. Increasing the distance from camera to subject or using a shorter focal length lens and accepting the resulting smaller image size will also increase the depth of field and keep more of the subject in focus. Frequently, photographers become obsessed with frame-filling photos, when a more appealing photo would give the subject a little breathing room and provide the viewer a hint of the subject's environment.
The direction from which the sun strikes the subject is another consideration for the close-up photographer using only natural light. Front lighting, or light coming from behind the camera, is the safest, since most of the subject, at least from the camera's point of view, is flooded with light.
Back lighting, or light coming from behind the subject toward the camera, is often dramatic, but records the subject in silhouette unless supplemental ughting is provided on the shadow side. Back lighting is particularly effective when some light is transmitted through a subject, such as the wings of an insect, a leaf or flower petals. It is also effective for photographing plants covered with hairs or spines, or seeds borne on plumy tufts. Back lighting is usually a poor choice when a significant part of the subject is opaque.
As a rule, plants and animals are flattered by side or quartering light, that is light striking the subject from the side. Side lighting helps the eye define rhe volume of an object and provides clues to its depth, structure and surface texture. This is particularly significant in revealing the feather patterns of birds or the scales of reptiles.
Reptiles and AmphibiansAlthough often perceived either as a threat or as fish bait, reptiles and amphibians are among the most interesting members of any natural community and make attractive photo subjects sure to grab the attention of viewers grown weary of cardinal and cottontail photos.
Although it is not always undesirable to have part of a photo subject, such as the green darner dragonfly's wings (opposite, below), out of focus, most photographers strive to keep as much in focus as possible. Shallow depth of field almost always can be compensated for by selecting a point of view from which the subject has the least "depth" and is parallel to the film plane, like the green darner dragonfly (opposite, top) and the western striped chorus frog (above).
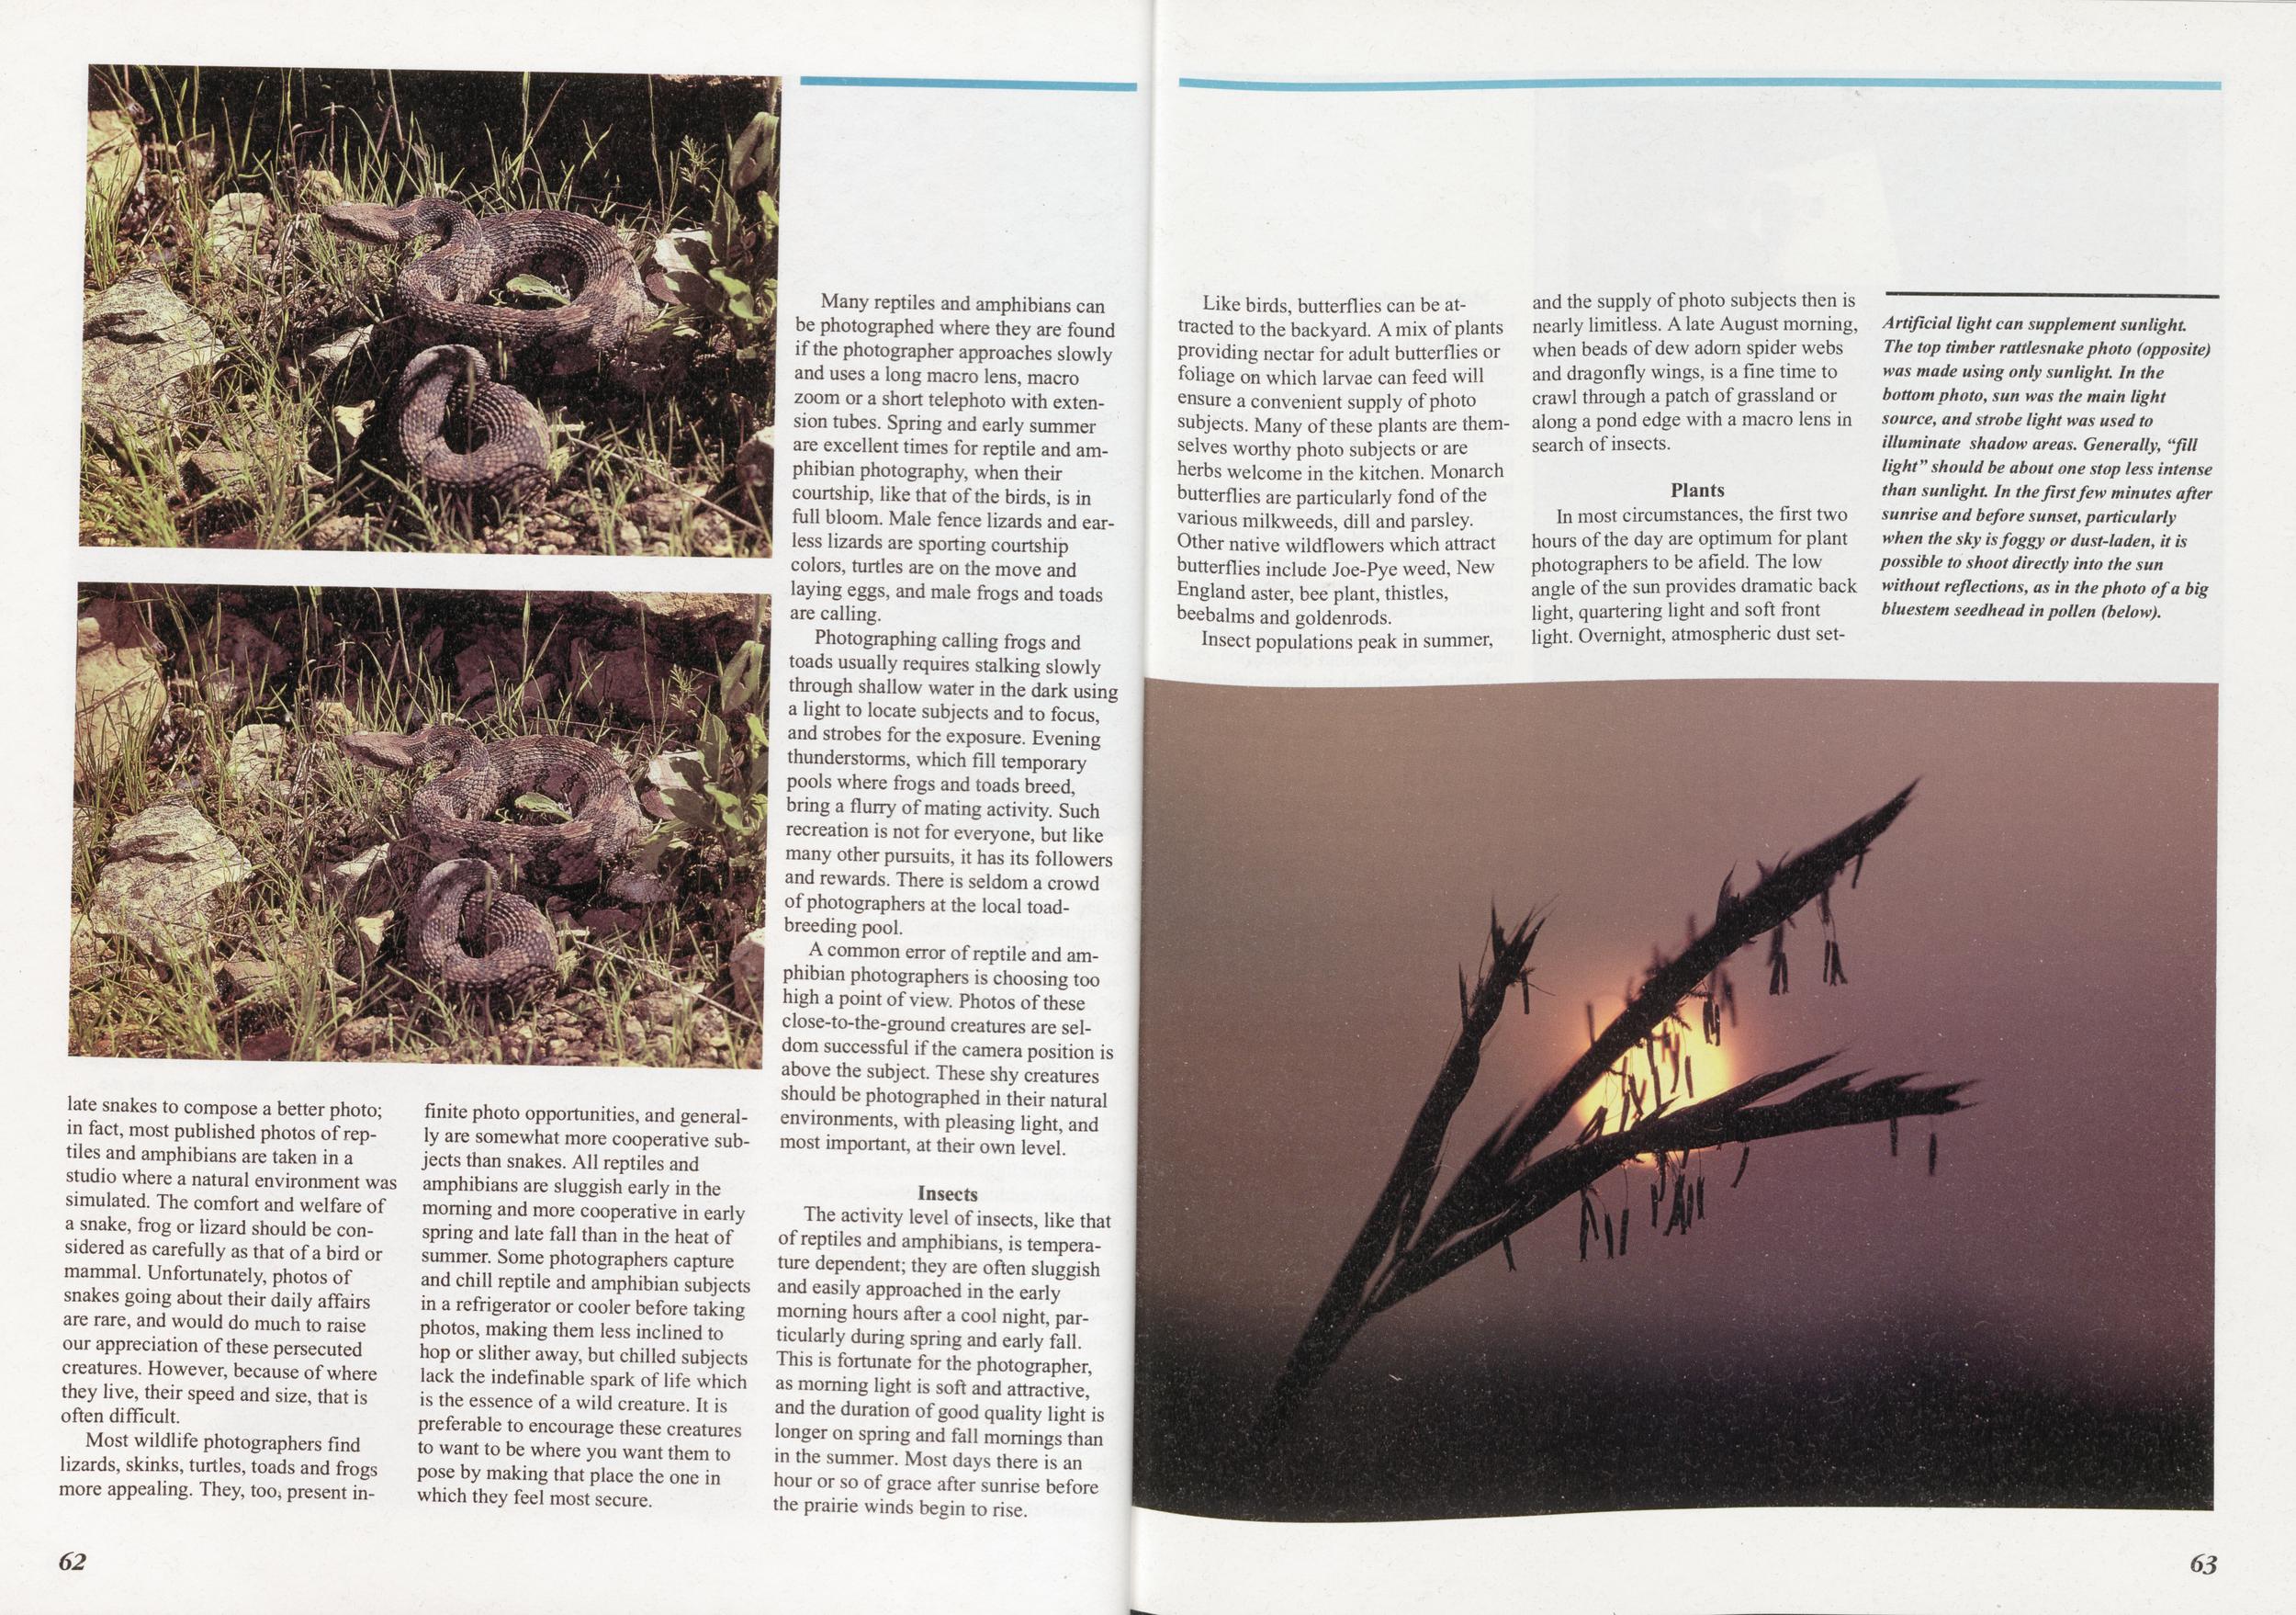
Most wildlife photographers find lizards, skinks, turtles, toads and frogs more appealing. They, too, present infinite photo opportunities, and generally are somewhat more cooperative subjects than snakes. All reptiles and amphibians are sluggish early in the morning and more cooperative in early spring and late fall than in the heat of summer. Some photographers capture and chill reptile and amphibian subjects in a refrigerator or cooler before taking photos, making them less inclined to hop or slither away, but chilled subjects lack the indefinable spark of life which is the essence of a wild creature. It is preferable to encourage these creatures to want to be where you want them to pose by making that place the one in which they feel most secure.
Many reptiles and amphibians can be photographed where they are found if the photographer approaches slowly and uses a long macro lens, macro zoom or a short telephoto with extension tubes. Spring and early summer are excellent times for reptile and amphibian photography, when their courtship, like that of the birds, is in full bloom. Male fence lizards and earless lizards are sporting courtship colors, turtles are on the move and laying eggs, and male frogs and toads are calling.
Photographing calling frogs and toads usually requires stalking slowly through shallow water in the dark using a light to locate subjects and to focus, and strobes for the exposure. Evening thunderstorms, which fill temporary pools where frogs and toads breed, bring a flurry of mating activity. Such recreation is not for everyone, but like many other pursuits, it has its followers and rewards. There is seldom a crowd of photographers at the local toadbreeding pool.
A common error of reptile and amphibian photographers is choosing too high a point of view. Photos of these close-to-the-ground creatures are seldom successful if the camera position is above the subject. These shy creatures should be photographed in their natural environments, with pleasing light, and most important, at their own level.
InsectsThe activity level of insects, like that of reptiles and amphibians, is temperature dependent; they are often sluggish and easily approached in the early morning hours after a cool night, particularly during spring and early fall. This is fortunate for the photographer, as morning light is soft and attractive, and the duration of good quality light is longer on spring and fall mornings than in the summer. Most days there is an hour or so of grace after sunrise before the prairie winds begin to rise.
Like birds, butterflies can be attracted to the backyard. A mix of plants providing nectar for adult butterflies or foliage on which larvae can feed will ensure a convenient supply of photo subjects. Many of these plants are themselves worthy photo subjects or are herbs welcome in the kitchen. Monarch butterflies are particularly fond of the various milkweeds, dill and parsley. Other native wildfiowers which attract butterflies include Joe-Pye weed, New England aster, bee plant, thistles, beebalms and goldenrods.
Insect populations peak in summer, and the supply of photo subjects then is nearly limitless. A late August morning, when beads of dew adorn spider webs and dragonfly wings, is a fine time to crawl through a patch of grassland or along a pond edge with a macro lens in search of insects.
PlantsArtificial light can supplement sunlight The top timber rattlesnake photo (opposite) was made using only sunlight In the bottom photo, sun was the main light source, and strobe light was used to illuminate shadow areas. Generally, 'fill light" should be about one stop less intense than sunlight In the first few minutes after sunrise and before sunset, particularly when the sky is foggy or dust-laden, it is possible to shoot directly into the sun without reflections, as in the photo of a big bluestem seedhead in pollen (below).
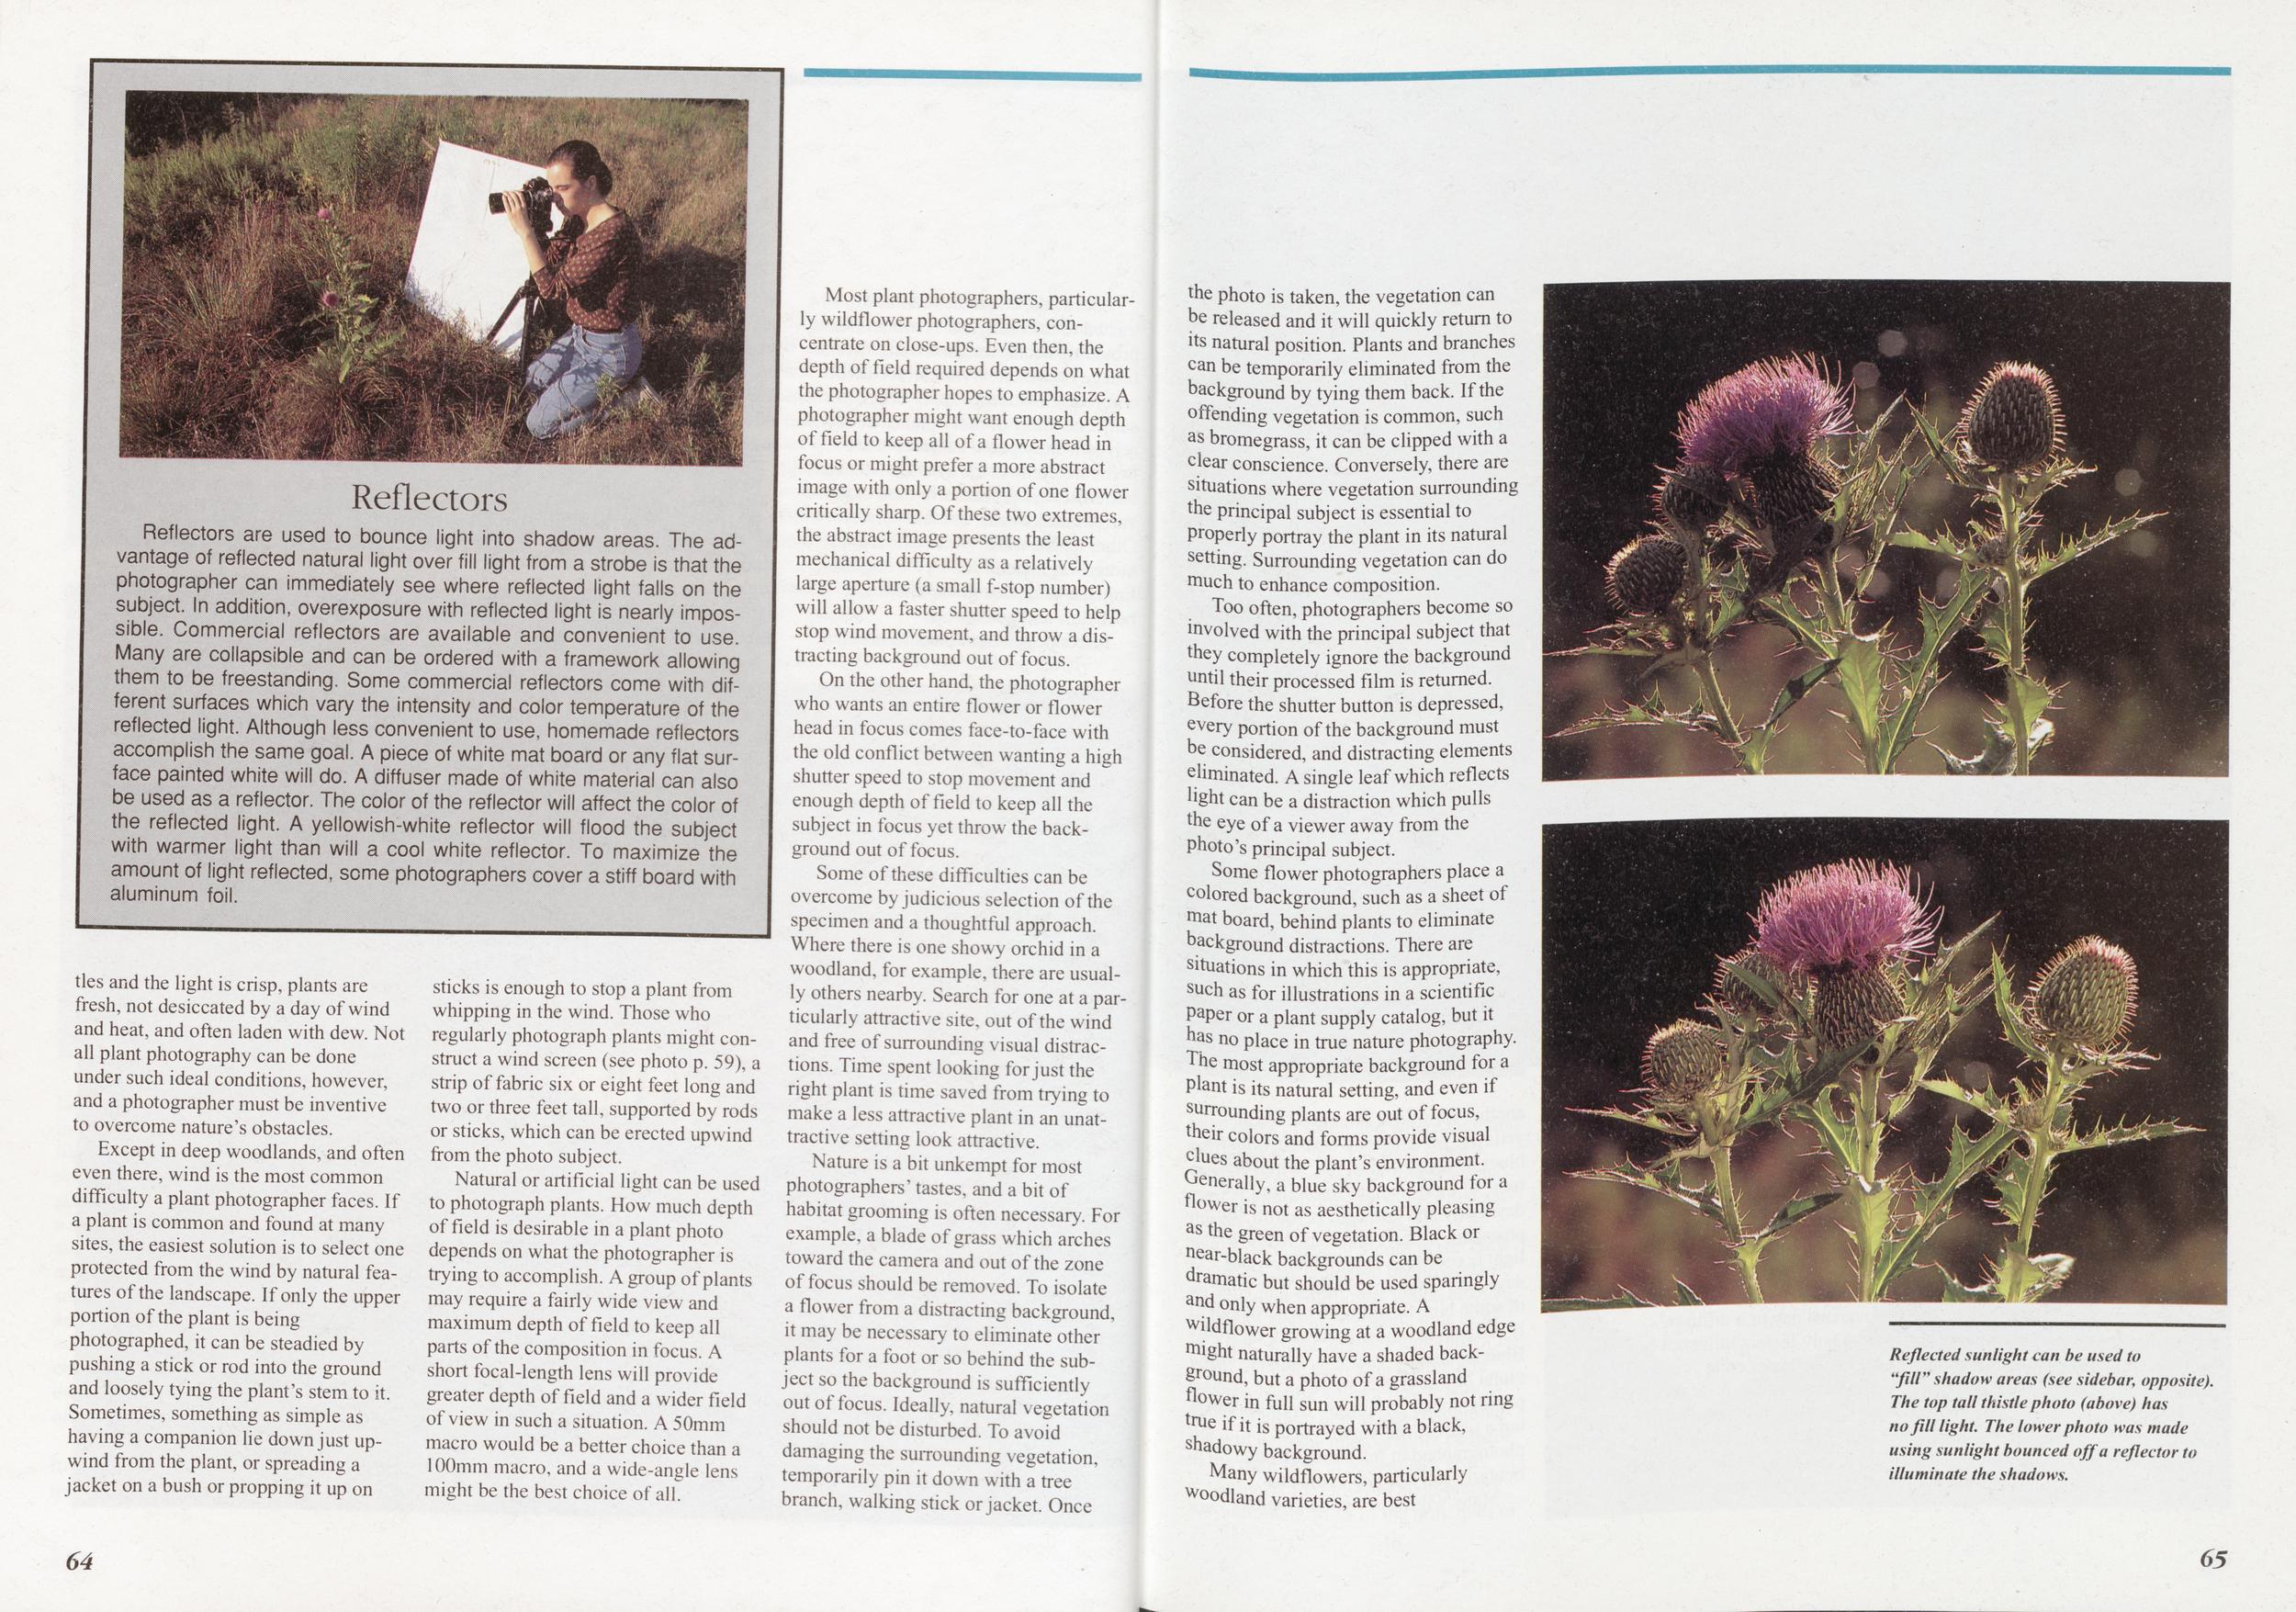
Reflectors are used to bounce light into shadow areas. The advantage of reflected natural light over fill light from a strobe is that the photographer can immediately see where reflected light falls on the subject. In addition, overexposure with reflected light is nearly impossible. Commercial reflectors are available and convenient to use. Many are collapsible and can be ordered with a framework allowing them to be freestanding. Some commercial reflectors come with different surfaces which vary the intensity and color temperature of the reflected light. Although less convenient to use, homemade reflectors accomplish the same goal. A piece of white mat board or any flat surface painted white will do. A diffuser made of white material can also be used as a reflector. The color of the reflector will affect the color of the reflected light. A yellowish-white reflector will flood the subject with warmer light than will a cool white reflector. To maximize the amount of light reflected, some photographers cover a stiff board with aluminum foil.
Except in deep woodlands, and often even there, wind is the most common difficulty a plant photographer faces. If a plant is common and found at many sites, the easiest solution is to select one protected from the wind by natural features of the landscape. If only the upper portion of the plant is being photographed, it can be steadied by pushing a stick or rod into the ground and loosely tying the plant's stem to it. Sometimes, something as simple as having a companion lie down just upwind from the plant, or spreading a jacket on a bush or propping it up on sticks is enough to stop a plant from whipping in the wind. Those who regularly photograph plants might construct a wind screen (see photo p. 59), a strip of fabric six or eight feet long and two or three feet tall, supported by rods or sticks, which can be erected upwind from the photo subject.
Natural or artificial light can be used to photograph plants. How much depth of field is desirable in a plant photo depends on what the photographer is trying to accomplish. A group of plants may require a fairly wide view and maximum depth of field to keep all parts of the composition in focus. A short focal-length lens will provide greater depth of field and a wider field of view in such a situation. A 50mm macro would be a better choice than a 100mm macro, and a wide-angle lens might be the best choice of all.
Most plant photographers, particularly wildflower photographers, concentrate on close-ups. Even then, the depth of field required depends on what the photographer hopes to emphasize. A photographer might want enough depth of field to keep all of a flower head in focus or might prefer a more abstract image with only a portion of one flower critically sharp. Of these two extremes, the abstract image presents the least mechanical difficulty as a relatively large aperture (a small f-stop number) will allow a faster shutter speed to help stop wind movement, and throw a distracting background out of focus.
On the other hand, the photographer who wants an entire flower or flower head in focus comes face-to-face with the old conflict between wanting a high shutter speed to stop movement and enough depth of field to keep all the subject in focus yet throw the background out of focus.
Some of these difficulties can be overcome by judicious selection of the specimen and a thoughtful approach. Where there is one showy orchid in a woodland, for example, there are usually others nearby. Search for one at a particularly attractive site, out of the wind and free of surrounding visual distractions. Time spent looking for just the right plant is time saved from trying to make a less attractive plant in an unattractive setting look attractive.
Nature is a bit unkempt for most photographers' tastes, and a bit of habitat grooming is often necessary. For example, a blade of grass which arches toward the camera and out of the zone of focus should be removed. To isolate a flower from a distracting background, it may be necessary to eliminate other plants for a foot or so behind the subject so the background is sufficiently out of focus. Ideally, natural vegetation should not be disturbed. To avoid damaging the surrounding vegetation, temporarily pin it down with a tree branch, walking stick or jacket. Once the photo is taken, the vegetation can be released and it will quickly return to its natural position. Plants and branches can be temporarily eliminated from the background by tying them back. If the offending vegetation is common, such as bromegrass, it can be clipped with a clear conscience. Conversely, there are situations where vegetation surrounding the principal subject is essential to Properly portray the plant in its natural setting. Surrounding vegetation can do much to enhance composition.
Too often, photographers become so involved with the principal subject that they completely ignore the background until their processed film is returned. Before the shutter button is depressed, every portion of the background must be considered, and distracting elements eliminated. A single leaf which reflects light can be a distraction which pulls the eye of a viewer away from the Photo's principal subject.
Some flower photographers place a colored background, such as a sheet of mat board, behind plants to eliminate background distractions. There are situations in which this is appropriate, such as for illustrations in a scientific Paper or a plant supply catalog, but it has no place in true nature photography. The most appropriate background for a Plant is its natural setting, and even if surrounding plants are out of focus, their colors and forms provide visual cmes about the plant's environment. Generally, a blue sky background for a Bower is not as aesthetically pleasing as the green of vegetation. Black or near-black backgrounds can be dramatic but should be used sparingly and only when appropriate. A wildflower growing at a woodland edge might naturally have a shaded background, but a photo of a grassland flower in full sun will probably not ring tru-e if it is portrayed with a black, shadowy background.
Reflected sunlight can be used to "fill" shadow areas (see sidebar, opposite). The top tall thistle photo (above) has no fill light. The lower photo was made using sunlight bounced off a reflector to illuminate the shadows.
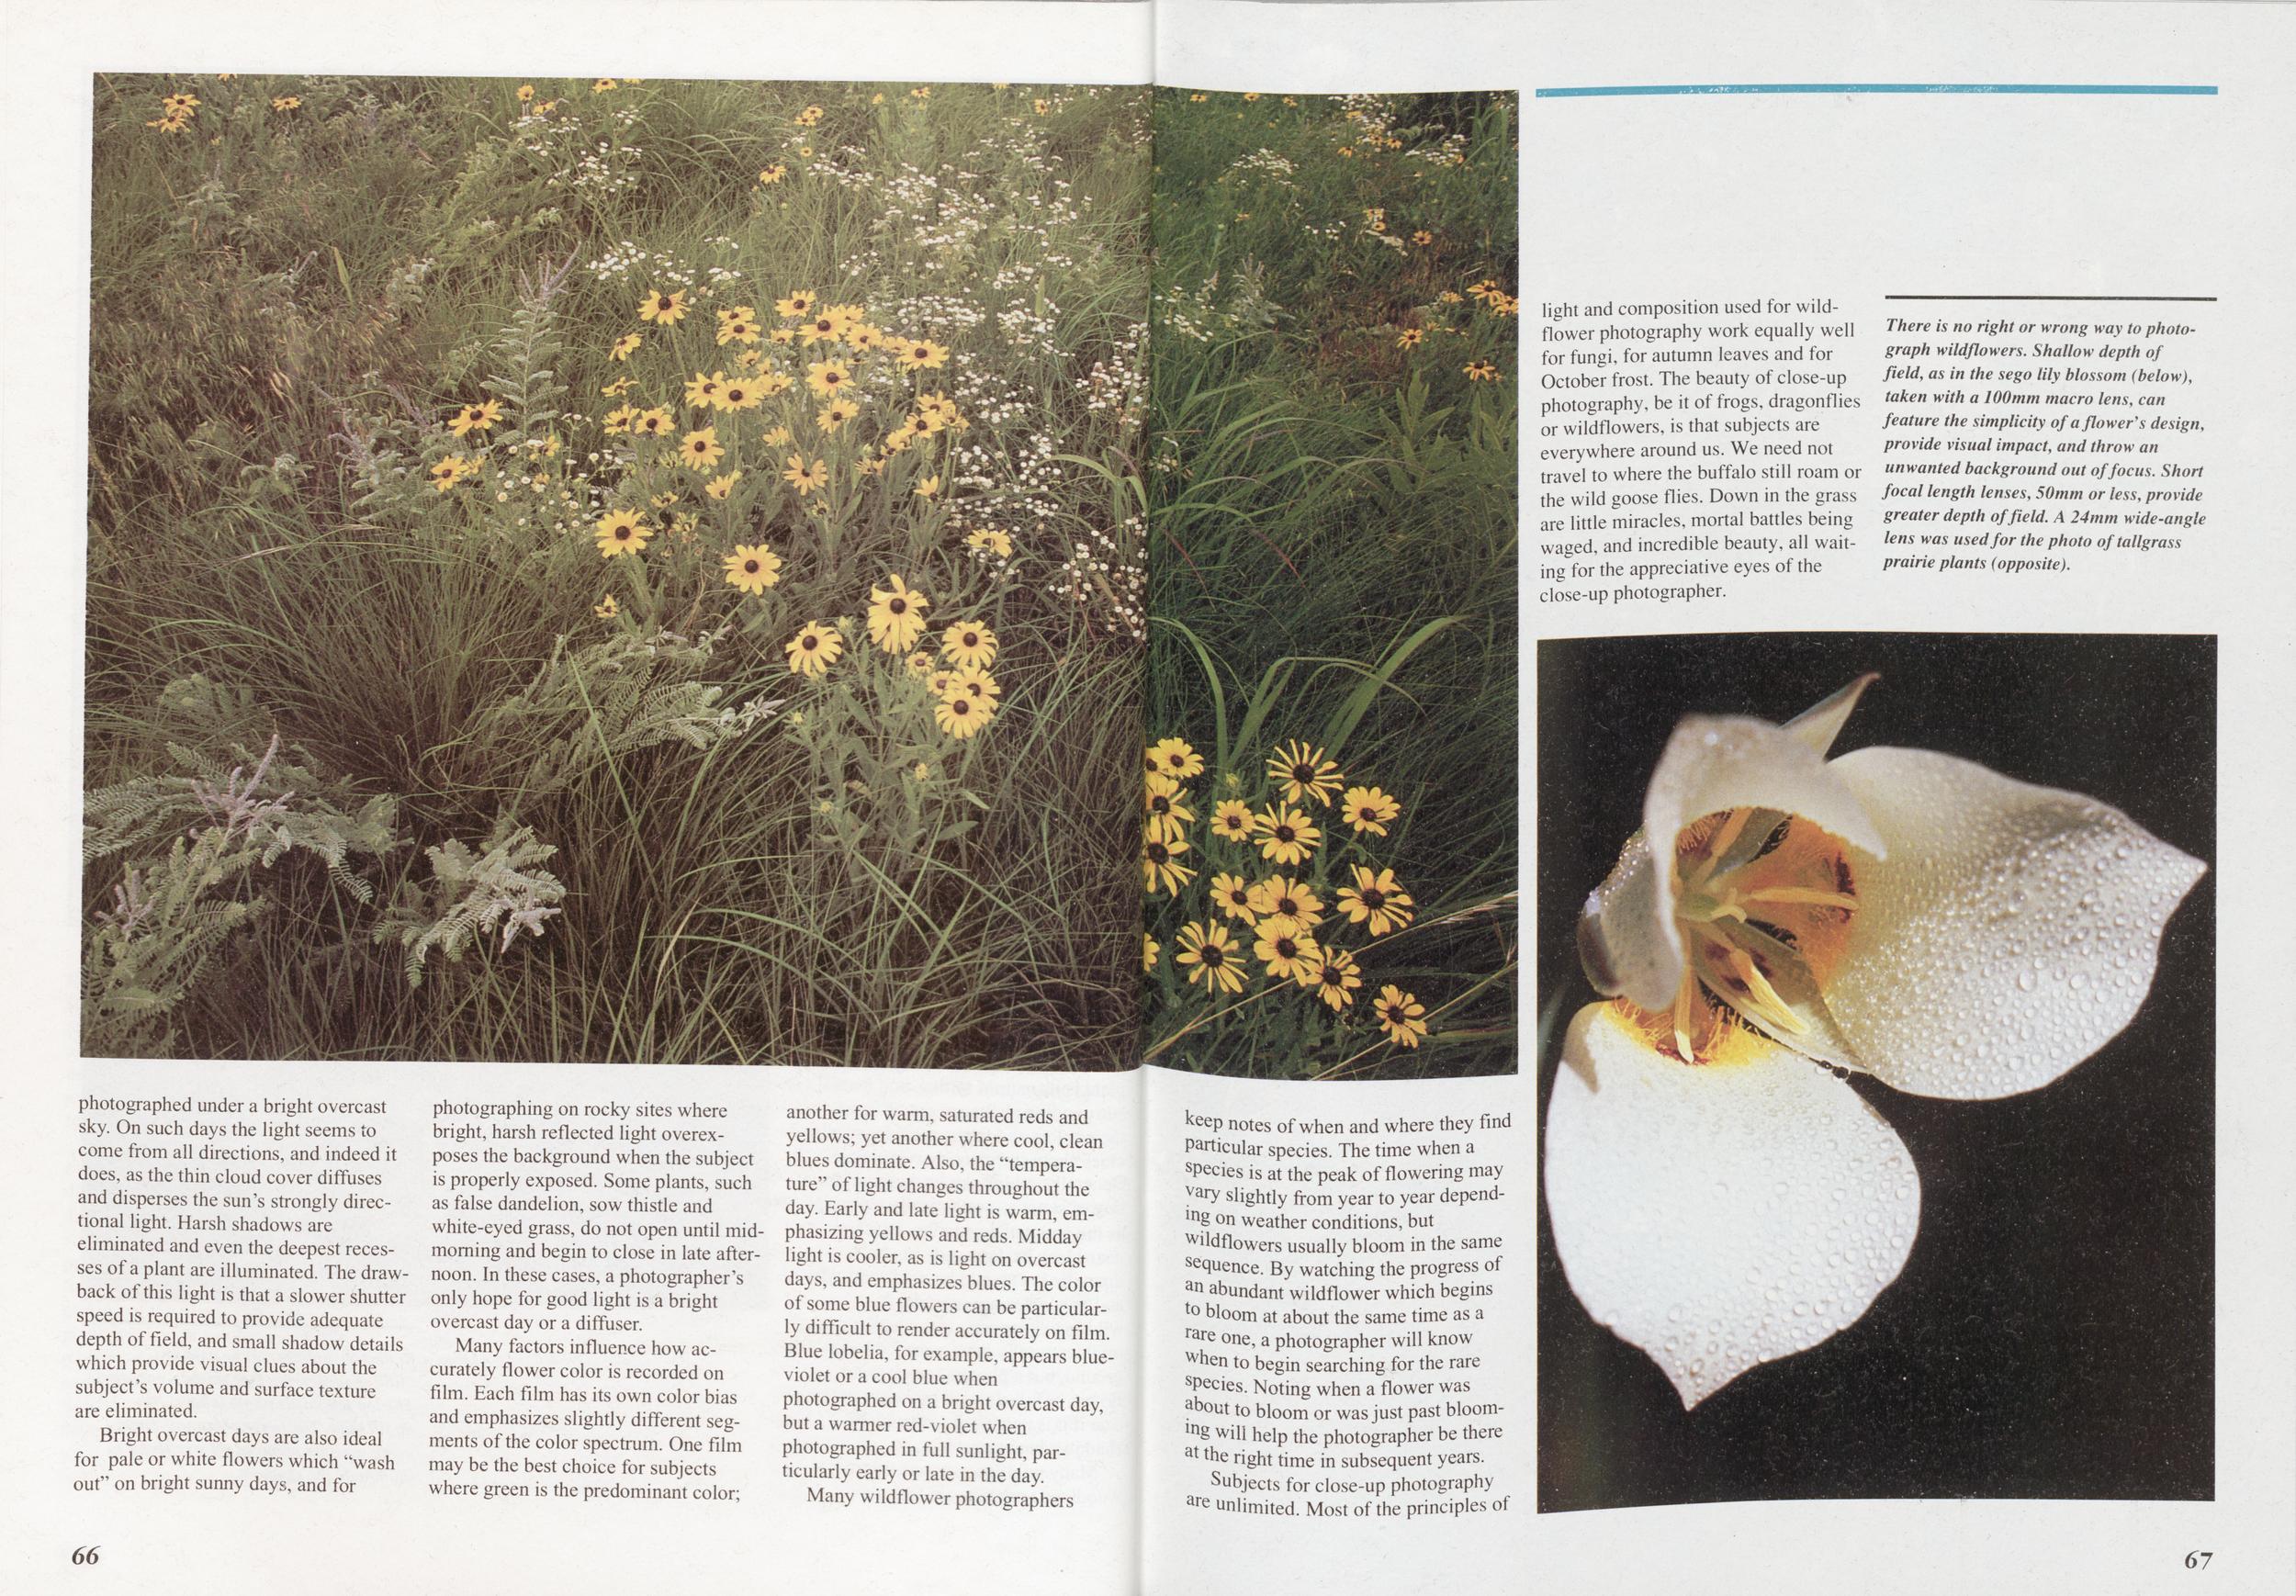 photographed under a bright overcast
sky. On such days the light seems to
come from all directions, and indeed it
does, as the thin cloud cover diffuses
and disperses the sun's strongly directional light. Harsh shadows are
eliminated and even the deepest recesses of a plant are illuminated. The drawback
of this light is that a slower shutter
speed is required to provide adequate
depth of field, and small shadow details
which provide visual clues about the
subject's volume and surface texture
are eliminated.
photographed under a bright overcast
sky. On such days the light seems to
come from all directions, and indeed it
does, as the thin cloud cover diffuses
and disperses the sun's strongly directional light. Harsh shadows are
eliminated and even the deepest recesses of a plant are illuminated. The drawback
of this light is that a slower shutter
speed is required to provide adequate
depth of field, and small shadow details
which provide visual clues about the
subject's volume and surface texture
are eliminated.Bright overcast days are also ideal for pale or white flowers which "wash out" on bright sunny days, and for photographing on rocky sites where bright, harsh reflected light overexposes the background when the subject is properly exposed. Some plants, such as false dandelion, sow thistle and white-eyed grass, do not open until midmorning and begin to close in late afternoon. In these cases, a photographer's only hope for good light is a bright overcast day or a diffuser.
Many factors influence how accurately flower color is recorded on film. Each film has its own color bias and emphasizes slightly different segments of the color spectrum. One film may be the best choice for subjects where green is the predominant color; another for warm, saturated reds and yellows; yet another where cool, clean blues dominate. Also, the "temperature" of light changes throughout the day. Early and late light is warm, emphasizing yellows and reds. Midday light is cooler, as is light on overcast days, and emphasizes blues. The color of some blue flowers can be particularly difficult to render accurately on film. Blue lobelia, for example, appears blueviolet or a cool blue when photographed on a bright overcast day, but a warmer red-violet when photographed in full sunlight, particularly early or late in the day.
Many wildflower photographers keep notes of when and where they find Particular species. The time when a species is at the peak of flowering may Vary slightly from year to year depending on weather conditions, but wildflowers usually bloom in the same sequence. By watching the progress of an abundant wildflower which begins to bloom at about the same time as a rare one, a photographer will know when to begin searching for the rare species. Noting when a flower was about to bloom or was just past blooming will help the photographer be there at the right time in subsequent years.
Subjects for close-up photography are unlimited. Most of the principles of light and composition used for wildflower photography work equally well for fungi, for autumn leaves and for October frost. The beauty of close-up photography, be it of frogs, dragonflies or wildflowers, is that subjects are everywhere around us. We need not travel to where the buffalo still roam or the wild goose flies. Down in the grass are little miracles, mortal battles being waged, and incredible beauty, all waiting for the appreciative eyes of the close-up photographer.
There is no right or wrong way to photograph wildflowers. Shallow depth of field, as in the sego lily blossom (below), taken with a 100mm macro lens, can feature the simplicity of a flower's design, provide visual impact, and throw an unwanted background out of focus. Short focal length lenses, 50mm or less, provide greater depth of field. A 24mm wide-angle lens was used for the photo oftallgrass prairie plants (opposite).
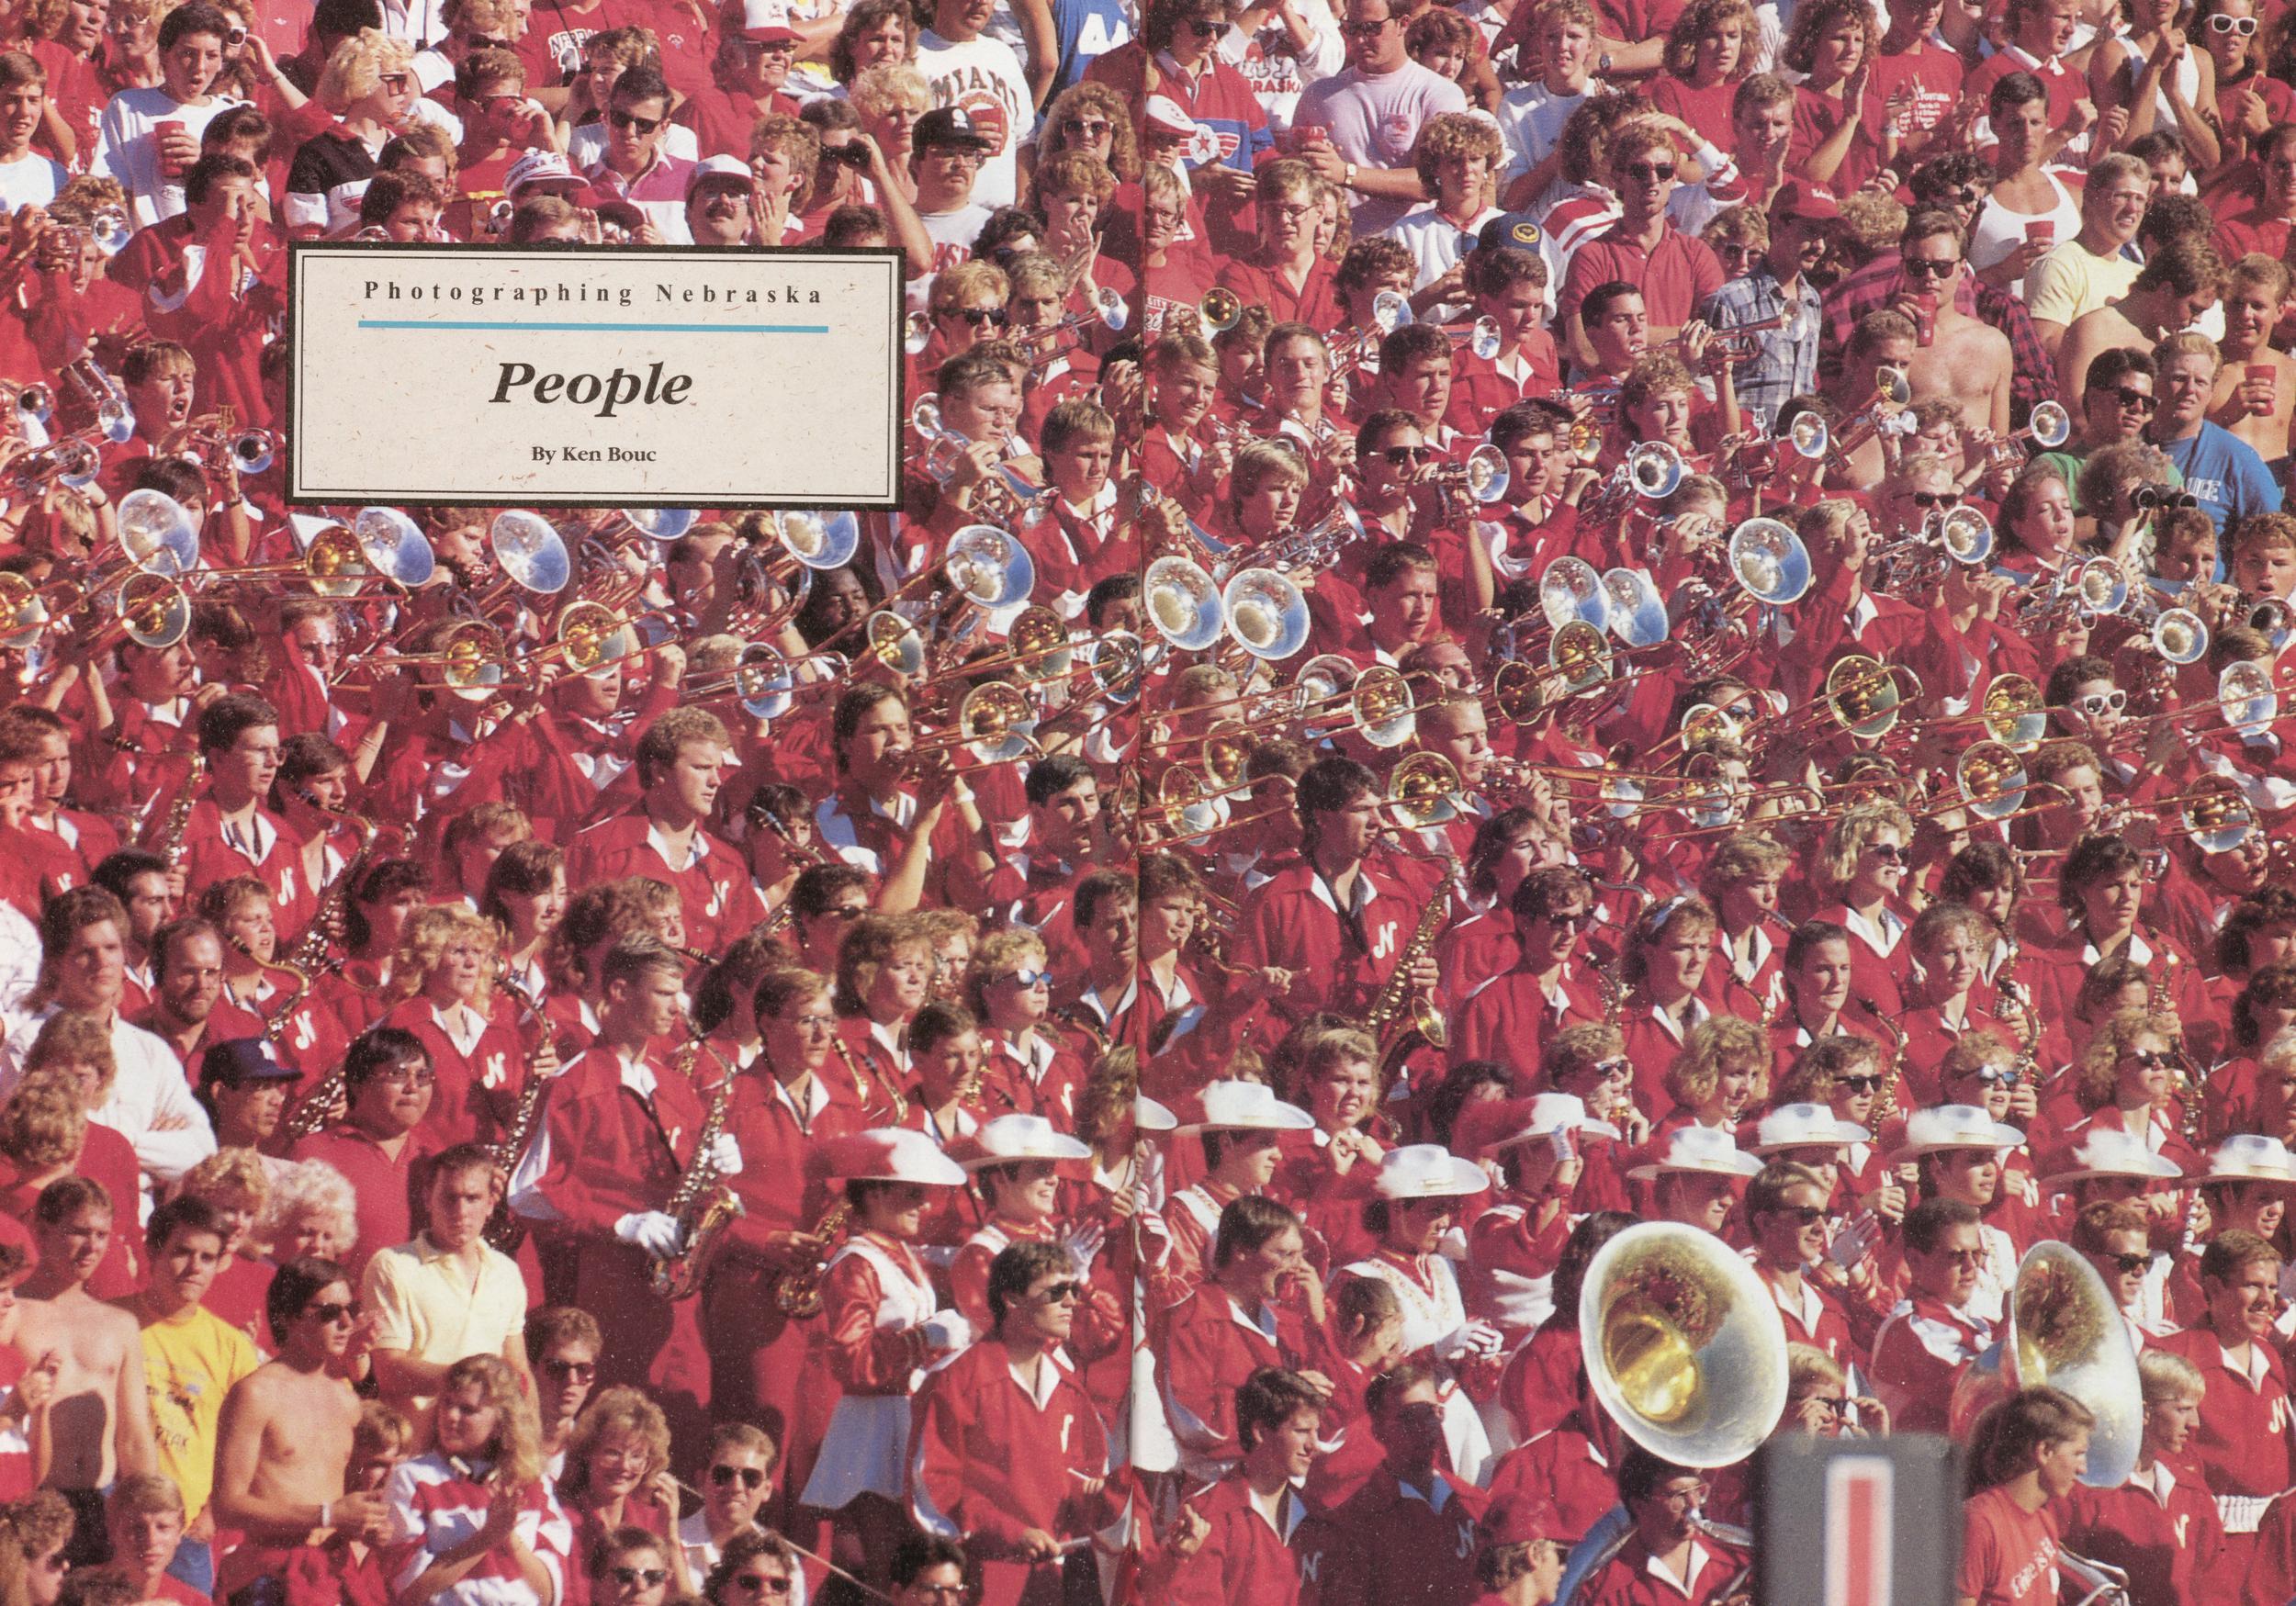
Photographing Nebraska
People
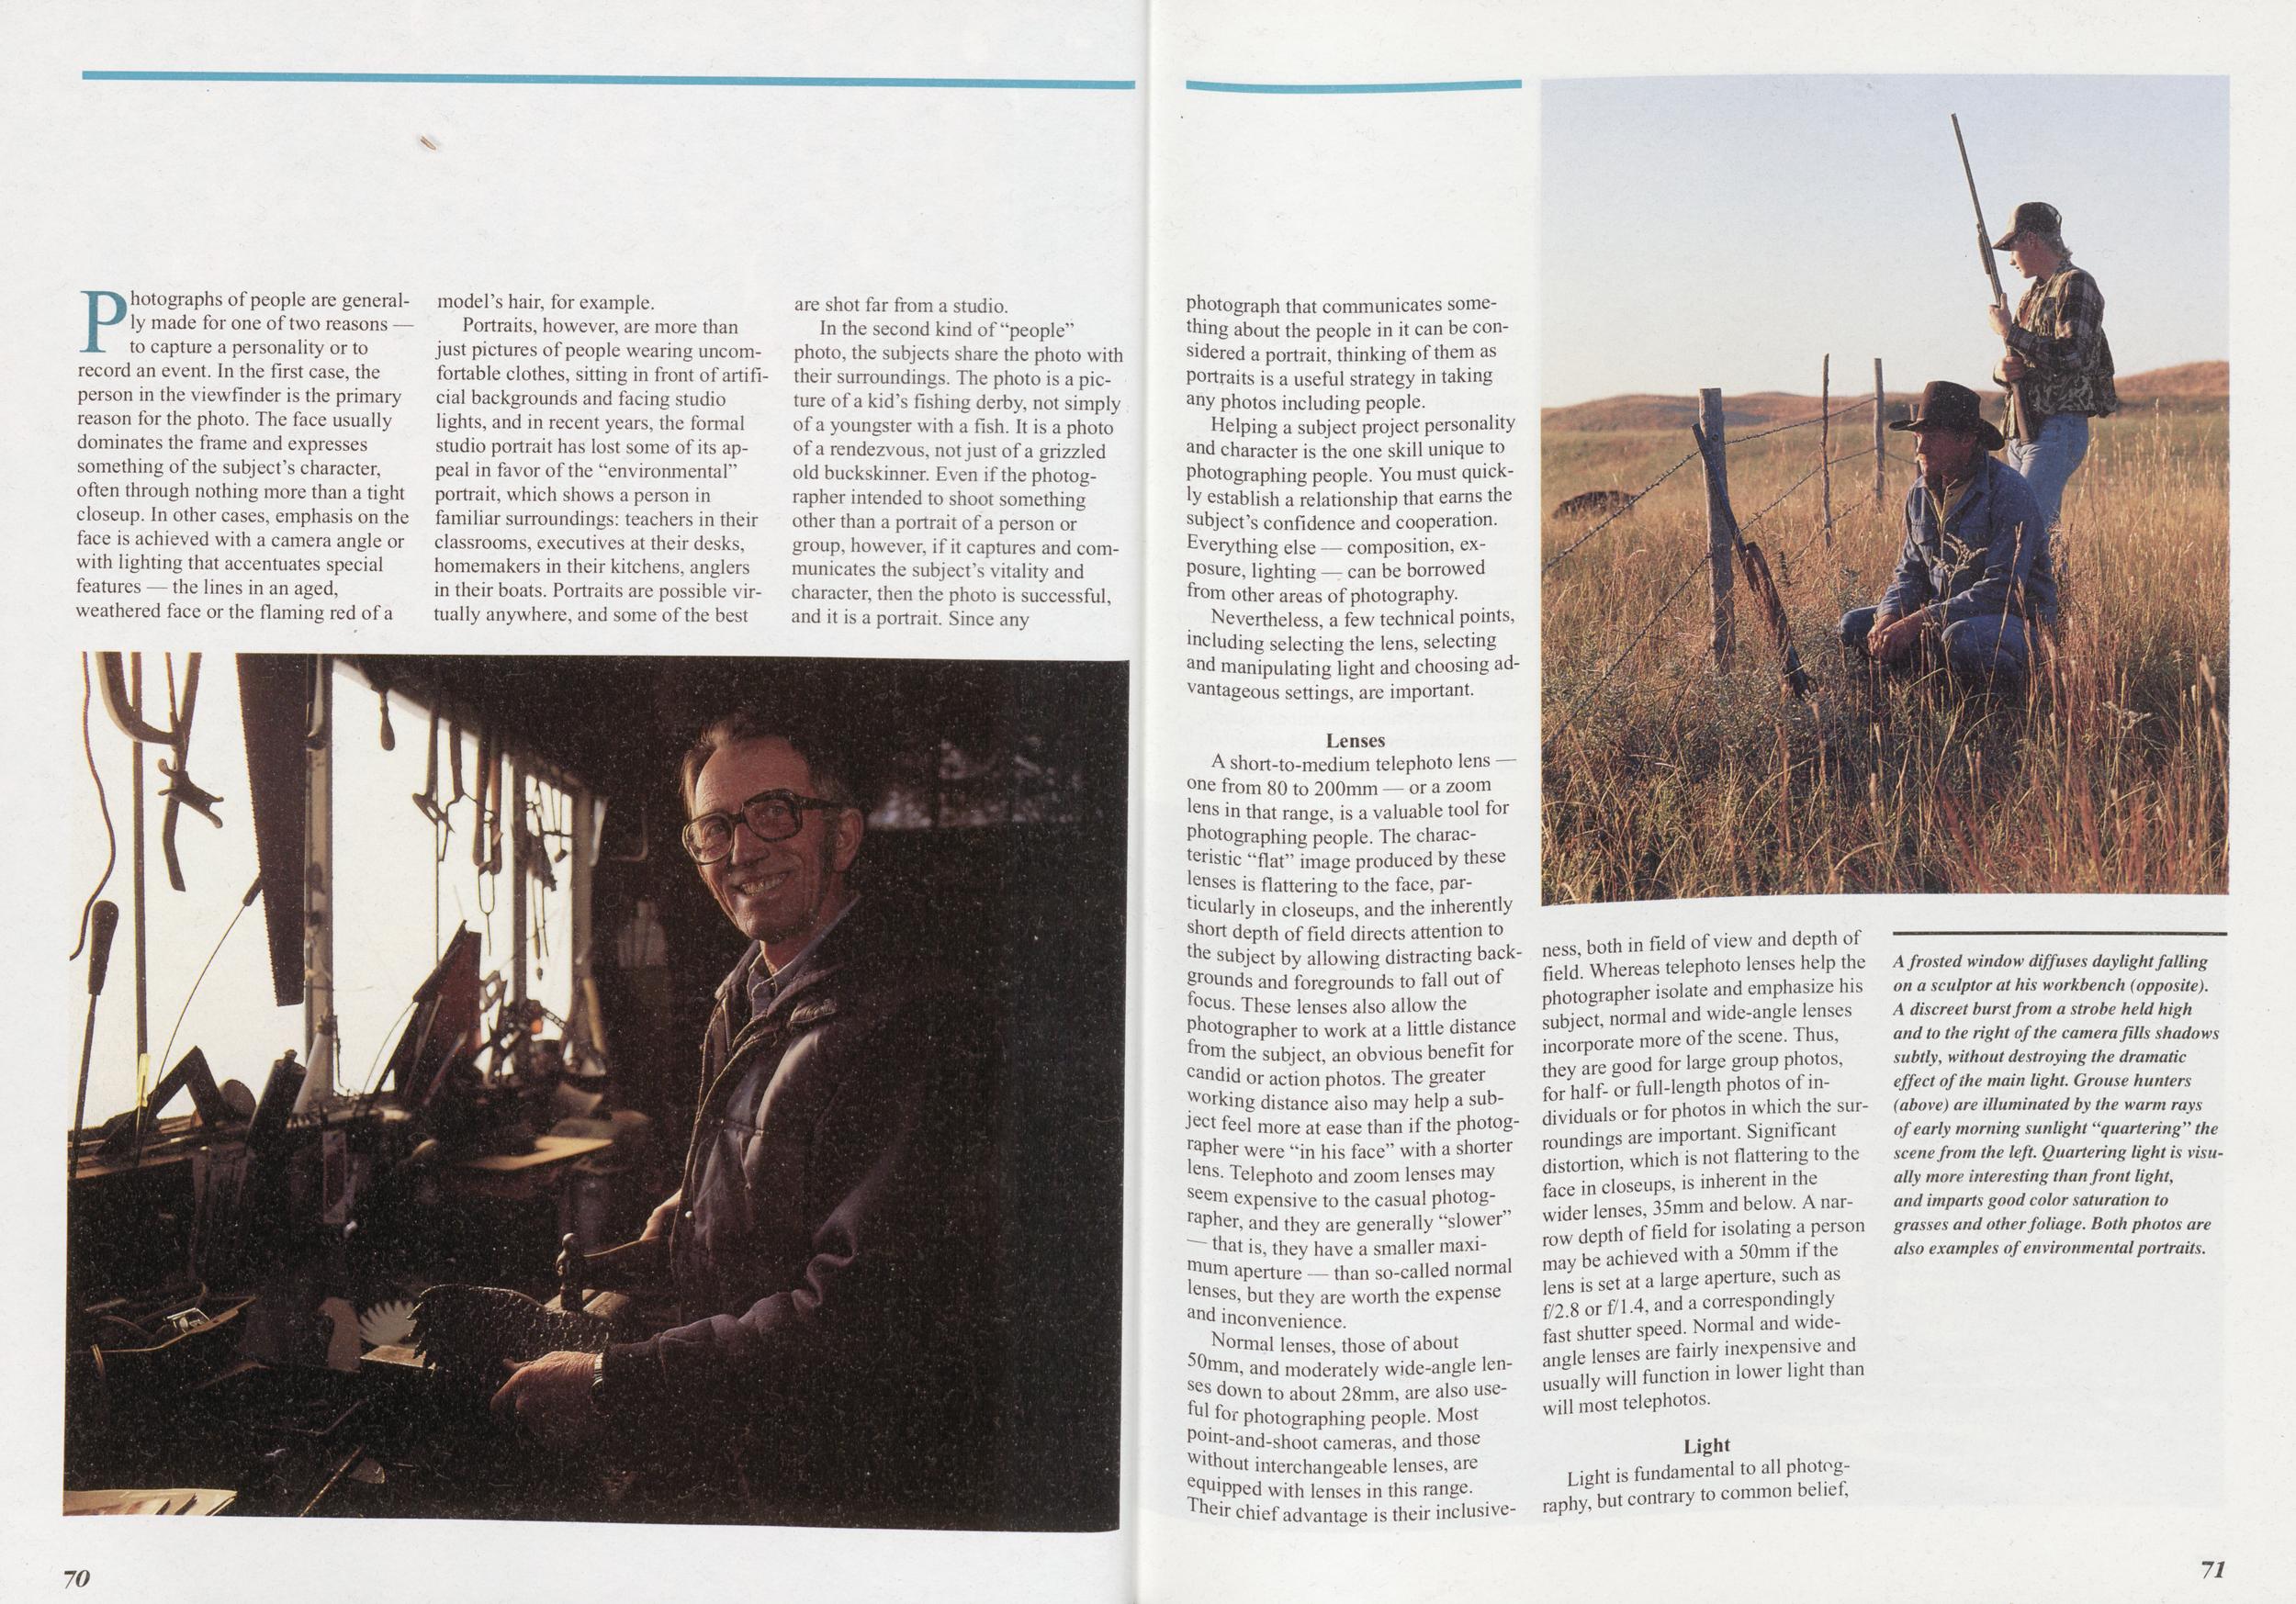
Photographs of people are generally made for one of two reasons — to capture a personality or to record an event. In the first case, the person in the viewfinder is the primary reason for the photo. The face usually dominates the frame and expresses something of the subject's character, often through nothing more than a tight closeup. In other cases, emphasis on the face is achieved with a camera angle or with lighting that accentuates special features — the lines in an aged, weathered face or the flaming red of a model's hair, for example.
Portraits, however, are more than just pictures of people wearing uncomfortable clothes, sitting in front of artificial backgrounds and facing studio lights, and in recent years, the formal studio portrait has lost some of its appeal in favor of the "environmental" portrait, which shows a person in familiar surroundings: teachers in their classrooms, executives at their desks, homemakers in their kitchens, anglers in their boats. Portraits are possible virtually anywhere, and some of the best are shot far from a studio.
In the second kind of "people" photo, the subjects share the photo with their surroundings. The photo is a picture of a kid's fishing derby, not simply of a youngster with a fish. It is a photo of a rendezvous, not just of a grizzled old buckskinner. Even if the photographer intended to shoot something other than a portrait of a person or group, however, if it captures and communicates the subject's vitality and character, then the photo is successful, and it is a portrait. Since any photograph that communicates something about the people in it can be considered a portrait, thinking of them as Portraits is a useful strategy in taking any photos including people.
Helping a subject project personality and character is the one skill unique to photographing people. You must quickly establish a relationship that earns the subject's confidence and cooperation. Everything else — composition, exposure, lighting — can be borrowed from other areas of photography.
Nevertheless, a few technical points, including selecting the lens, selecting and manipulating light and choosing advantageous settings, are important.
LensesA short-to-medium telephoto lens one from 80 to 200mm — or a zoom lens in that range, is a valuable tool for Photographing people. The characteristic "flat" image produced by these lenses is flattering to the face, particularly in closeups, and the inherently short depth of field directs attention to the subject by allowing distracting backgrounds and foregrounds to fall out of focus. These lenses also allow the Photographer to work at a little distance from the subject, an obvious benefit for candid or action photos. The greater working distance also may help a subject feel more at ease than if the photographer were "in his face" with a shorter lens. Telephoto and zoom lenses may seem expensive to the casual photographer, and they are generally "slower" that is, they have a smaller maximum aperture — than so-called normal lenses, but they are worth the expense and inconvenience.
Normal lenses, those of about 50mm, and moderately wide-angle lenses down to about 28mm, are also useful for photographing people. Most Point-and-shoot cameras, and those Wlthout interchangeable lenses, are Quipped with lenses in this range. Their chief advantage is their inclusiveness, both in field of view and depth of field Whereas telephoto lenses help the photographer isolate and emphasize his subject, normal and wide-angle lenses incorporate more of the scene. Thus, they are good for large group photos, for half- or full-length photos of individuals or for photos in which the surroundings are important. Significant distortion, which is not flattering to the face in closeups, is inherent in the wider lenses, 35mm and below. A narrow depth of field for isolating a person may be achieved with a 50mm if the lens is set at a large aperture, such as 1/2 8 or f/1.4, and a correspondingly fast shutter speed. Normal and wide-angle lenses are fairly inexpensive and usually will function in lower light than will most telephotos.
LightA frosted window diffuses daylight falling on a sculptor at his workbench (opposite). A discreet burst from a strobe held high and to the right of the camera fills shadows subtly, without destroying the dramatic effect of the main light. Grouse hunters (above) are illuminated by the warm rays of early morning sunlight "quartering" the scene from the left. Quartering light is visually more interesting than front light, and imparts good color saturation to grasses and other foliage. Both photos are also examples of environmental portraits.
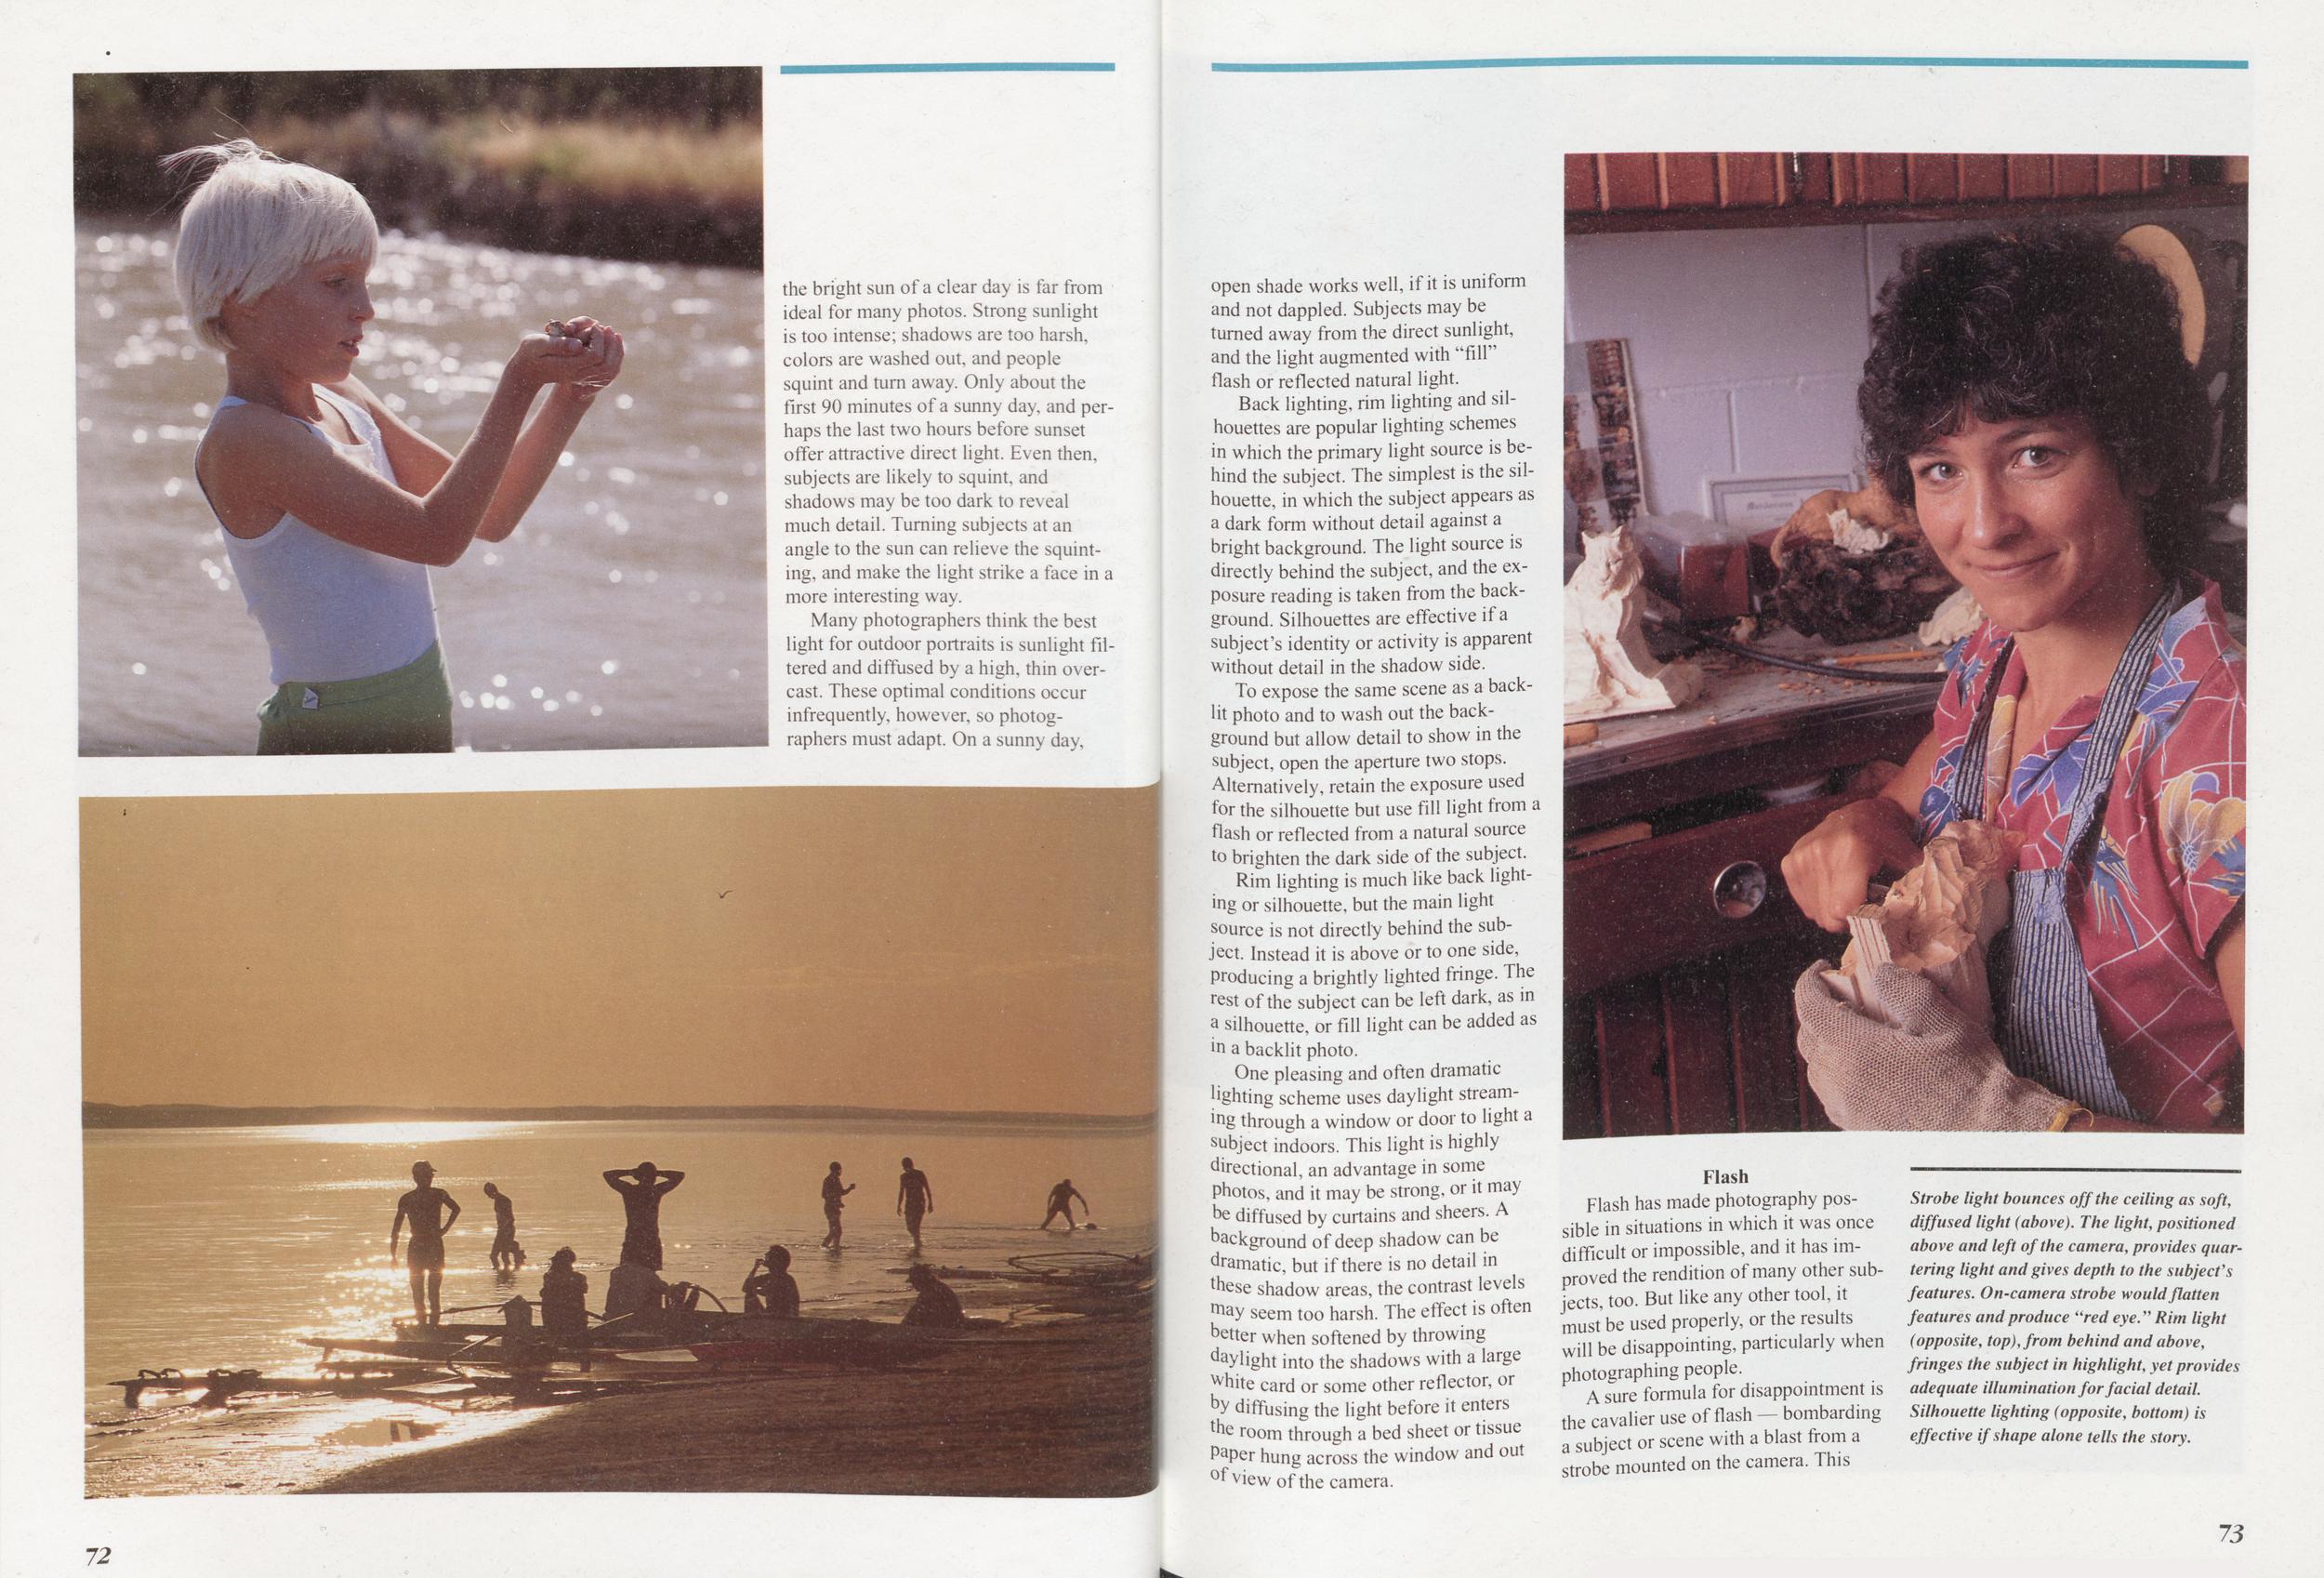
Many photographers think the best light for outdoor portraits is sunlight filtered and diffused by a high, thin overcast. These optimal conditions occur infrequently, however, so photographers must adapt. On a sunny day, open shade works well, if it is uniform and not dappled. Subjects may be turned away from the direct sunlight, and the light augmented with "fill" flash or reflected natural light.
Back lighting, rim lighting and silhouettes are popular lighting schemes in which the primary light source is behind the subject. The simplest is the silhouette, in which the subject appears as a dark form without detail against a bright background. The light source is directly behind the subject, and the exposure reading is taken from the background. Silhouettes are effective if a subject's identity or activity is apparent without detail in the shadow side.
To expose the same scene as a backlit photo and to wash out the background but allow detail to show in the subject, open the aperture two stops. Alternatively, retain the exposure used for the silhouette but use fill light from a flash or reflected from a natural source to brighten the dark side of the subject.
Rim lighting is much like back lighting or silhouette, but the main light source is not directly behind the subject. Instead it is above or to one side, Producing a brightly lighted fringe. The rest of the subject can be left dark, as in a silhouette, or fill light can be added as in a backlit photo.
One pleasing and often dramatic lighting scheme uses daylight streaming through a window or door to light a subject indoors. This light is highly directional, an advantage in some Photos, and it may be strong, or it may he diffused by curtains and sheers. A background of deep shadow can be dramatic, but if there is no detail in these shadow areas, the contrast levels may seem too harsh. The effect is often hetter when softened by throwing daylight into the shadows with a large white card or some other reflector, or by diffusing the light before it enters the room through a bed sheet or tissue Paper hung across the window and out ofview of the camera.
FlashFlash has made photography possible in situations in which it was once difficult or impossible, and it has improved the rendition of many other subjects, too. But like any other tool, it must be used properly, or the results will be disappointing, particularly when photographing people.
Strobe light bounces off the ceiling as soft, diffused light (above). The light, positioned above and left of the camera, provides quartering light and gives depth to the subject's features. On-camera strobe would flatten features and produce "red eye." Rim light (opposite, top), from behind and above, fringes the subject in highlight, yet provides adequate illumination for facial detail. Silhouette lighting (opposite, bottom) is effective if shape alone tells the story.
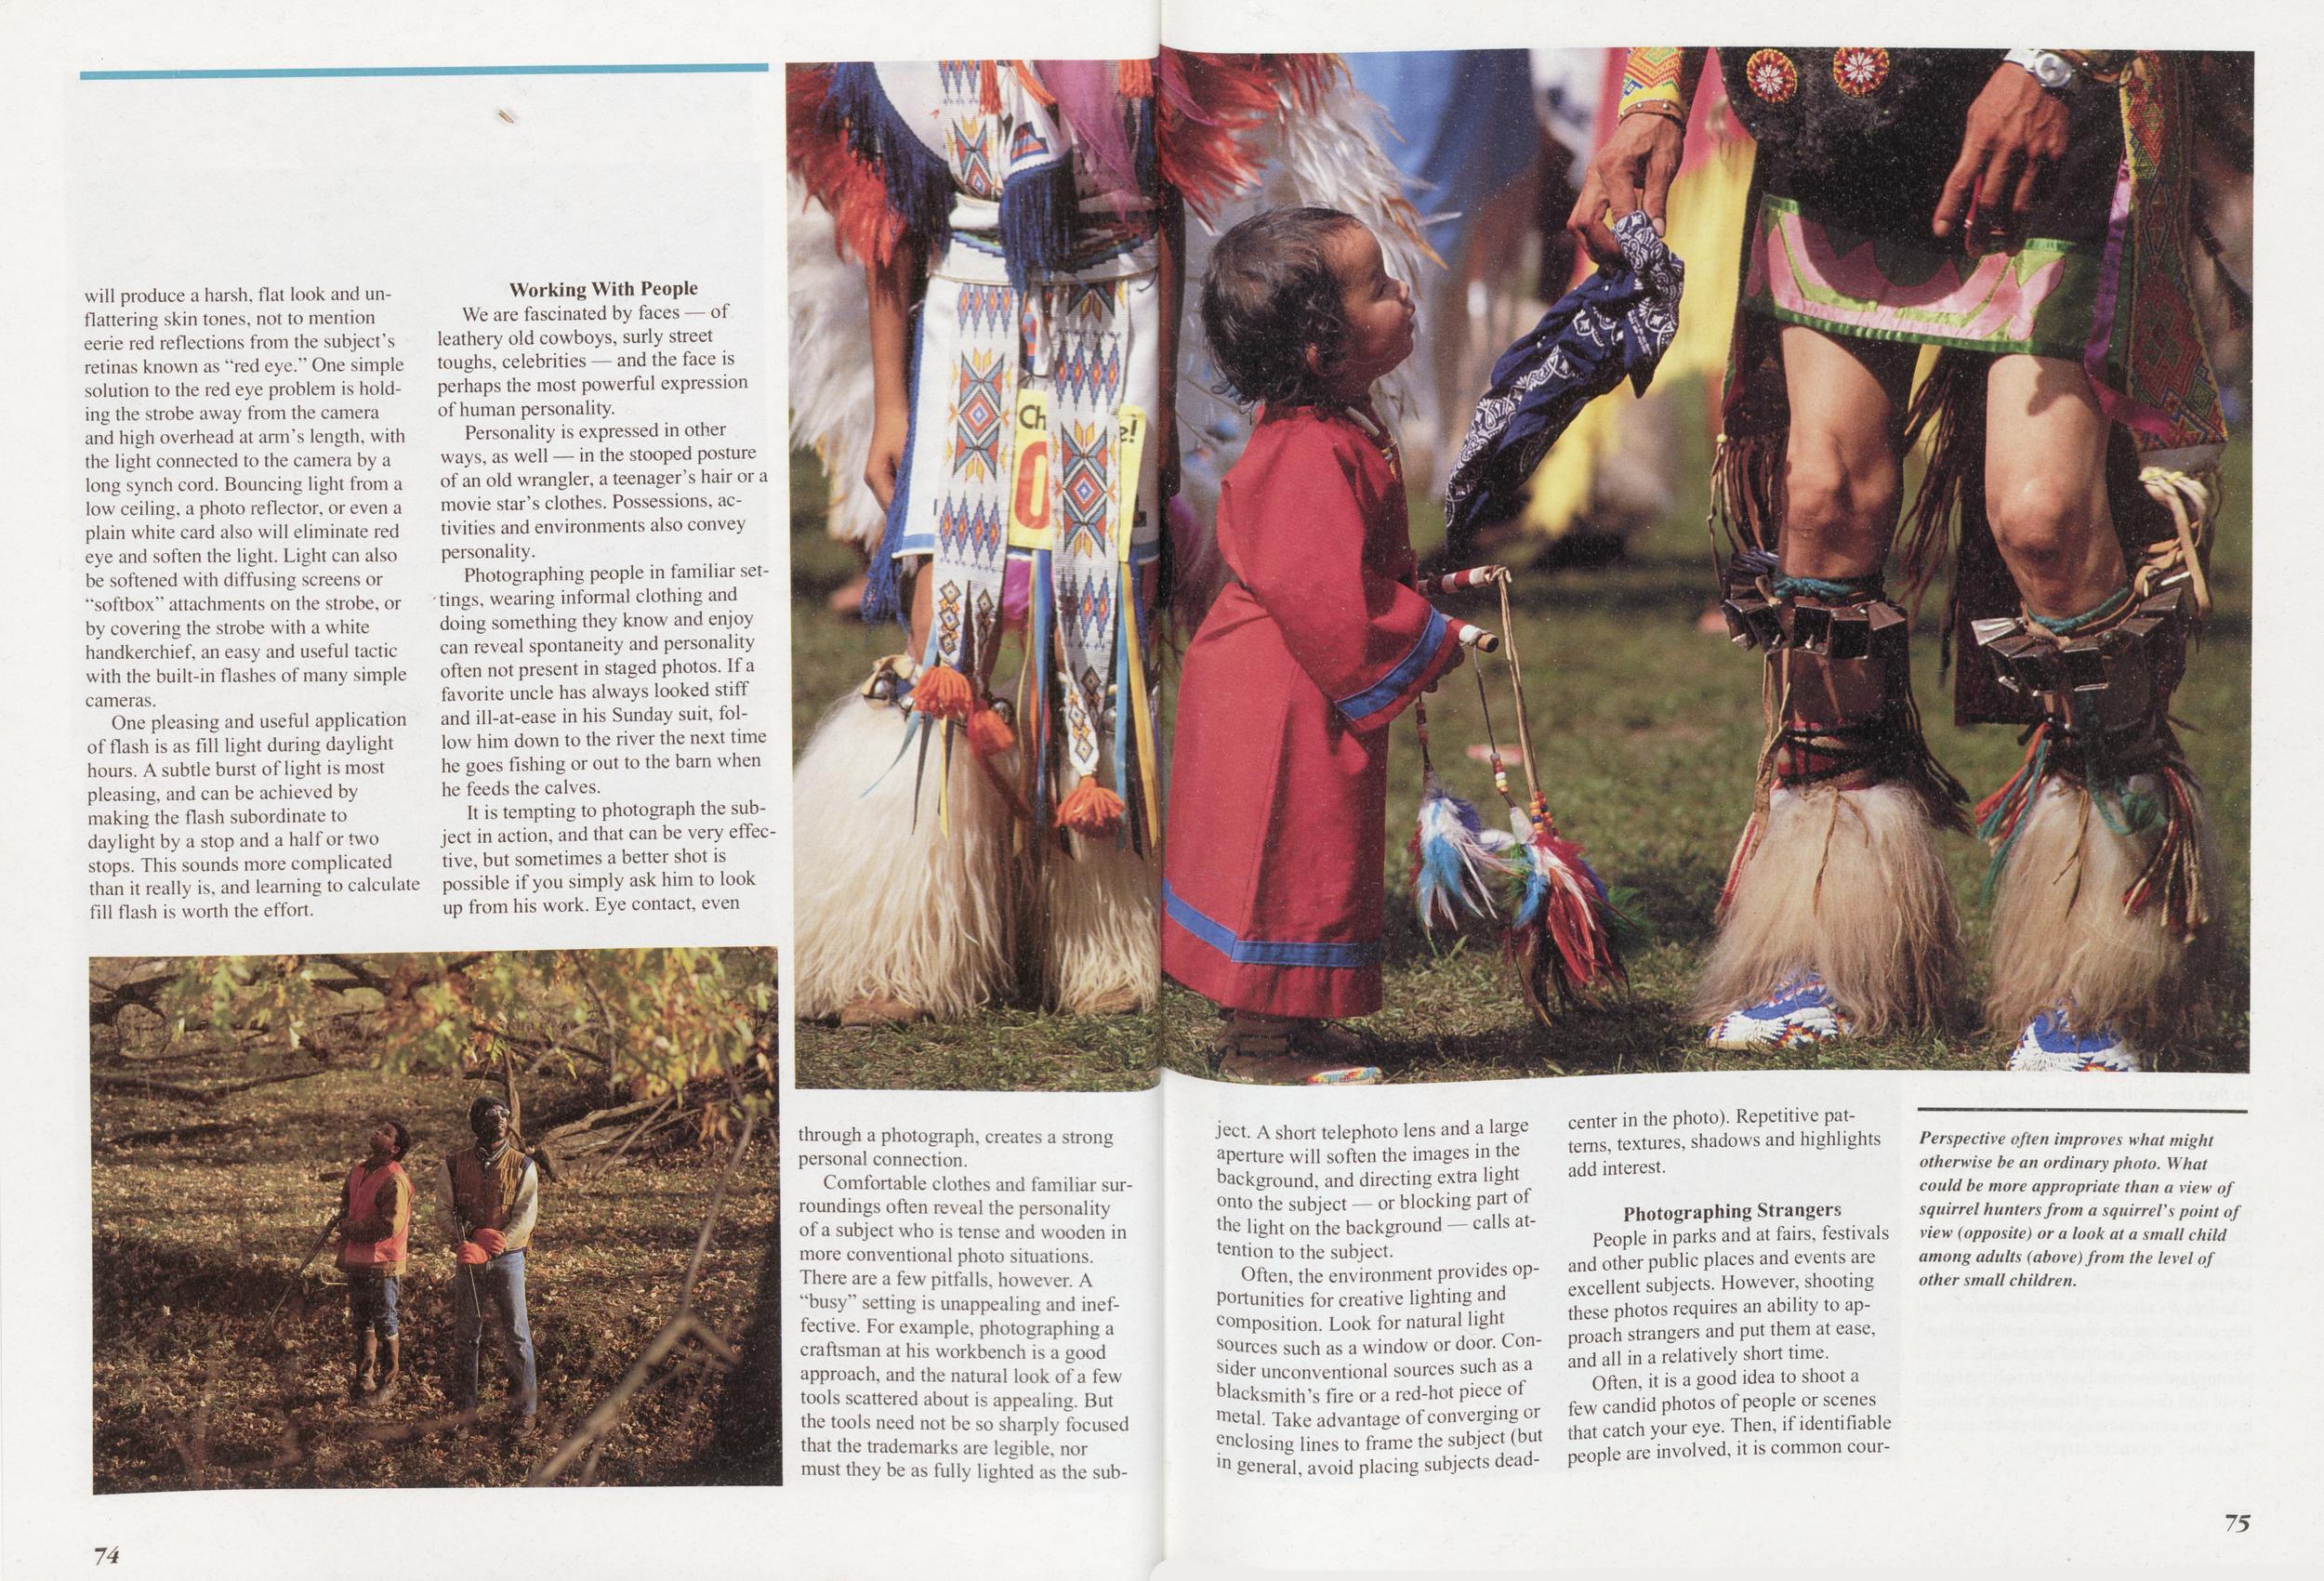 will produce a harsh, flat look and unflattering skin tones, not to mention
eerie red reflections from the subject's
retinas known as "red eye." One simple
solution to the red eye problem is holding the strobe away from the camera
and high overhead at arm's length, with
the light connected to the camera by a
long synch cord. Bouncing light from a
low ceiling, a photo reflector, or even a
plain white card also will eliminate red
eye and soften the light. Light can also
be softened with diffusing screens or
"softbox" attachments on the strobe, or
by covering the strobe with a white
handkerchief, an easy and useful tactic
with the built-in flashes of many simple
cameras.
will produce a harsh, flat look and unflattering skin tones, not to mention
eerie red reflections from the subject's
retinas known as "red eye." One simple
solution to the red eye problem is holding the strobe away from the camera
and high overhead at arm's length, with
the light connected to the camera by a
long synch cord. Bouncing light from a
low ceiling, a photo reflector, or even a
plain white card also will eliminate red
eye and soften the light. Light can also
be softened with diffusing screens or
"softbox" attachments on the strobe, or
by covering the strobe with a white
handkerchief, an easy and useful tactic
with the built-in flashes of many simple
cameras.One pleasing and useful application of flash is as fill light during daylight hours. A subtle burst of light is most pleasing, and can be achieved by making the flash subordinate to daylight by a stop and a half or two stops. This sounds more complicated than it really is, and learning to calculate fill flash is worth the effort.
Working With PeopleWe are fascinated by faces — of leathery old cowboys, surly street toughs, celebrities — and the face is perhaps the most powerful expression of human personality.
Personality is expressed in other ways, as well — in the stooped posture of an old wrangler, a teenager's hair or a movie star's clothes. Possessions, activities and environments also convey personality.
Photographing people in familiar settings, wearing informal clothing and doing something they know and enjoy can reveal spontaneity and personality often not present in staged photos. If a favorite uncle has always looked stiff and ill-at-ease in his Sunday suit, follow him down to the river the next time he goes fishing or out to the barn when he feeds the calves.
It is tempting to photograph the subject in action, and that can be very effective, but sometimes a better shot is possible if you simply ask him to look up from his work. Eye contact, even through a photograph, creates a strong personal connection.
Comfortable clothes and familiar surroundings often reveal the personality of a subject who is tense and wooden in more conventional photo situations. There are a few pitfalls, however. A "busy" setting is unappealing and ineffective. For example, photographing a craftsman at his workbench is a good approach, and the natural look of a few tools scattered about is appealing. But the tools need not be so sharply focused that the trademarks are legible, nor must they be as fully lighted as the subject. A short telephoto lens and a large aperture will soften the images in the background, and directing extra light onto the subject — or blocking part of the light on the background — calls attention to the subject.
Often, the environment provides opportunities for creative lighting and composition. Look for natural light sources such as a window or door. Consider unconventional sources such as a blacksmith's fire or a red-hot piece of metal. Take advantage of converging or enclosing lines to frame the subject (but in general, avoid placing subjects deadcenter in the photo). Repetitive patterns, textures, shadows and highlights add interest.
Photographing StrangersPeople in parks and at fairs, festivals and other public places and events are excellent subjects. However, shooting these photos requires an ability to approach strangers and put them at ease, and all in a relatively short time.
Perspective often improves what might otherwise be an ordinary photo. What could be more appropriate than a view of squirrel hunters from a squirrel's point of view (opposite) or a look at a small child among adults (above) from the level of other small children.
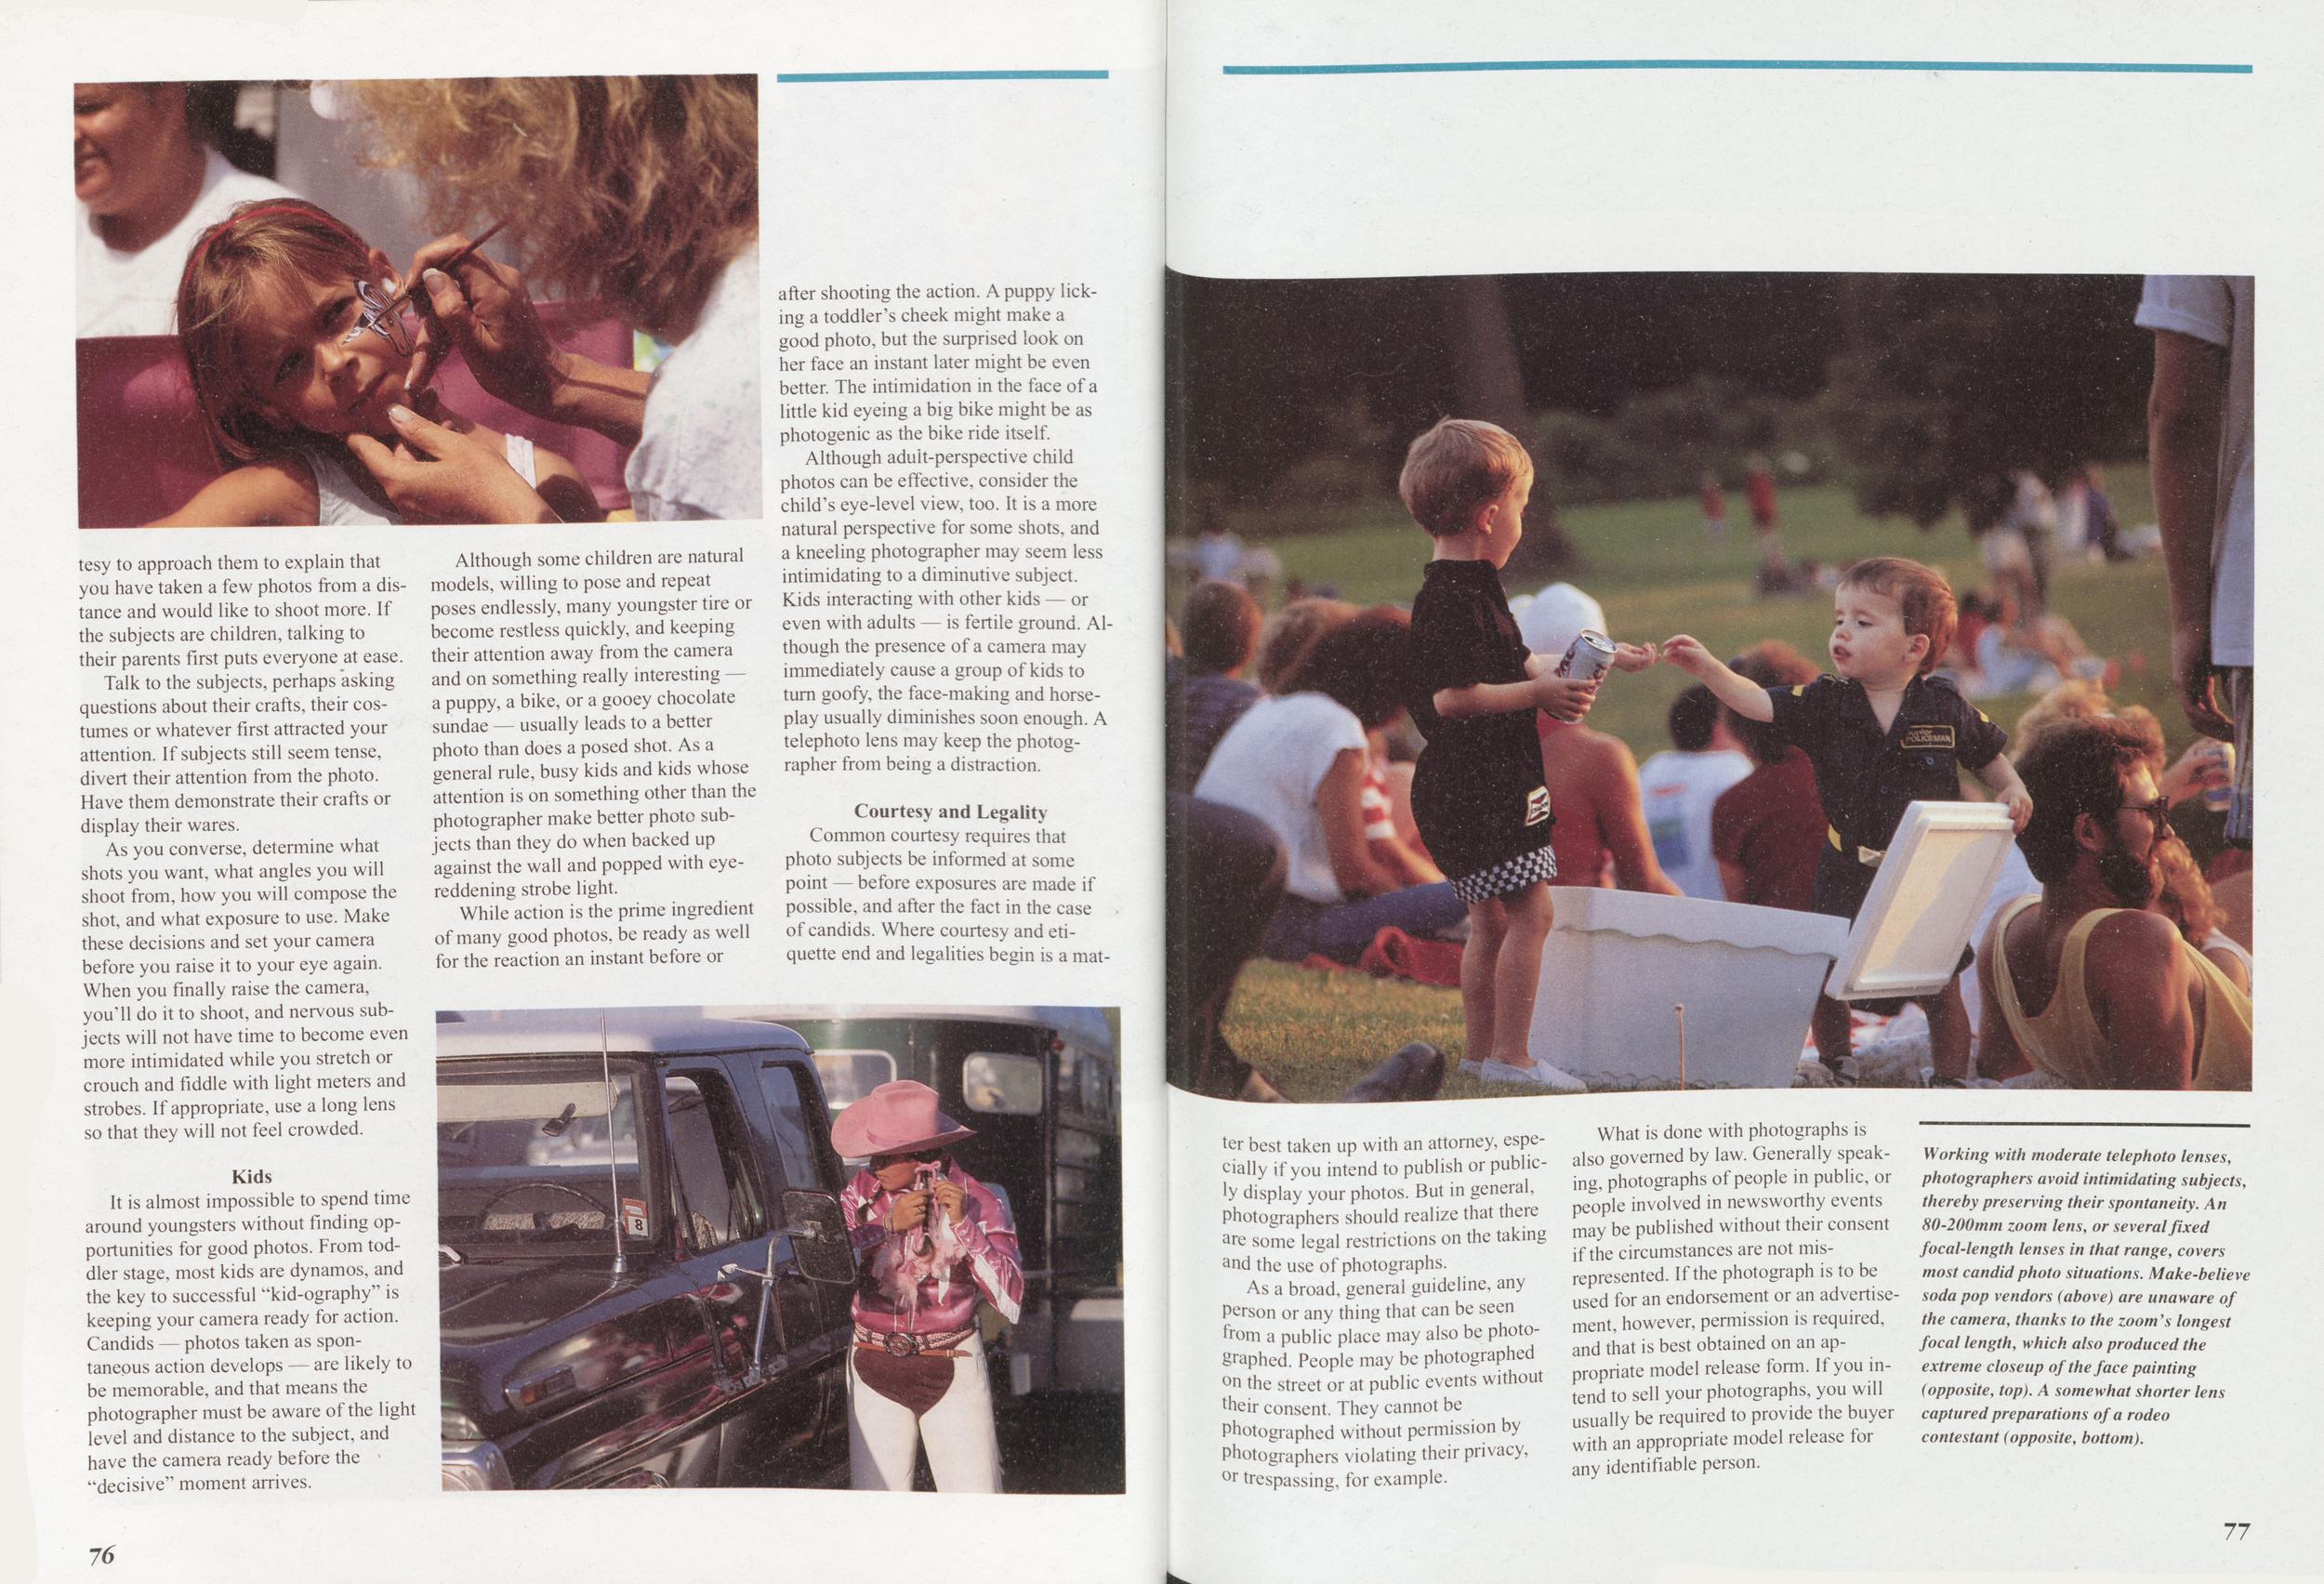
Talk to the subjects, perhaps asking questions about their crafts, their costumes or whatever first attracted your attention. If subjects still seem tense, divert their attention from the photo. Have them demonstrate their crafts or display their wares.
As you converse, determine what shots you want, what angles you will shoot from, how you will compose the shot, and what exposure to use. Make these decisions and set your camera before you raise it to your eye again. When you finally raise the camera, youTl do it to shoot, and nervous subjects will not have time to become even more intimidated while you stretch or crouch and fiddle with light meters and strobes. If appropriate, use a long lens so that they will not feel crowded.
KidsIt is almost impossible to spend time around youngsters without finding opportunities for good photos. From toddler stage, most kids are dynamos, and the key to successful "kid-ography" is keeping your camera ready for action. Candids — photos taken as spontaneous action develops are likely to be memorable, and that means the photographer must be aware of the light level and distance to the subject, and have the camera ready before the "decisive" moment arrives.
Although some children are natural models, willing to pose and repeat poses endlessly, many youngster tire or become restless quickly, and keeping their attention away from the camera and on something really interesting a puppy, a bike, or a gooey chocolate sundae — usually leads to a better photo than does a posed shot. As a general rule, busy kids and kids whose attention is on something other than the photographer make better photo subjects than they do when backed up against the wall and popped with eye-reddening strobe light.
While action is the prime ingredient of many good photos, be ready as well for the reaction an instant before or after shooting the action. A puppy licking a toddler's cheek might make a good photo, but the surprised look on her face an instant later might be even better. The intimidation in the face of a little kid eyeing a big bike might be as photogenic as the bike ride itself.
Although adult-perspective child photos can be effective, consider the child's eye-level view, too. It is a more natural perspective for some shots, and a kneeling photographer may seem less intimidating to a diminutive subject. Kids interacting with other kids — or even with adults — is fertile ground. Although the presence of a camera may immediately cause a group of kids to turn goofy, the face-making and horseplay usually diminishes soon enough. A telephoto lens may keep the photographer from being a distraction.
Courtesy and LegalityCommon courtesy requires that photo subjects be informed at some point — before exposures are made if possible, and after the fact in the case of candids. Where courtesy and etiquette end and legalities begin is a matter best taken up with an attorney, especially if you intend to publish or publicly display your photos. But in general, photographers should realize that there are some legal restrictions on the taking and the use of photographs.
As a broad, general guideline, any Person or any thing that can be seen from a public place may also be photographed. People may be photographed on the street or at public events without meir consent. They cannot be Photographed without permission by Photographers violating their privacy, or trespassing, for example.
What is done with photographs is also governed by law. Generally speaking, photographs of people in public, or people involved in newsworthy events may be published without their consent if the circumstances are not misrepresented. If the photograph is to be used for an endorsement or an advertisement, however, permission is required, and that is best obtained on an appropriate model release form. If you intend to sell your photographs, you will usually be required to provide the buyer with an appropriate model release for any identifiable person.
Working with moderate telephoto lenses, photographers avoid intimidating subjects, thereby preserving their spontaneity. An 80-2 00 mm zoom lens, or several fixed focal-length lenses in that range, covers most candid photo situations. Make-believe soda pop vendors (above) are unaware of the camera, thanks to the zoom's longest focal length, which also produced the extreme closeup of the face painting (opposite, top). A somewhat shorter lens captured preparations of a rodeo contestant (opposite, bottom).
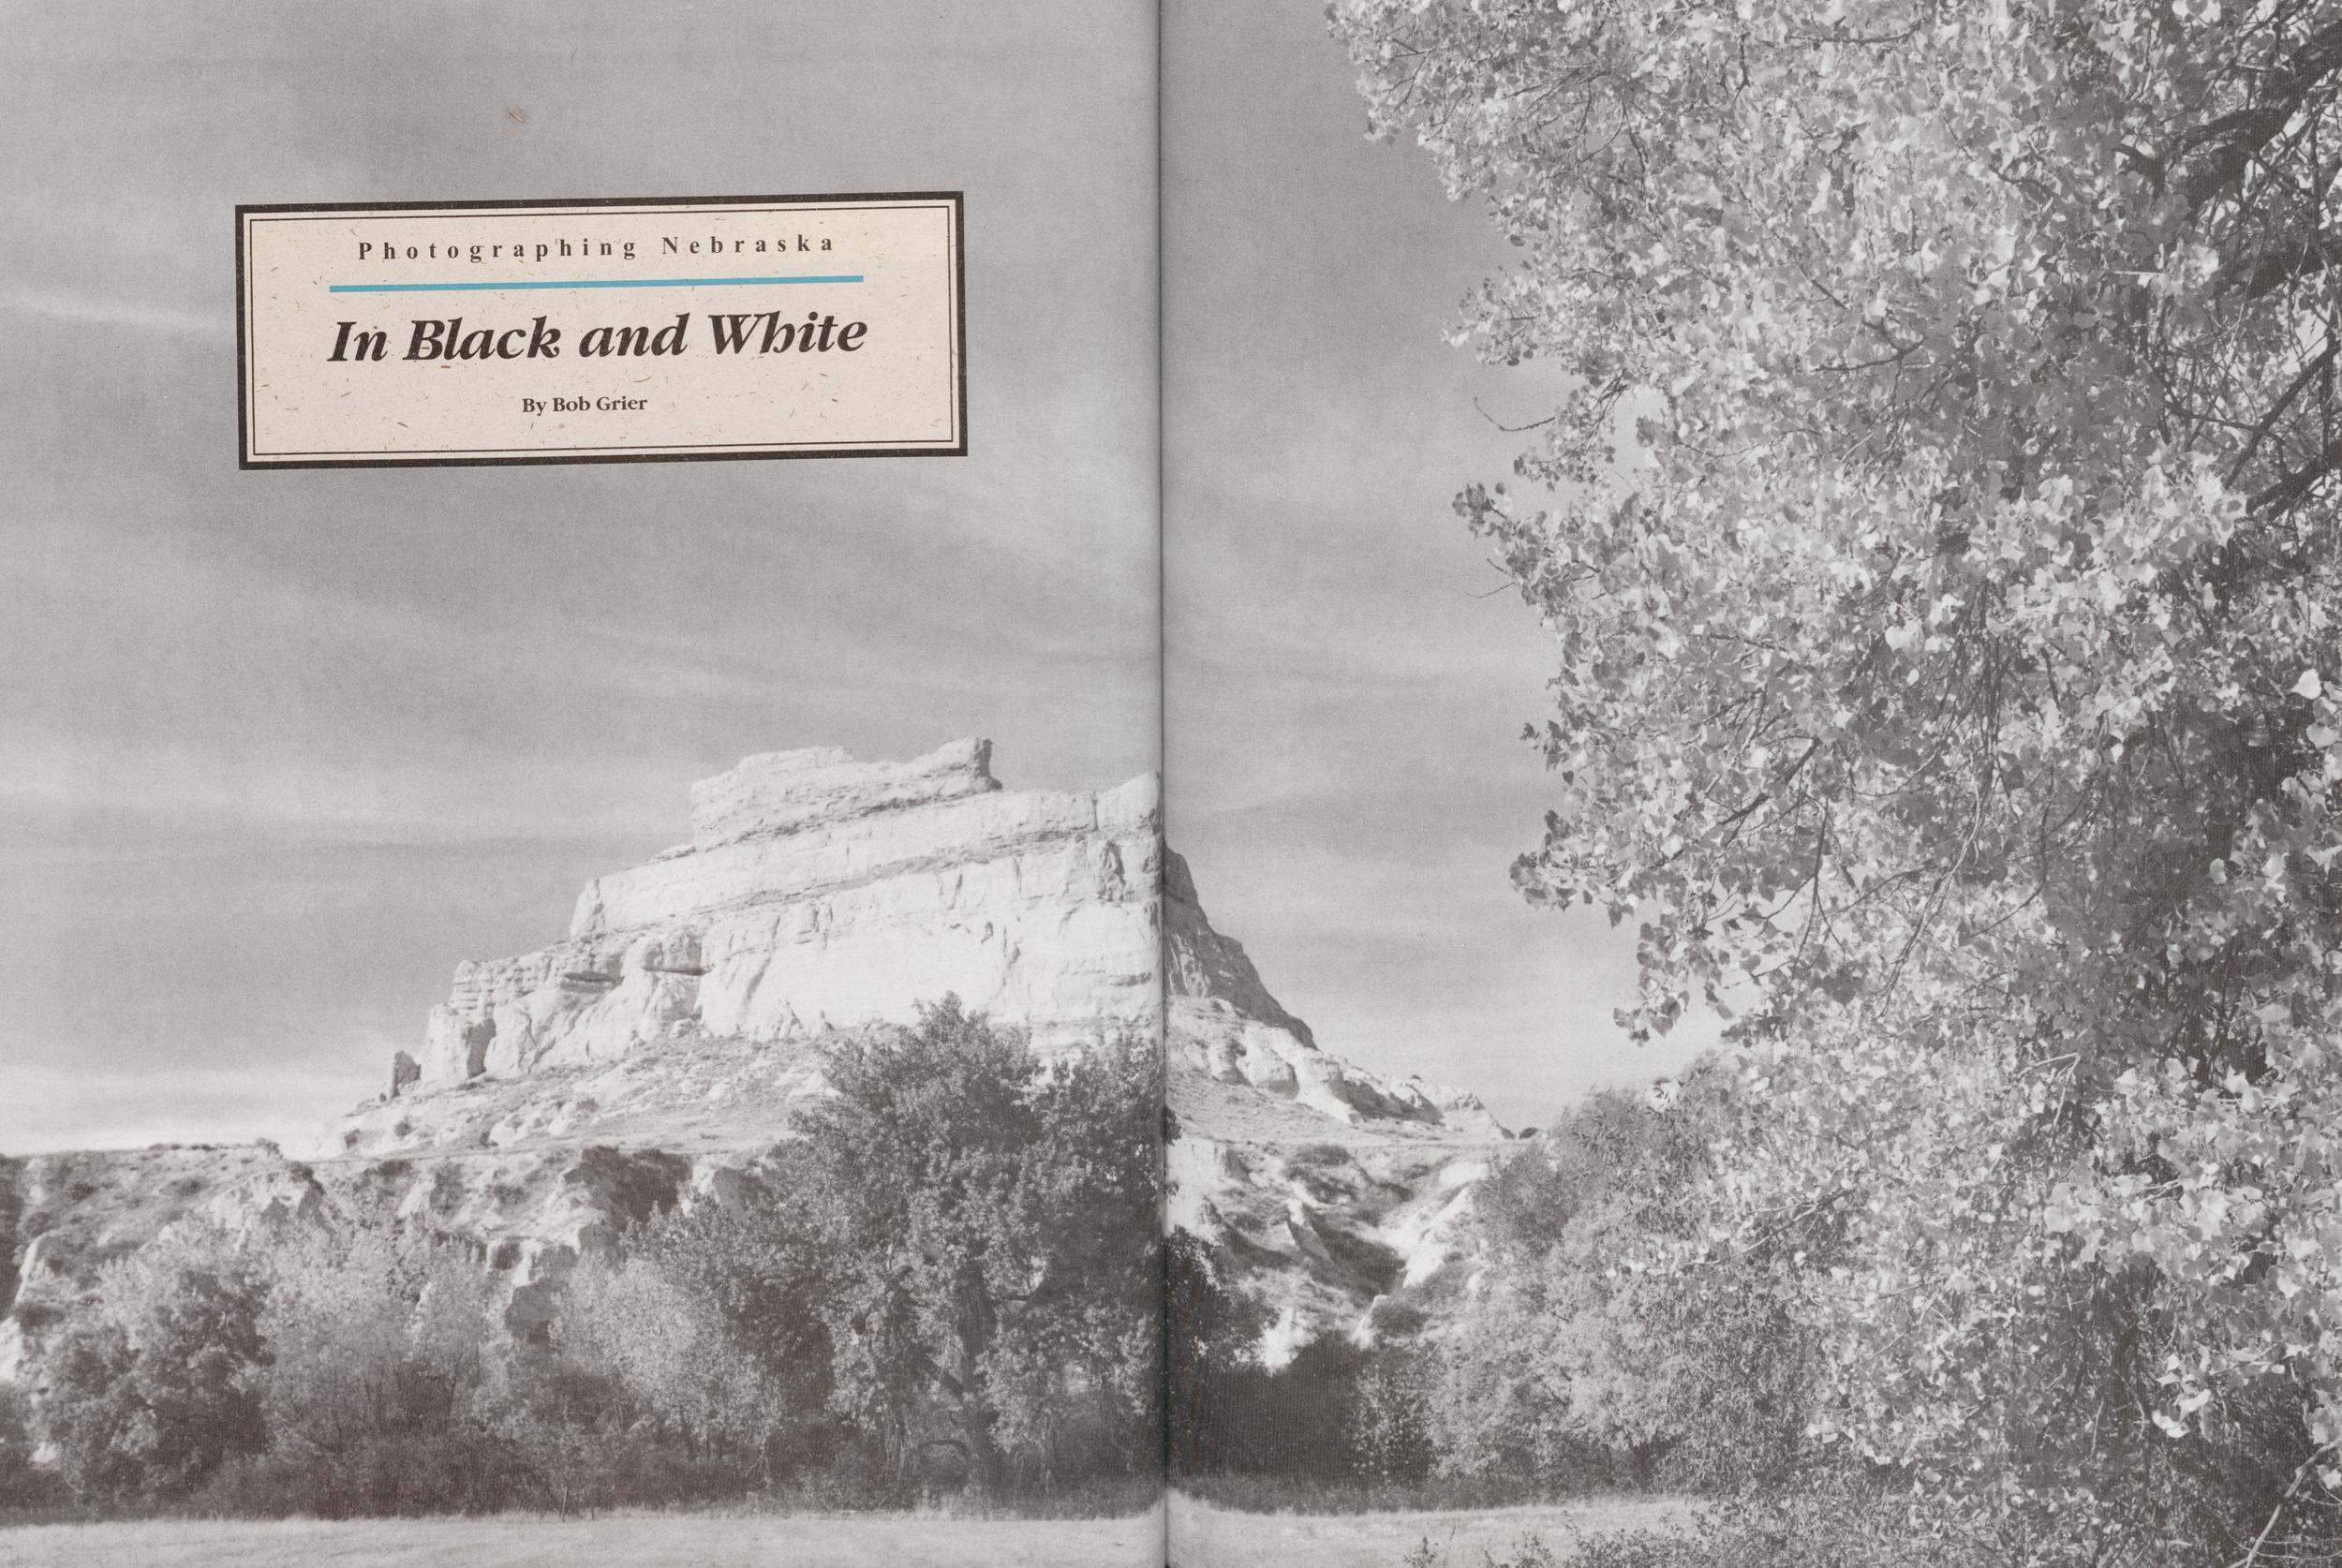
Photographing Nebraska
In Black and White
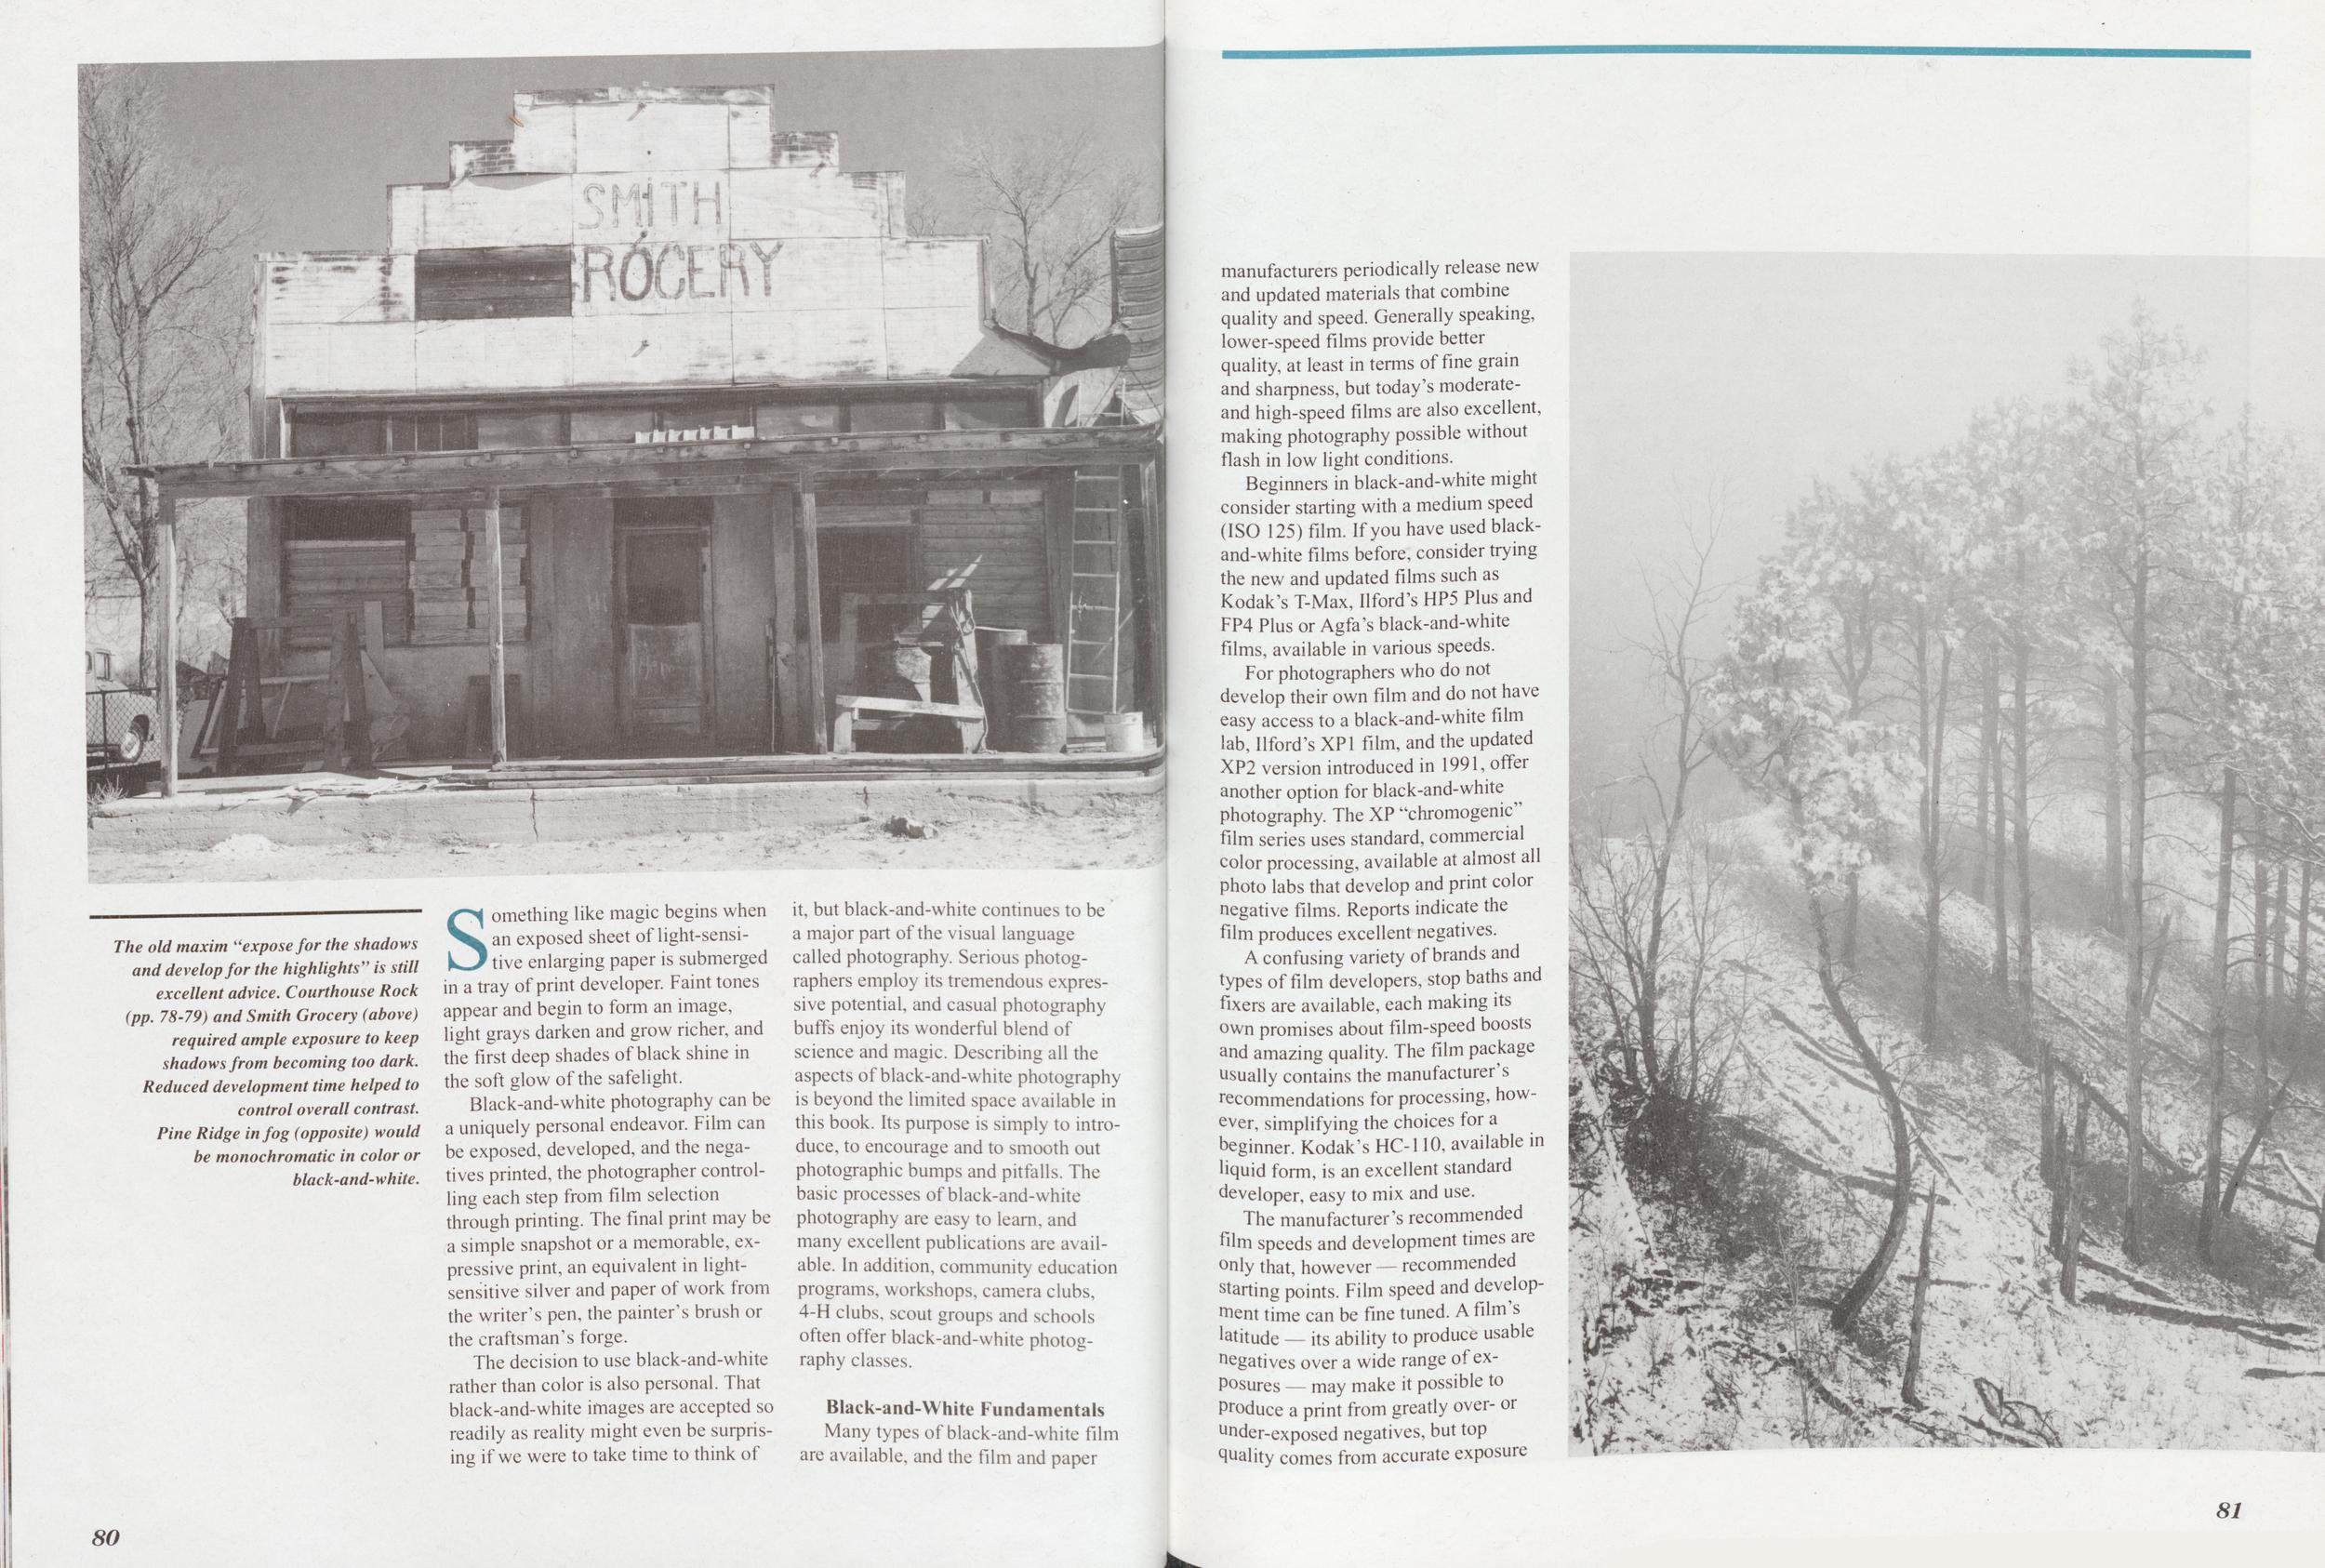
The old maxim "expose for the shadows and develop for the highlights" is still excellent advice. Courthouse Rock (pp. 78-79) and Smith Grocery (above) required ample exposure to keep shadows from becoming too dark. Reduced development time helped to control overall contrast. Pine Ridge in fog (opposite) would be monochromatic in color or black-and-white.
Something like magic begins when an exposed sheet of light-sensitive enlarging paper is submerged in a tray of print developer. Faint tones appear and begin to form an image, light grays darken and grow richer, and the first deep shades of black shine in the soft glow of the safelight.
Black-and-white photography can be a uniquely personal endeavor. Film can be exposed, developed, and the negatives printed, the photographer controlling each step from film selection through printing. The final print may be a simple snapshot or a memorable, expressive print, an equivalent in lightsensitive silver and paper of work from the writer's pen, the painter's brush or the craftsman's forge.
The decision to use black-and-white rather than color is also personal. That black-and-white images are accepted so readily as reality might even be surprising if we were to take time to think of it, but black-and-white continues to be a major part of the visual language called photography. Serious photographers employ its tremendous expressive potential, and casual photography buffs enjoy its wonderful blend of science and magic. Describing all the aspects of black-and-white photography is beyond the limited space available in this book. Its purpose is simply to introduce, to encourage and to smooth out photographic bumps and pitfalls. The basic processes of black-and-white photography are easy to learn, and many excellent publications are available. In addition, community education programs, workshops, camera clubs, 4-H clubs, scout groups and schools often offer black-and-white photography classes.
Black-and-White FundamentalsMany types of black-and-white film are available, and the film and paper manufacturers periodically release new and updated materials that combine quality and speed. Generally speaking, lower-speed films provide better quality, at least in terms of fine grain and sharpness, but today's moderate and high-speed films are also excellent, making photography possible without flash in low light conditions.
Beginners in black-and-white might consider starting with a medium speed (ISO 125) film. If you have used black-and-white films before, consider trying the new and updated films such as Kodak's T-Max, Ilford's HP5 Plus and FP4 Plus or Agfa's black-and-white films, available in various speeds.
For photographers who do not develop their own film and do not have easy access to a black-and-white film lab, Ilford's XP1 film, and the updated XP2 version introduced in 1991, offer another option for black-and-white photography. The XP "chromogenic" film series uses standard, commercial color processing, available at almost all photo labs that develop and print color negative films. Reports indicate the film produces excellent negatives.
A confusing variety of brands and types of film developers, stop baths and fixers are available, each making its own promises about film-speed boosts and amazing quality. The film package usually contains the manufacturer's recommendations for processing, however, simplifying the choices for a beginner. Kodak's HC-110, available in liquid form, is an excellent standard developer, easy to mix and use.
The manufacturer's recommended film speeds and development times are only that, however — recommended starting points. Film speed and development time can be fine tuned. A film's latitude — its ability to produce usable negatives over a wide range of exposures — may make it possible to Produce a print from greatly over or under-exposed negatives, but top quality comes from accurate exposure
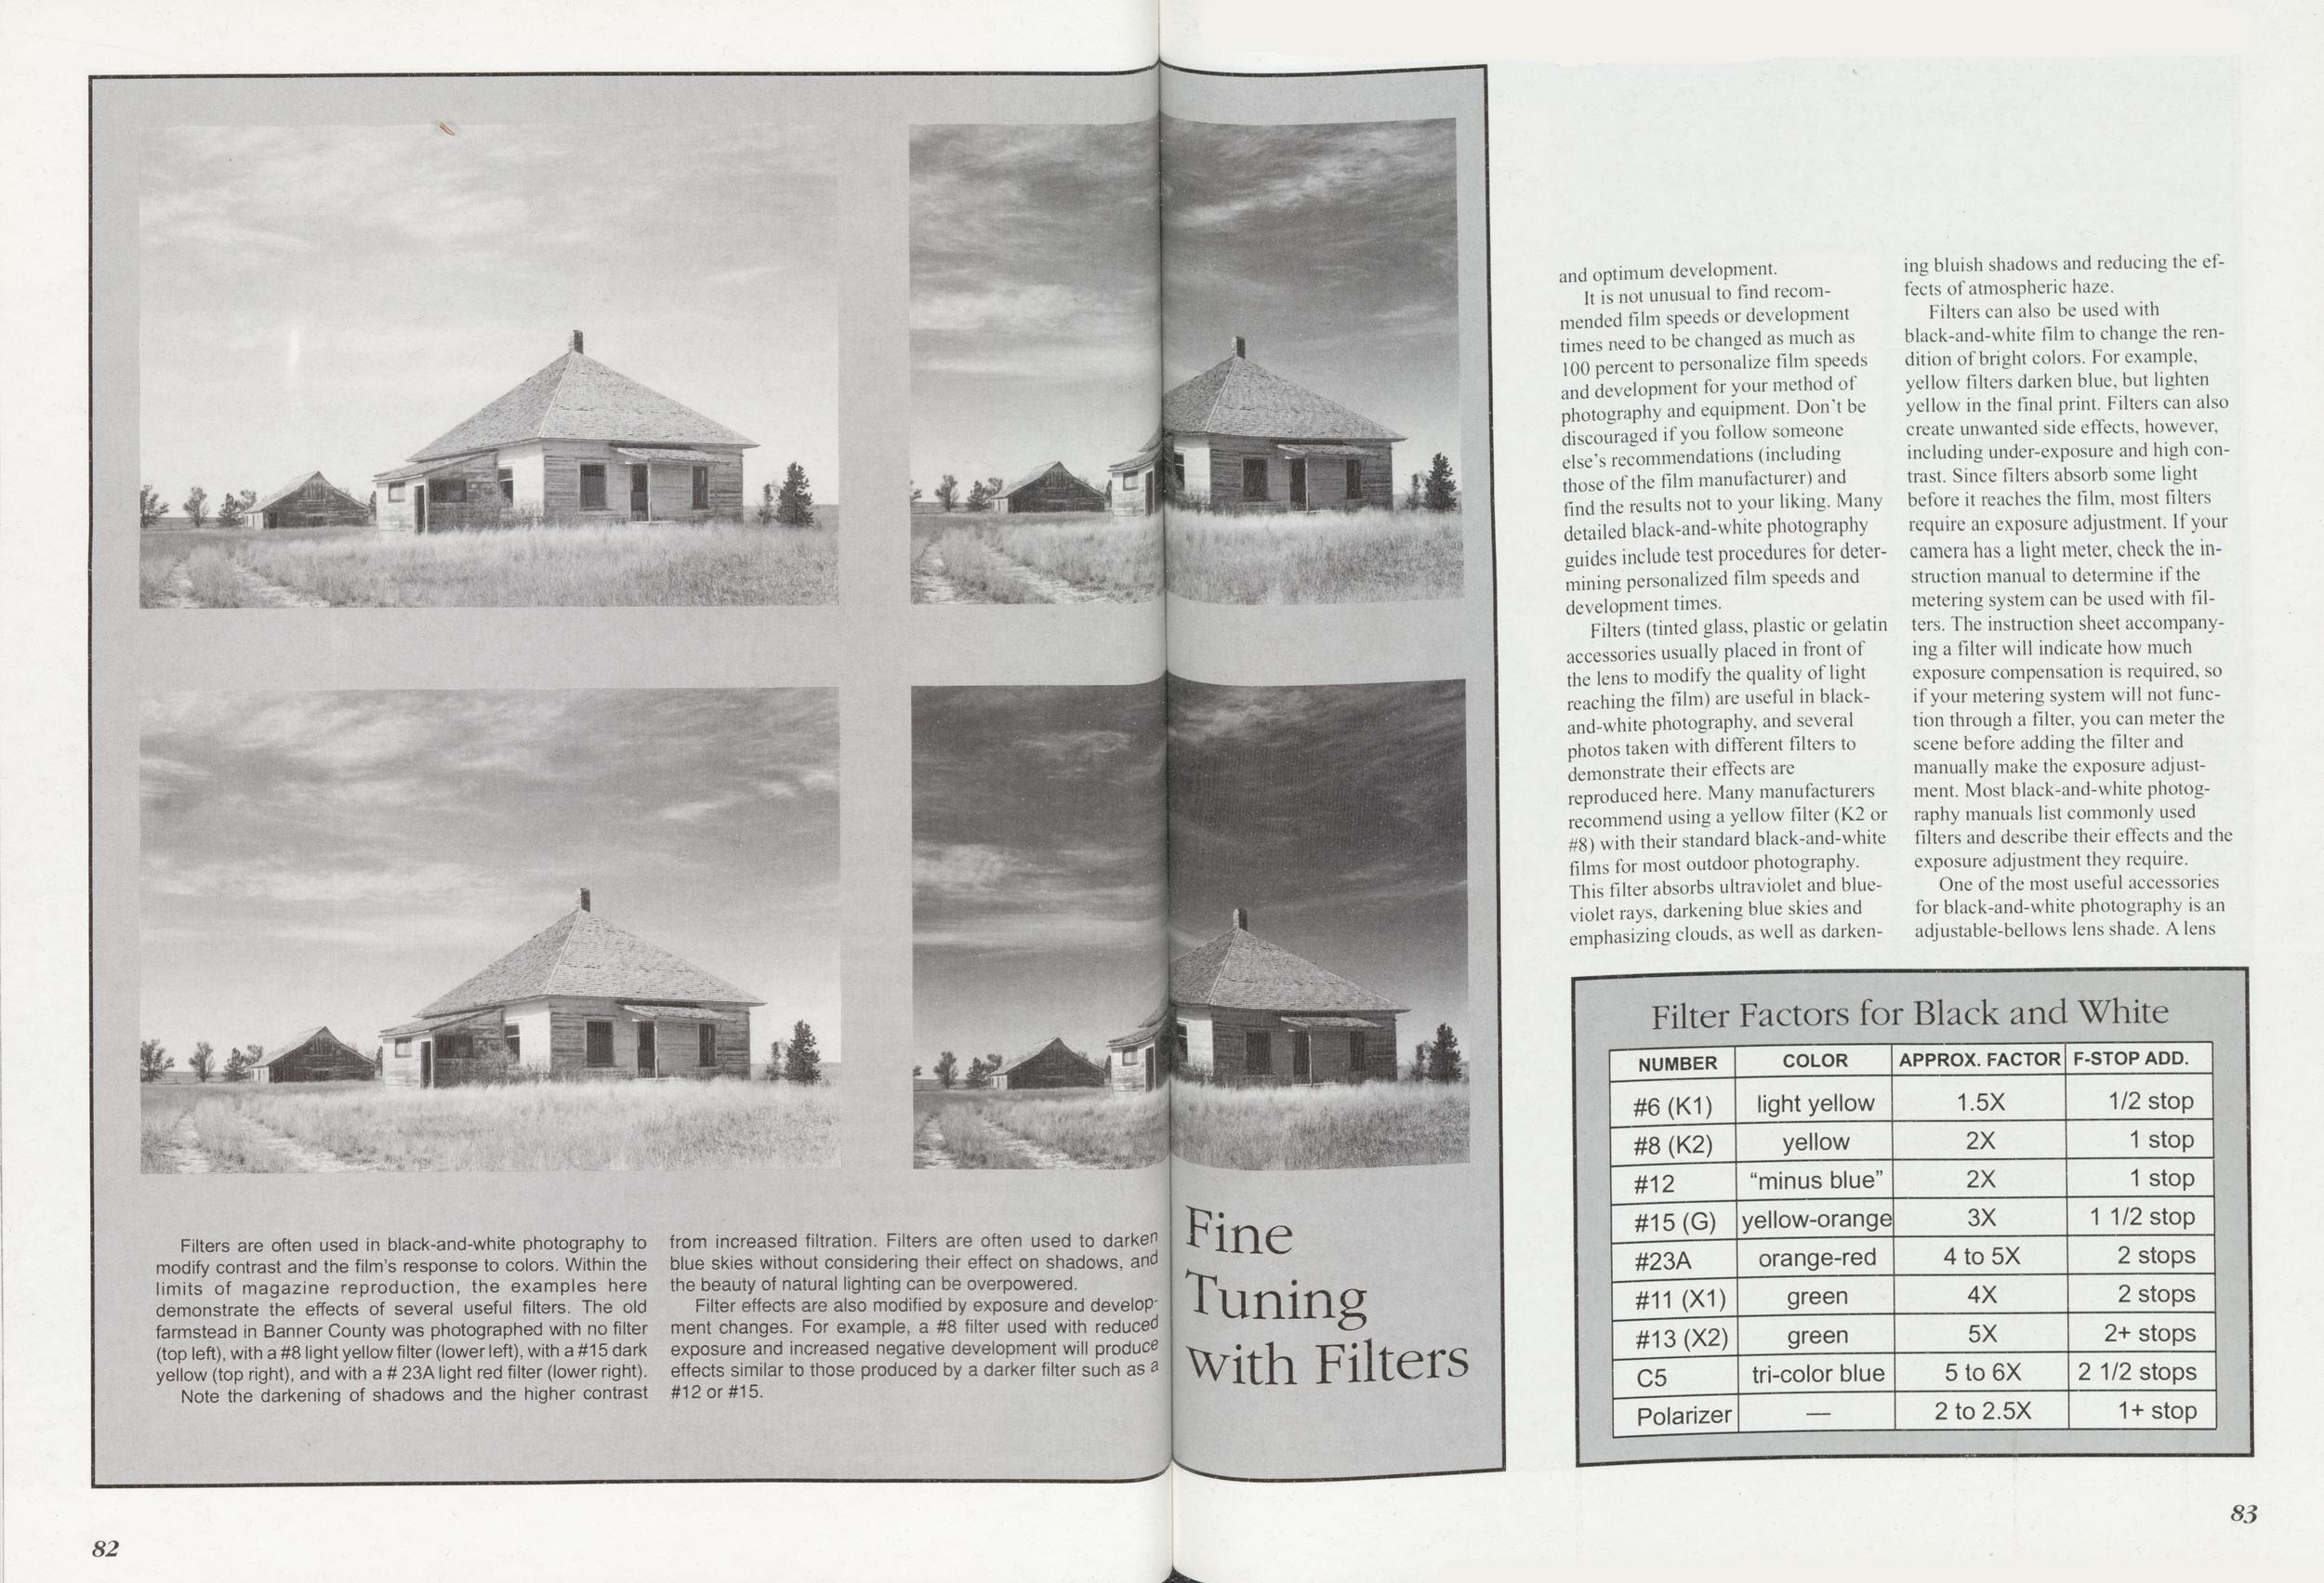
Fine Tuning With Filters
Filters are often used in black-and-white photography to modify contrast and the film's response to colors. Within the limits of magazine reproduction, the examples here demonstrate the effects of several useful filters. The old farmstead in Banner County was photographed with no filter (top left), with a #8 light yellowfilter (lower left), with a #15 dark yellow (top right), and with a # 23A light red filter (lower right).
Note the darkening of shadows and the higher contrast from increased filtration. Filters are often used to darken blue skies without considering their effect on shadows, and the beauty of natural lighting can be overpowered.
Filter effects are also modified by exposure and develop' ment changes. For example, a #8 filter used with reduced exposure and increased negative development will produce effects similar to those produced by a darker filter such as #12 or #15.
and optimum development.
It is not unusual to find recommended film speeds or development times need to be changed as much as 100 percent to personalize film speeds and development for your method of photography and equipment. Don't be discouraged if you follow someone else's recommendations (including those of the film manufacturer) and find the results not to your liking. Many detailed black-and-white photography guides include test procedures for determining personalized film speeds and development times.
Filters (tinted glass, plastic or gelatin accessories usually placed in front of the lens to modify the quality of light reaching the film) are useful in black-and-white photography, and several photos taken with different filters to demonstrate their effects are reproduced here. Many manufacturers recommend using a yellow filter (K2 or #8) with their standard black-and-white films for most outdoor photography. This filter absorbs ultraviolet and blueviolet rays, darkening blue skies and emphasizing clouds, as well as darkening bluish shadows and reducing the effects of atmospheric haze.
Filters can also be used with black-and-white film to change the rendition of bright colors. For example, yellow filters darken blue, but lighten yellow in the final print. Filters can also create unwanted side effects, however, including under-exposure and high contrast. Since filters absorb some light before it reaches the film, most filters require an exposure adjustment. If your camera has a light meter, check the instruction manual to determine if the metering system can be used with filters. The instruction sheet accompanying a filter will indicate how much exposure compensation is required, so if your metering system will not function through a filter, you can meter the scene before adding the filter and manually make the exposure adjustment. Most black-and-white photography manuals list commonly used filters and describe their effects and the exposure adjustment they require.
One of the most useful accessories for black-and-white photography is an adjustable-bellows lens shade. A lens
Filter Factors for Black and White NUMBER COLOR APPROX. FACTOR F-STOP ADD. #6(K1) light yellow 1.5X 1/2 stop #8 (K2) yellow 2X 1 stop #12 "minus blue" 2X 1 stop #15 (G) yellow-orange 3X 1 1/2 stop #23A orange-red 4to5X 2 stops #11 (X1) green 4X 2 stops #13 (X2) green 5X 2+ stops C5 tri-color blue 5lo6X 2 1/2 stops Polarizer — 2 to 2.5X 1 + stop 82 83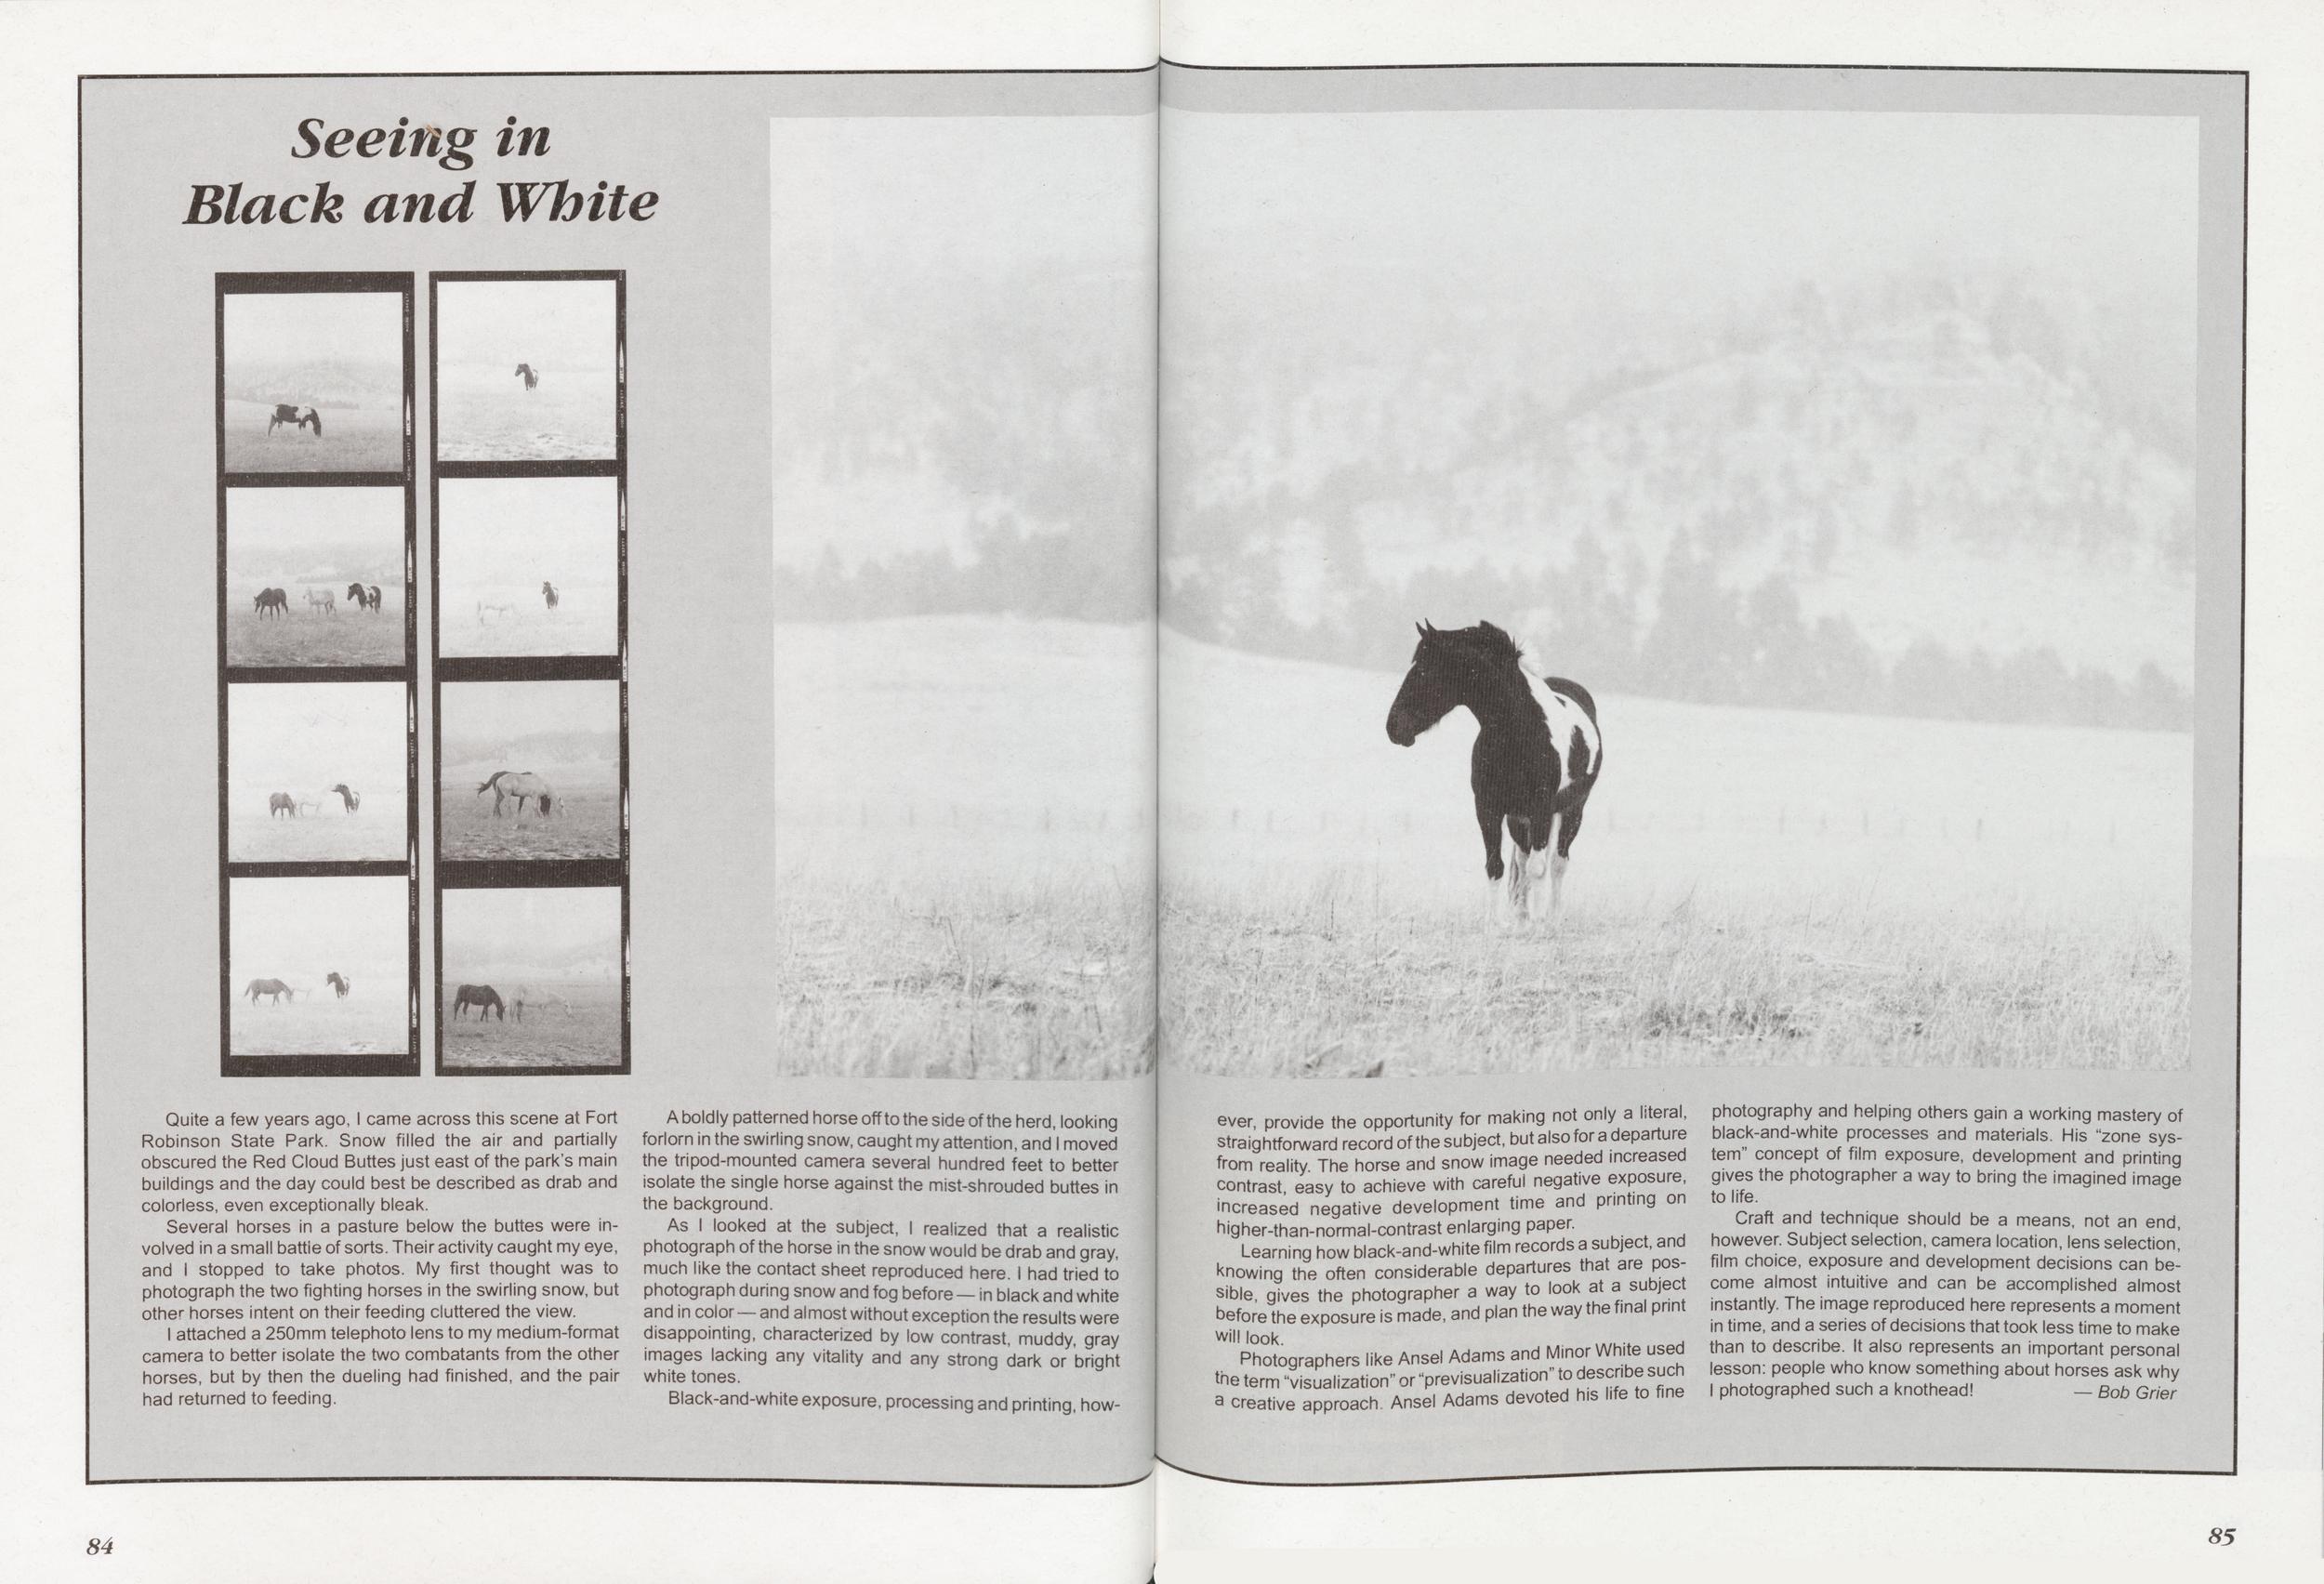
Seeing in Black and White
Quite a few years ago, I came across this scene at Fort Robinson State Park. Snow filled the air and partially obscured the Red Cloud Buttes just east of the park's main buildings and the day could best be described as drab and colorless, even exceptionally bleak.
Several horses in a pasture below the buttes were involved in a small battle of sorts. Their activity caught my eye, and I stopped to take photos. My first thought was to photograph the two fighting horses in the swirling snow, but other horses intent on their feeding cluttered the view.
I attached a 250mm telephoto lens to my medium-format camera to better isolate the two combatants from the other horses, but by then the dueling had finished, and the pair had returned to feeding.
A boldly patterned horse offto the side of the herd, looking forlorn in the swirling snow, caught my attention, and I moved the tripod-mounted camera several hundred feet to better isolate the single horse against the mist-shrouded buttes in the background.
As I looked at the subject, I realized that a realistic photograph of the horse in the snow would be drab and gray, much like the contact sheet reproduced here. I had tried to photograph during snow and fog before—in black and white and in color—and almost without exception the results were disappointing, characterized by low contrast, muddy, gray images lacking any vitality and any strong dark or bright white tones.
Black-and-white exposure, processing and printing, however, provide the opportunity for making not only a literal, straightforward record of the subject, but also for a departure from reality The horse and snow image needed increased contrast, easy to achieve with careful negative exposure, increased negative development time and printing on higher-than-normal-contrast enlarging paper.
Learning how black-and-white film records a subject, and knowing the often considerable departures that are possible, gives the photographer a way to look at a subject before the exposure is made, and plan the way the final pnnt will look.
Photographers like Ansel Adams and Minor White used the term "visualization" or "previsualization" to describe such a creative approach. Ansel Adams devoted his life to fine photography and helping others gain a working mastery of black-and-white processes and materials. His "zone system" concept of film exposure, development and printing gives the photographer a way to bring the imagined image to life.
Craft and technique should be a means, not an end, however. Subject selection, camera location, lens selection,' film choice, exposure and development decisions can become almost intuitive and can be accomplished almost instantly. The image reproduced here represents a moment in time, and a series of decisions that took less time to make than to describe. It also represents an important personal lesson: people who know something about horses ask why I photographed such a knothead!
84 85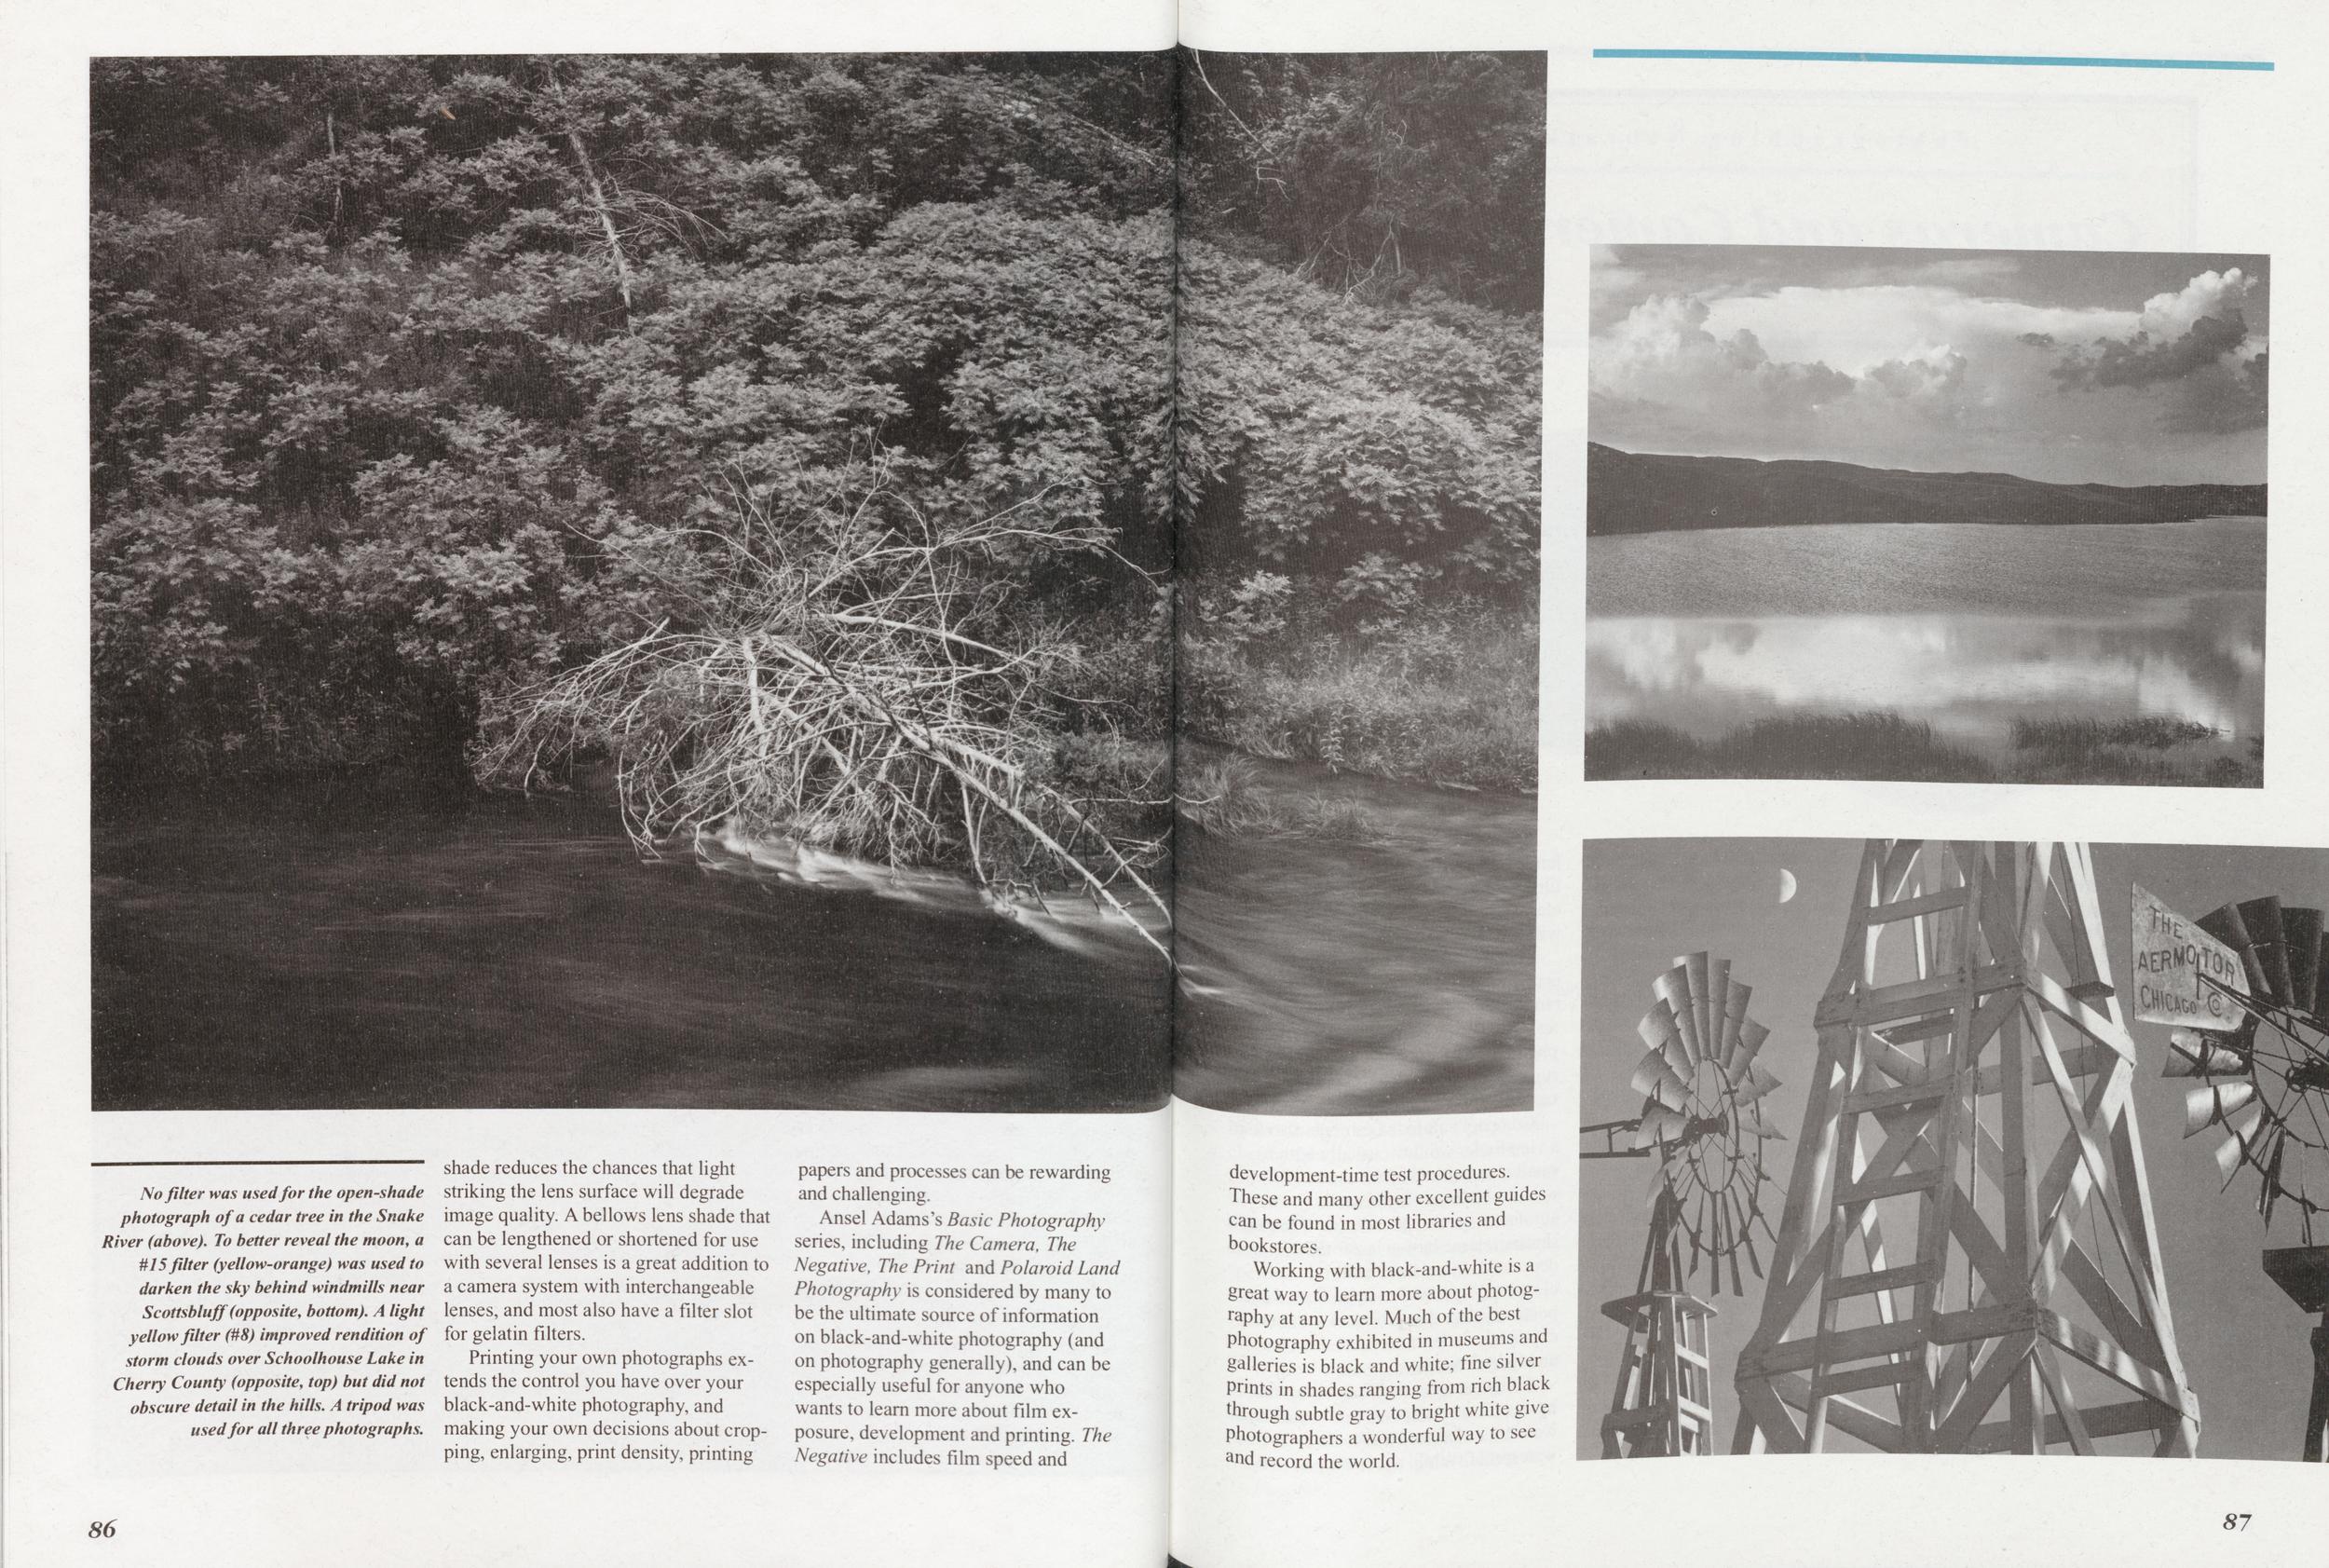
No filter was used for the open-shade photograph of a cedar tree in the Snake River (above). To better reveal the moon, a HI5 filter (yellow-orange) was used to darken the sky behind windmills near Scottsbluff (opposite, bottom). A light yellow filter (#8) improved rendition of storm clouds over Schoolhouse Lake in Cherry County (opposite, top) but did not obscure detail in the hills. A tripod was used for all three photographs.
shade reduces the chances that light striking the lens surface will degrade image quality. A bellows lens shade that can be lengthened or shortened for use with several lenses is a great addition to a camera system with interchangeable lenses, and most also have a filter slot for gelatin filters.
Printing your own photographs extends the control you have over your black-and-white photography, and making your own decisions about cropping, enlarging, print density, printing papers and processes can be rewarding and challenging.
Ansel Adams's Basic Photography series, including The Camera, The Negative, The Print and Polaroid Land Photography is considered by many to be the ultimate source of information on black-and-white photography (and on photography generally), and can be especially useful for anyone who wants to learn more about film exposure, development and printing. The Negative includes film speed and development-time test procedures. These and many other excellent guides can be found in most libraries and bookstores.
Working with black-and-white is a great way to learn more about photography at any level. Much of the best Photography exhibited in museums and galleries is black and white; fine silver Prints in shades ranging from rich black through subtle gray to bright white give Photographers a wonderful way to see and record the world.
86 87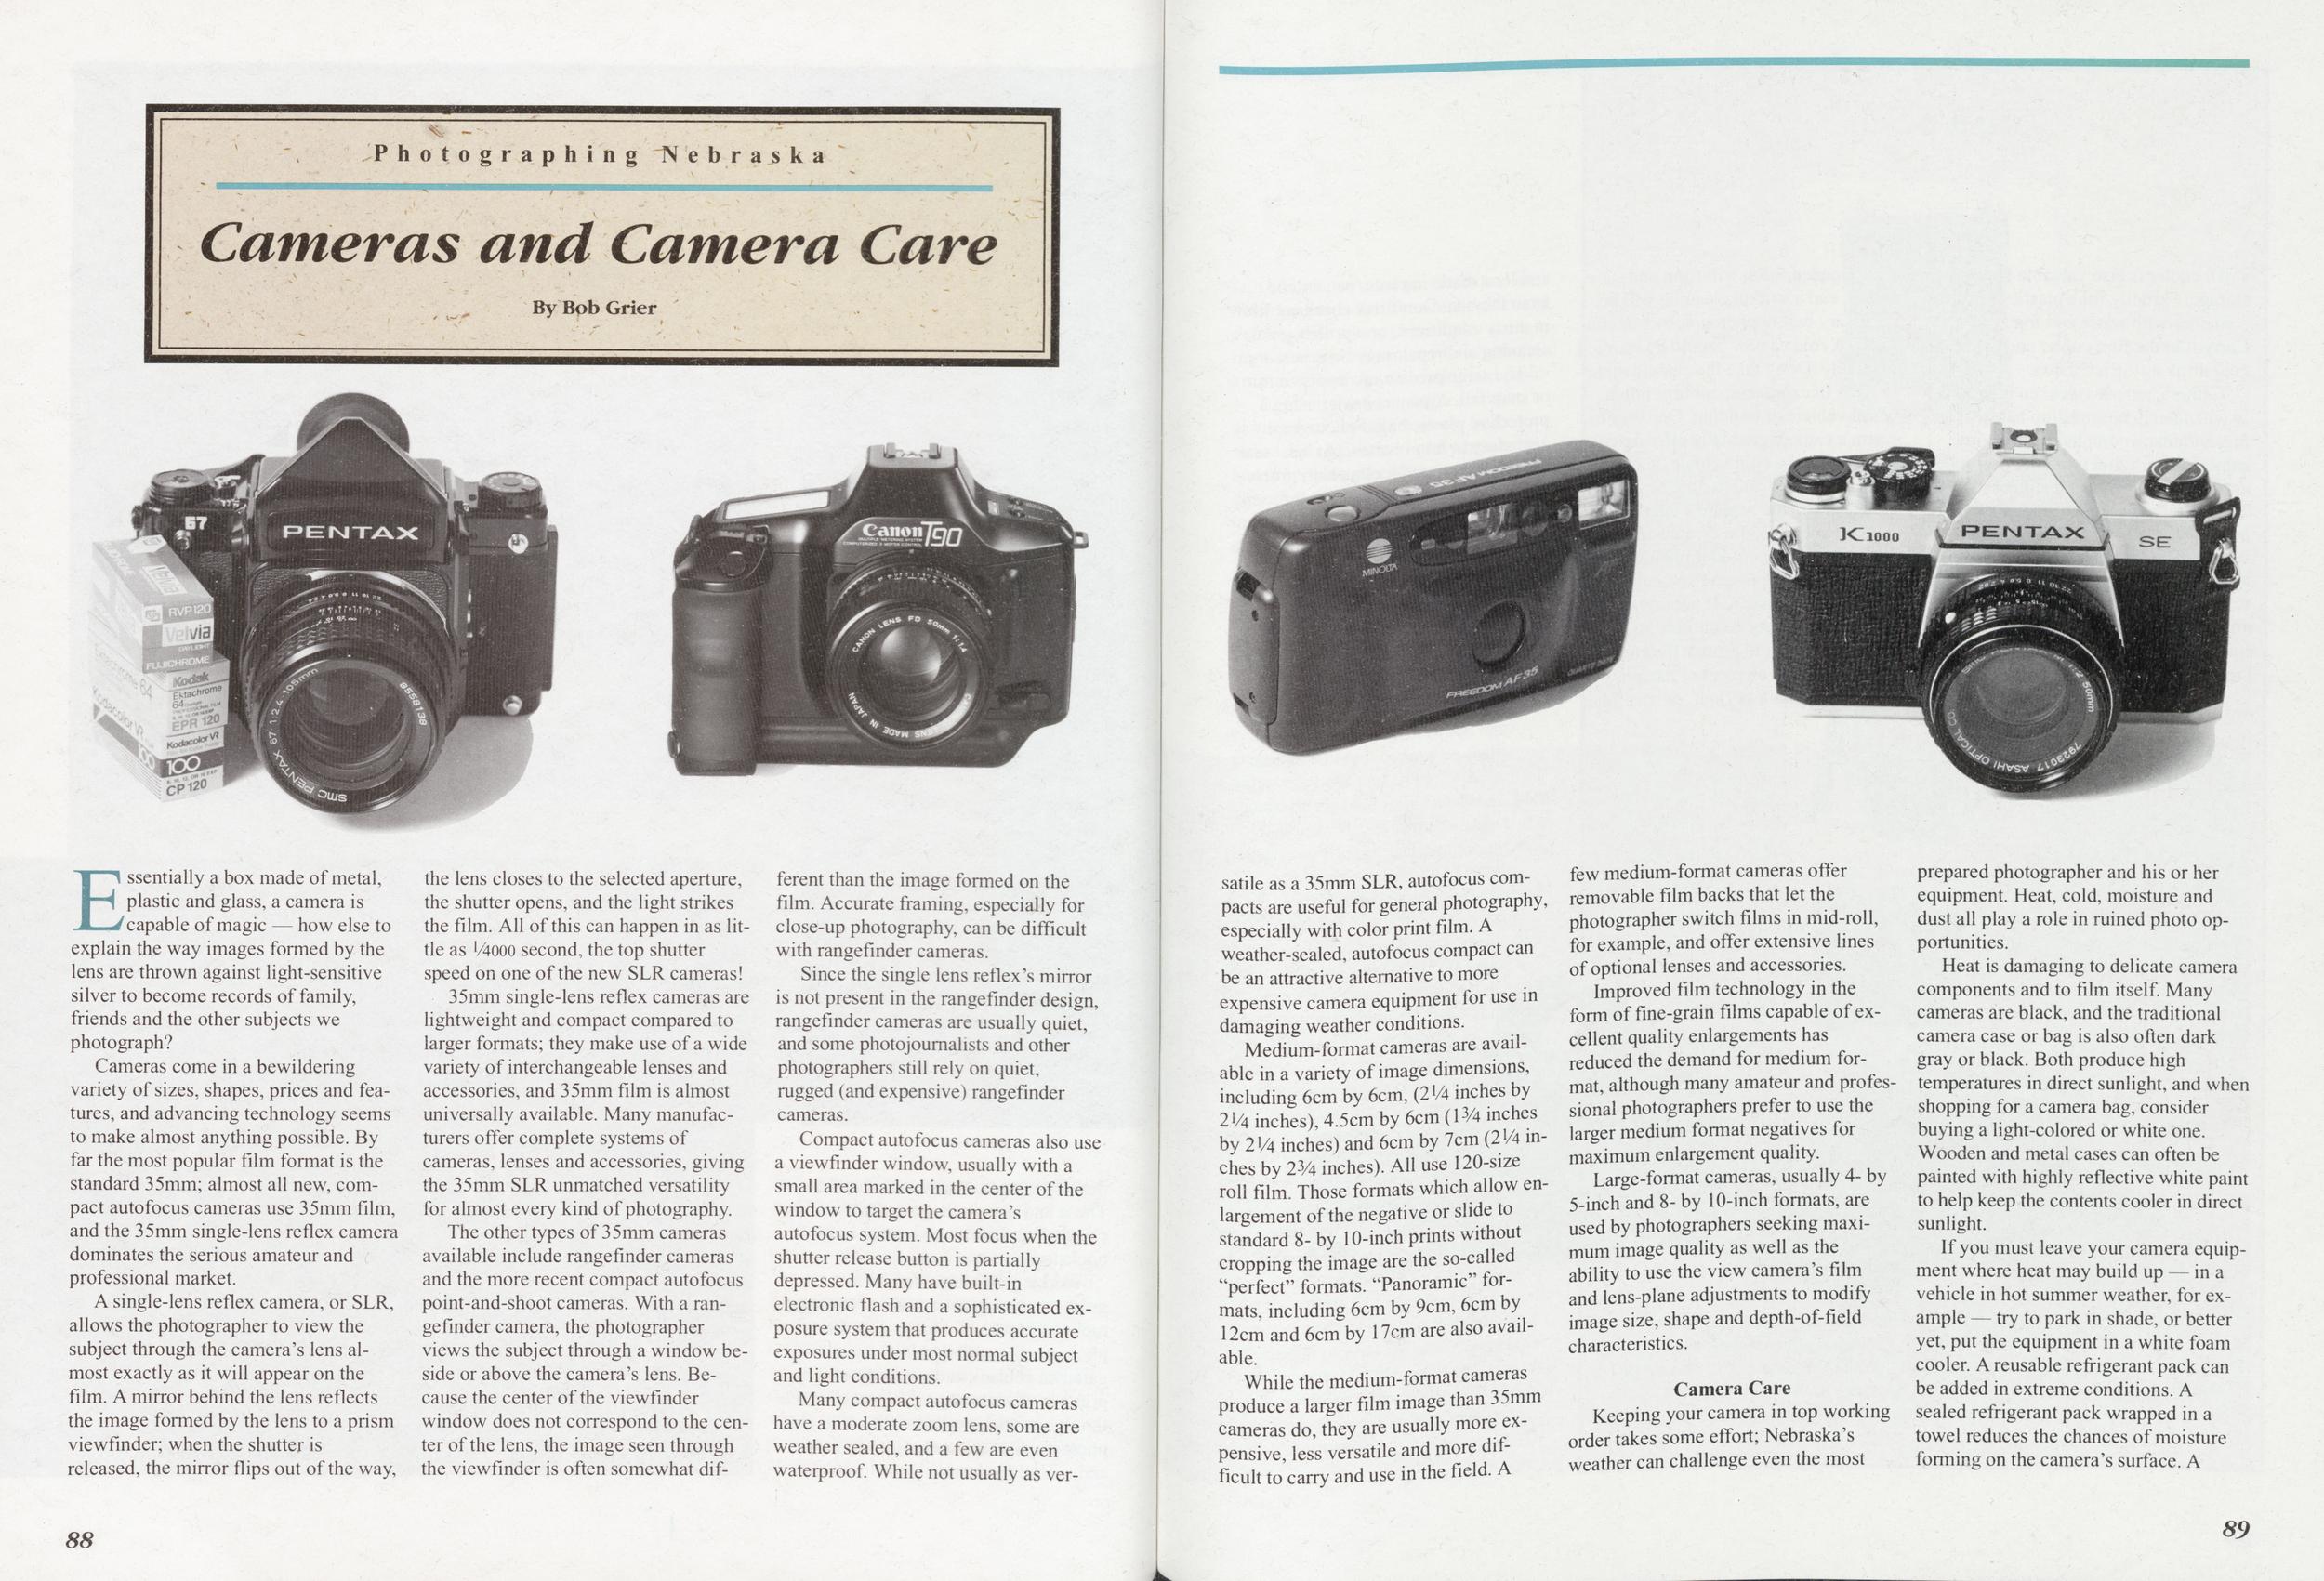
Photographing Nebraska
Cameras and Camera Care
Essentially a box made of metal, plastic and glass, a camera is capable of magic – how else to explain the way images formed by the lens are thrown against light-sensitive silver to become records of family, friends and the other subjects we photograph?
Cameras come in a bewildering variety of sizes, shapes, prices and features, and advancing technology seems to make almost anything possible. By far the most popular film format is the standard 35mm; almost all new, compact auto focus cameras use 35mm film, and the 35mm single-lens reflex camera dominates the serious amateur and professional market.
A single-lens reflex camera, or SLR, allows the photographer to view the subject through the camera's lens almost exactly as it will appear on the film. A mirror behind the lens reflects the image formed by the lens to a prism viewfinder; when the shutter is released, the mirror flips out of the way, the lens closes to the selected aperture, the shutter opens, and the light strikes the film. All of this can happen in as little as V4000 second, the top shutter speed on one of the new SLR cameras!
35mm single-lens reflex cameras are lightweight and compact compared to larger formats; they make use of a wide variety of interchangeable lenses and accessories, and 35mm film is almost universally available. Many manufacturers offer complete systems of cameras, lenses and accessories, giving the 35mm SLR unmatched versatility for almost every kind of photography.
The other types of 35mm cameras available include rangefinder cameras and the more recent compact autofocus point-and-shoot cameras. With a rangefinder camera, the photographer views the subject through a window beside or above the camera's lens. Because the center of the viewfinder window does not correspond to the center of the lens, the image seen through the viewfinder is often somewhat different than the image formed on the film. Accurate framing, especially for close-up photography, can be difficult with rangefinder cameras.
Since the single lens reflex's mirror is not present in the rangefinder design, rangefinder cameras are usually quiet, and some photojournalists and other photographers still rely on quiet, rugged (and expensive) rangefinder cameras.
Compact autofocus cameras also use a viewfinder window, usually with a small area marked in the center of the window to target the camera's autofocus system. Most focus when the shutter release button is partially depressed. Many have built-in electronic flash and a sophisticated exposure system that produces accurate exposures under most normal subject and light conditions.
Many compact autofocus cameras have a moderate zoom lens, some are weather sealed, and a few are even waterproof. While not usually as versatile as a 35mm SLR, autofocus compacts are useful for general photography, especially with color print film. A weather-sealed, autofocus compact can be an attractive alternative to more expensive camera equipment for use in damaging weather conditions.
Medium-format cameras are available in a variety of image dimensions, including 6cm by 6cm, (21/4 inches by 21/4 inches), 4.5cm by 6cm (1% inches by 21/4 inches) and 6cm by 7cm (23/4 inches by 23/4 inches). All use 120-size roll film. Those formats which allow enlargement of the negative or slide to standard 8- by 10-inch prints without cropping the image are the so-called "perfect" formats. "Panoramic" formats, including 6cm by 9cm, 6cm by 12cm and 6cm by 17cm are also available.
While the medium-format cameras produce a larger film image than 35mm cameras do, they are usually more expensive, less versatile and more difficult to carry and use in the field. few medium-format cameras offer removable film backs that let the photographer switch films in mid-roll, for example, and offer extensive lines of optional lenses and accessories.
Improved film technology in the form of fine-grain films capable of excellent quality enlargements has reduced the demand for medium format, although many amateur and professional photographers prefer to use the larger medium format negatives for maximum enlargement quality.
Large-format cameras, usually 4- by 5-inch and 8- by 10-inch formats, are used by photographers seeking maximum image quality as well as the ability to use the view camera's film and lens-plane adjustments to modify image size, shape and depth-of-field characteristics.
Camera CareKeeping your camera in top working order takes some effort; Nebraska's weather can challenge even the most prepared photographer and his or her equipment. Heat, cold, moisture and dust all play a role in ruined photo opportunities.
Heat is damaging to delicate camera components and to film itself. Many cameras are black, and the traditional camera case or bag is also often dark gray or black. Both produce high temperatures in direct sunlight, and when shopping for a camera bag, consider buying a light-colored or white one. Wooden and metal cases can often be painted with highly reflective white paint to help keep the contents cooler in direct sunlight.
If you must leave your camera equipment where heat may build up - in a
vehicle in hot summer weather, for example — try to park in shade, or better
yet, put the equipment in a white foam
cooler. A reusable refrigerant pack can
be added in extreme conditions. A
sealed refrigerant pack wrapped in a
towel reduces the chances of moisture
forming on the camera's surface. A
88 89
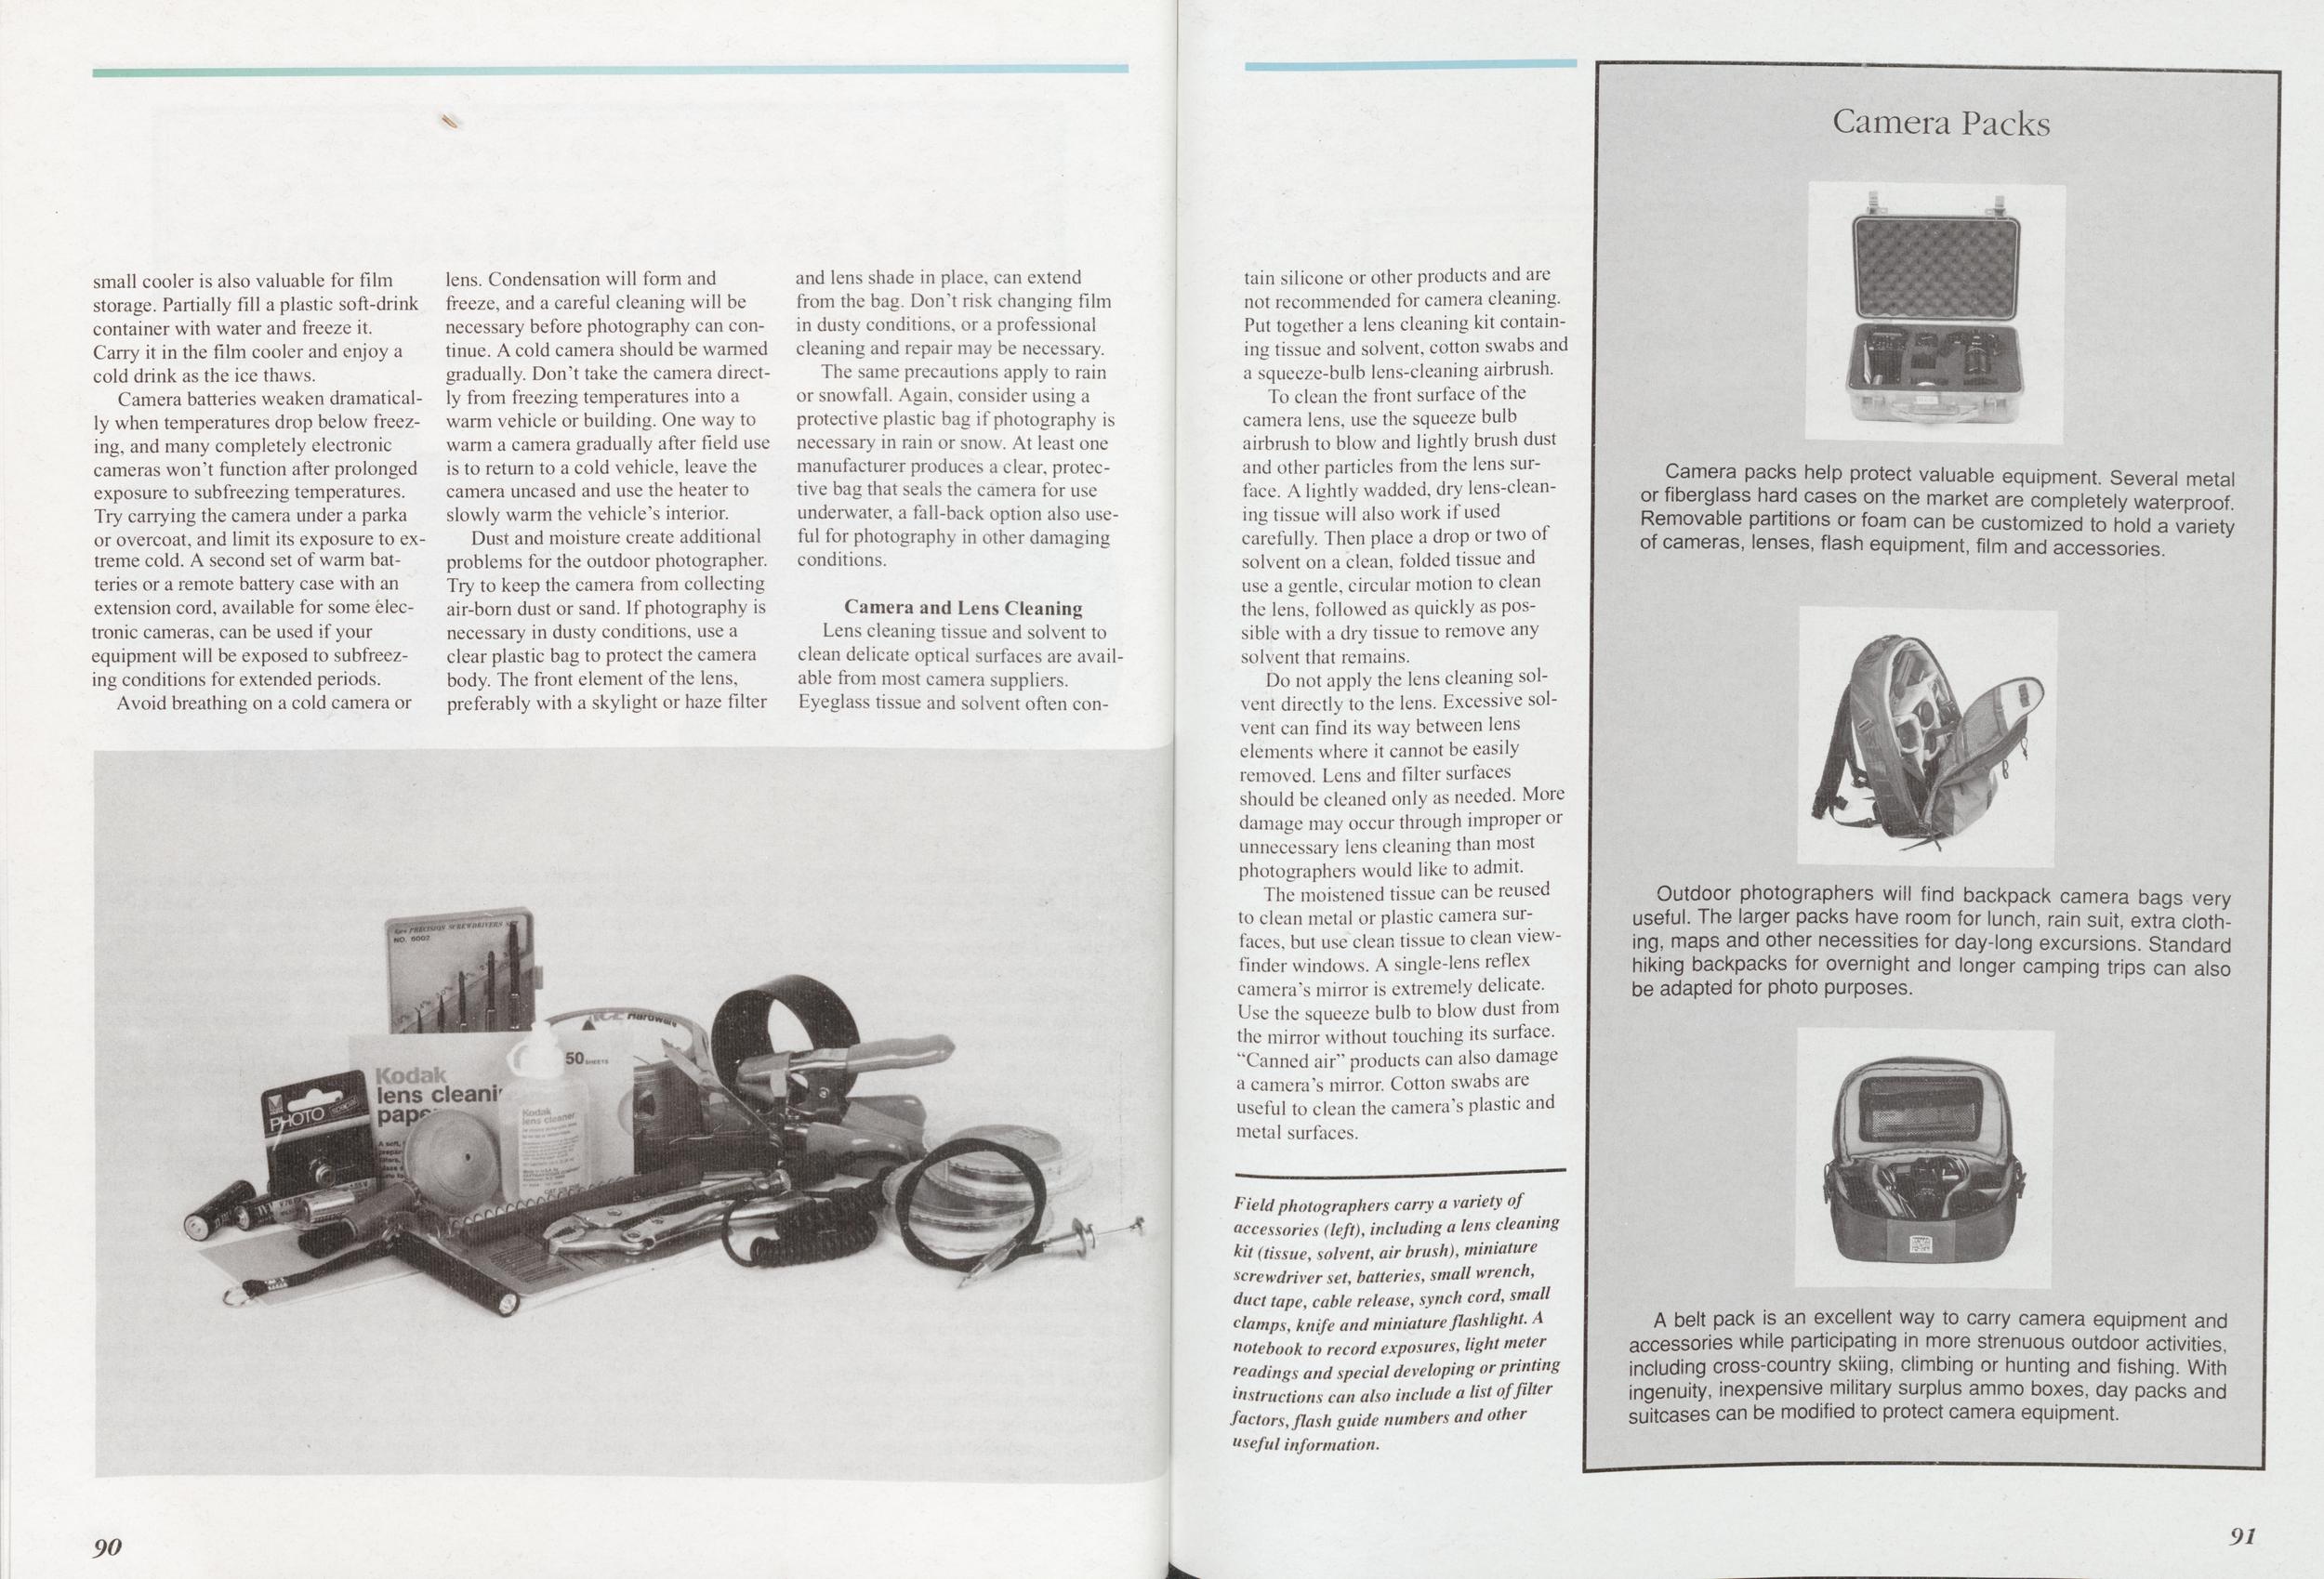 small cooler is also valuable for film
storage. Partially fill a plastic soft-drink
container with water and freeze it.
Carry it in the film cooler and enjoy a
cold drink as the ice thaws.
small cooler is also valuable for film
storage. Partially fill a plastic soft-drink
container with water and freeze it.
Carry it in the film cooler and enjoy a
cold drink as the ice thaws.
Camera batteries weaken dramatically when temperatures drop below freezing, and many completely electronic cameras won't function after prolonged exposure to subfreezing temperatures. Try carrying the camera under a parka or overcoat, and limit its exposure to extreme cold. A second set of warm batteries or a remote battery case with an extension cord, available for some electronic cameras, can be used if your equipment will be exposed to subfreezing conditions for extended periods.
Avoid breathing on a cold camera or lens. Condensation will form and freeze, and a careful cleaning will be necessary before photography can continue. A cold camera should be warmed gradually. Don't take the camera directly from freezing temperatures into a warm vehicle or building. One way to warm a camera gradually after field use is to return to a cold vehicle, leave the camera uncased and use the heater to slowly warm the vehicle's interior.
Dust and moisture create additional problems for the outdoor photographer. Try to keep the camera from collecting air-born dust or sand. If photography is necessary in dusty conditions, use a clear plastic bag to protect the camera body. The front element of the lens, preferably with a skylight or haze filter and lens shade in place, can extend from the bag. Don't risk changing film in dusty conditions, or a professional cleaning and repair may be necessary.
The same precautions apply to rain or snowfall. Again, consider using a protective plastic bag if photography is necessary in rain or snow. At least one manufacturer produces a clear, protective bag that seals the camera for use underwater, a fall-back option also useful for photography in other damaging conditions.
Camera and Lens CleaningLens cleaning tissue and solvent to clean delicate optical surfaces are available from most camera suppliers. Eyeglass tissue and solvent often contain silicone or other products and are not recommended for camera cleaning. Put together a lens cleaning kit containing tissue and solvent, cotton swabs and a squeeze-bulb lens-cleaning airbrush.
To clean the front surface of the camera lens, use the squeeze bulb airbrush to blow and lightly brush dust and other particles from the lens surface. A lightly wadded, dry lens-cleaning tissue will also work if used carefully. Then place a drop or two of solvent on a clean, folded tissue and use a gentle, circular motion to clean the lens, followed as quickly as possible with a dry tissue to remove any solvent that remains.
Do not apply the lens cleaning solvent directly to the lens. Excessive solvent can find its way between lens elements where it cannot be easily removed. Lens and filter surfaces should be cleaned only as needed. More damage may occur through improper or unnecessary lens cleaning than most photographers would like to admit.
The moistened tissue can be reused to clean metal or plastic camera surfaces, but use clean tissue to clean viewfinder windows. A single-lens reflex camera's minor is extremely delicate. Use the squeeze bulb to blow dust from the mirror without touching its surface. "Canned air" products can also damage a camera's mirror. Cotton swabs are useful to clean the camera's plastic and metal surfaces.
Field photographers carry a variety of accessories (left), including a lens cleaning kit (tissue, solvent, air brush), miniature screwdriver set, batteries, small wrench, duct tape, cable release, synch cord, small damps, knife and miniature flashlight. A notebook to record exposures, light meter readings and special developing or printing instructions can also include a list of filter factors, flash guide numbers and other useful information.
Camera Packs
Camera packs help protect valuable equipment. Several metal or fiberglass hard cases on the market are completely waterproof. Removable partitions or foam can be customized to hold a variety of cameras, lenses, flash equipment, film and accessories.
Outdoor photographers will find backpack camera bags very useful. The larger packs have room for lunch, rain suit, extra clothing, maps and other necessities for day-long excursions. Standard hiking backpacks for overnight and longer camping trips can also be adapted for photo purposes.
A belt pack is an excellent way to carry camera equipment and accessories while participating in more strenuous outdoor activities, including cross-country skiing, climbing or hunting and fishing. With ingenuity, inexpensive military surplus ammo boxes, day packs and suitcases can be modified to protect camera equipment.
90 91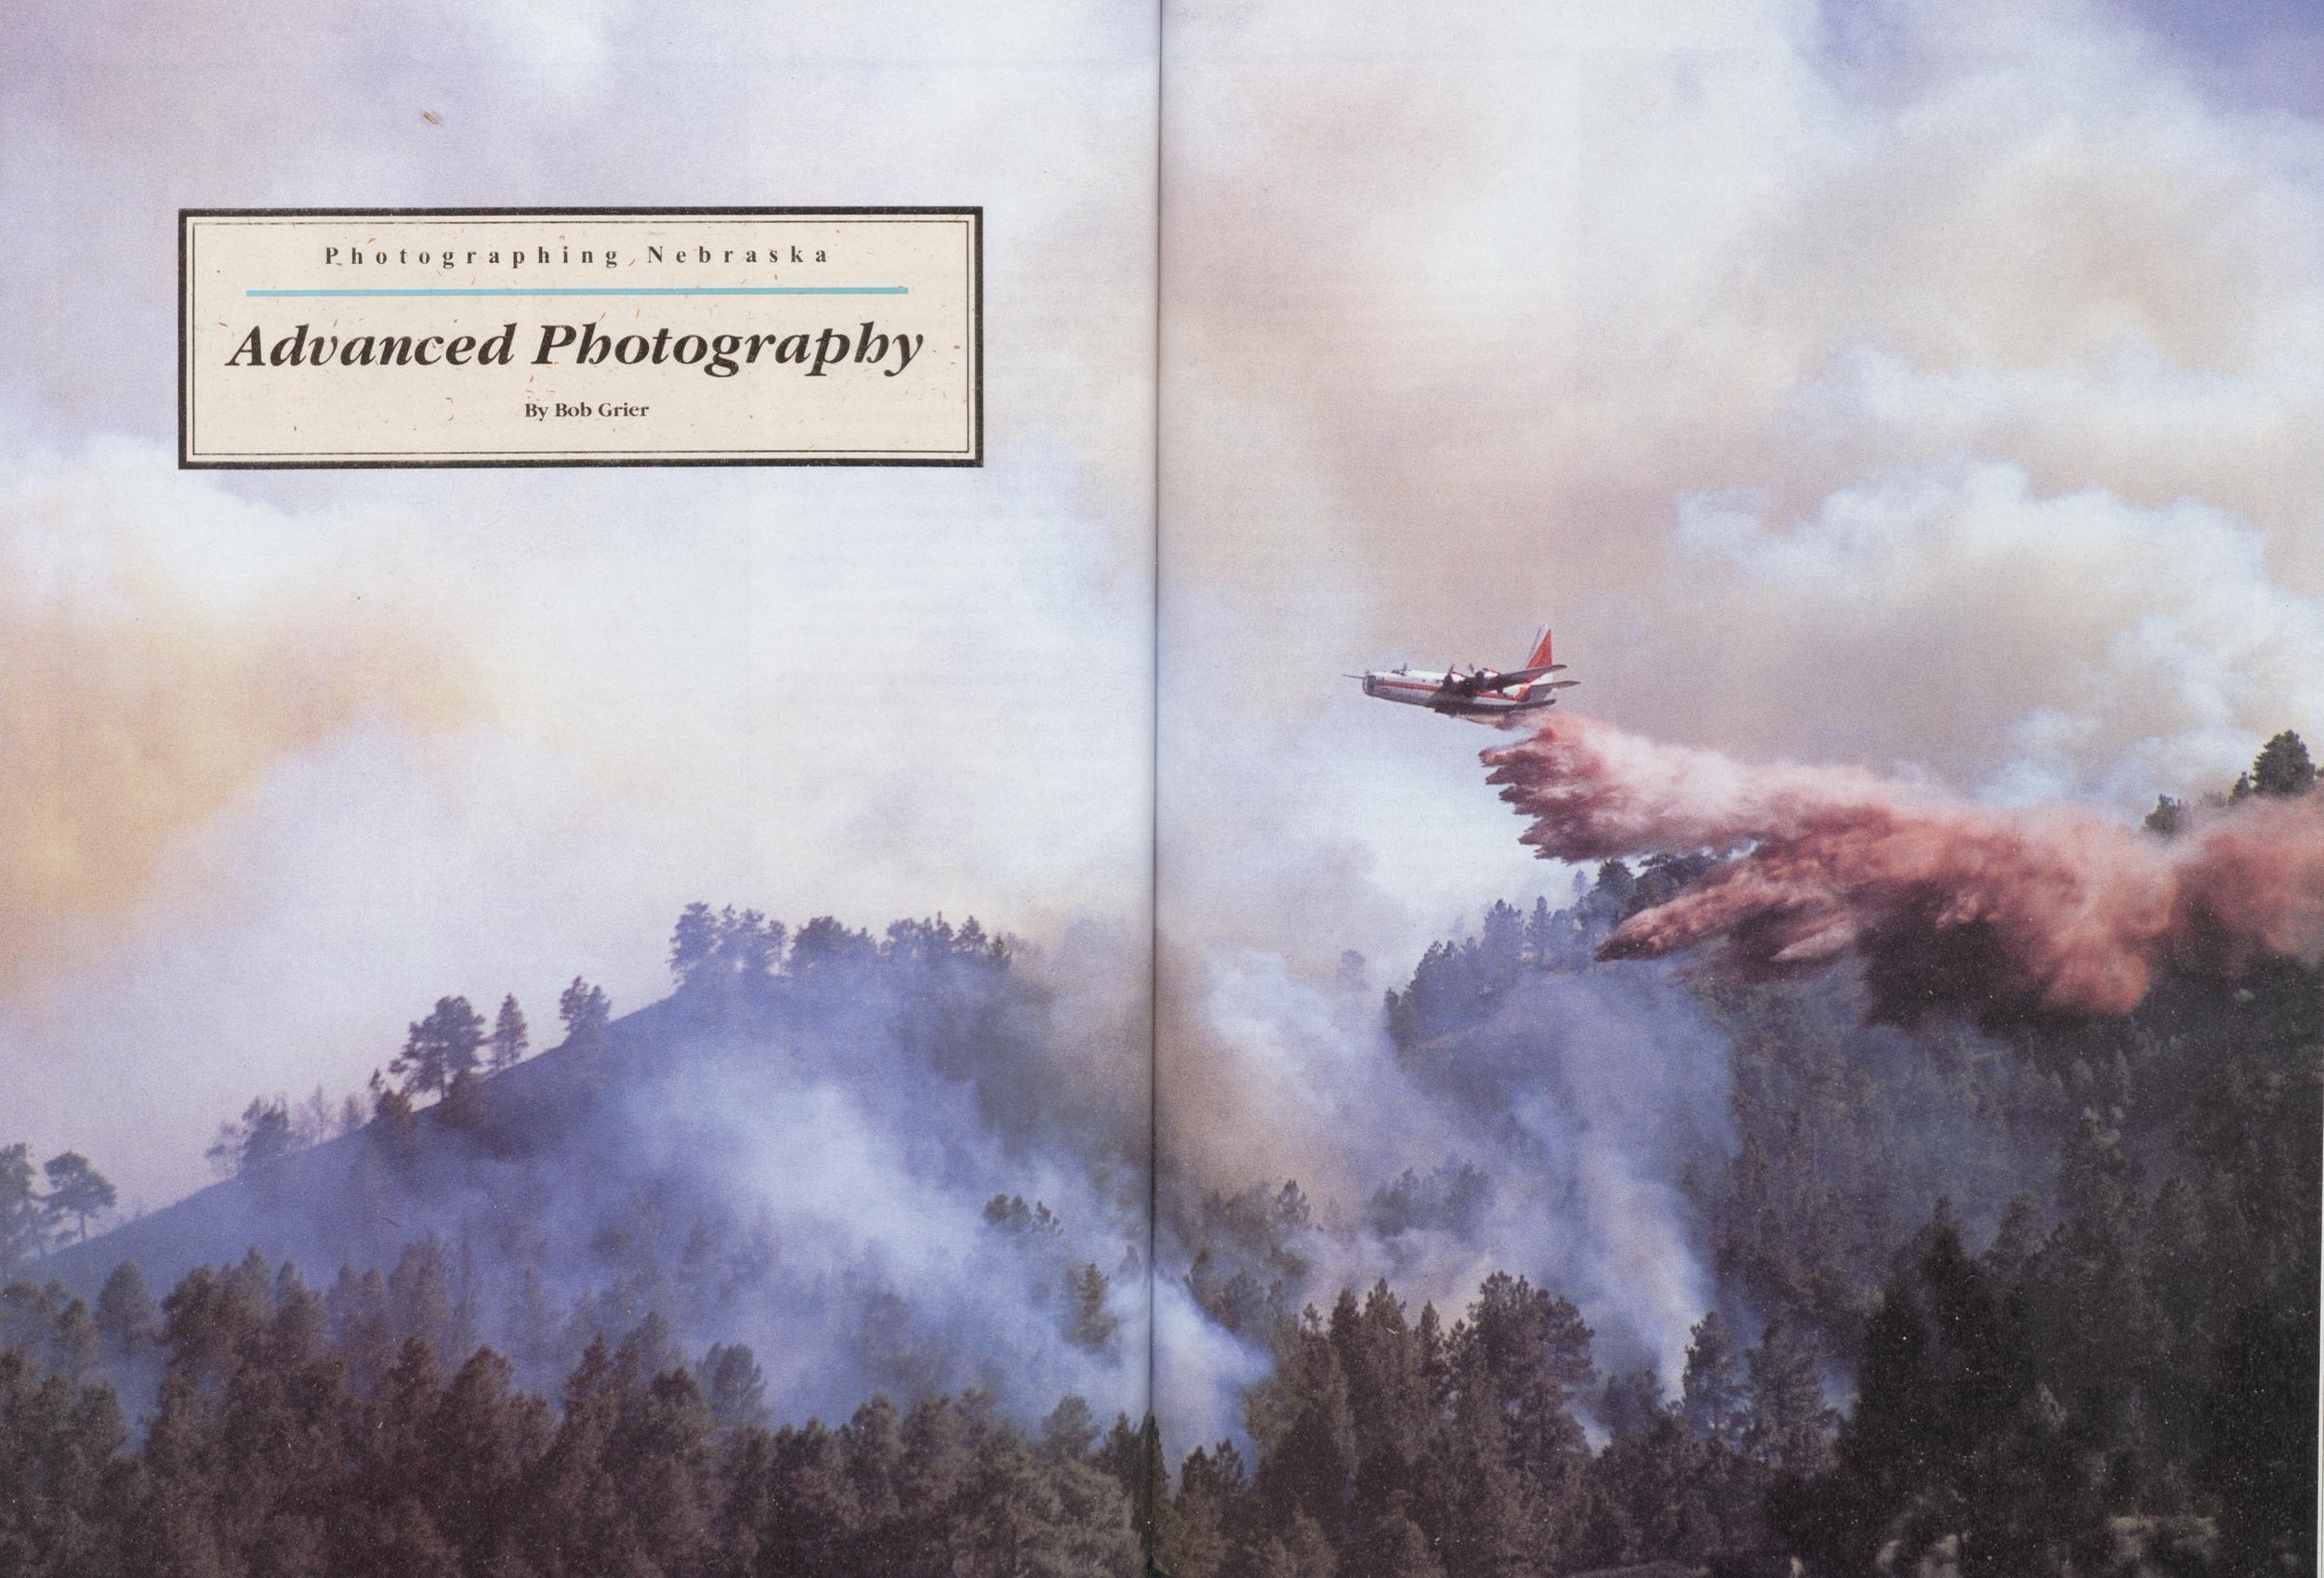
Photographing, Nebraska
Advanced Photography
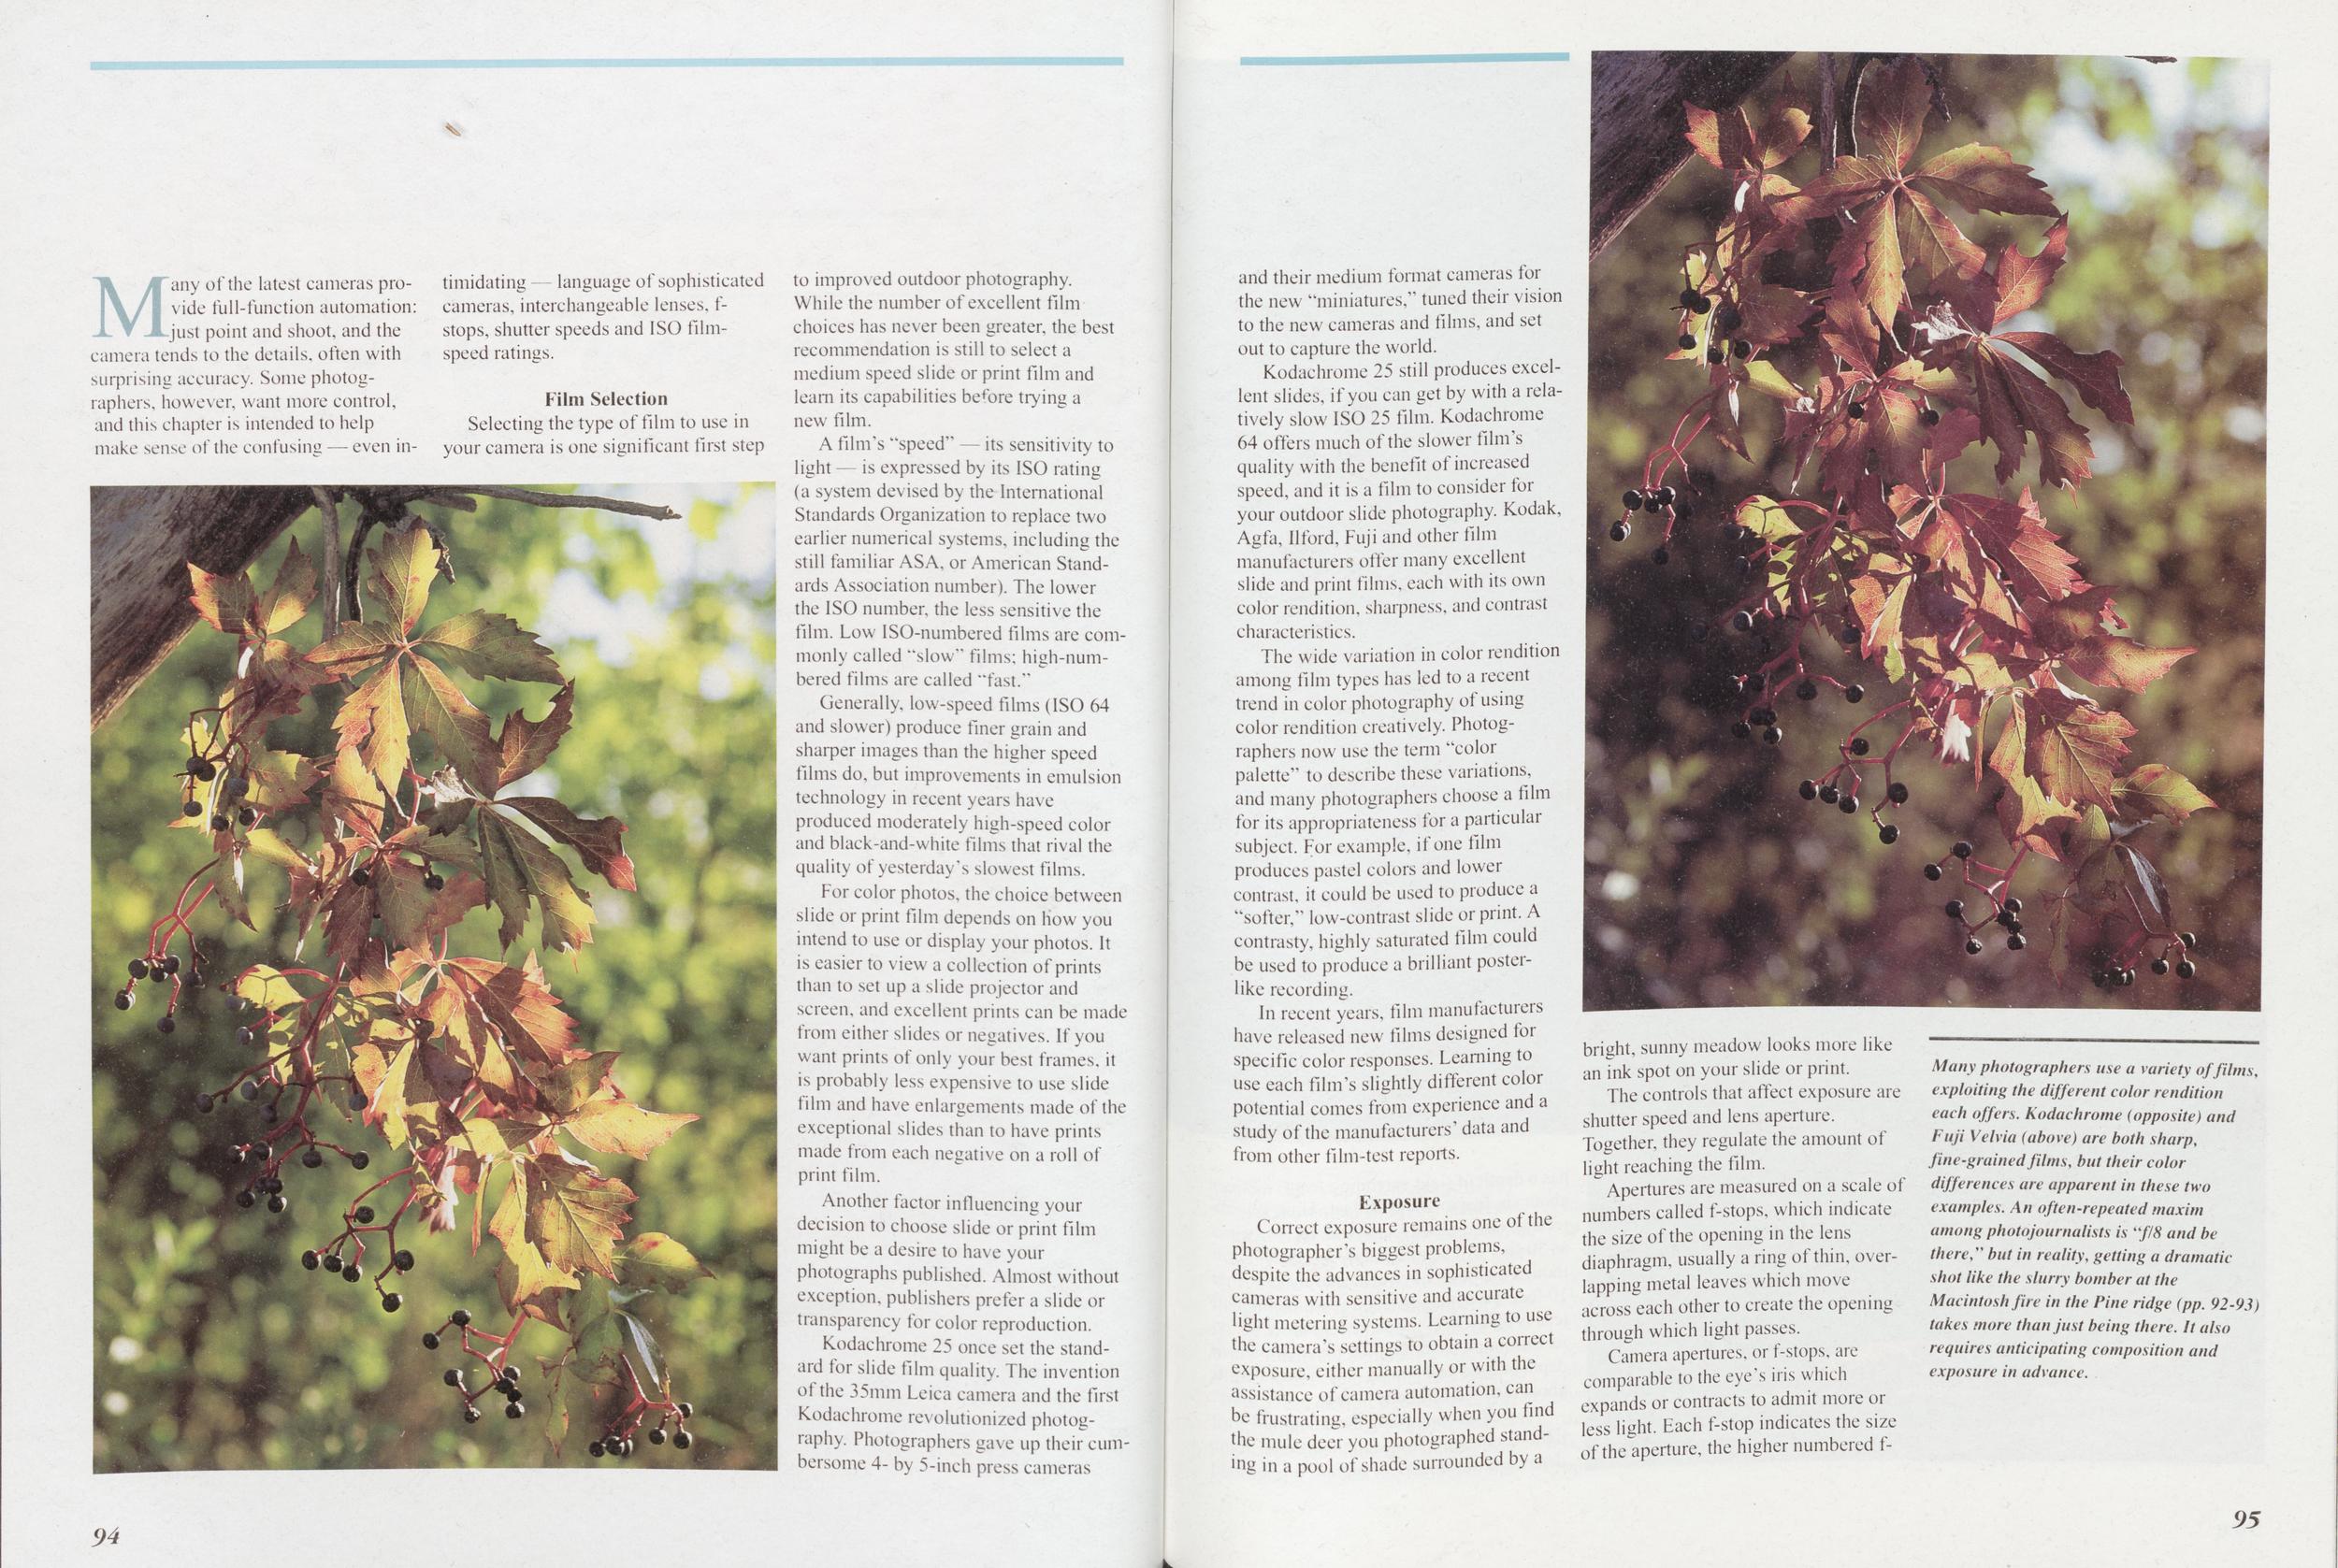
Many of the latest cameras provide full-function automation: just point and shoot, and the camera tends to the details, often with surprising accuracy. Some photographers, however, want more control, and this chapter is intended to help make sense o( the confusing — even intimidating - language of sophisticated cameras, interchangeable lenses, stops, shutter speeds and ISO filmspeed ratings.
Selecting the type of film to use in your camera is one significant first step to improved outdoor photography. While the number of excellent film choices has never been greater, the best recommendation is still to select a medium speed slide or print film and learn its capabilities before trying a new film.
A film's "speed" its sensitivity to light is expressed by its ISO rating (a system devised by the International Standards Organization to replace two earlier numerical systems, including the still familiar ASA, or American Standards Association number). The lower the ISO number, the less sensitive the film. Low ISO-numbered films are commonly called "slow" films: high-numbered films are called "fast."
Generally, low-speed films (ISO 64 and slower) produce finer grain and sharper images than the higher speed films do, but improvements in emulsion technology in recent years have produced moderately high-speed color and black-and-white films that rival the quality of yesterday's slowest films.
For color photos, the choice between slide or print film depends on how you intend to use or display your photos. It is easier to view a collection of prints than to set up a slide projector and screen, and excellent prints can be made from either slides or negatives. If you want prints of only your best frames, it is probably less expensive to use slide film and have enlargements made of the exceptional slides than to have prints made from each negative on a roll iA print film.
Another factor influencing your decision to choose slide or print film might be a desire to have your photographs published. Almost without exception, publishers prefer a slide or transparency for color reproduction.
Kodachrome 25 once set the standard for slide film quality. The invention of the 35mm Leica camera and the first Kodachrome revolutionized photography. Photographers gave up their cumbersome 4- by 5-inch press cameras
Kodachrome 25 still produces excellent slides, if you can get by with a relatively slow ISO 25 film. Kodachrome 64 offers much of the slower film's quality with the benefit of increased speed, and it is a film to consider for your outdoor slide photography. Kodak, Agfa, Ilford, Fuji and other film manufacturers offer many excellent slide and print films, each with its own color rendition, sharpness, and contrast characteristics.
The wide variation in color rendition among film types has led to a recent trend in color photography of using color rendition creatively. Photographers now use the term "color palette" to describe these variations, and many photographers choose a film for its appropriateness for a particular subject. For example, if one film produces pastel colors and lower contrast, it could be used to produce a "softer," low-contrast slide or print. A contrasty, highly saturated film could be used to produce a brilliant posterlike recording.
In recent years, film manufacturers have released new films designed for specific color responses. Learning to use each film's slightly different color potential comes from experience and a study of the manufacturers' data and from other film-test reports.
ExposureCorrect exposure remains one of the photographer's biggest problems, despite the advances in sophisticated cameras with sensitive and accurate light metering systems. Learning to use the camera's settings to obtain a correct exposure, cither manually or with the assistance of camera automation, can be frustrating, especially when you find the mule deer you photographed standing in a pool of shade surrounded by a bright, sunny meadow looks more like an ink spot on your slide or print.
The controls that affect exposure are shutter speed and lens aperture. Together, they regulate the amount of light reaching the film.
Apertures are measured on a scale of numbers called f-stops, which indicate the size of the opening in the lens diaphragm, usually a ring of thin, overlapping metal leaves which move across each other to create the opening through which light passes.
Many photographers use a variety of films, exploiting the different color rendition each offers. Kodachrome (opposite) and Fuji Velvia (above) are both sharp, fine-grained films, but their color differences are apparent in these two examples. An often-repeated maxim among photojournalists is "f/8 and be there," but in reality, getting a dramatic shot like the slurry bomber at the Macintosh fire in the Pine ridge (pp. 92-93) takes more than just being there. It also requires anticipating composition and exposure in advance.
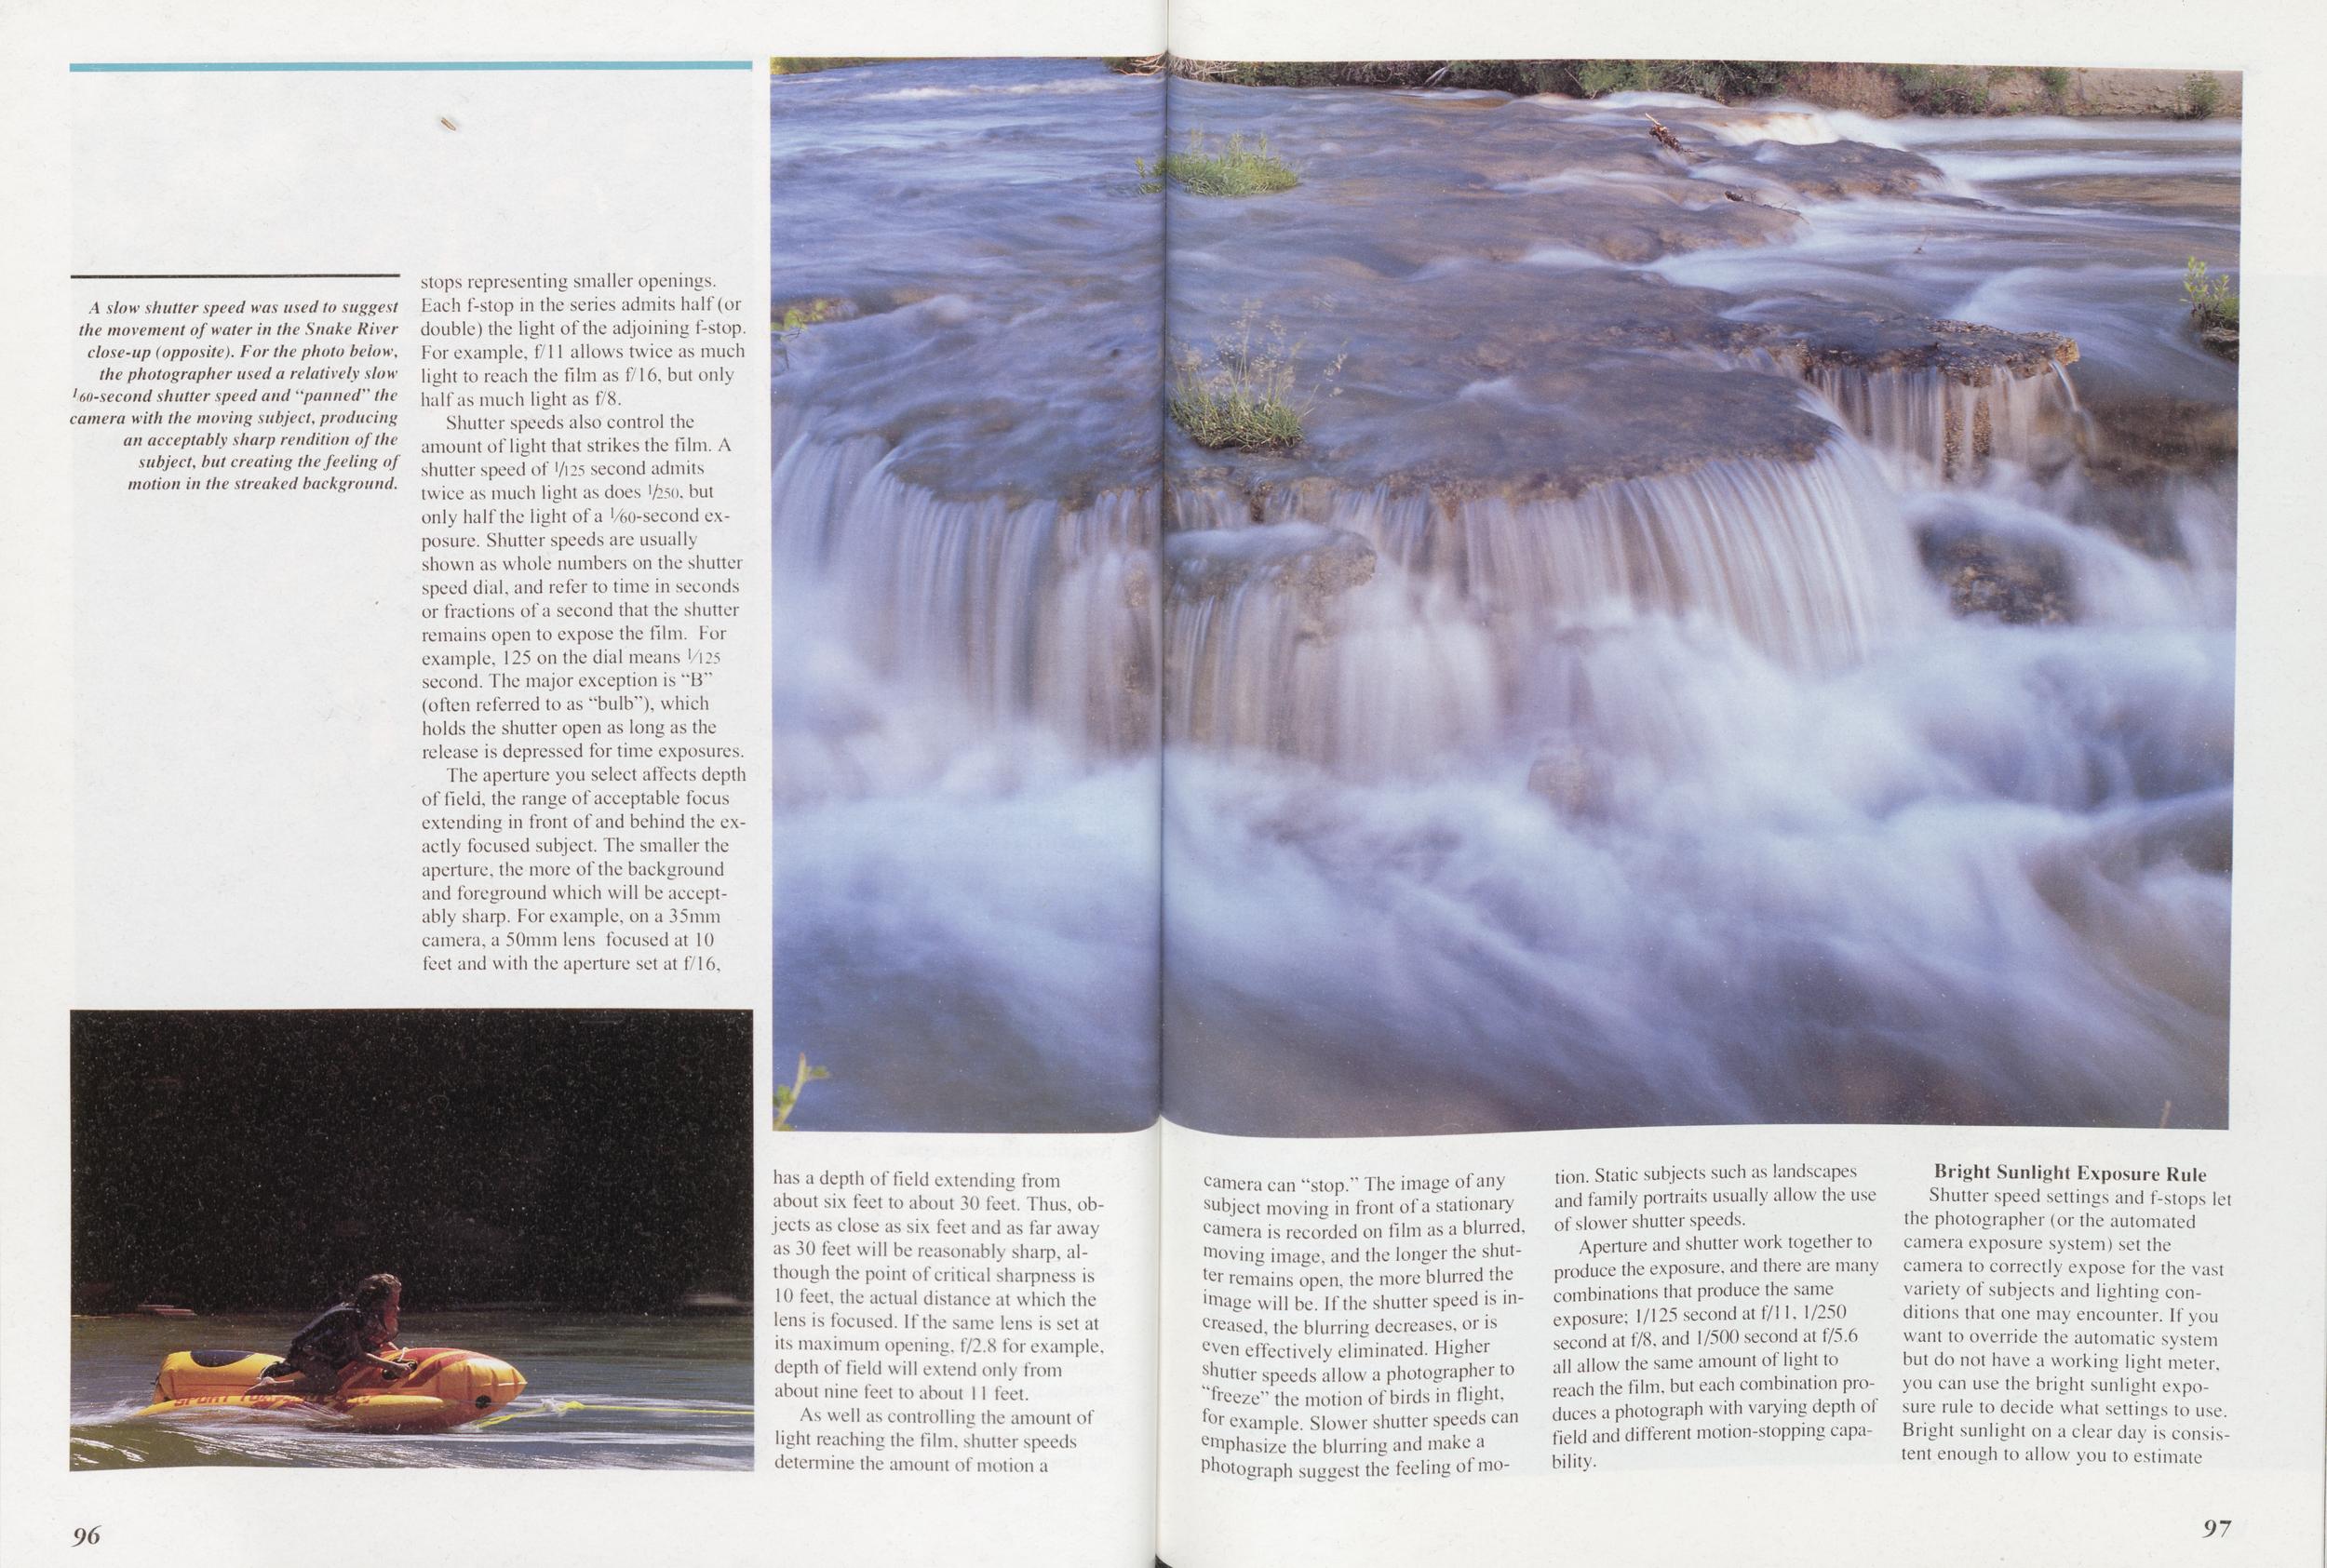
A slow shutter speed was used to suggest the movement of water in the Snake River close-up (opposite). For the photo below, the photographer used a relatively slow l60-second shutter speed and "panned" the camera with the moving subject, producing an acceptably sharp rendition of the subject, but creating the feeling of motion in the streaked background.
Shutter speeds also control the amount of light that strikes the film. A shutter speed of '/i25 second admits twice as much light as does 1/250, but only half the light of a fTo-second exposure. Shutter speeds are usually shown as whole numbers on the shutter speed dial, and refer to time in seconds or fractions of a second that the shutter remains open to expose the film. For example, 125 on the dial means 1/125 second. The major exception is "B" (often referred to as "bulb"), which holds the shutter open as long as the release is depressed for time exposures.
The aperture you select affects depth of field, the range of acceptable focus extending in front of and behind the exactly focused subject. The smaller the aperture, the more of the background and foreground which will be acceptably sharp. For example, on a 35mm camera, a 50mm lens focused at 10 feet and with the aperture set at f/16, has a depth of field extending from about six feet to about 30 feet. Thus, objects as close as six feet and as far away as 30 feet will be reasonably sharp, although the point of critical sharpness is 10 feet, the actual distance at which the lens is focused. If the same lens is set at its maximum opening. 1/2.8 tor example, depth of field will extend only from about nine feet to about 11 feet.
As well as controlling the amount of light reaching the film, shutter speeds determine the amount of motion a camera can "stopT The image of any subject moving in front of a stationary camera is recorded on film as a blurred, Moving image, and the longer the shutter remains open, the more blurred the ilr>age will be. If the shutter speed is increased, the blurring decreases, or is even effectively eliminated. Higher shutter speeds allow a photographer to "freeze" the motion of birds in flight, for example. Slower shutter speeds can emphasize the blurring and make a Photograph suggest the feeling of motion. Static subjects such as landscapes and family portraits usually allow the use of slower shutter speeds.
Aperture and shutter work together to produce the exposure, and there are many combinations that produce the same exposure; 1/125 second at f/11, 1/250 second at f/8, and 1/500 second at f/5.6 all allow the same amount of light to reach the film, but each combination produces a photograph with varying depth of field and different motion-stopping capability.
Bright Sunlight Exposure Rule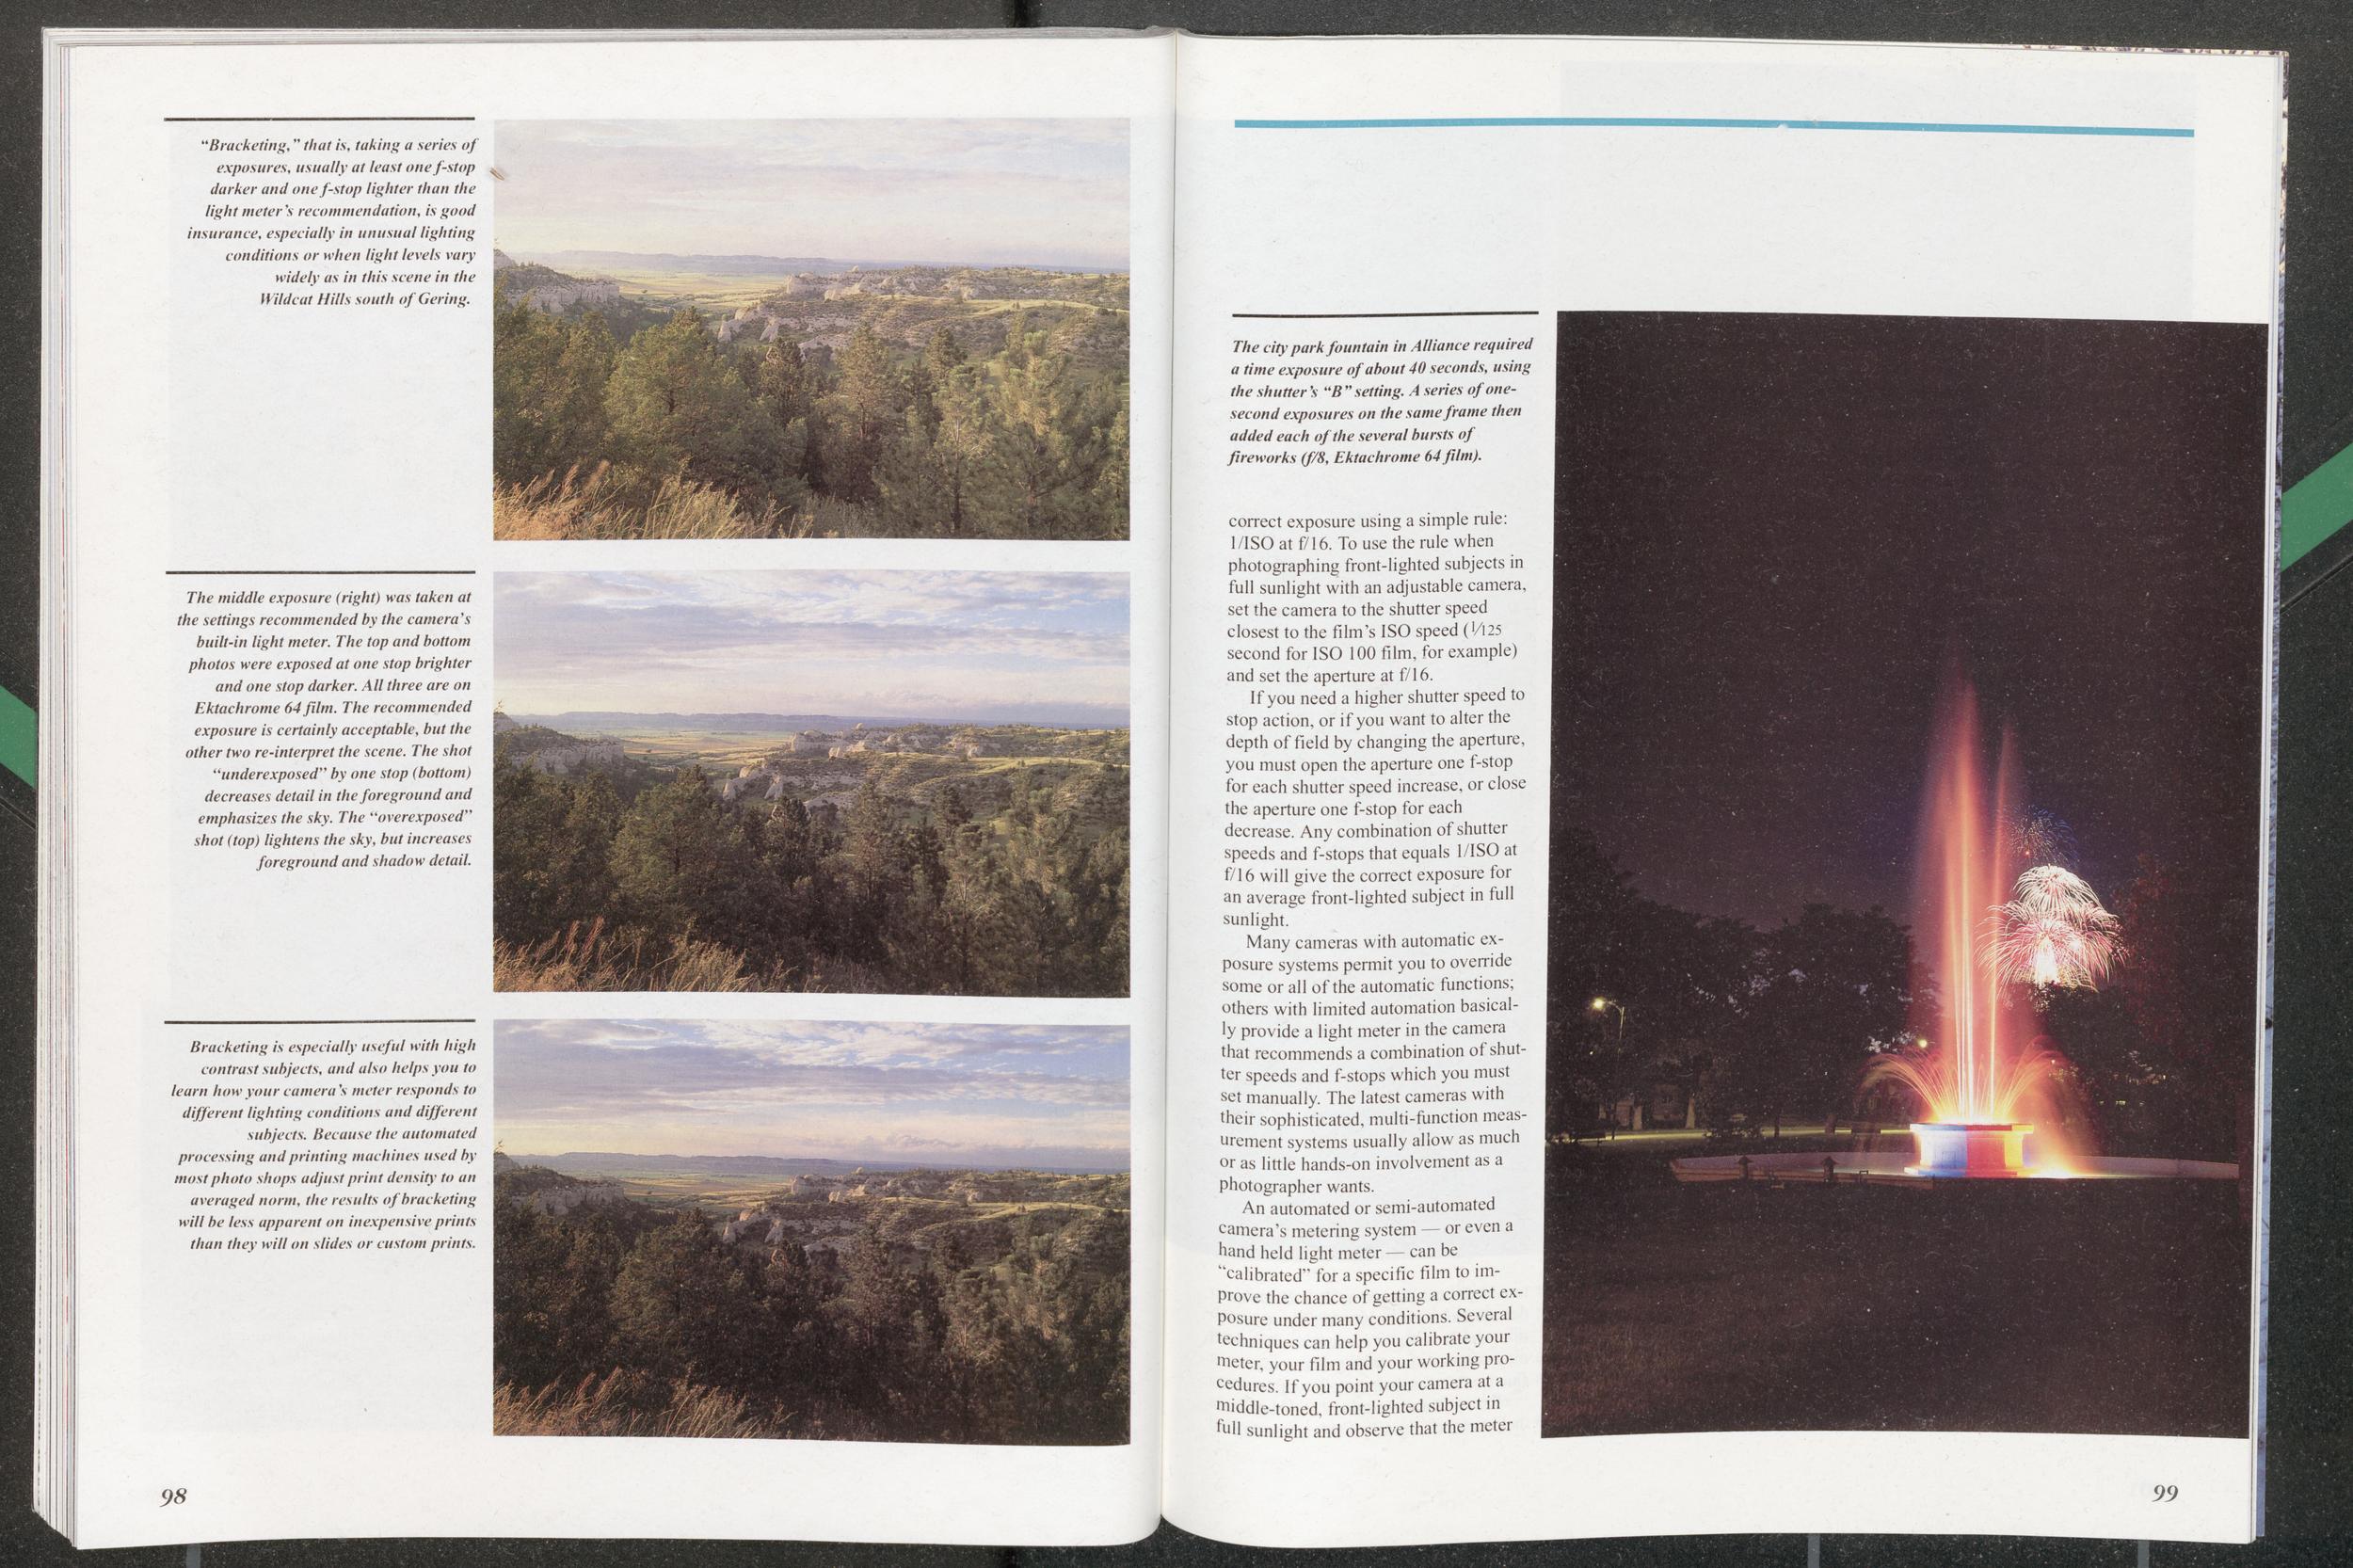
"Bracketing," that is, taking a series of exposures, usually at least one f-stop darker and one f-stop lighter than the light meter *s recommendation, is good insurance, especially in unusual lighting conditions or when light levels vary widely as in this scene in the Wildcat Hills south of Gering.
The middle exposure (right) was taken at the settings recommended by the cameras built-in light meter. The top and bottom photos were exposed at one stop brighter and one stop darker. All three are on Ektachrome 64 film. The recommended exposure is certainly acceptable, but the other two re-interpret the scene. The shot "underexposed" by one stop (bottom) decreases detail in the foreground and emphasizes the sky. The "overexposed" shot (top) lightens the sky, but increases foreground and shadow detail.
Bracketing is especially useful with high contrast subjects, and also helps you to learn how your camera meter responds to different lighting conditions and different subjects. Because the automated processing and printing machines used by most photo shops adjust print density to an averaged norm, the results of bracketing will be less apparent on inexpensive prints than they will on slides or custom prints.
The city park fountain in Alliance required a time exposure of about 40 seconds, using the shutter's "B" setting. A series of one second exposures on the same frame then added each of the several bursts of fireworks (f/8, Ektachrome 64 film).
If you need a higher shutter speed to stop action, or if you want to alter the depth of field by changing the aperture, you must open the aperture one f-stop for each shutter speed increase, or close the aperture one f-stop for each decrease. Any combination of shutter speeds and f-stops that equals 1/ISO at f/16 will give the correct exposure for an average front-lighted subject in full sunlight.
Many cameras with automatic exposure systems permit you to override some or all of the automatic functions; others with limited automation basically provide a light meter in the camera that recommends a combination of shutter speeds and f-stops which you must set manually. The latest cameras with their sophisticated, multi-function measurement systems usually allow as much or as little hands-on involvement as a photographer wants.
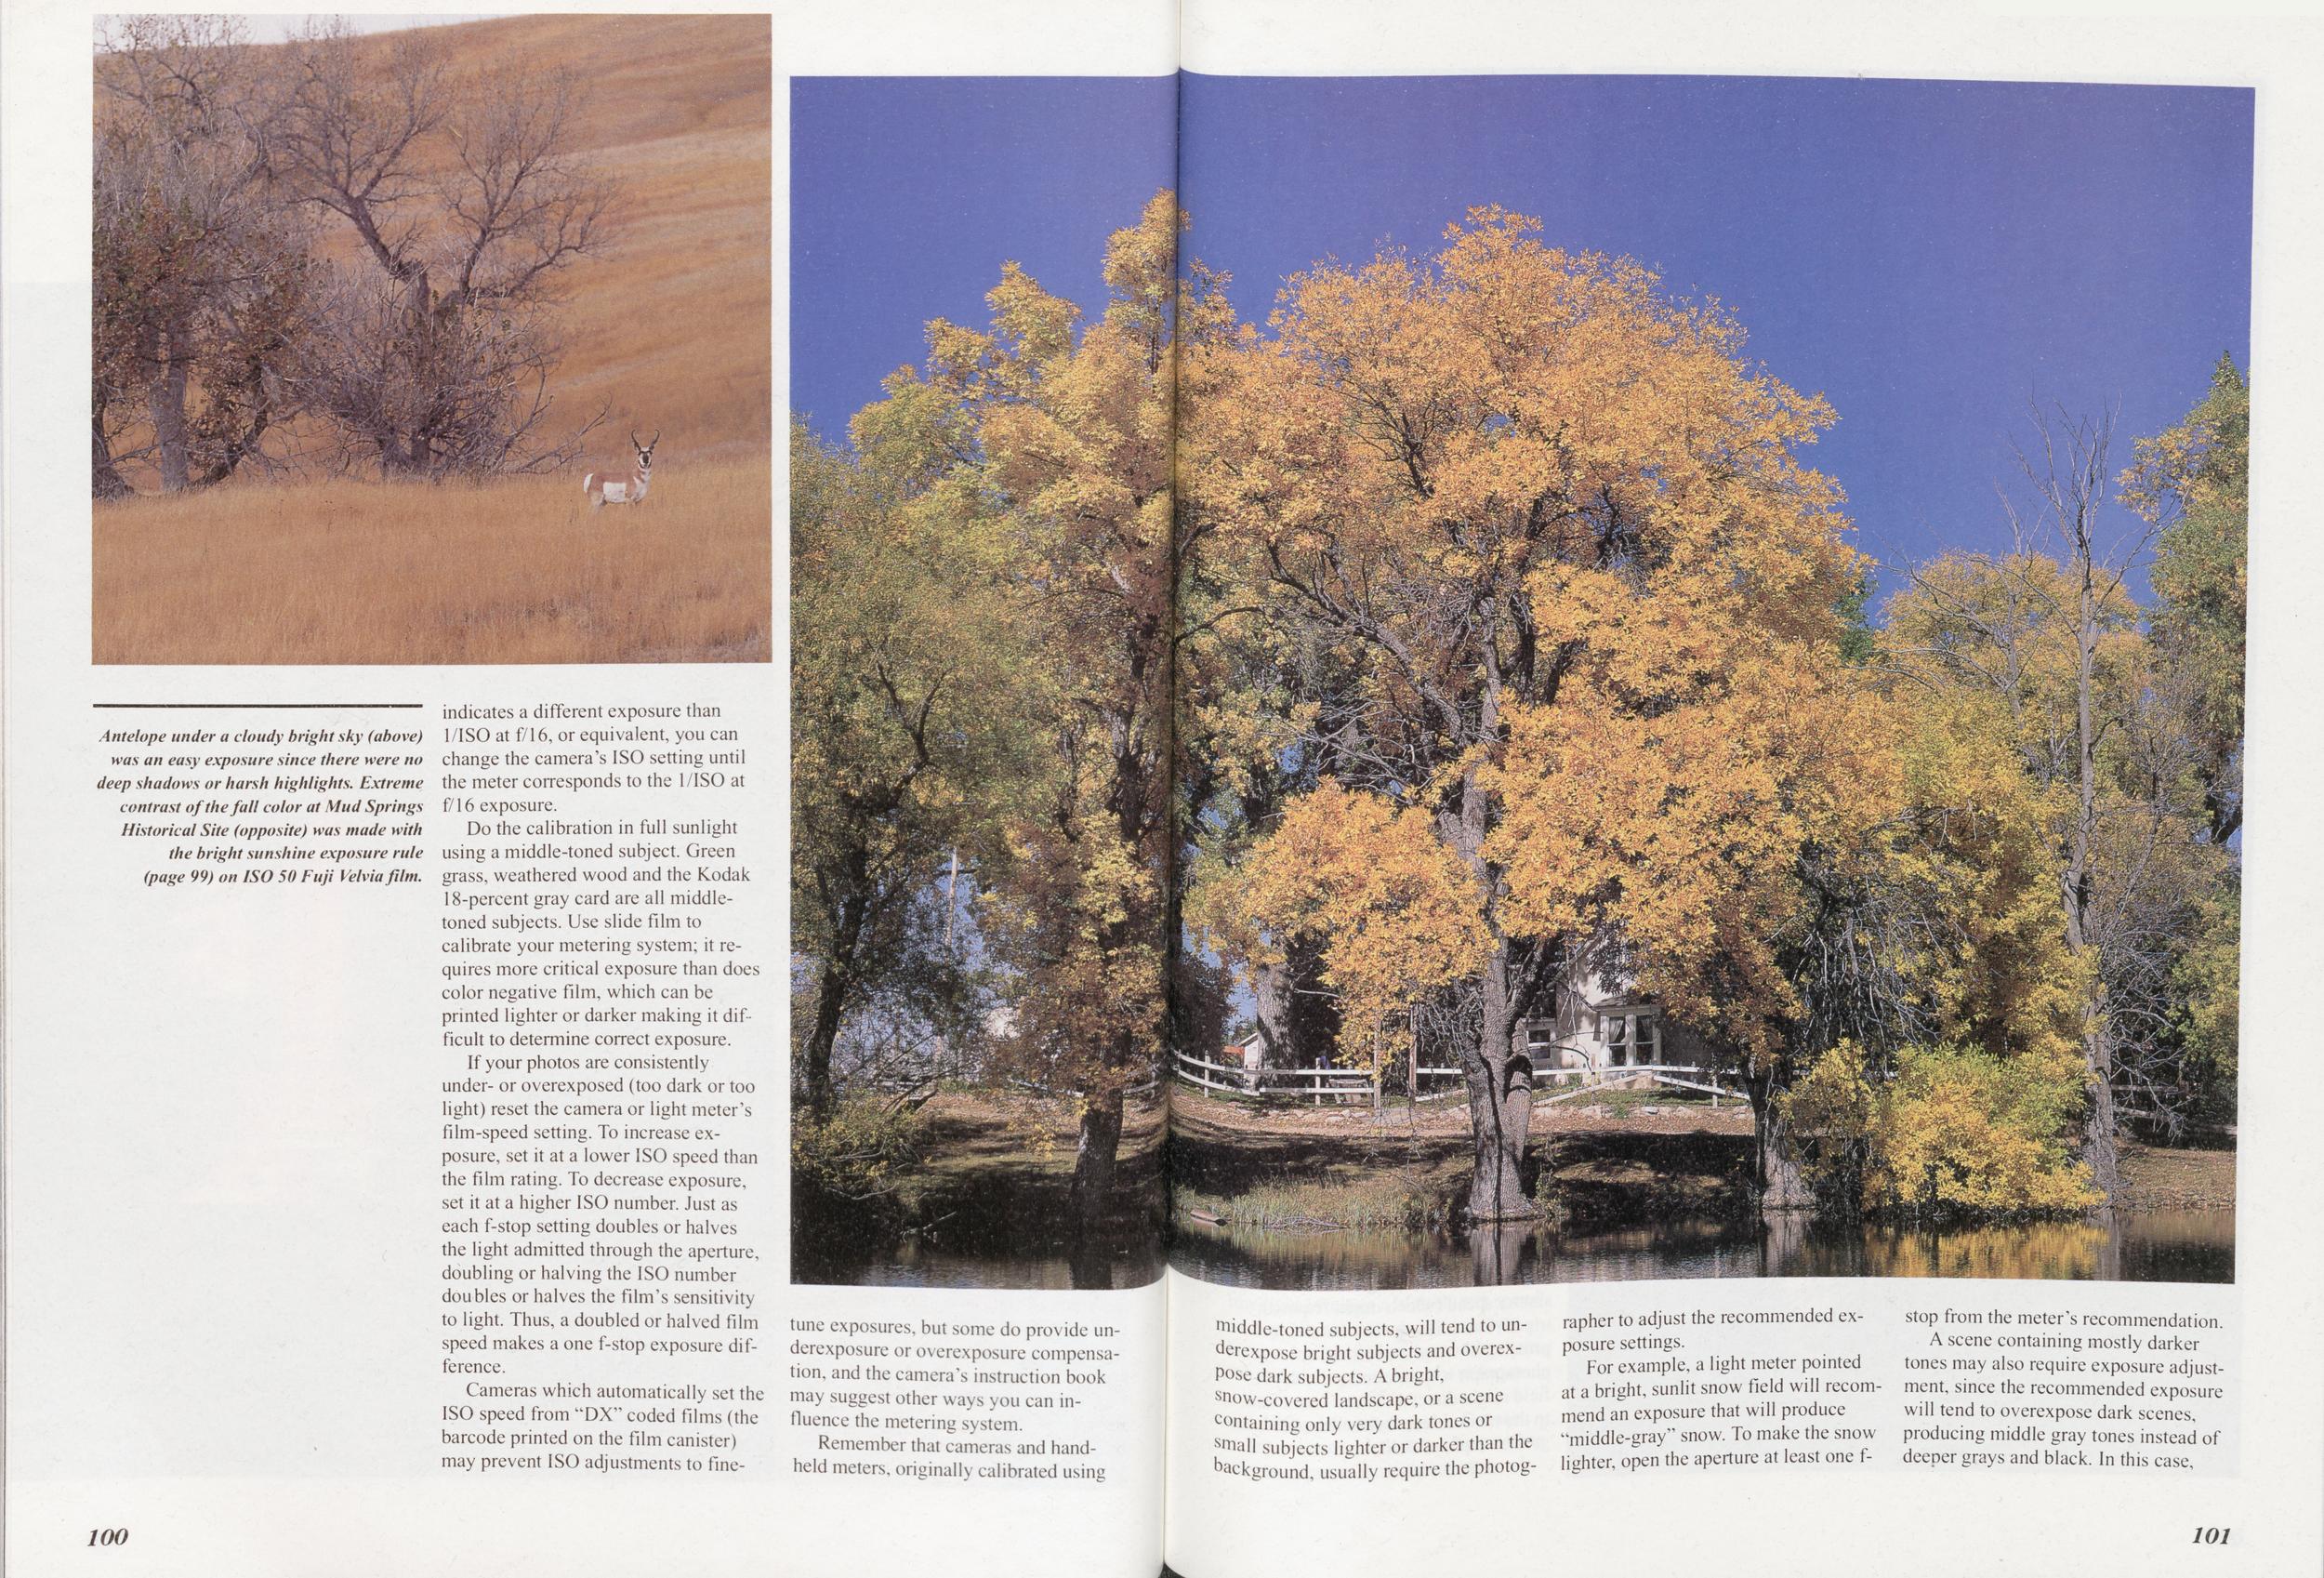
Antelope under a cloudy bright sky (above) was an easy exposure since there were no deep shadows or harsh highlights. Extreme contrast of the fall color at Mud Springs Historical Site (opposite) was made with the bright sunshine exposure rule (page 99) on ISO 50 Fuji Velvia film.
Do the calibration in full sunlight using a middle-toned subject. Green grass, weathered wood and the Kodak 18-percent gray card are all middletoned subjects. Use slide film to calibrate your metering system; it requires more critical exposure than does color negative film, which can be printed lighter or darker making it difficult to determine correct exposure.
If your photos are consistently under- or overexposed (too dark or too light) reset the camera or light meter's film-speed setting. To increase exposure, set it at a lower ISO speed than the film rating. To decrease exposure, set it at a higher ISO number. Just as each f-stop setting doubles or halves the light admitted through the aperture, doubling or halving the ISO number doubles or halves the film's sensitivity to light. Thus, a doubled or halved film speed makes a one f-stop exposure difference.
Cameras which automatically set the ISO speed from "DX" coded films (the barcode printed on the film canister) may prevent ISO adjustments to finetune exposures, but some do provide underexposure or overexposure compensation, and the camera's instruction book may suggest other ways you can influence the metering system.
Remember that cameras and handheld meters, originally calibrated using middle-toned subjects, will tend to underexpose bright subjects and overexpose dark subjects. A bright, snow-covered landscape, or a scene containing only very dark tones or srnall subjects lighter or darker than the background, usually require the photographer to adjust the recommended exposure settings.
For example, a light meter pointed at a bright, sunlit snow field will recommend an exposure that will produce "middle-gray" snow. To make the snow lighter, open the aperture at least one f-stop from the meter's recommendation.
A scene containing mostly darker tones may also require exposure adjustment, since the recommended exposure will tend to overexpose dark scenes, producing middle gray tones instead of deeper grays and black. In this case,
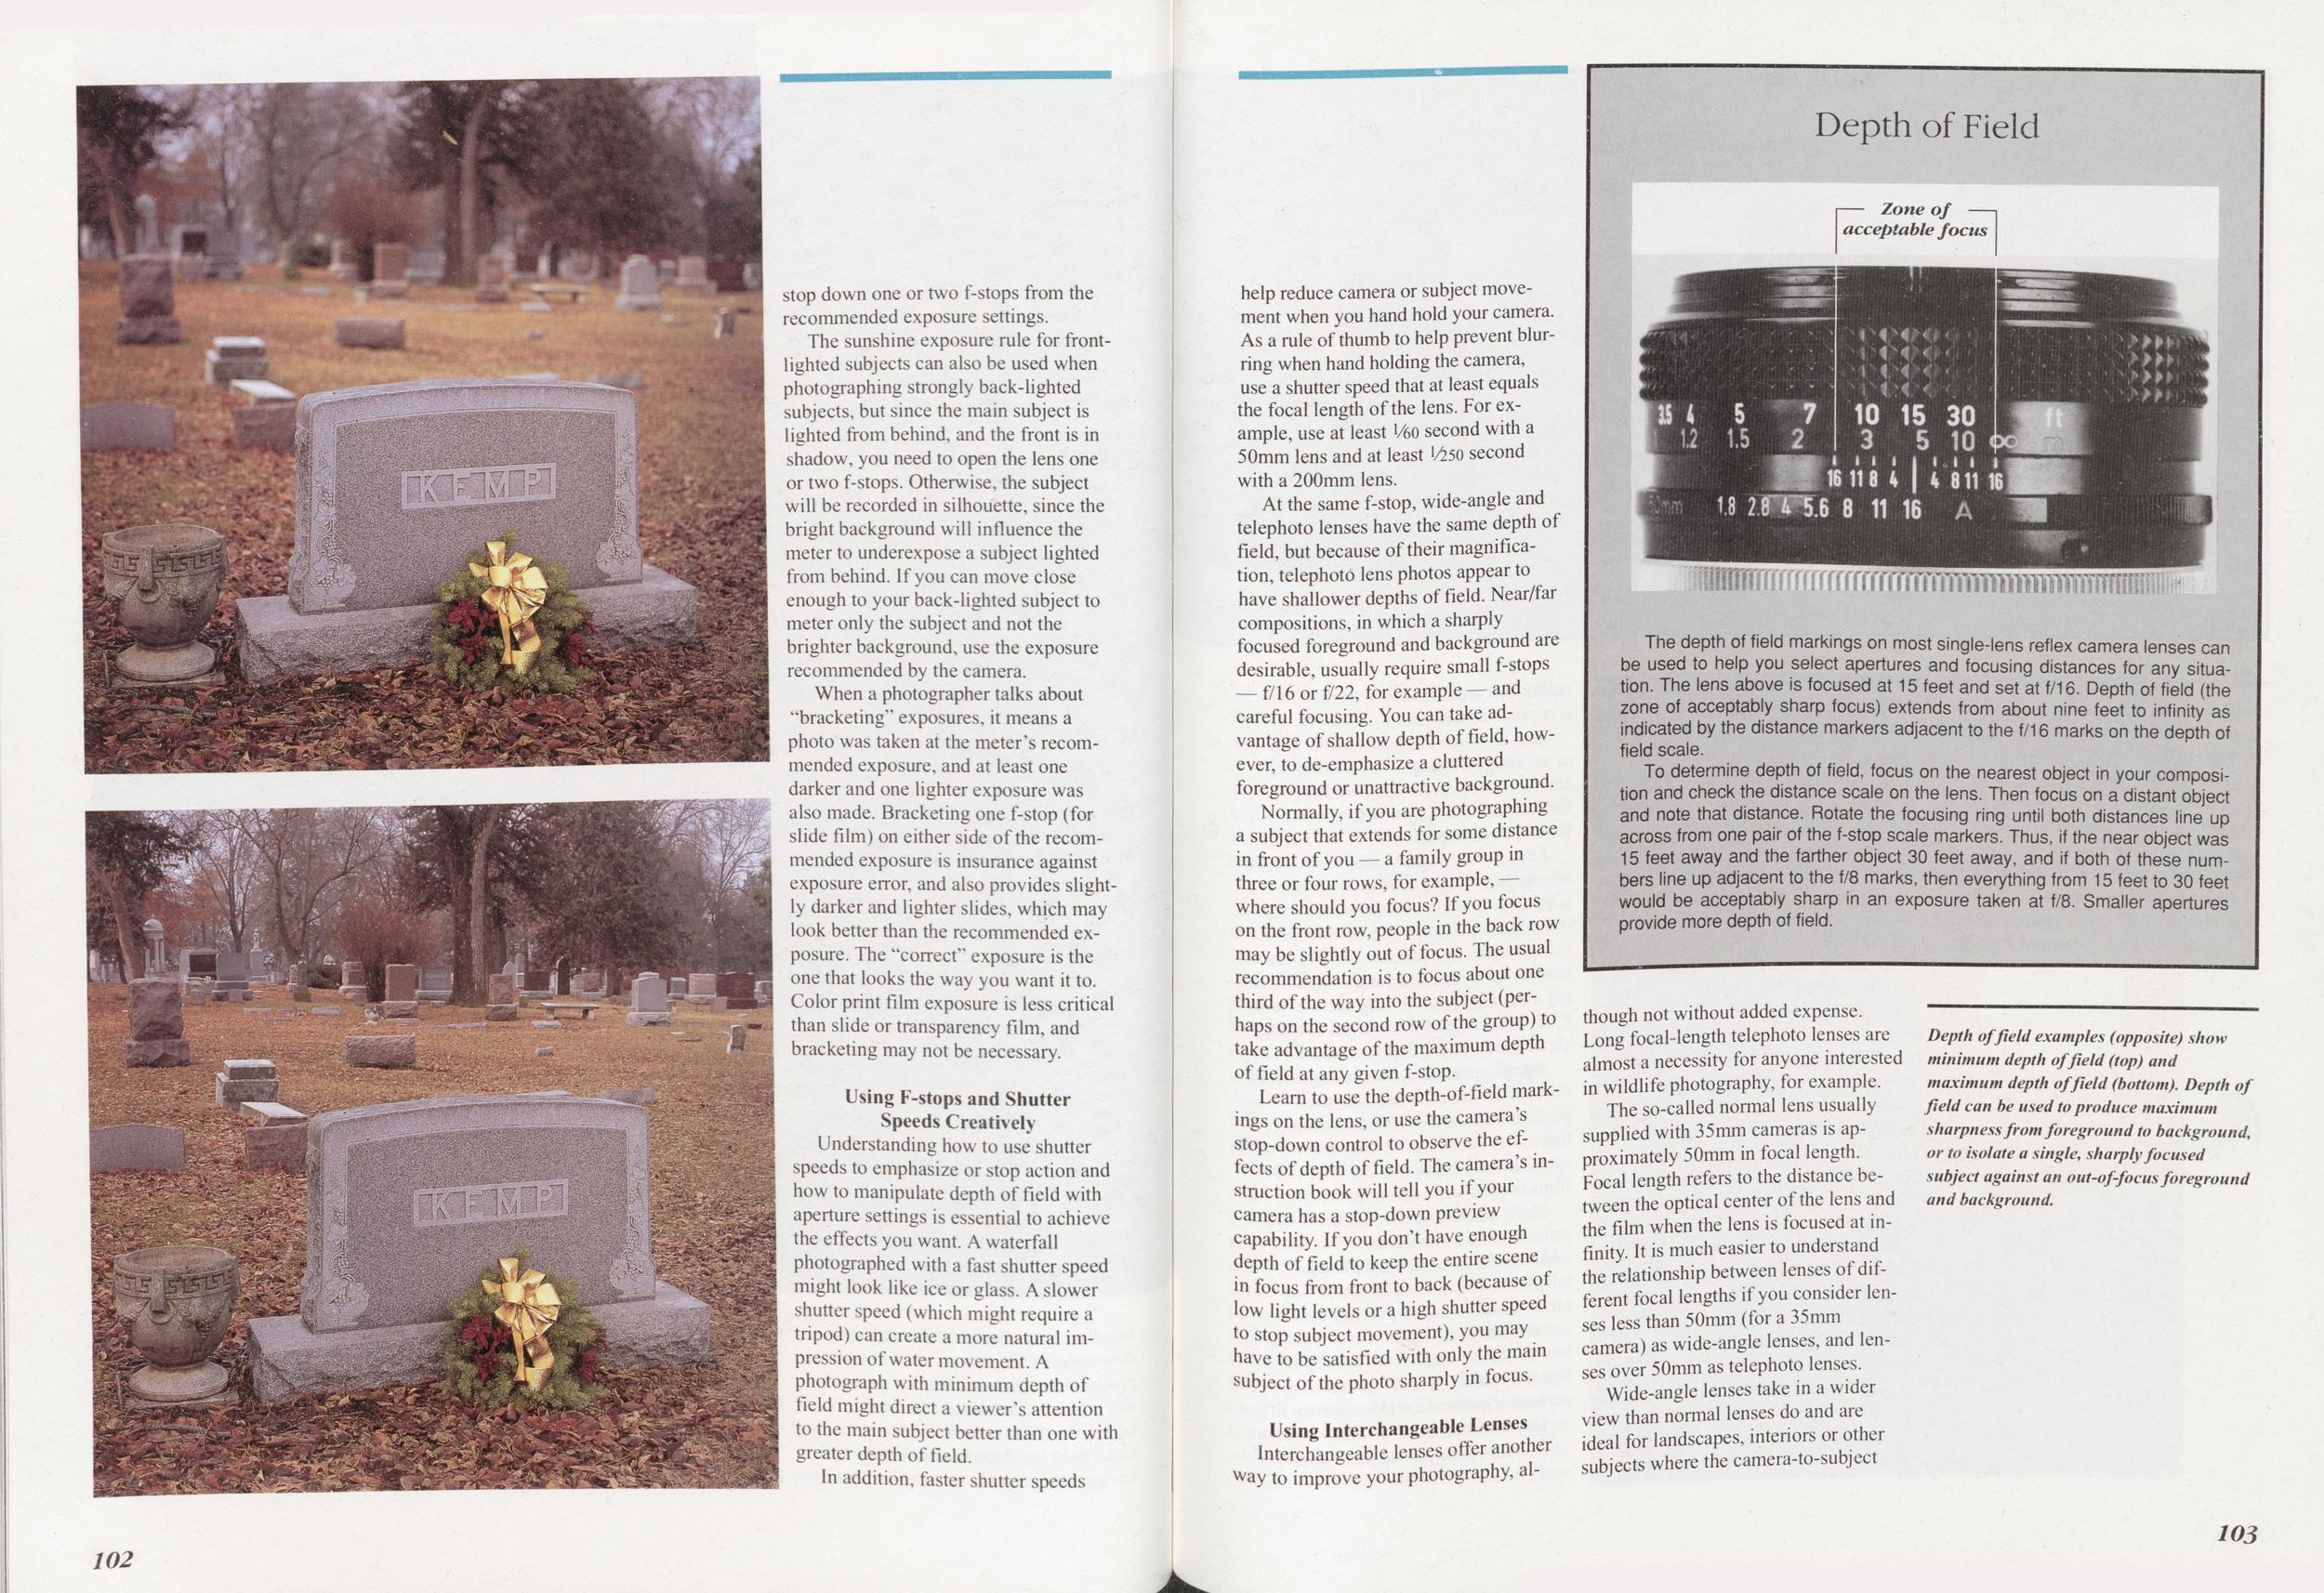
The sunshine exposure rule for frontlighted subjects can also be used when photographing strongly back-lighted subjects, but since the main subject is lighted from behind, and the front is in shadow, you need to open the lens one or two f-stops. Otherwise, the subject will be recorded in silhouette, since the bright background will influence the meter to underexpose a subject lighted from behind. If you can move close enough to your back-lighted subject to meter only the subject and not the brighter background, use the exposure recommended by the camera.
When a photographer talks about "bracketing" exposures, it means a photo was taken at the meter's recommended exposure, and at least one darker and one lighter exposure was also made. Bracketing one f-stop (for slide film) on either side of the recommended exposure is insurance against exposure error, and also provides slightly darker and lighter slides, which may look better than the recommended exposure. The "correct" exposure is the one that looks the way you want it to. Color print film exposure is less critical than slide or transparency film, and bracketing may not be necessary.
Using F-stops and Shutter Speeds CreativelyUnderstanding how to use shutter speeds to emphasize or stop action and how to manipulate depth of field with aperture settings is essential to achieve the effects you want. A waterfall photographed with a fast shutter speed might look like ice or glass. A slower shutter speed (which might require a tripod) can create a more natural impression of water movement. A photograph with minimum depth of field might direct a viewer's attention to the main subject better than one with greater depth of field.
In addition, faster shutter speeds help reduce camera or subject movement when you hand hold your camera. As a rule of thumb to help prevent blurring when hand holding the camera, use a shutter speed that at least equals the focal length of the lens. For example, use at least 1/60 second with a 50mm lens and at least 1^50 second with a 200mm lens.
At the same f-stop, wide-angle and telephoto lenses have the same depth of field, but because of their magnification, telephoto lens photos appear to have shallower depths of field. Near/far compositions, in which a sharply focused foreground and background are desirable, usually require small f-stops — f/16 or f/22, for example — and careful focusing. You can take advantage of shallow depth of field, however, to de-emphasize a cluttered foreground or unattractive background.
Normally, if you are photographing a subject that extends for some distance in front of you — a family group in three or four rows, for example, where should you focus? If you focus on the front row, people in the back row may be slightly out of focus. The usual recommendation is to focus about one third of the way into the subject (perhaps on the second row of the group) to take advantage of the maximum depth of field at any given f-stop.
Learn to use the depth-of-field markings on the lens, or use the camera's stop-down control to observe the effects of depth of field. The camera's instruction book will tell you if your camera has a stop-down preview capability. If you don't have enough depth of field to keep the entire scene in focus from front to back (because of low light levels or a high shutter speed to stop subject movement), you may have to be satisfied with only the main subject of the photo sharply in focus.
Using Interchangeable LensesInterchangeable lenses offer another way to improve your photography, al though not without added expense. Long focal-length telephoto lenses are almost a necessity for anyone interested in wildlife photography, for example.
The so-called normal lens usually supplied with 35mm cameras is approximately 50mm in focal length. Focal length refers to the distance between the optical center of the lens and the film when the lens is focused at infinity. It is much easier to understand the relationship between lenses of different focal lengths if you consider lenses less than 50mm (for a 35mm camera) as wide-angle lenses, and lenses over 50mm as telephoto lenses.
Wide-angle lenses take in a wider view than normal lenses do and are ideal for landscapes, interiors or other subjects where the camera-to-subject
Depth of fieId examples (opposite) show minimum depth of field (top) and maximum depth of field (bottom). Depth of field can be used to produce maximum sharpness from foreground to background, or to isolate a single, sharply focused subject against an out-offocus foreground and background.
Depth of Field
— Zone of — acceptable focus
The depth of field markings on most single-lens reflex camera lenses can be used to help you select apertures and focusing distances for any situation. The lens above is focused at 15 feet and set at f/16. Depth of field (the zone of acceptably sharp focus) extends from about nine feet to infinity as indicated by the distance markers adjacent to the f/16 marks on the depth of field scale.
To determine depth of field, focus on the nearest object in your composition and check the distance scale on the lens. Then focus on a distant object and note that distance. Rotate the focusing ring until both distances line up across from one pair of the f-stop scale markers. Thus, if the near object was 15 feet away and the farther object 30 feet away, and if both of these numbers line up adjacent to the f/8 marks, then everything from 15 feet to 30 feet would be acceptably sharp an exposure taken at f/8. Smaller apertures provide more depth of field.
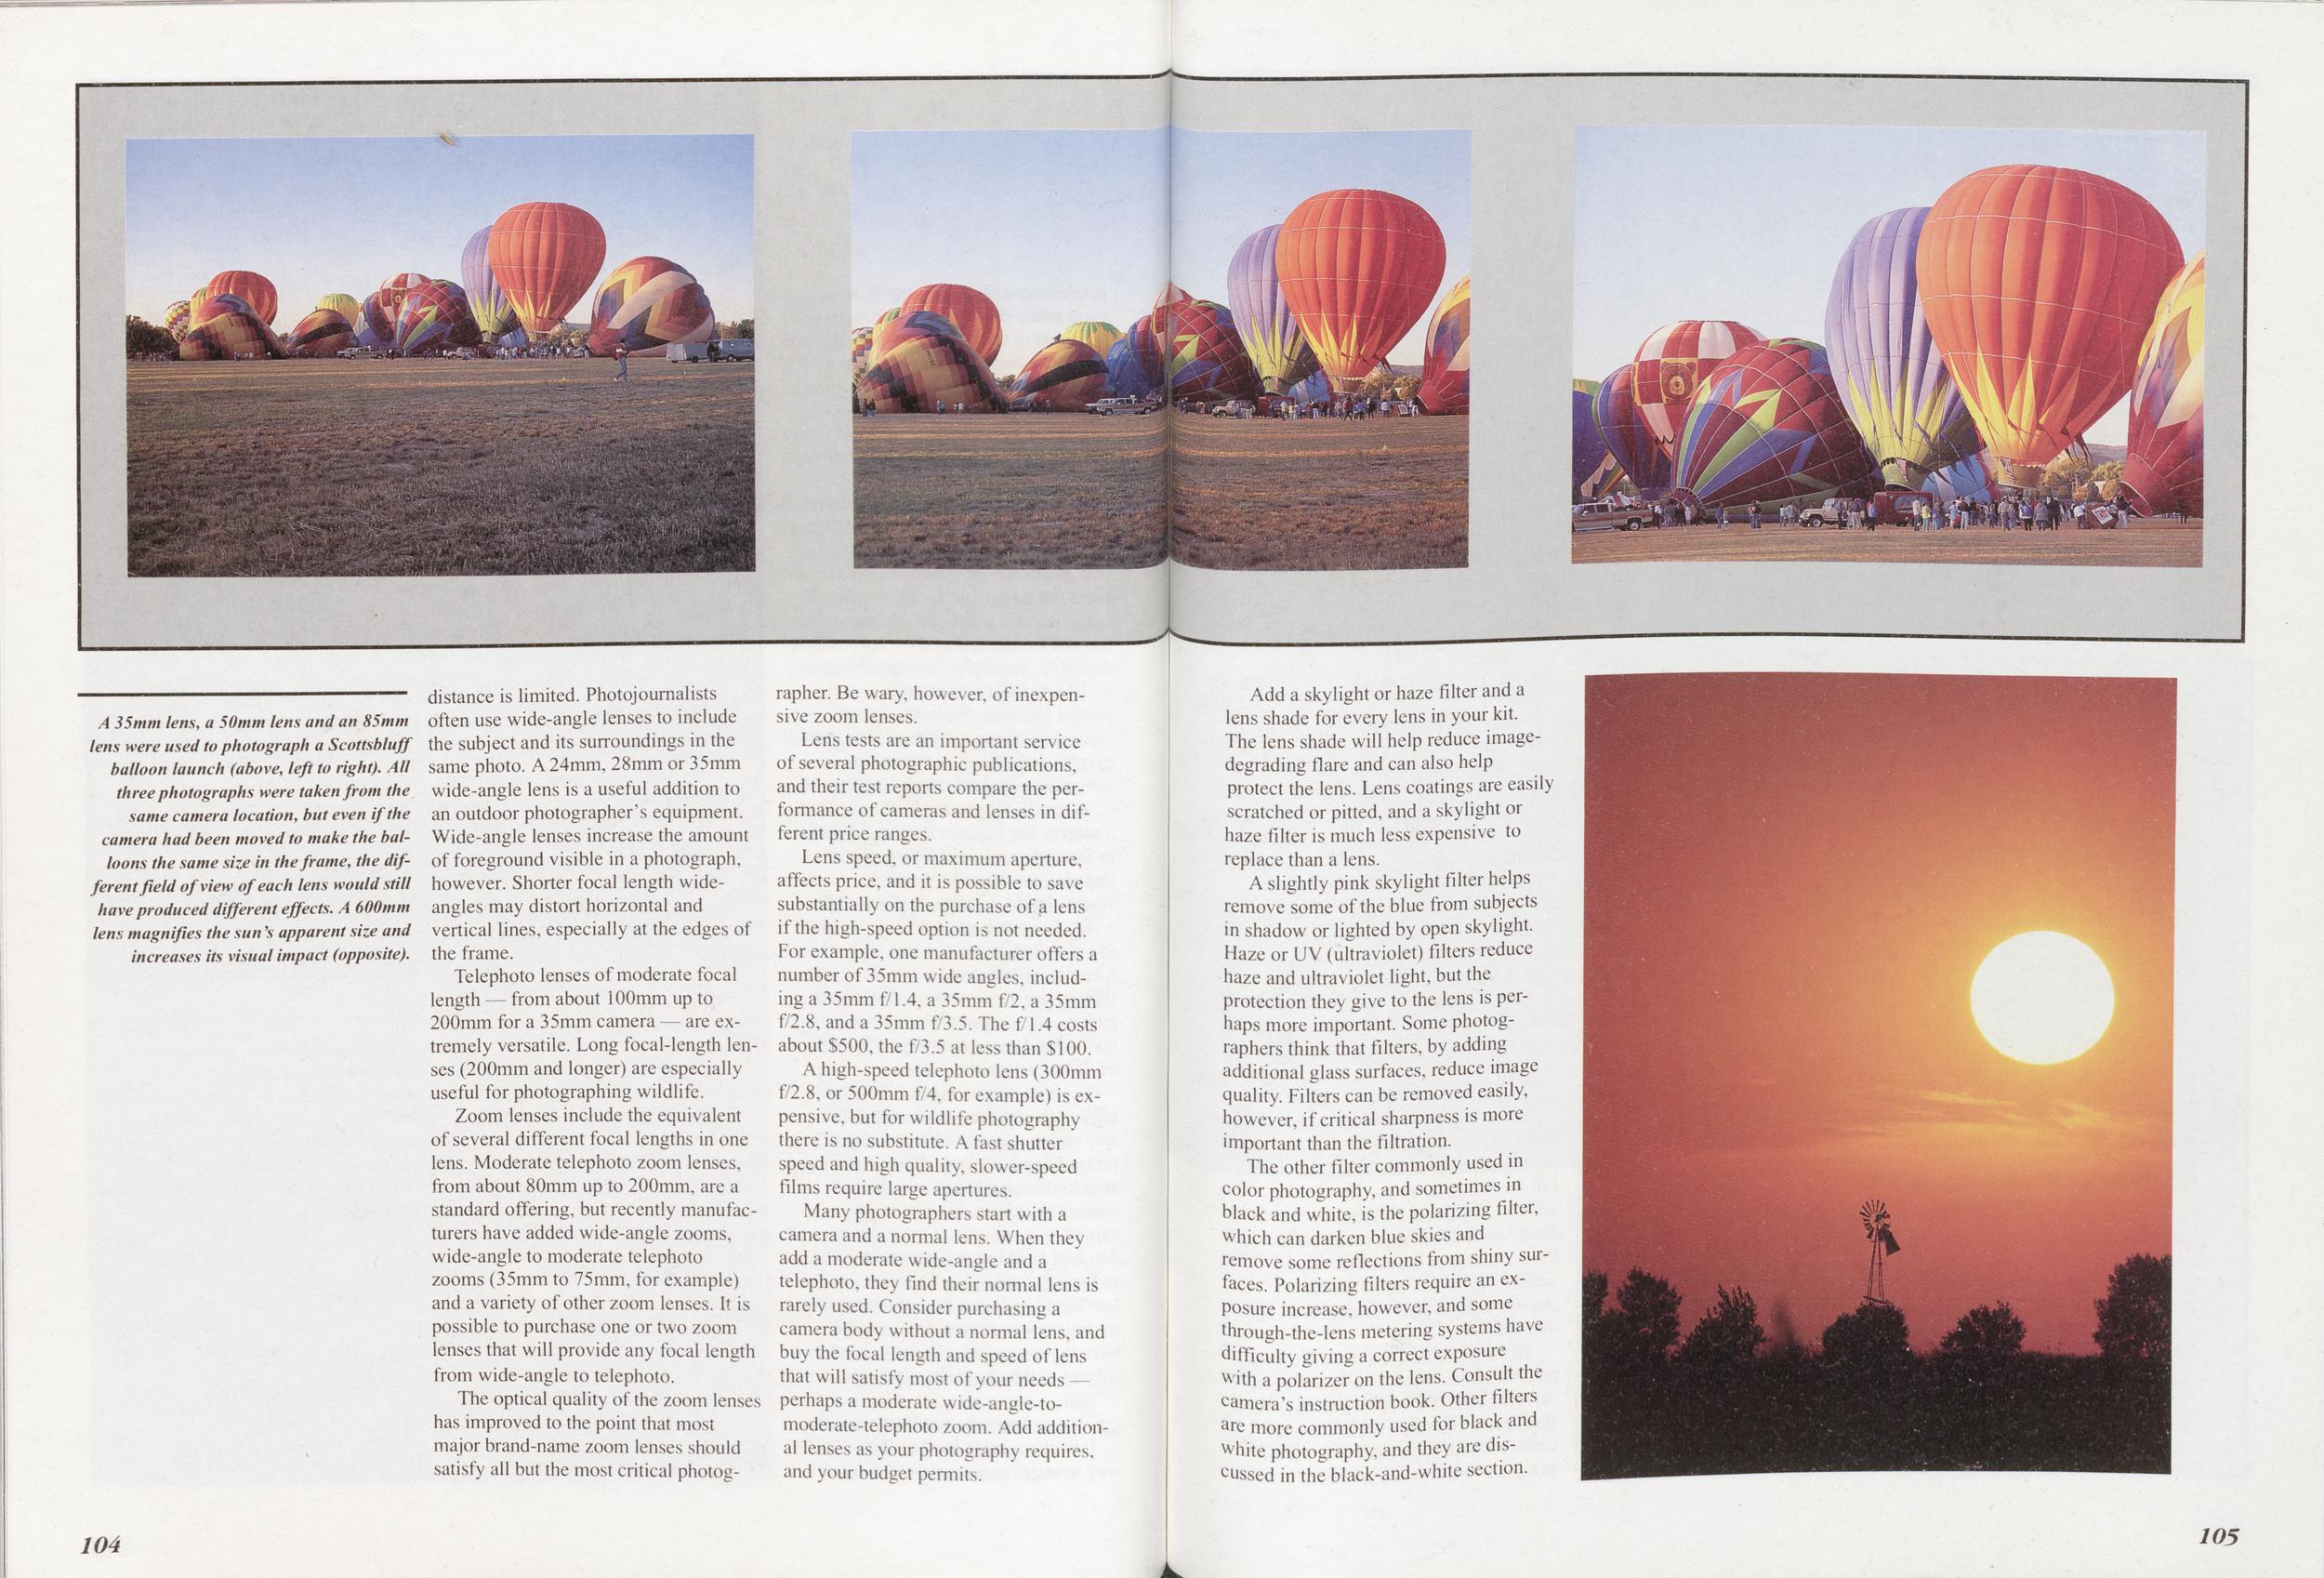
A 35mm lens, a 50mm lens and an 85mm lens were used to photograph a Scottsbluff balloon launch (above, left to right). All three photographs were taken from the same camera location, but even if the camera had been moved to make the balloons the same size in the frame, the different field of view of each lens would still have produced different effects. A 600mm lens magnifies the sun's apparent size and increases its visual impact (opposite).
distance is limited. Photo-journalists often use wide-angle lenses to include the subject and its surroundings in the same photo. A 24mm, 28mm or 35mm wide-angle lens is a useful addition to an outdoor photographer's equipment. Wide-angle lenses increase the amount of foreground visible in a photograph, however. Shorter focal length wide angles may distort horizontal and vertical lines, especially at the edges of the frame.
Telephoto lenses of moderate focal length — from about 100mm up to 200mm for a 35mm camera — are extremely versatile. Long focal-length lenses (200mm and longer) are especially useful for photographing wildlife.
Zoom lenses include the equivalent of several different focal lengths in one lens. Moderate telephoto zoom lenses, from about 80mm up to 200mm, are a standard offering, but recently manufacturers have added wide-angle zooms, wide-angle to moderate telephoto zooms (35mm to 75mm, for example) and a variety of other zoom lenses. It is possible to purchase one or two zoom lenses that will provide any focal length from wide-angle to telephoto.
The optical quality of the zoom lenses has improved to the point that most major brand-name zoom lenses should satisfy all but the most critical photographer. Be wary, however, of inexpensive zoom lenses.
Lens tests are an important service of several photographic publications, and their test reports compare the performance of cameras and lenses in different price ranges.
Lens speed, or maximum aperture, affects price, and it is possible to save substantially on the purchase of a lens if the high-speed option is not needed. For example, one manufacturer offers a number of 35mm wide angles, including a 35mm f/1.4, a 35mm f/2, a 35mm f/2.8, and a 35mm f/3.5. The f/1.4 costs about $500, the f/3.5 at less than $100.
A high-speed telephoto lens (300mm f/2.8, or 500mm f/4, for example) is expensive, but for wildlife photography there is no substitute. A fast shutter speed and high quality, slower-speed films require large apertures.
Many photographers start with a camera and a normal lens. When they add a moderate wide-angle and a telephoto, they find their normal lens is rarely used. Consider purchasing a camera body without a normal lens, and buy the focal length and speed of lens that will satisfy most of your needs perhaps a moderate wide-angle-to-moderate-telephoto zoom. Add additional lenses as your photography requires, and your budget permits.
Add a skylight or haze filter and a lens shade for every lens in your kit. The lens shade will help reduce imagedegrading flare and can also help protect the lens. Lens coatings are easily scratched or pitted, and a skylight or haze filter is much less expensive to replace than a lens.
A slightly pink skylight filter helps remove some of the blue from subjects in shadow or lighted by open skylight. Haze or UV (ultraviolet) filters reduce haze and ultraviolet light, but the protection they give to the lens is perhaps more important. Some photog- raphers think that filters, by adding additional glass surfaces, reduce image quality. Filters can be removed easily, however, if critical sharpness is more important than the filtration.
The other filter commonly used in color photography, and sometimes in black and white, is the polarizing filter, which can darken blue skies and remove some reflections from shiny surfaces. Polarizing filters require an exposure increase, however, and some through-the-lens metering systems have difficulty giving a correct exposure with a polarizer on the lens. Consult the camera's instruction book. Other filters are more commonly used for black and white photography, and they are discussed in the black-and-white section.
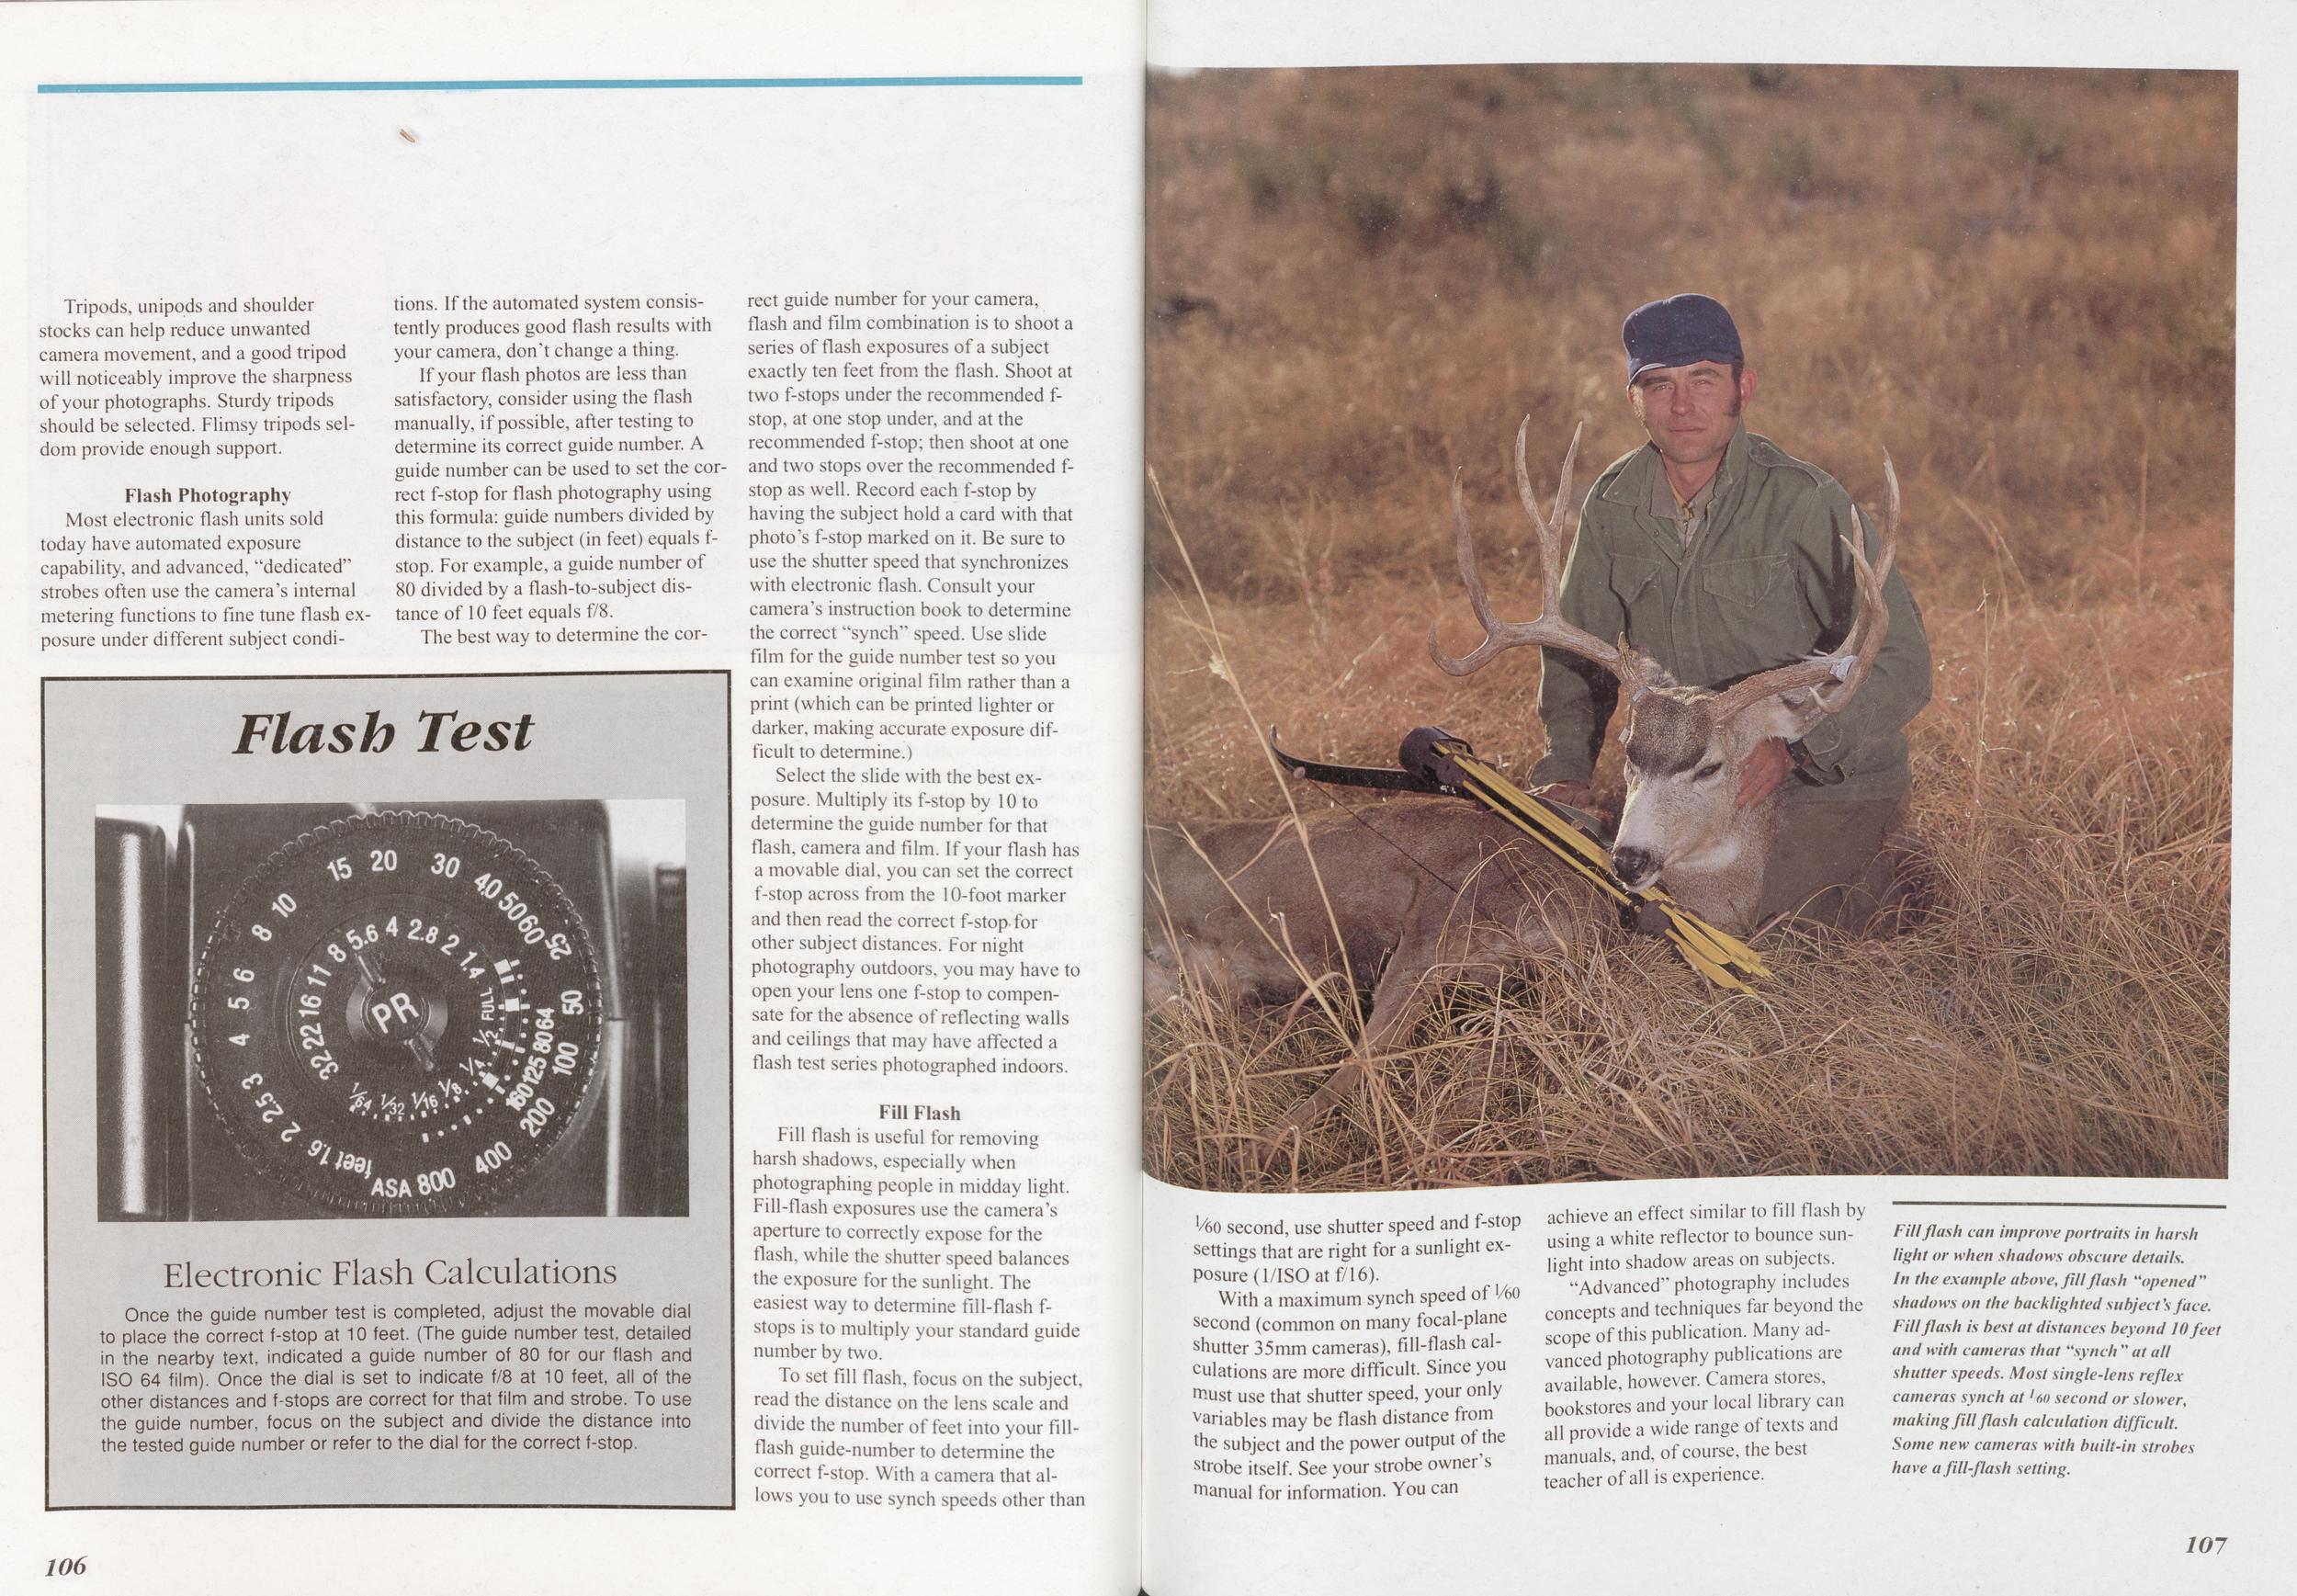
Tripods, unipods and shoulder stocks can help reduce unwanted camera movement, and a good tripod will noticeably improve the shaipness of your photographs. Sturdy tripods should be selected. Flimsy tripods seldom provide enough support.
Once the guide number test is completed, adjust the movable dial to place the correct f-stop at 10 feet. (The guide number test, detailed in the nearby text, indicated a guide number of 80 for our flash and ISO 64 film). Once the dial is set to indicate f/8 at 10 feet, all of the other distances and f-stops are correct for that film and strobe. To use the guide number, focus on the subject and divide the distance into the tested guide number or refer to the dial for the correct f-stop.
Most electronic flash units sold today have automated exposure capability, and advanced, "dedicated" strobes often use the camera's internal metering functions to fine tune flash exposure under different subject conditions. If the automated system consistently produces good flash results with your camera, don't change a thing.
If your flash photos are less than satisfactory, consider using the flash manually, if possible, after testing to determine its correct guide number. A guide number can be used to set the correct f-stop for flash photography using this formula: guide numbers divided by distance to the subject (in feet) equals f-stop. For example, a guide number of 80 divided by a flash-to-subject distance of 10 feet equals f/8.
The best way to determine the correct guide number for your camera, flash and film combination is to shoot a series of flash exposures of a subject exactly ten feet from the flash. Shoot at two f-stops under the recommended f-stop, at one stop under, and at the recommended f-stop; then shoot at one and two stops over the recommended f-stop as well. Record each f-stop by having the subject hold a card with that photo's f-stop marked on it. Be sure to use the shutter speed that synchronizes with electronic flash. Consult your camera's instruction book to determine the correct "synch" speed. Use slide film for the guide number test so you can examine original film rather than a print (which can be printed lighter or darker, making accurate exposure difficult to determine.)
Select the slide with the best exposure. Multiply its f-stop by 10 to determine the guide number for that flash, camera and film. If your flash has a movable dial, you can set the correct f-stop across from the 10-foot marker and then read the correct f-stop for other subject distances. For night photography outdoors, you may have to open your lens one f-stop to compensate for the absence of reflecting walls and ceilings that may have affected a flash test series photographed indoors.
Fill FlashFill flash is useful for removing harsh shadows, especially when photographing people in midday light. Fill-flash exposures use the camera's aperture to correctly expose for the flash, while the shutter speed balances the exposure for the sunlight. The easiest way to determine fill-flash f-stops is to multiply your standard guide number by two.
To set fill flash, focus on the subject, read the distance on the lens scale and divide the number of feet into your fillflash guide-number to determine the correct f-stop. With a camera that allows you to use synch speeds other than 60 second, use shutter speed and f-stop settings that are right for a sunlight exposure (1/I SO at f/16).
With a maximum synch speed of VbO second (common on many focal-plane shutter 35mm cameras), fill-flash calculations are more difficult. Since you rnust use that shutter speed, your only variables may be flash distance from the subject and the power output of the strobe itself. See your strobe owner's Manual for information. You can achieve an effect similar to fill flash by using a white reflector to bounce sunlight into shadow areas on subjects.
"Advanced" photography includes concepts and techniques far beyond the scope of this publication. Many advanced photography publications are available, however. Camera stores, bookstores and your local library can all provide a wide range of texts and manuals, and, of course, the best teacher of all is experience.
Fill flash can improve portraits in harsh light or when shadows obscure details. In the example above, Jill flash "opened" shadows on the backlighted subject's face. Fill flash is best at distances beyond 10 feet and with cameras that "synch " at all shutter speeds. Most single-lens reflex cameras synch at l60 second or slower, making fill flash calculation difficult. Some new cameras with built-in strobes have a fill-flash setting.
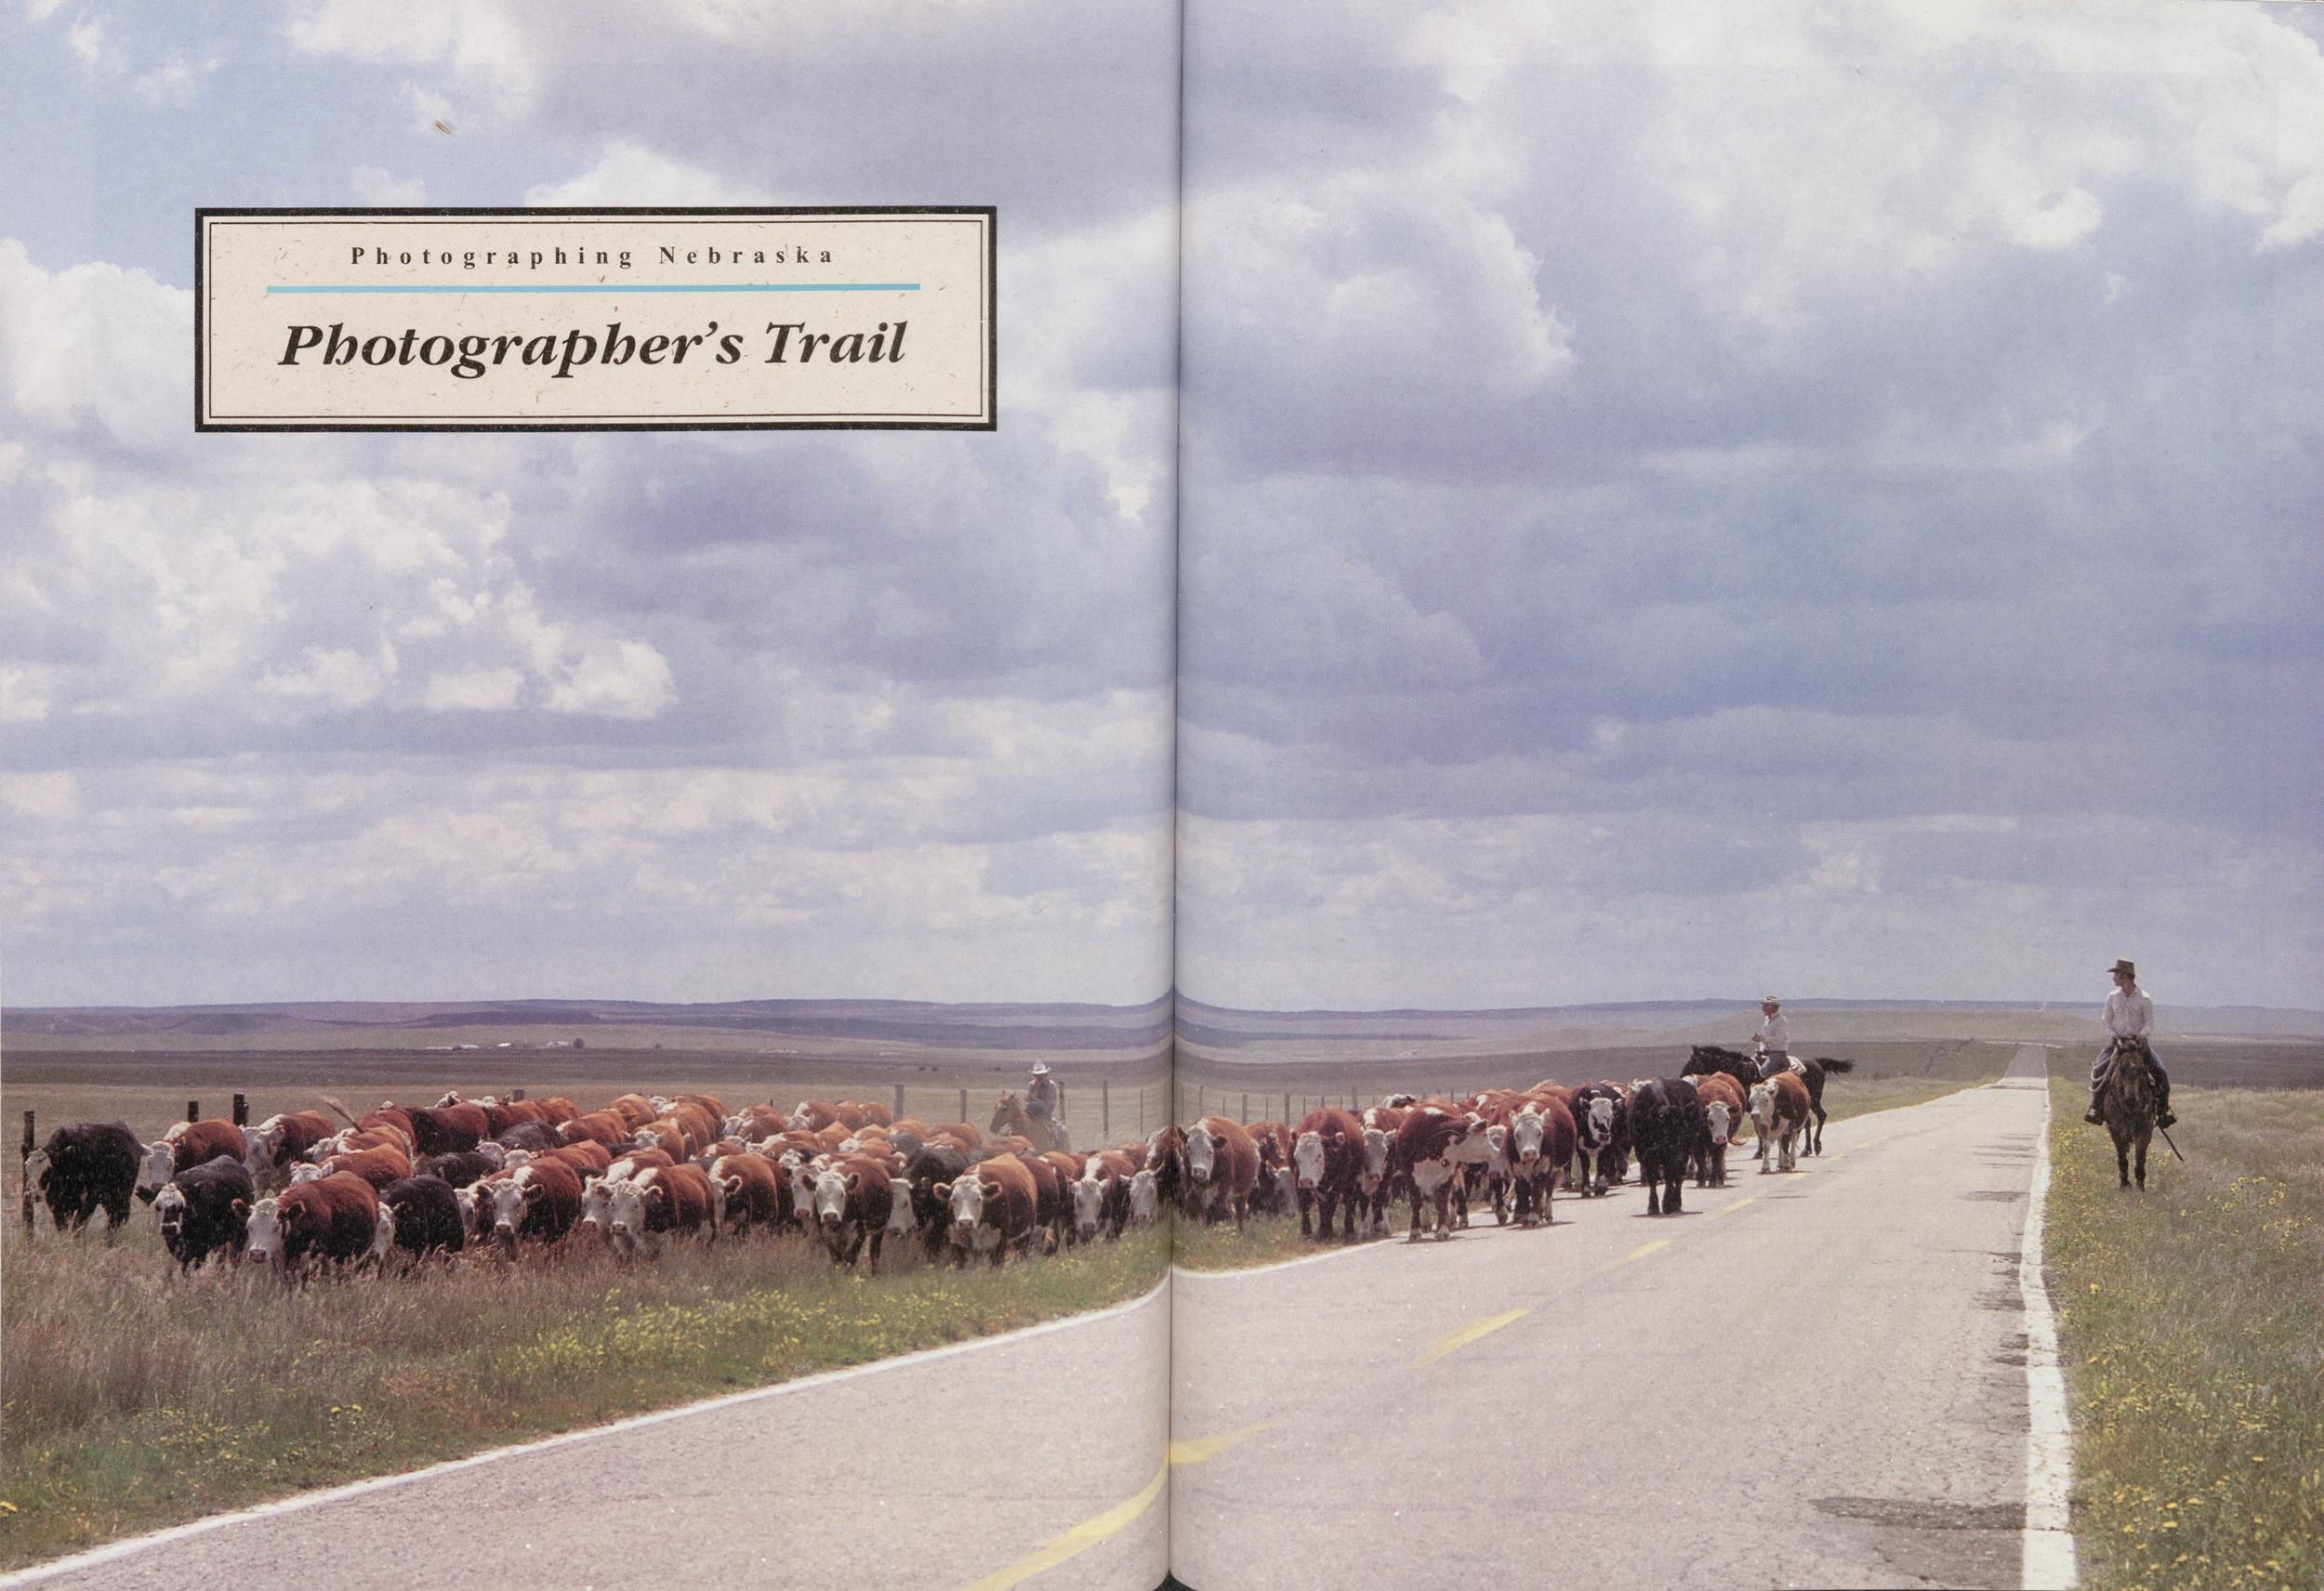
Photographing Nebraska
Photographer's Trail
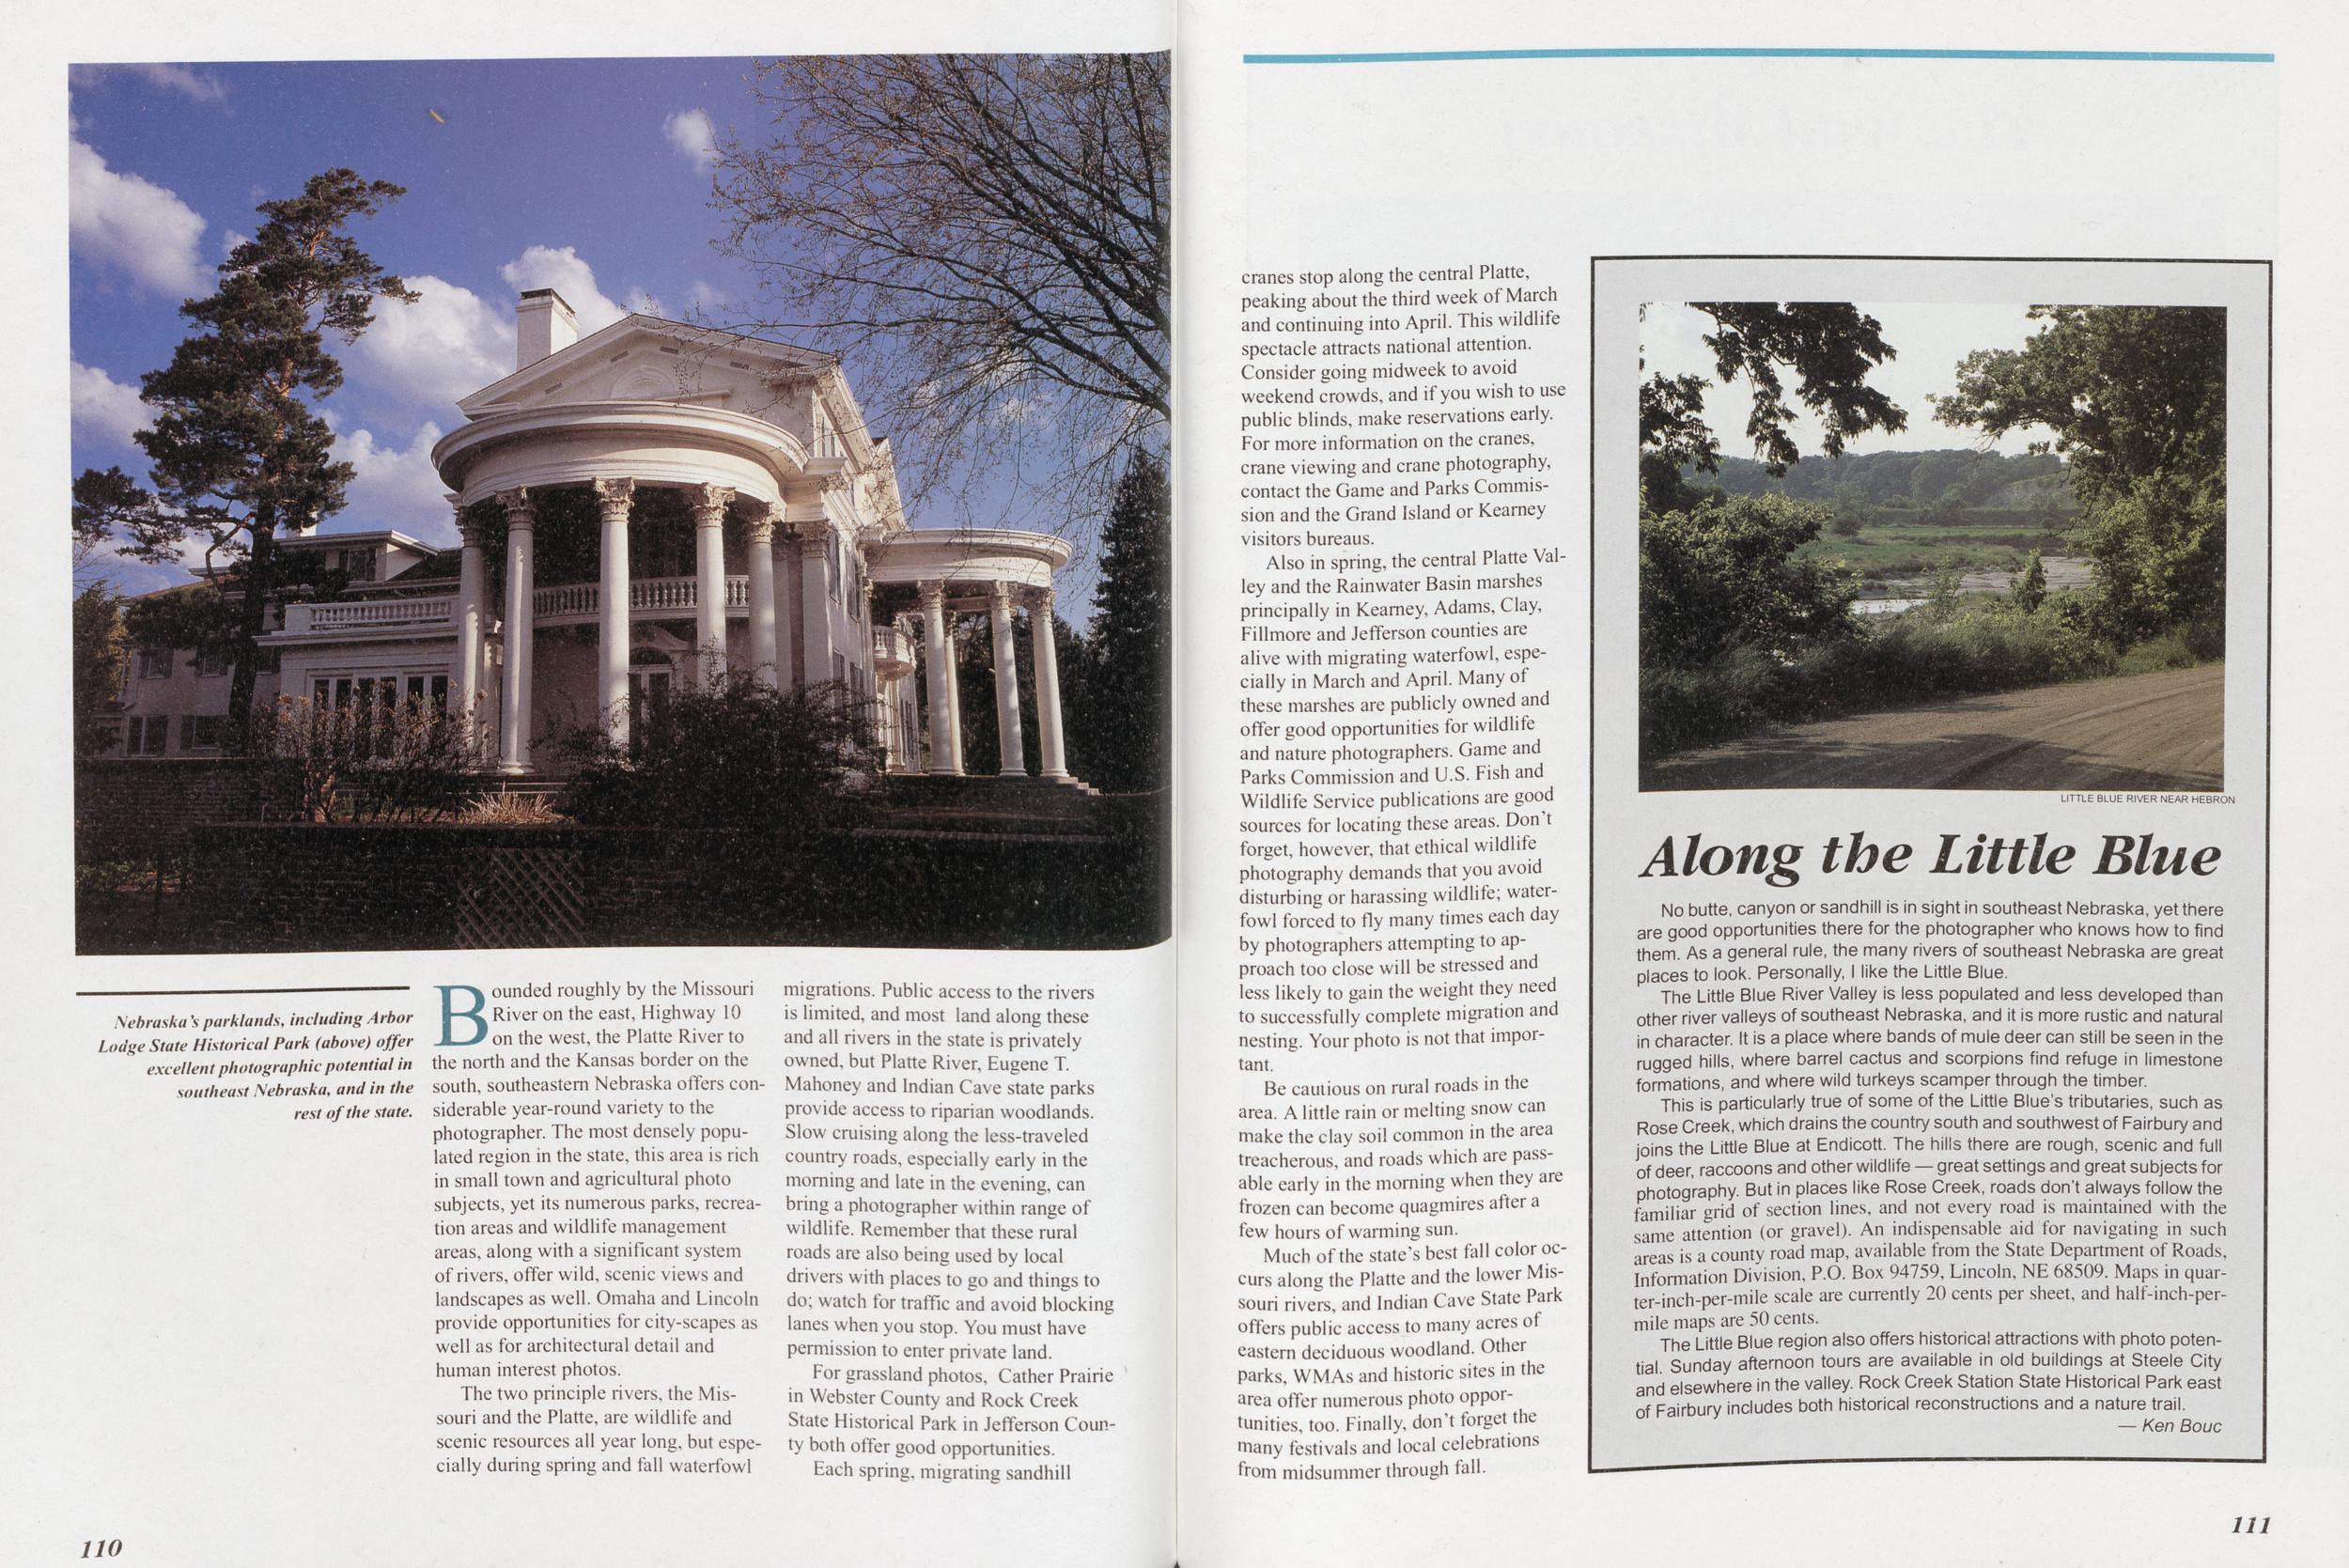
Nebraska's parklands, including Arbor Lodge State Historical Park (above) offer excellent photographic potential in southeast Nebraska, and in the rest of the state.
Bounded roughly by the Missouri River on the east, Highway 10 on the west, the Platte River to the north and the Kansas border on the south, southeastern Nebraska offers considerable year-round variety to the photographer. The most densely populated region in the state, this area is rich in small town and agricultural photo subjects, yet its numerous parks, recreation areas and wildlife management areas, along with a significant system of rivers, offer wild, scenic views and landscapes as well. Omaha and Lincoln provide opportunities for city-scapes as well as for architectural detail and human interest photos.
The two principle rivers, the Missouri and the Platte, are wildlife and scenic resources all year long, but especially during spring and fall waterfowl migrations. Public access to the rivers is limited, and most land along these and all rivers in the state is privately owned, but Platte River, Eugene T. Mahoney and Indian Cave state parks provide access to riparian woodlands. Slow cruising along the less-traveled country roads, especially early in the morning and late in the evening, can bring a photographer within range of wildlife. Remember that these rural roads are also being used by local drivers with places to go and things to do; watch for traffic and avoid blocking lanes when you stop. You must have permission to enter private land.
For grassland photos, Cather Prairie in Webster County and Rock Creek State Historical Park in Jefferson County both offer good opportunities.
Each spring, migrating sandhill cranes stop along the central Platte, peaking about the third week of March and continuing into April. This wildlife spectacle attracts national attention. Consider going midweek to avoid weekend crowds, and if you wish to use public blinds, make reservations early. For more information on the cranes, crane viewing and crane photography, contact the Game and Parks Commission and the Grand Island or Kearney visitors bureaus.
Also in spring, the central Platte Valley and the Rainwater Basin marshes principally in Kearney, Adams, Clay, Fillmore and Jefferson counties are alive with migrating waterfowl, especially in March and April. Many of these marshes are publicly owned and offer good opportunities for wildlife and nature photographers. Game and Parks Commission and U.S. Fish and Wildlife Service publications are good sources for locating these areas. Don't forget, however, that ethical wildlife photography demands that you avoid disturbing or harassing wildlife; waterfowl forced to fly many times each day by photographers attempting to approach too close will be stressed and less likely to gain the weight they need to successfully complete migration and nesting. Your photo is not that important.
Be cautious on rural roads in the area. A little rain or melting snow can make the clay soil common in the area treacherous, and roads which are passable early in the morning when they are frozen can become quagmires after a few hours of warming sun.
Much of the state's best fall color occurs along the Platte and the lower Missouri rivers, and Indian Cave State Park offers public access to many acres of eastern deciduous woodland. Other parks, WMAs and historic sites in the area offer numerous photo opportunities, too. Finally, don't forget the many festivals and local celebrations from midsummer through fall.
LITTLE BLUE RIVER NEAR HEBRON
Along the Little Blue
No butte, canyon or sandhill is in sight in southeast Nebraska, yet there are good opportunities there for the photographer who knows how to find them. As a general rule, the many rivers of southeast Nebraska are great places to look. Personally, I like the Little Blue.
The Little Blue River Valley is less populated and less developed than other river valleys of southeast Nebraska, and it is more rustic and natural in character. It is a place where bands of mule deer can still be seen in the rugged hills, where barrel cactus and scorpions find refuge in limestone formations, and where wild turkeys scamper through the timber.
This is particularly true of some of the Little Blue's tributaries, such as Rose Creek, which drains the country south and southwest of Fairbury and joins the Little Blue at Endicott. The hills there are rough, scenic and full of deer, raccoons and other wildlife — great settings and great subjects for photography. But in places like Rose Creek, roads don't always follow the familiar grid of section lines, and not every road is maintained with the same attention (or gravel). An indispensable aid for navigating in such areas is a county road map, available from the State Department of Roads, Information Division, P.O. Box 94759, Lincoln, NE 68509. Maps in quarter-inch-per-mile scale are currently 20 cents per sheet, and half-inch-per-mile maps are 50 cents.
The Little Blue region also offers historical attractions with photo potential Sunday afternoon tours are available in old buildings at Steele City and elsewhere in the valley. Rock Creek Station State Historical Park east of Fairbury includes both historical reconstructions and a nature trail.
110 111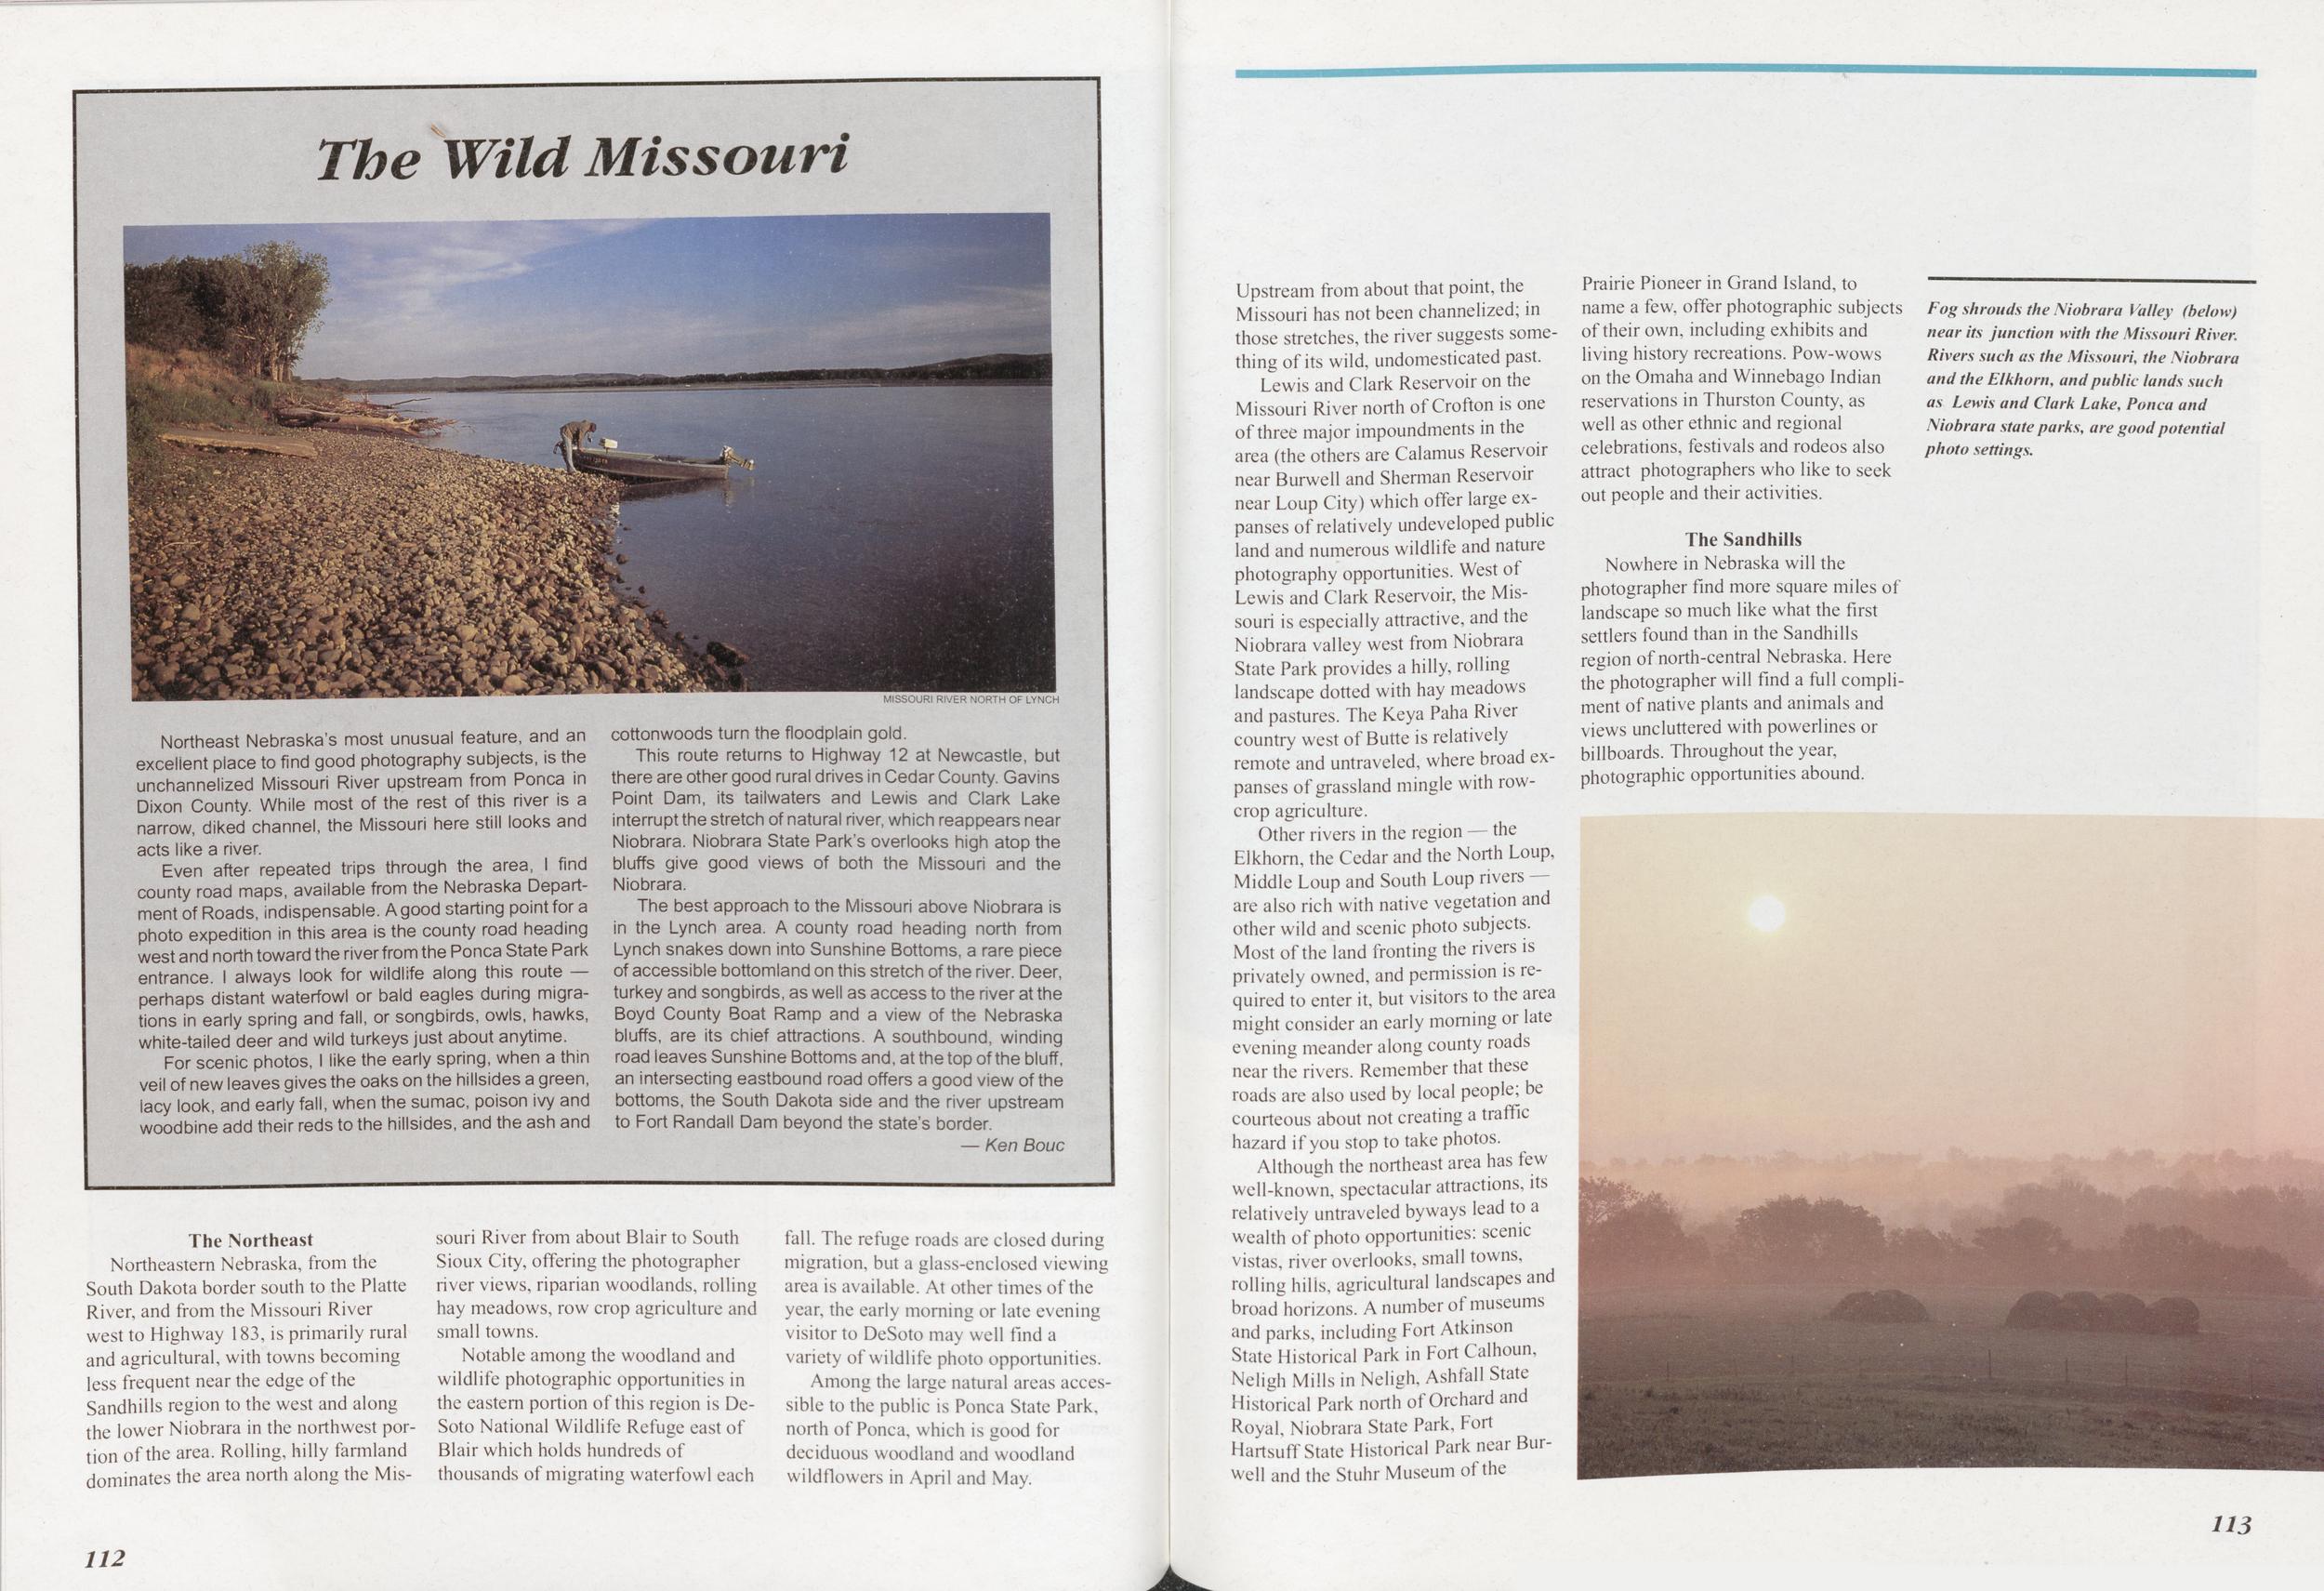
The Wild Missouri
MISSOURI RIVER NORTH OF LYNCH
Northeast Nebraska's most unusual feature, and an excellent place to find good photography subjects, is the unchannelized Missouri River upstream from Ponca in Dixon County. While most of the rest of this river is a narrow, diked channel, the Missouri here still looks and acts like a river.
Even after repeated trips through the area, I find county road maps, available from the Nebraska Department of Roads, indispensable. A good starting point for a photo expedition in this area is the county road heading west and north toward the river from the Ponca State Park entrance. I always look for wildlife along this route perhaps distant waterfowl or bald eagles during migrations in early spring and fall, or songbirds, owls, hawks, white-tailed deer and wild turkeys just about anytime.
For scenic photos, I like the early spring, when a thin veil of new leaves gives the oaks on the hillsides a green, iacy look, and early fall, when the sumac, poison ivy and woodbine add their reds to the hillsides, and the ash and cottonwoods turn the floodplain gold.
This route returns to Highway 12 at Newcastle, but there are other good rural drives in Cedar County. Gavins Point Dam, its tailwaters and Lewis and Clark Lake interrupt the stretch of natural river, which reappears near Niobrara. Niobrara State Park's overlooks high atop the bluffs give good views of both the Missouri and the Niobrara.
The best approach to the Missouri above Niobrara is in the Lynch area. A county road heading north from Lynch snakes down into Sunshine Bottoms, a rare piece of accessible bottomland on this stretch of the river. Deer, turkey and songbirds, as well as access to the river at the Boyd County Boat Ramp and a view of the Nebraska bluffs, are its chief attractions. A southbound, winding road leaves Sunshine Bottoms and, at the top of the bluff, an intersecting eastbound road offers a good view of the bottoms, the South Dakota side and the river upstream to Fort Randall Dam beyond the state's border.
Northeastern Nebraska, from the South Dakota border south to the Platte River, and from the Missouri River west to Highway 183, is primarily rural and agricultural, with towns becoming less frequent near the edge of the Sandhills region to the west and along the lower Niobrara in the northwest portion of the area. Rolling, hilly farmland dominates the area north along the Missouri River from about Blair to South Sioux City, offering the photographer river views, riparian woodlands, rolling hay meadows, row crop agriculture and small towns.
Notable among the woodland and wildlife photographic opportunities in the eastern portion of this region is DeSoto National Wildlife Refuge east of Blair which holds hundreds of thousands of migrating waterfowl each fall. The refuge roads are closed during migration, but a glass-enclosed viewing area is available. At other times of the year, the early morning or late evening visitor to DeSoto may well find a variety of wildlife photo opportunities.
Among the large natural areas accessible to the public is Ponca State Park, north of Ponca, which is good for deciduous woodland and woodland wildflowers in April and May. Upstream from about that point, the Missouri has not been channelized; in those stretches, the river suggests something of its wild, undomesticated past.
Lewis and Clark Reservoir on the Missouri River north of Crofton is one of three major impoundments in the area (the others are Calamus Reservoir near Burwell and Sherman Reservoir near Loup City) which offer large expanses of relatively undeveloped public land and numerous wildlife and nature photography opportunities. West of Lewis and Clark Reservoir, the Missouri is especially attractive, and the Niobrara valley west from Niobrara State Park provides a hilly, rolling landscape dotted with hay meadows and pastures. The Keya Paha River country west of Butte is relatively remote and untraveled, where broad expanses of grassland mingle with rowcrop agriculture.
Other rivers in the region — the Elkhorn, the Cedar and the North Loup, Middle Loup and South Loup rivers are also rich with native vegetation and other wild and scenic photo subjects. Most of the land fronting the rivers is privately owned, and permission is required to enter it, but visitors to the area might consider an early morning or late evening meander along county roads near the rivers. Remember that these roads are also used by local people; be courteous about not creating a traffic hazard if you stop to take photos.
Although the northeast area has few well-known, spectacular attractions, its relatively untraveled byways lead to a wealth of photo opportunities: scenic vistas, river overlooks, small towns, rolling hilis, agricultural landscapes and broad horizons. A number of museums and parks, including Fort Atkinson State Historical Park in Fort Calhoun, Neligh Mills in Ncligh, Ashfall State Historical Park north of Orchard and Royal, Niobrara State Park, Fort Hartsuff State Historical Park near Burwell and the Stuhr Museum of the Prairie Pioneer in Grand Island, to name a few, offer photographic subjects of their own, including exhibits and living history recreations. Pow-wows on the Omaha and Winnebago Indian reservations in Thurston County, as well as other ethnic and regional celebrations, festivals and rodeos also attract photographers who like to seek out people and their activities.
The SandhillsNowhere in Nebraska will the photographer find more square miles of landscape so much like what the first settlers found than in the Sandhills region of north-central Nebraska. Here the photographer will find a full compliment of native plants and animals and views uncluttered with powerlines or billboards. Throughout the year, photographic opportunities abound.
Fog shrouds the Niobrara V'alley (below) near its junction with the Missouri River. Rivers such as the Missouri, the Niobrara and the Elkhorn, and public lands such as Lewis and Clark Lake, Ponca and Niobrara state parks, are good potential photo settings.
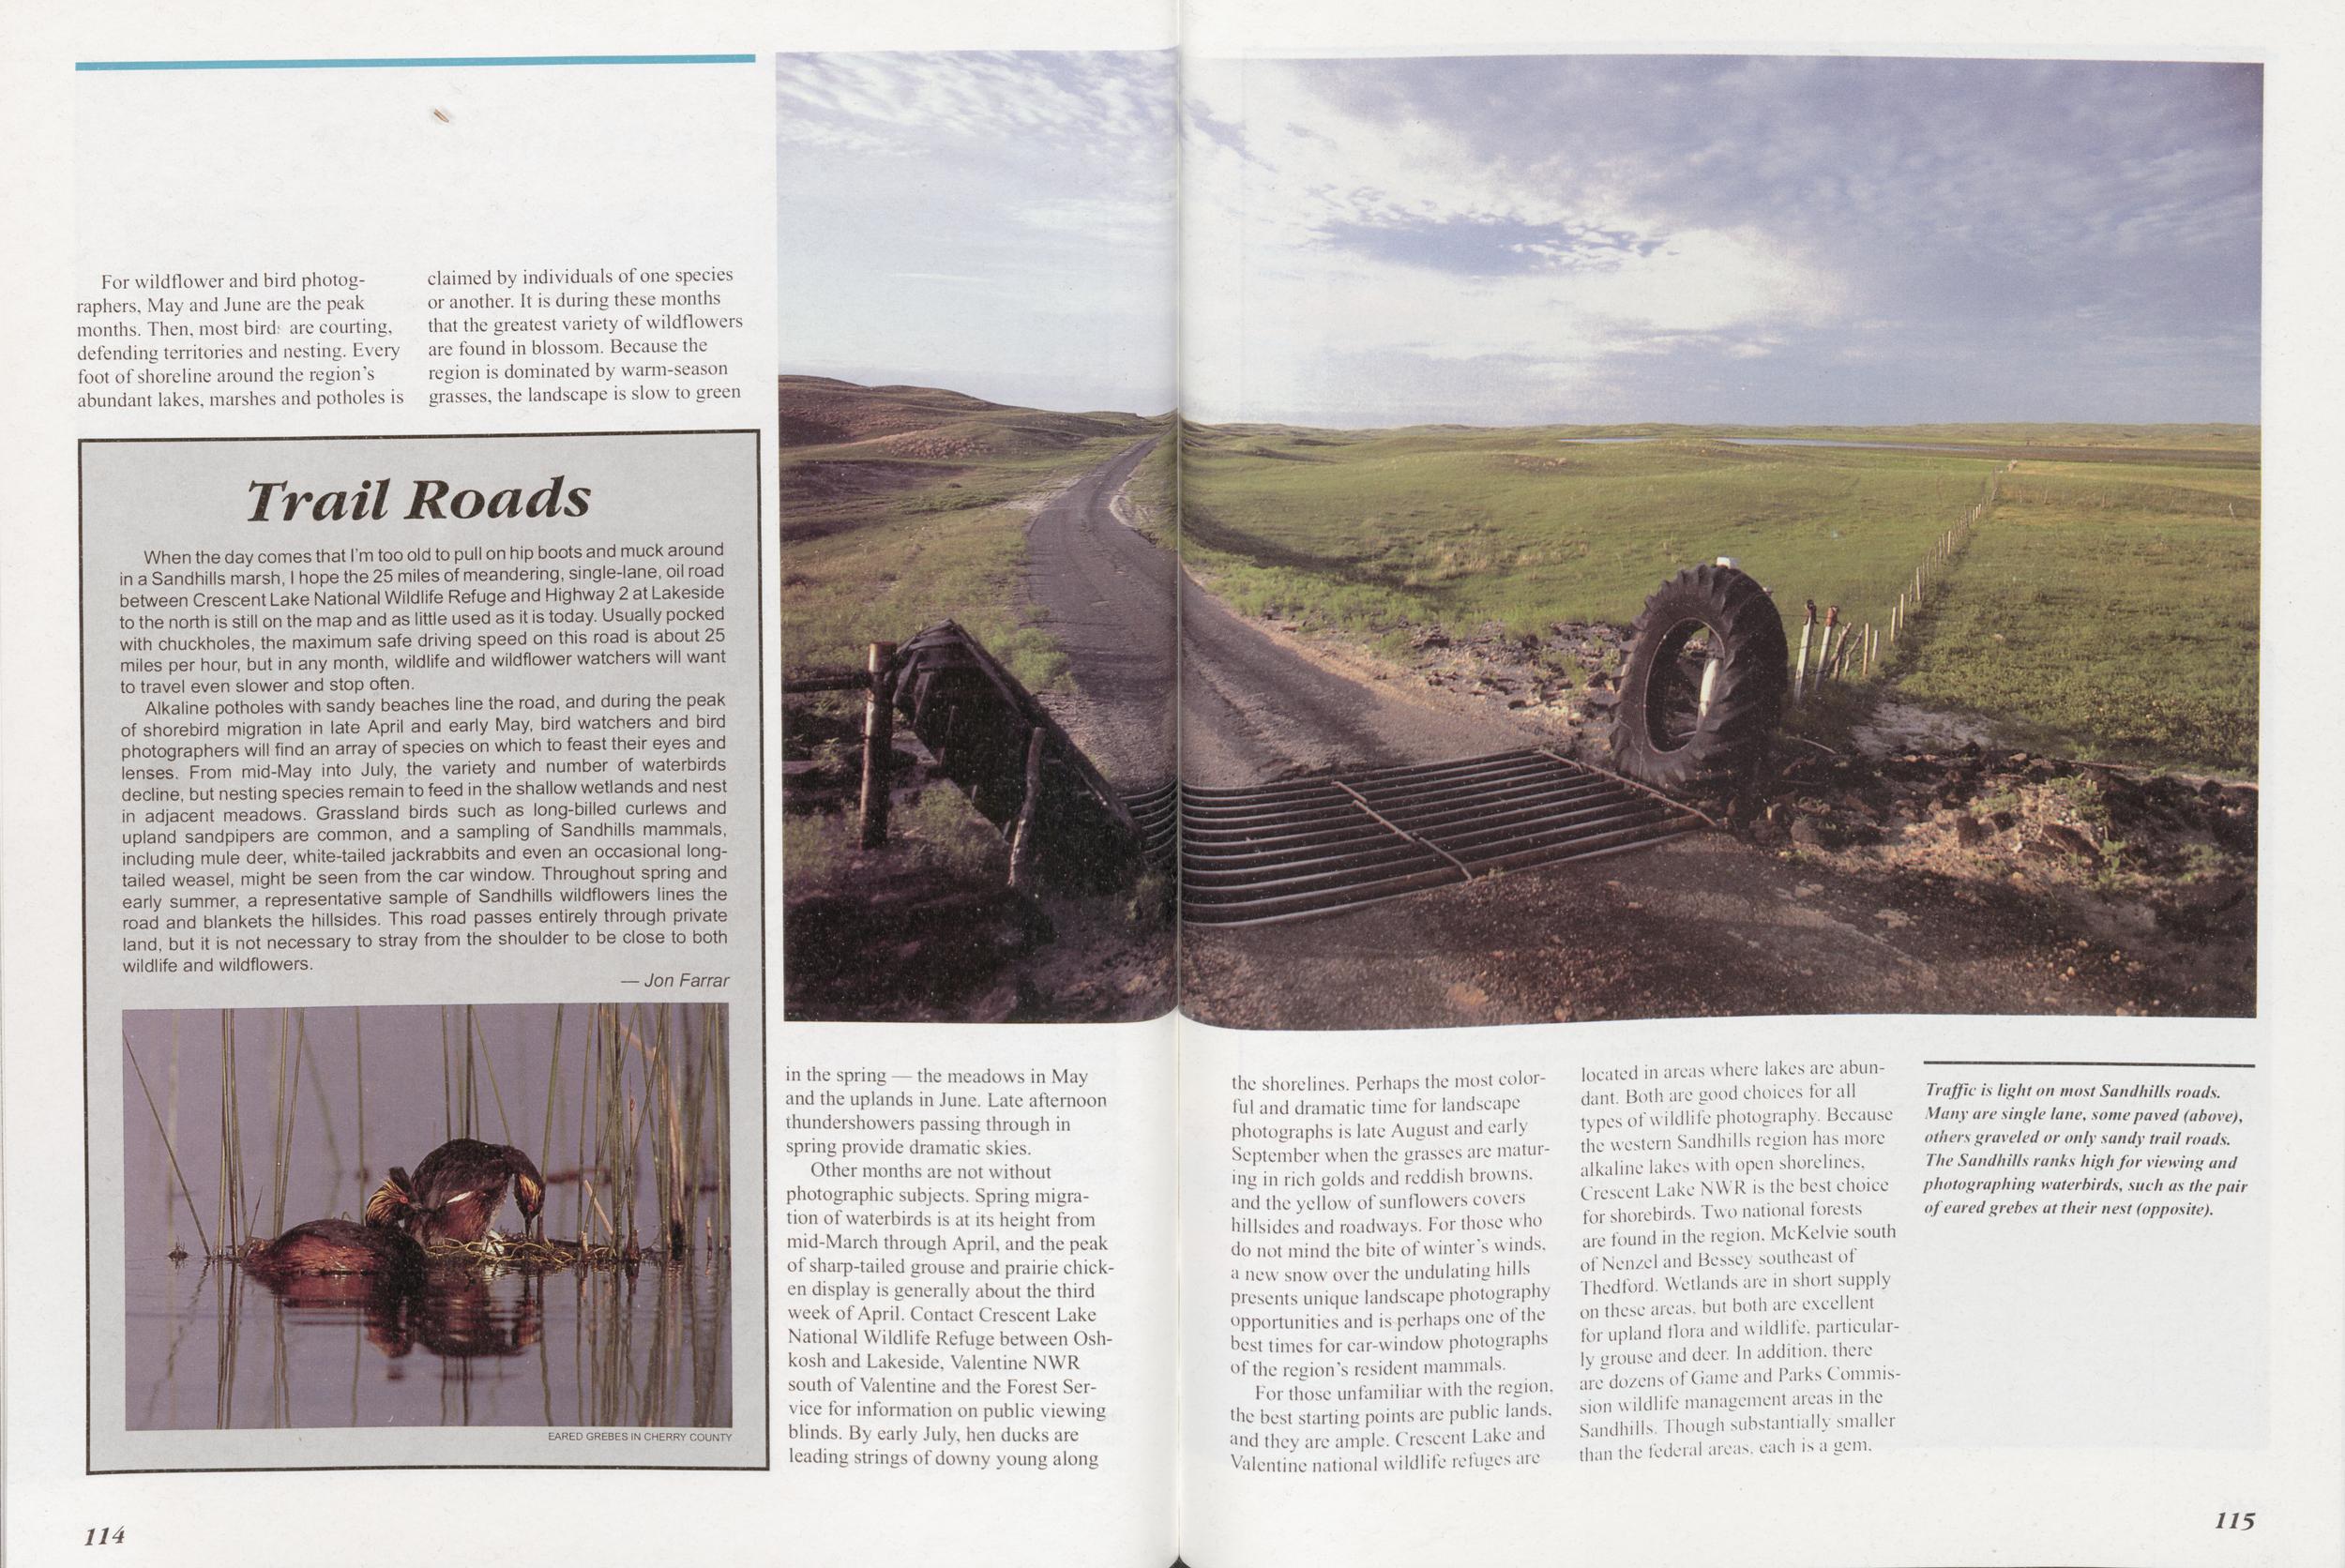
Trail Roads
When the day comes that I'm too old to pull on hip boots and muck around in a Sandhills marsh, I hope the 25 miles of meandering, single-lane, oil road between Crescent Lake National Wildlife Refuge and Highway 2 at Lakeside to the north is still on the map and as little used as it is today. Usually pocked with chuckholes, the maximum safe driving speed on this road is about 25 miles per hour, but in any month, wildlife and wildflower watchers will want to travel even slower and stop often.
Alkaline potholes with sandy beaches line the road, and during the peak of shorebird migration in late April and early May, bird watchers and bird photographers will find an array of species on which to feast their eyes and lenses. From mid-May into July, the variety and number of waterbirds decline, but nesting species remain to feed in the shallow wetlands and nest in adjacent meadows. Grassland birds such as long-billed curlews and upland sandpipers are common, and a sampling of Sandhills mammals, including mule deer, white-tailed jackrabbits and even an occasional longtailed weasel, might be seen from the car window. Throughout spring and early summer, a representative sample of Sandhills wildflowers lines the road and blankets the hillsides. This road passes entirely through private land, but it is not necessary to stray from the shoulder to be close to both wildlife and wildflowers.
EARED GREBES IN CHERRY COUNTY
For wildflower and bird photographers, May and June are the peak months. Then, most bird* are courting, defending territories and nesting. Every foot of shoreline around the region's abundant lakes, marshes and potholes is claimed by individuals of one species or another. It is during these months that the greatest variety of wildflowers are found in blossom. Because the region is dominated by warm-season grasses, the landscape is slow to green in the spring — the meadows in May and the uplands in June. Late afternoon rhundershowers passing through in spring provide dramatic skies.
Other months are not without photographic subjects. Spring migration of waterbirds is at its height from mid-March through April, and the peak of sharp-tailed grouse and prairie chicken display is generally about the third week of April. Contact Crescent Lake National Wildlife Refuge between Oshkosh and Lakeside, Valentine NWR south of Valentine and the Forest Service for information on public viewing blinds. By early July, hen ducks are leading strings of downy young along the shorelines. Perhaps the most colorful and dramatic time for landscape photographs is late August and early September when the grasses arc maturing in rich golds and reddish browns, and the yellow of sunflowers covers hillsides and roadways. For those who do not mind the bite of winter's winds, a new snow over the undulating hills presents unique landscape photography opportunities and is perhaps one of the best times for car-window photographs of the region's resident mammals.
For those unfamiliar with the region, the best starting points are public lands, and they are ample. Crescent Lake and Valentine national wildlife refuges are located in areas where lakes are abundant. Both are good choices for all types of wildlife photography. Because the western Sandhills region has more alkaline lakes with open shorelines. Crescent Lake NWR is the best choice for shorebirds. Two national forests are found in the region. McKelvie south of Nen/el and Bessey southeast of Thedford. Wetlands are in short supply on these areas, btit both are excellent for upland flora and wildlife, particularly mouse and deer. In addition, there arc dozens of Came and Parks Commission wildlife management areas in the Sandhills Though substantially smaller than the federal areas, each is a gem.
Traffic is light on most Sandhills roads. Many are single lane, some paved (above), others graveled or only sandy trail roads. The Sandhills ranks high for viewing and photographing waterbirds, such as the pair of eared grebes at their nest (opposite).
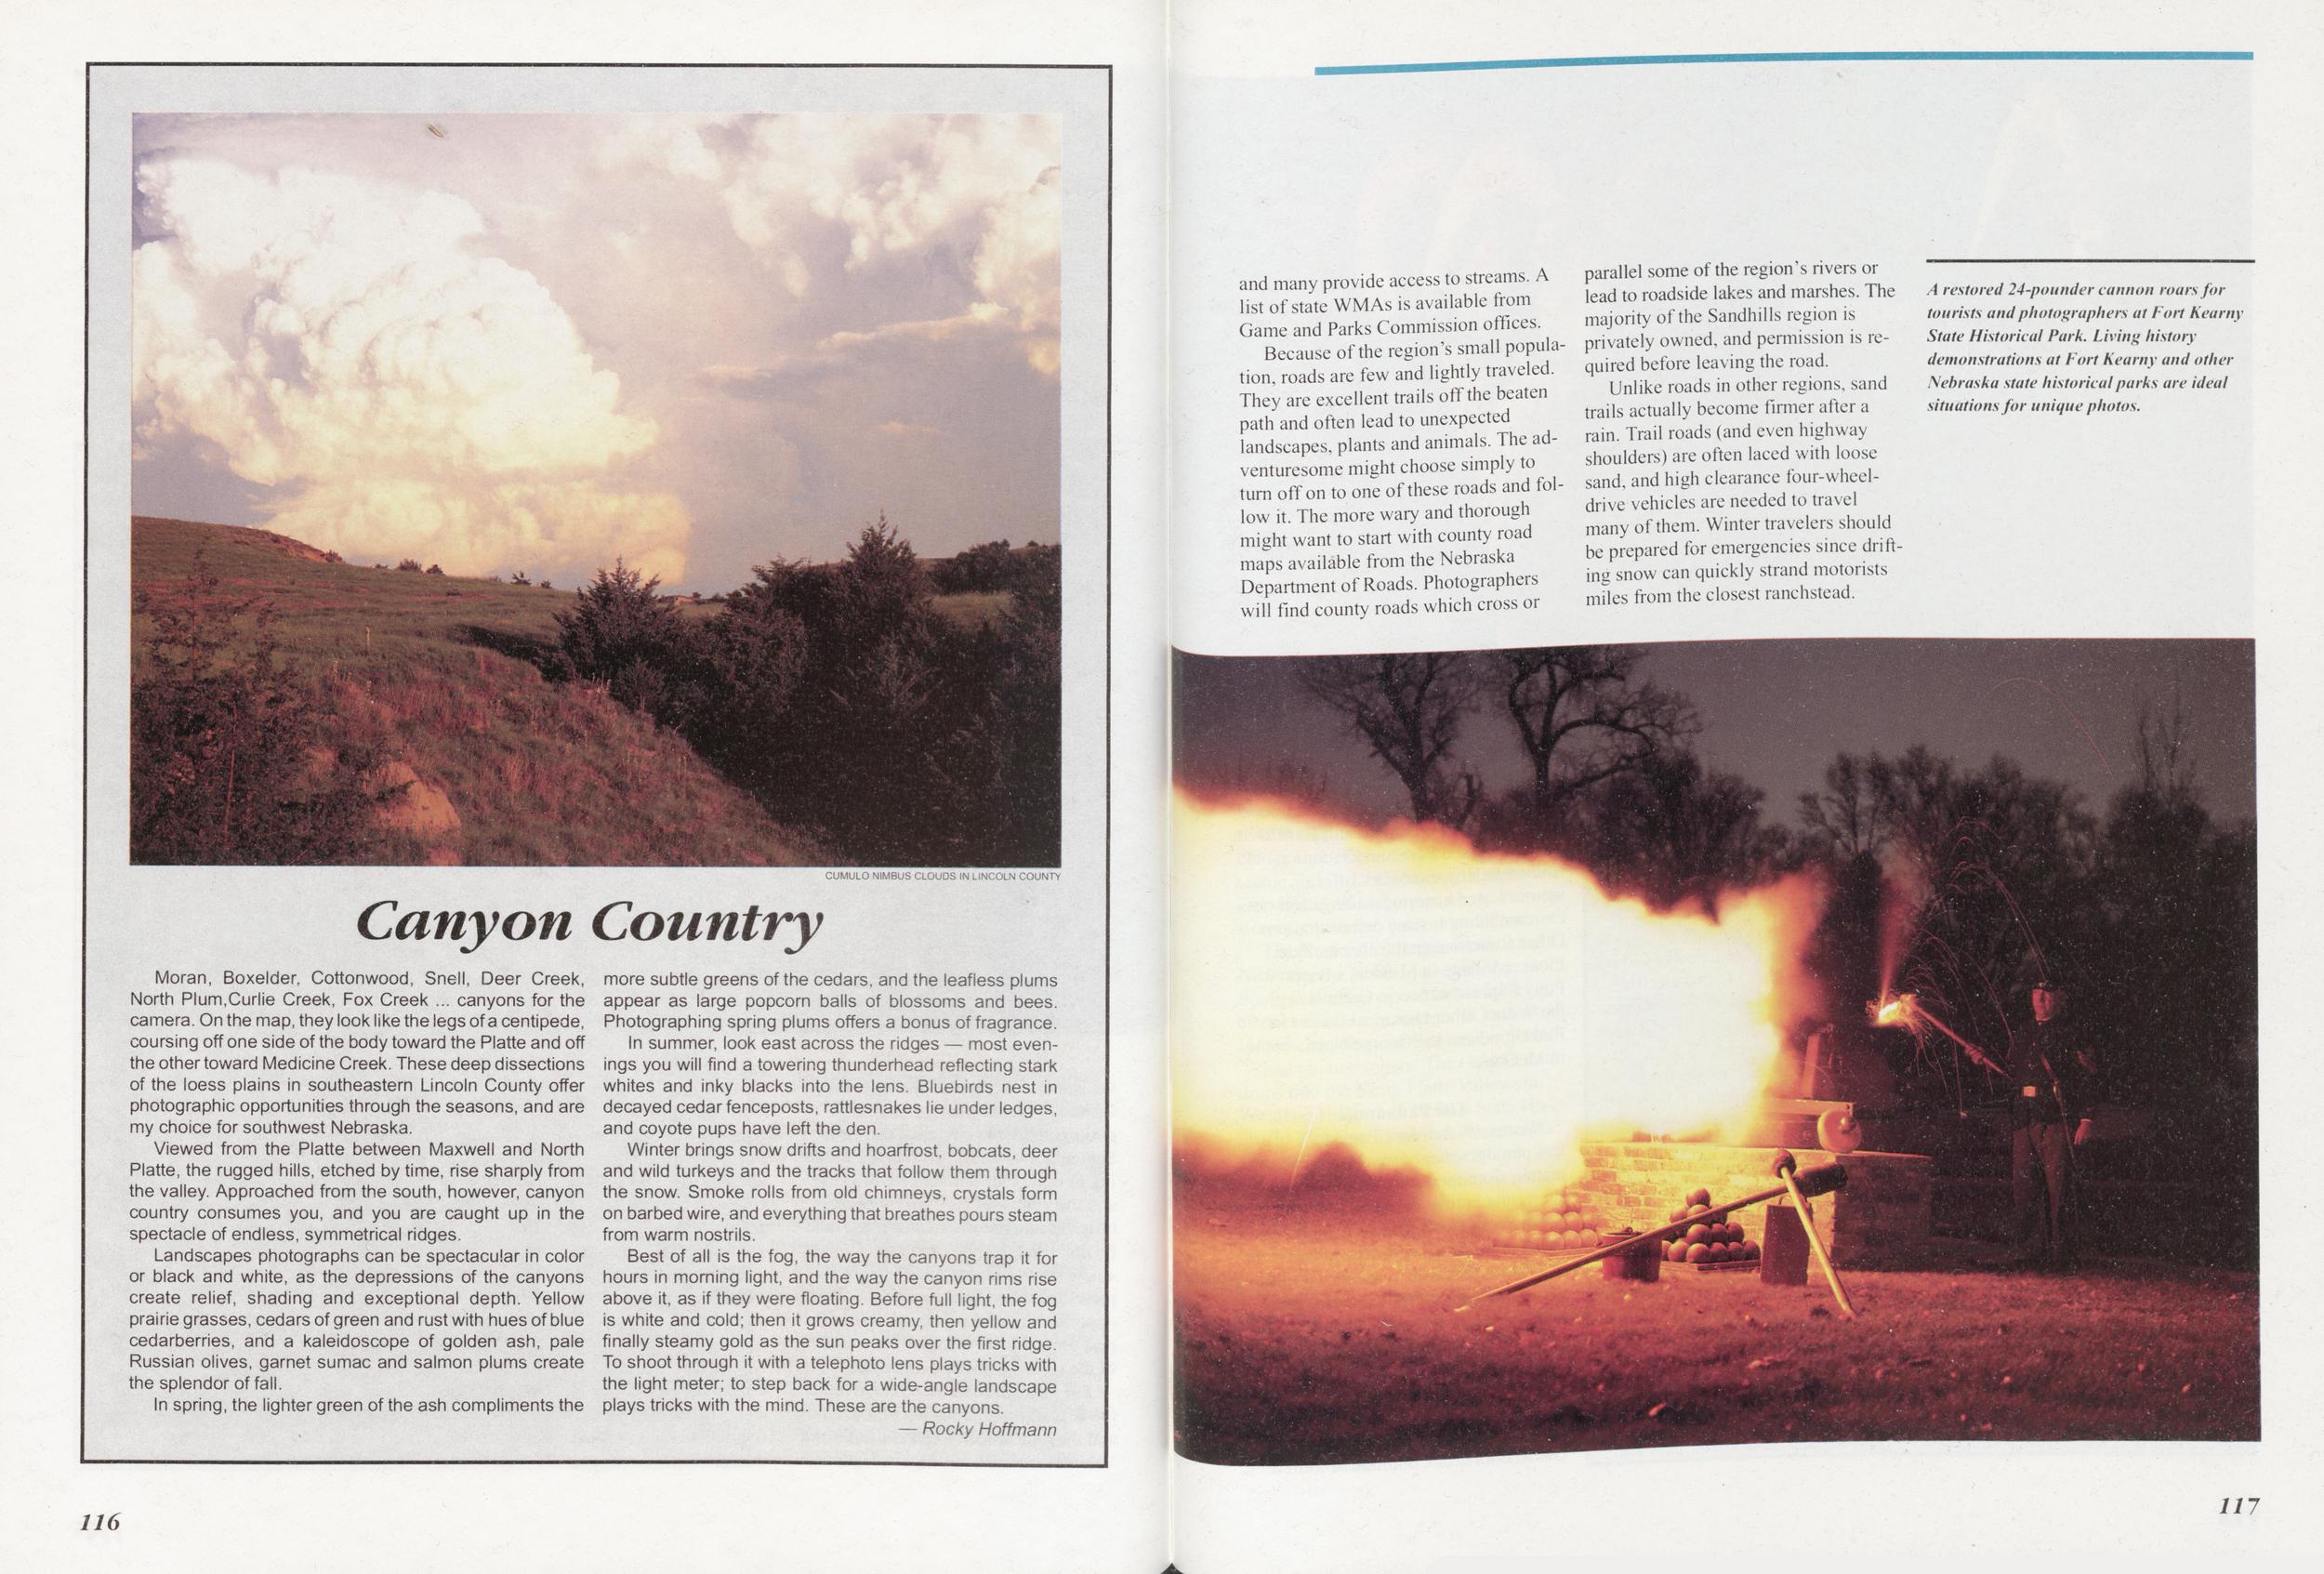
CUMULO NIMBUS CLOUDS IN LINCOLN COUNTY
Canyon Country
Moran, Boxelder, Cottonwood, Snell, Deer Creek, North Plum,Curlie Creek, Fox Creek canyons for the camera. On the map, they look like the legs of a centipede, coursing off one side of the body toward the Platte and off the other toward Medicine Creek. These deep dissections of the loess plains in southeastern Lincoln County offer photographic opportunities through the seasons, and are my choice for southwest Nebraska.
Viewed from the Platte between Maxwell and North Platte, the rugged hills, etched by time, rise sharply from the valley. Approached from the south, however, canyon country consumes you, and you are caught up in the spectacle of endless, symmetrical ridges.
Landscapes photographs can be spectacular in color or black and white, as the depressions of the canyons create relief, shading and exceptional depth. Yellow prairie grasses, cedars of green and rust with hues of blue cedarberries, and a kaleidoscope of golden ash, pale Russian olives, garnet sumac and salmon plums create the splendor of fall.
In spring, the lighter green of the ash compliments the more subtle greens of the cedars, and the leafless plums appear as large popcorn balls of blossoms and bees. Photographing spring plums offers a bonus of fragrance.
In summer, look east across the ridges — most evenings you will find a towering thunderhead reflecting stark whites and inky blacks into the lens. Bluebirds nest in decayed cedar fence posts, rattlesnakes lie under ledges, and coyote pups have left the den.
Winter brings snow drifts and hoarfrost, bobcats, deer and wild turkeys and the tracks that follow them through the snow. Smoke rolls from old chimneys, crystals form on barbed wire, and everything that breathes pours steam from warm nostrils.
Best of all is the fog, the way the canyons trap it for hours in morning light, and the way the canyon rims rise above it, as if they were floating. Before full light, the fog is white and cold; then it grows creamy, then yellow and finally steamy gold as the sun peaks over the first ridge. To shoot through it with a telephoto lens plays tricks with the light meter; to step back for a wide-angle landscape plays tricks with the mind. These are the canyons.
and many provide access to streams. A list of state WMAs is available from Game and Parks Commission offices.
Because of the region's small population, roads are few and lightly traveled. They are excellent trails off the beaten path and often lead to unexpected landscapes, plants and animals. The adventuresome might choose simply to turn off on to one of these roads and follow it. The more wary and thorough might want to start with county road maps available from the Nebraska Department of Roads. Photographers will find county roads which cross or parallel some of the region's rivers or lead to roadside lakes and marshes. The majority of the Sandhills region is privately owned, and permission is required before leaving the road.
Unlike roads in other regions, sand trails actually become firmer after a rain. Trail roads (and even highway shoulders) are often laced with loose sand, and high clearance four-wheel-drive vehicles are needed to travel many of them. Winter travelers should be prepared for emergencies since drifting snow can quickly strand motorists miles from the closest ranchstead.
A restored 24-pounder cannon roars for tourists and photographers at Fort Kearny State Historical Park. Living history demonstrations at Fort Kearny and other Nebraska state historical parks are ideal situations for unique photos.
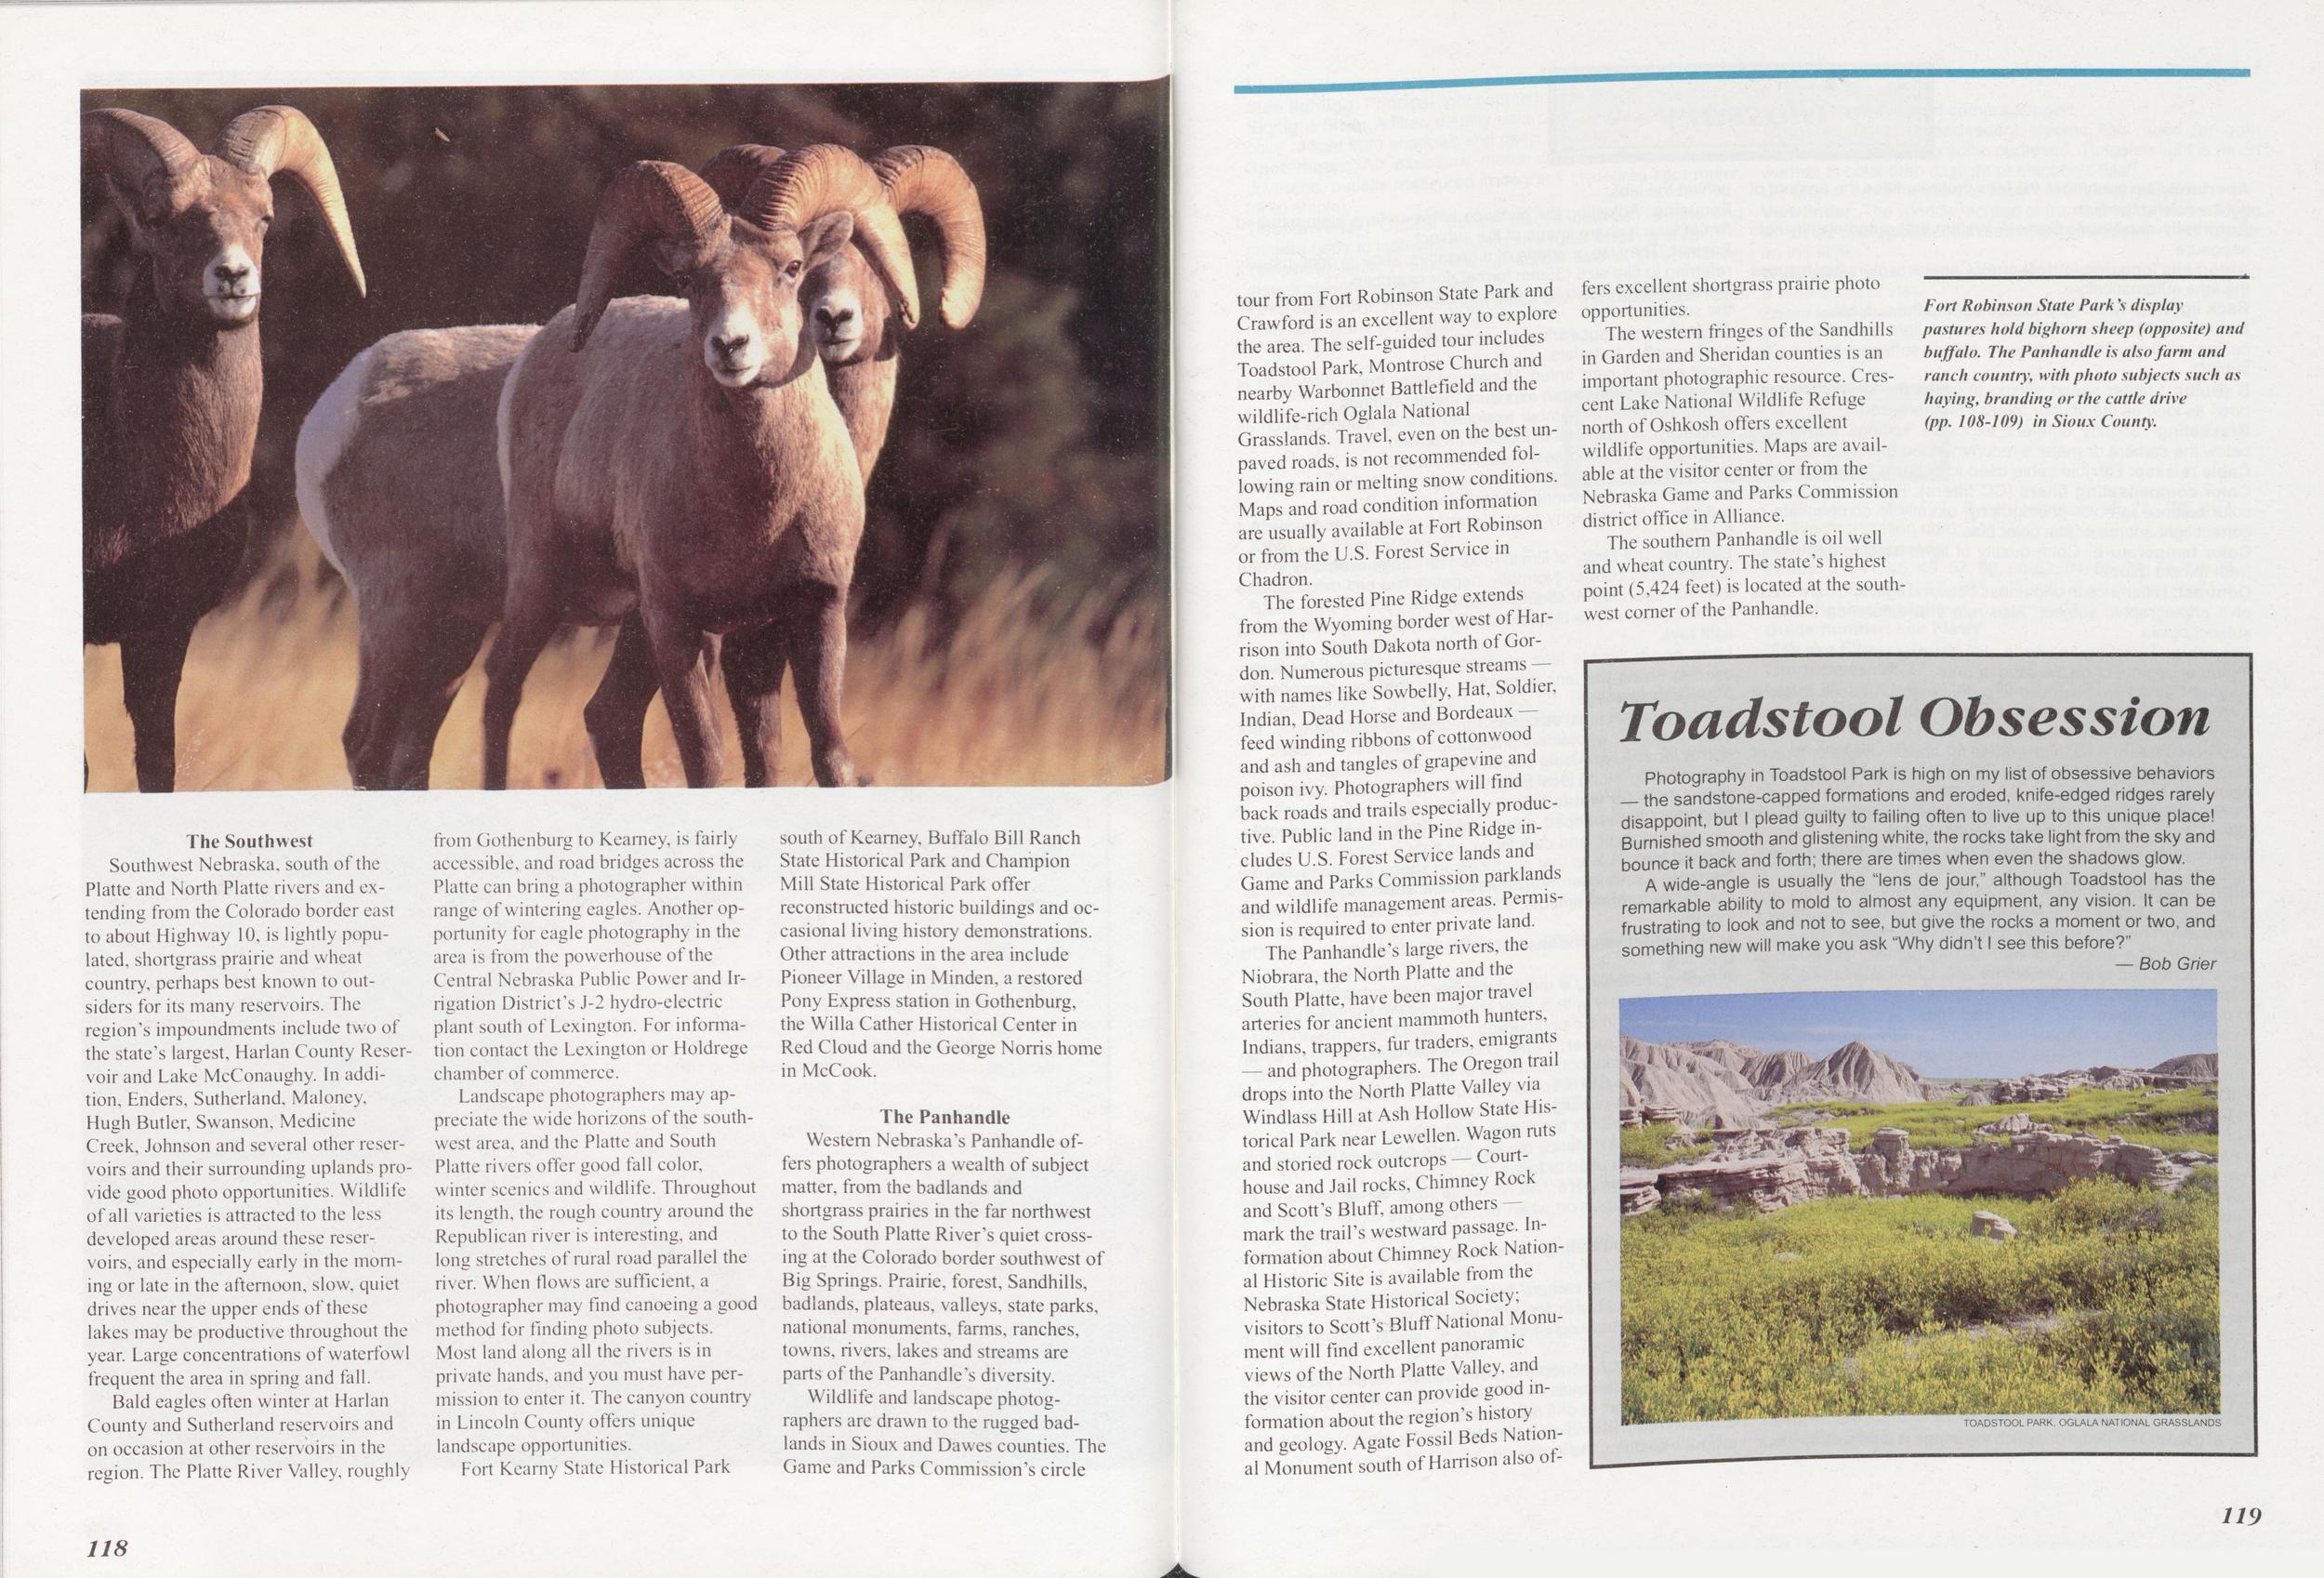
Southwest Nebraska, south of the Platte and North Platte rivers and extending from the Colorado border east to about Highway 10, is lightly populated, shortgrass prairie and wheat country, perhaps best known to outsiders for its many reservoirs. The region's impoundments include two of the state's largest, Harlan County Reservoir and Lake McConaughy. In addition, Enders, Sutherland, Maloney, Hugh Butler, Swanson, Medicine Creek, Johnson and several other reservoirs and their surrounding uplands provide good photo opportunities. Wildlife of all varieties is attracted to the less developed areas around these reservoirs, and especially early in the morning or late in the afternoon, slow, quiet drives near the upper ends of these lakes may be productive throughout the year. Large concentrations of waterfowl frequent the area in spring and fall.
Bald eagles often winter at Harlan County and Sutherland reservoirs and on occasion at other reservoirs in the region. The Platte River Valley, roughly from Gothenburg to Kearney, is fairly accessible, and road bridges across the Platte can bring a photographer within range of wintering eagles. Another opportunity for eagle photography in the area is from the powerhouse of the Central Nebraska Public Power and Irrigation District's J-2 hydro-electric plant south of Lexington. For information contact the Lexington or Holdrege chamber of commerce.
Landscape photographers may appreciate the wide horizons of the southwest area, and the Platte and South Platte rivers offer good fall color, winter scenics and wildlife. Throughout its length, the rough country around the Republican river is interesting, and long stretches of rural road parallel the river. When flows are sufficient, a photographer may find canoeing a good method for finding photo subjects. Most land along all the rivers is in private hands, and you must have permission to enter it. The canyon country in Lincoln County offers unique landscape opportunities.
Fort Kearny State Flistorical Park south of Kearney, Buffalo Bill Ranch State Historical Park and Champion Mill State Historical Park offer reconstructed historic buildings and occasional living history demonstrations. Other attractions in the area include Pioneer Village in Minden, a restored Pony Express station in Gothenburg, the Willa Cather Historical Center in Red Cloud and the George Norris home in McCook.
The PanhandleWestern Nebraska's Panhandle offers photographers a wealth of subject matter, from the badlands and shortgrass prairies in the far northwest to the South Platte River's quiet crossing at the Colorado border southwest of Big Springs. Prairie, forest, Sandhills, badlands, plateaus, valleys, state parks, national monuments, farms, ranches, towns, rivers, lakes and streams are parts of the Panhandle's diversity.
Wildlife and landscape photographers are drawn to the rugged badlands in Sioux and Dawes counties. The Game and Parks Commission's circle tour from Fort Robinson State Park and Crawford is an excellent way to explore the area. The self-guided tour includes Toadstool Park, Montrose Church and nearby Warbonnet Battlefield and the wildlife-rich Oglala National Grasslands. Travel, even on the best unpaved roads, is not recommended following rain or melting snow conditions. Maps and road condition information are usually available at Fort Robinson or from the U.S. Forest Service in Chadron.
The forested Pine Ridge extends from the Wyoming border west of Harrison into South Dakota north of Gordon. Numerous picturesque streams — with names like Sowbelly, Hat, Soldier, Indian, Dead Horse and Bordeaux — feed winding ribbons of cottonwood and ash and tangles of grapevine and poison ivy. Photographers will find back roads and trails especially productive. Public land in the Pine Ridge includes U.S. Forest Service lands and Game and Parks Commission parklands and wildlife management areas. Permission is required to enter private land.
The Panhandle's large rivers, the Niobrara, the North Platte and the South Platte, have been major travel arteries for ancient mammoth hunters, Indians, trappers, fur traders, emigrants - and photographers. The Oregon trail drops into the North Platte Valley via Windlass Hill at Ash Hollow State Historical Park near Lewellen. Wagon ruts and storied rock outcrops — Courthouse and Jail rocks, Chimney Rock and Scott's Bluff, among others — mark the trail's westward passage. Information about Chimney Rock National Historic Site is available from the Nebraska State Historical Society; visitors to Scott's Bluff National Monument will find excellent panoramic views of the North Platte Valley, and the visitor center can provide good information about the region's history and geology. Agate Fossil Beds National Monument south of Harrison also offers excellent shortgrass prairie photo opportunities.
The western fringes of the Sandhills in Garden and Sheridan counties is an important photographic resource. Crescent Lake National Wildlife Refuge north of Oshkosh offers excellent wildlife opportunities. Maps are available at the visitor center or from the Nebraska Game and Parks Commission district office in Alliance.
The southern Panhandle is oil well and wheat country. The state's highest point (5,424 feet) is located at the southwest corner of the Panhandle.
Fort Robinson State Park's display pastures hold bighorn sheep (opposite) and buffalo. The Panhandle is also farm and ranch country, with photo subjects such as haying, branding or the cattle drive (pp. 108-109) in Sioux County.
Toadstool Obsession
Photography in Toadstool Park is high on my list of obsessive behaviors — the sandstone-capped formations and eroded, knife-edged ridges rarely disappoint, but I plead guilty to failing often to live up to this unique place! Burnished smooth and glistening white, the rocks take light from the sky and bounce it back and forth; there are times when even the shadows glow.
A wide-angle is usually the "lens de jour," although Toadstool has the remarkable ability to mold to almost any equipment, any vision. It can be frustrating to look and not to see, but give the rocks a moment or two, and something new will make you ask "Why didn't 1 see this before?"
TOADSTOOL PARK. OGLALA NATIONAL GRASSLANDS
Glossary
Aperture: The opening in the lens that regulates the amount of light reaching the film.
Automatic exposure: Camera system that automatically sets exposure.
Automatic focusing (autofocus): Camera system that focuses the lens automatically.
Back lighting: Main light source behind the subject.
Bounce light: Directing flash or other light source toward a ceiling, wall or other surface to reflect softened light on the subject.
B (Bulb): Shutter speed setting at which the shutter will stay open as long as the shutter release is depressed.
Bracketing: Slightly different exposure settings above and below the camera or meter's recommended exposure settings.
Cable release: Flexible cable used to depress camera shutter.
Color compensating filters (CC filters): Filters used to alter color balance in color photography, usually to compensate or correct light source or film color bias.
Color temperature: Color quality of light, ranging from warm (red) to cold (blue).
Contrast: Difference in brightness between light and dark areas of a photographic subject. Also refers to difference between subject colors.
Cropping: Trimming an image along one or more of its edges during enlarging, or on the slide or print.
Daylight film: Film balanced to produce accurate colors when exposed to subject lit by daylight or light of similar color temperature, (electronic flash, for example).
Dedicated flash: A flash unit made for specific make or type of camera which uses the camera's metering system to control flash output automatically.
Depth of field: The zone of sharpness, extending in front of and behind the subject, that is in acceptable focus.
Diaphragm: The part of the lens that controls the size of the aperture.
Diffused light: Light that is modified, usually by passing through translucent material or by reflection, before striking the subject.
Emulsion: The light-sensitive layer on film or paper.
Exposure: The amount of light striking light-sensitive film or paper, controlled in the camera by aperture and shutter speed.
Exposure meter: Instrument used to measure intensity of light to determine shutter and aperture settings.
Extension tubes or rings: Plastic or metal tubes added to small or medium format cameras to extend lens-to-film distance for close-up photography.
Fill light: Light used to supplement principal light source, usually to brighten shadows.
Film speed: A film's sensitivity to light, rated numerically on several different scales. ISO and ASA rating numbers correspond, and are most commonly used, while DIN is a European rating system.
Filter: A thin sheet of glass, plastic or gelatin usually used in front of the lens to control or change the appearance of the picture.
Flash: A very brief burst of artificial light supplied by electronic flash or flashbulb.
Flash synchronization: Feature of cameras that makes peak of flash and maximum shutter opening coincide.
F-number: A numbered scale on a lens indicating aperture size.
Focal length: The distance, usually in millimeters, between the optical center of a lens and the film when the lens is focused at infinity.
Focal plane: The plane on which the image is brought into focus behind the lens.
Focusing: Adjusting the distance between lens elements and film to form a sharp image of the subject.
Format: The size or shape of a negative, slide or print, usually referring to film size (35mm format, for example).
Front lighting: Main light source and camera on same side of the subject.
Grain:Texture appearing to some degree in all processed photographic materials.
Gray card: A card tinted 18-percent gray, from which light is reflected to take precise exposure meter readings.
Guide number: A number assigned to a light source such as an electronic flash unit to indicate its power.
Highlights: The brightest areas of a subject.
Incident light reading: Measuring light that falls on a subject, as opposed to measuring light reflected from it.
Infinity: In photography, focus distance of objects on the distant horizon.
Latitude: The ability of film to record an image even if exposure is not exactly correct. Normally, negative film has more latitude than transparency or slide film.
Lens: Optical device that forms images by bending and focusing light rays.
Lens hood: Simple lens accessory, usually metal or rubber, used to shield the lens from stray light that can degrade the photographic image.
Macro lens: A lens designed for close-up photography, but usually capable of ordinary photography as well.
Mirror lens: A lens using curved mirrors to reflect light back and forth creating a long focal length within a compact lens housing.
Motor drive (or winder): Power-driven film advance.
Negative: A developed photographic image, with light tones recorded as dark, and dark tones as light.
Normal lens: A lens that produces an image close to what the human eye sees in terms of angle of view, scale and perspective. For 35mm format cameras, a normal lens is about 50mm focal length.
Open flash: Firing the flash while the shutter is held open on its B setting.
Panning: Following a moving subject with the camera during exposure (usually with a slow shutter speed) to convey movement or speed in the photograph.
Photographic paper: Paper coated with light-sensitive emulsion used to make contact prints or enlargements.
Polarizing filter: A filter normally used to darken sky, improve color saturation in foliage and remove unwanted reflections. Can be used with color or black and white film.
Rangefinder: A distance measuring device, normally built into the camera and used to focus.
Reciprocity failure: Increasing loss of sensitivity of photographic emulsion when exposures are extremely brief or long.
Reflected light reading: Measuring light reflected from a subject.
Reflex camera: A camera employing a mirror in the viewing system to reflect the image onto a viewfinder screen.
Rim lighting: Lighting of the subject, usually from behind, to give it a bright fringe.
Rule of thirds: A principle of composition. Mentally divide the viewfinder frame equally into thirds horizontally and vertically. Place the subject at one intersection of the imaginary lines.
Sandwiching: Combining two or more negatives or slides to produce a composite image.
Shutter: Camera mechanism that controls duration of exposure.
Side lighting: Principal light source to one side of subject.
Skylight filter: A filter, usually pale pink, used to reduce blue color of light from shadows and open blue sky.
Spot meter An exposure meter with a reduced angle of coverage, usually measured in degrees (1-degree spot meter, for example).
Teleconverter: Optical device placed between a lens and camera body to increase the effective focal length of a lens.
Telephoto lens: A lens with a narrow field of view, making distant objects appear closer.
Time exposure: A photograph made with the shutter held open manually by the photographer.
Transparency: A positive image viewed by transmitted light or projected as a slide.
Tripod: A three-legged camera support.
Tungsten light: Incandescent electric light used for both household and photographic purposes. Tungsten light is much warmer in color than daylight or electronic flash.
UV filter: Lens filter used to absorb ultraviolet radiation.
Viewfinder: The window, screen or frame on a camera through which the photographer can see approximately what will appear on the film.
Wide-angle lens: A lens with a short focal length that takes in a wide angle of view.
Zoom lens: A variable focal length lens.
Index
Aperture: see Lens ASA: see Film, Speed of B: see Exposure, Time Back light: see Light, Black-and-White Photography: 80, 81, 8d-Bb Blind: 41, 44, 47, 48, 50, 51, 53, 54, 111,114 Bounce light: see Light Bracket: see Exposure Cable release: 59 Camera: 23, 24, 30, 33, 40, 41, 43, 59, 71 83, 84, 8>, 94-97, 99,104; Cases and packs: 91; 107 Reflex: 40, 57, 60, 88, 91; Shutter. 36 4a 88 96 97 107, View: 34, 89; Viewfinder: 16-19, 40 41,43 52 70 88, 91 Camera position: 12, 14, 15, 30, 32-34, 45, 46, 62, 70, Clo'slup photography: 40, 41, 55, 57-61, 67, 88; Extension tubes: 59, 62 Cold: see Film, Light Color Temperature: see Film, Light Rllionf Composition: 12, 15-17, 19, 25, 32, 45, 65, 71, Rule of thirds: 15-19 inn Contrast: 19-21, 24, 52, 60, 73, 80, 82-85, 95, 98, 100 Cropping: 19, 86, 89 R7 71 Depth of field: 31, 41, 46, 51, 52, 57, 60, 61, 64, 66, 67, 71, 96,97,99, 102, 103 Diaphragm: see Lens DIN: see Film, Speed of Dummy camera: 44, 48 Exposure: 23, 24 59 73 81, 83 86, matic: 40, 99; Bracketing. 23, 98, 95, 96, 99-103, 106, 107; Gray card: 100, Shutter speed. 41, 46, 51, 58-60, 64, 71, 88, 95-97, 99 102-104, 106, 107; Time: 36, 96, 99; Zone system:;85 . Exposure meter: 23, 76, 83, 97-102, 116; Through the lens. 57 Fill (light or flash): see Light Film: 19-21, 31, 66, 80 81 100,102-104,106; Color: 20, 21, Color balance i or cold): 20, 21, 49, 66, 114, 116; Daylight. 20 21 47 71 iA Fmi.kinn-29 94 Format: 17, 19, 30-34, 4u, oh, 73,74, Emulsion. Latitude: 81; Negative: 80, 81, 85, 86, 89, 94, 100, 102; RoH.**. Speed of. 106; Red eye: 36, 73, 74, 96, 99; Strobe. 51, 58 60, n. 73, 74, 76, 106, 107; Synchronization: 58, 74, 106, 107; Synchronization cord: 74 F-stop: see Exposure Focus: 31, 41, 45, 49, 57, 59, 60-62, 64, 65, 71, 74, 88, 96, 103; Infinity: 31, 57, 103 Front light: see Light Guide number: see Flash ISO: see Film, Speed of Landscapes:26-37 Lens: 17, 23, 31, 32, 41-43, 46, 51, 52, 57, 59-64, 67, 71, 75 77,85,90,91,94,95, 103-106, 119; Angle of view: 20, 63; Aperture: 31, 36, 40-42, 57, 59, 60, 64, 71, 75, 88, 95 97, 99-102, 104, 106; Diaphragm: 95; Focal length: 41 43,51,57,59-61,67,103,104; Long: 41, 46, 76; Macro: 57, 59-64, 67; Mirror: 42, 43; Normal: 71, 103, 104; Sharpness: 31, 43, 81, 95, 96, 105, 106; Teleconverter: 42; Telephoto: 23, 32, 40, 41, 42, 46, 49, 57, 71, 75, 76, 103, 104; Wide-angle: 31, 32, 64, 71, 103, 104; Zoom: 71,77,88 Light: 12, 15, 20, 21, 24, 30, 31, 51, 59-67, 70-75, 95-97, 99, 102, 106, 116, 119; Back: 20. 61, 63, 73; Bounce: 64, 73; Color temperature of (warm or cold): 20, 31, 64, 66, 116; Diffused: 24, 59, 71-73; Fill: 20, 63-65, 71, 73, 74, 106, 107; Front: 20, 61, 99; Reflector: 64, 65, 73, 74, 107; Rim: 73; Side: 20, 61; Silhouette: 61, 73, 102; Tungsten: 21 Macro: see Lens Monopod: 46, 52 Motor drive: 44-46, 48, 51-53 Panning: 46, 51, 96 People: 68-77 Portrait: 28, 70-72, 97 Previsualization: 36, 85 Red eye: see Flash Reflector: see Light Remote release: 45, 48 Rim light: see Light Rule of thirds: see Composition Shoulder stock: 46, 52, 106, 114 Shutter: see Camera Shutter speed: see Exposure Silhouette: see Light Strobe: see Flash Teleconverter: see Lens Tripod: 23, 25, 31, 41, 46, 48, 52, 59, 86, 102, 106 Warm: see Film, Color temperature of, Light Wildlife: 38-55 121 120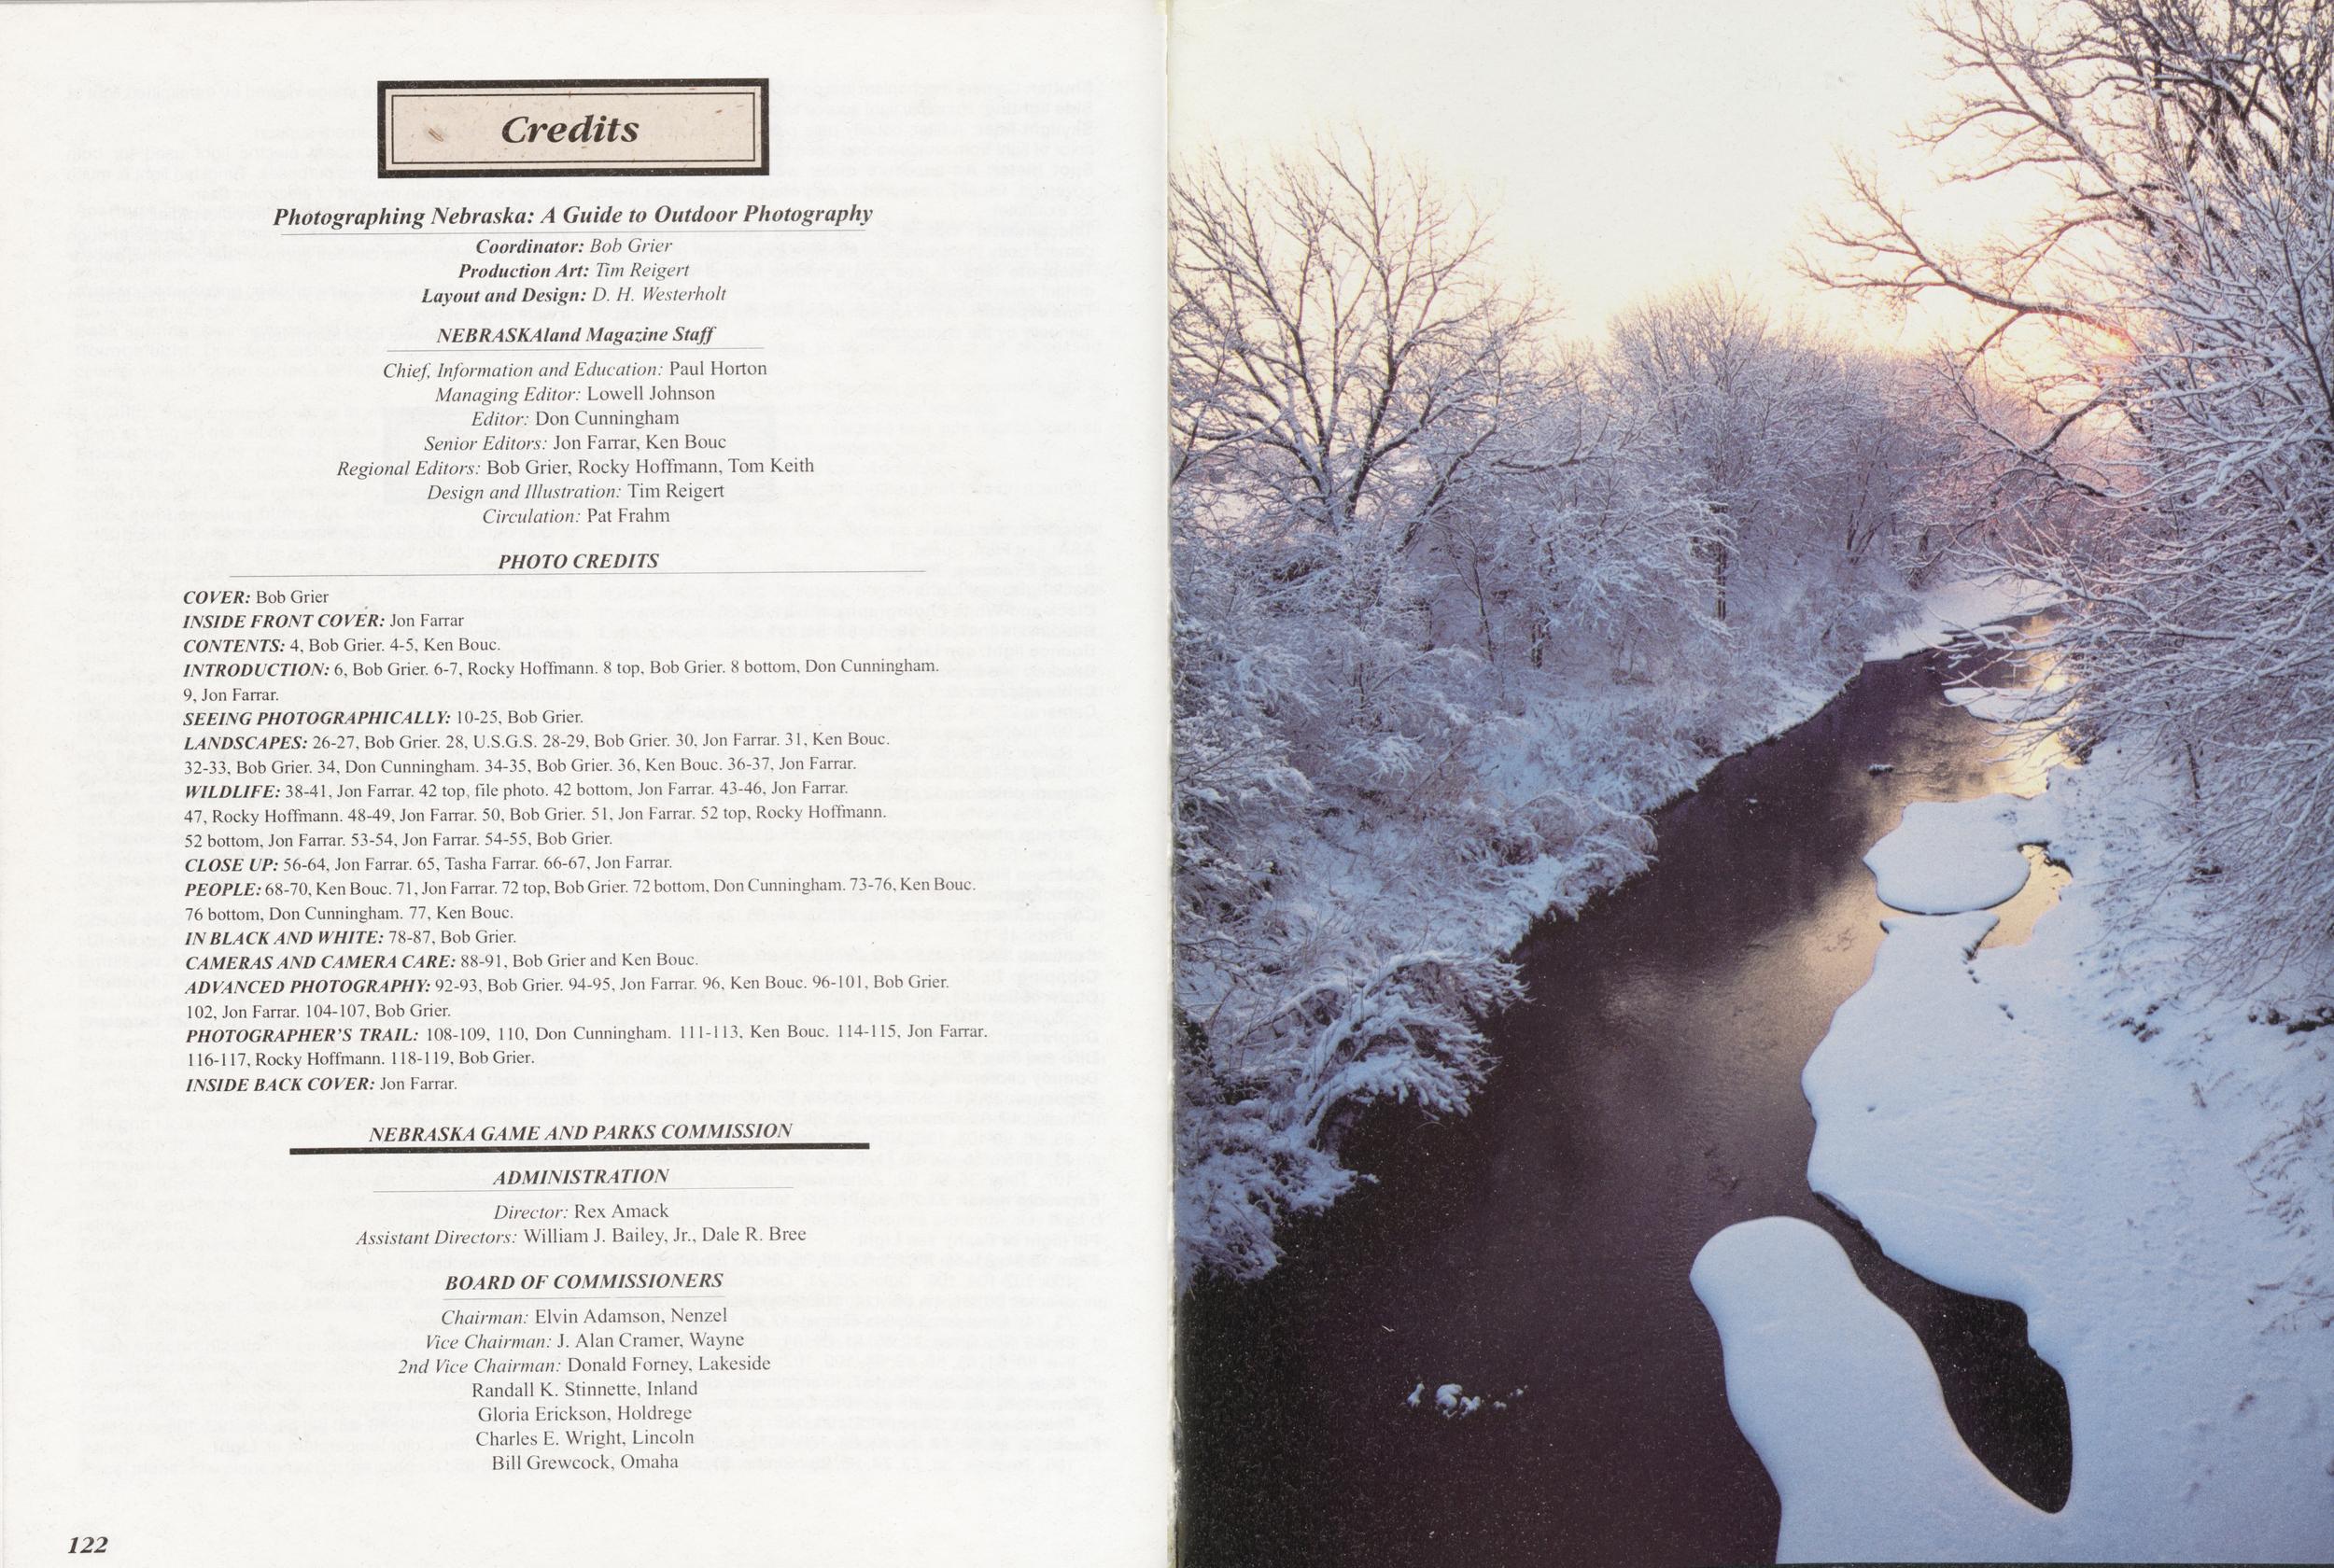
Credits
Photographing Nebraska: A Guide to Outdoor Photography Coordinator: Bob Grier Production Art: Tim Reigert Layout and Design: D. H. Westerholt NEBRASKAland Magazine Staff Chief, Information and Education: Paul Horton Managing Editor: Lowell Johnson Editor: Don Cunningham Senior Editors: Jon Farrar, Ken Bouc Regional Editors: Bob Grier, Rocky Hoffmann, Tom Keith Design and Illustration: Tim Reigert Circulation: Pat Frahm PHOTO CREDITS COVER: Bob Grier INSIDE FRONT COVER: Jon Farrar CONTENTS: 4, Bob Grier. 4-5, Ken Bouc. INTRODUCTION: 6, Bob Grier. 6-7, Rocky Hoffmann. 8 top, Bob Grier. 8 bottom, Don Cunningham. 9, Jon Farrar. SEEING PHOTOGRAPHICALLY: 10-25, Bob Grier LANDSCAPES: 26-27, Bob Grier. 28, U.S.G.S. 28-29, Bob Grier. 30. Jon Farrar. 31, Ken Bouc. 32-33, Bob Grier. 34, Don Cunningham. 34-35, Bob Grier. 36, Ken Bouc. 36-37. Jon Farrar. WILDLIFE: 38-41, Jon Farrar. 42 top, file photo. 42 bottom, Jon Farrar. 43-46, Jon Farrar. 47, Rocky Hoffmann. 48-49, Jon Farrar. 50, Bob Grier. 51, Jon Farrar. 52 top, Rocky Hoffmann. 52 bottom, Jon Farrar. 53-54, Jon Farrar. 54-55, Bob Grier. CLOSE UP: 56-64, Jon Farrar. 65, Tasha Farrar. 66-67, Jon Farrar. PEOPLE: 68-70, Ken Bouc. 71, Jon Farrar. 72 top, Bob Grier. 72 bottom, Don Cunningham. 73-76, Ken Bouc. 76 bottom, Don Cunningham. 77, Ken Bouc. IN BLACK AND WHITE: 78-87, Bob Grier. CAMERAS AND CAMERA CARE: 88-91, Bob Grier and Ken Bouc ADVANCED PHOTOGRAPHY: 92-93, Bob Grier. 94-95, Jon Farrar. 96, Ken Bouc. 96-101, Bob Grier. 102, Jon Farrar. 104-107, Bob Grier. PHOTOGRAPHER'S TRAIL: 108-109, 110, Don Cunningham. 111-113, Ken Bouc. 114-115, Jon Farrar. 116-117, Rocky Hoffmann. 118-119, Bob Grier. INSIDE BA CK CO VER: Jon Farrar NEBRASKA GAME AND PARKS COMMISSION ADMINISTRATION Director: Rex Amack Assistant Directors: William J. Bailey, Jr., Dale R. Bree BOARD OF COMMISSIONERS Chairman: Elvin Adamson, Nenzel Vice Chairman: J. Alan Cramer, Wayne 2nd Vice Chairman: Donald Forney, Lakeside Randall K. Stinnette, Inland Gloria Erickson, Holdrege Charles E. Wright, Lincoln Bill Grewcock, Omaha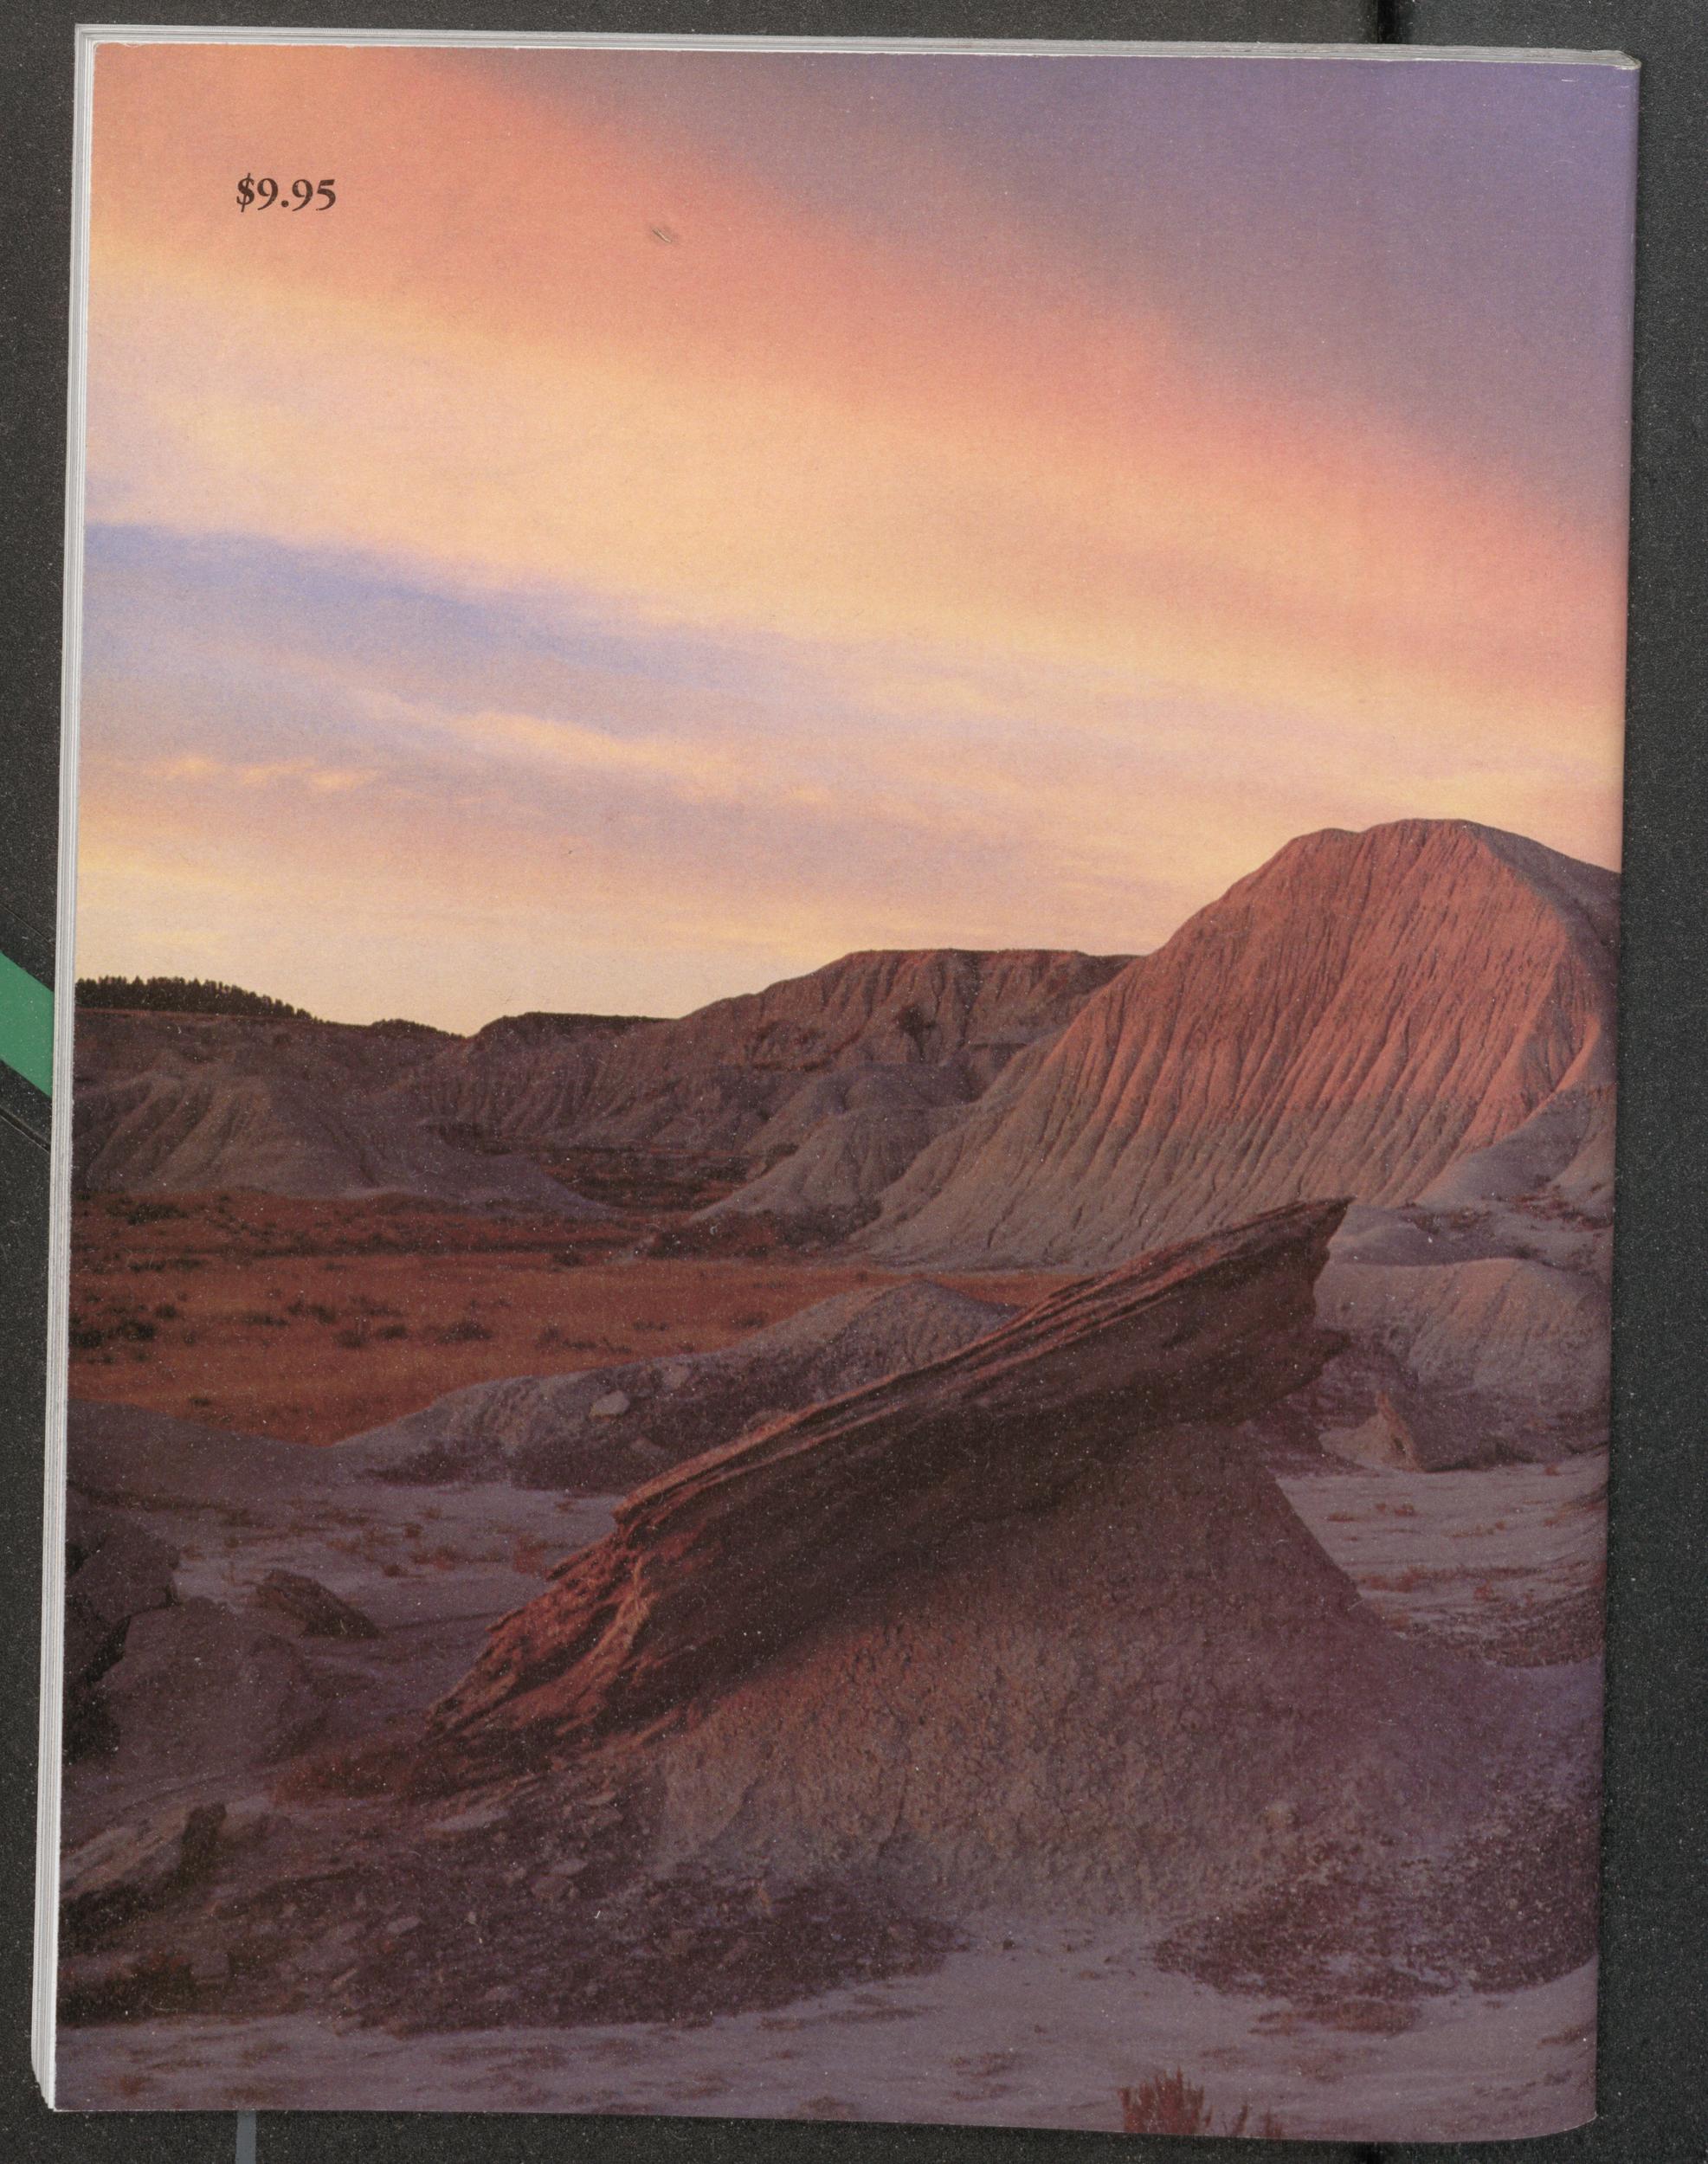
Position: 1065 (2 views)