Volume 63, Issue 7, 1985
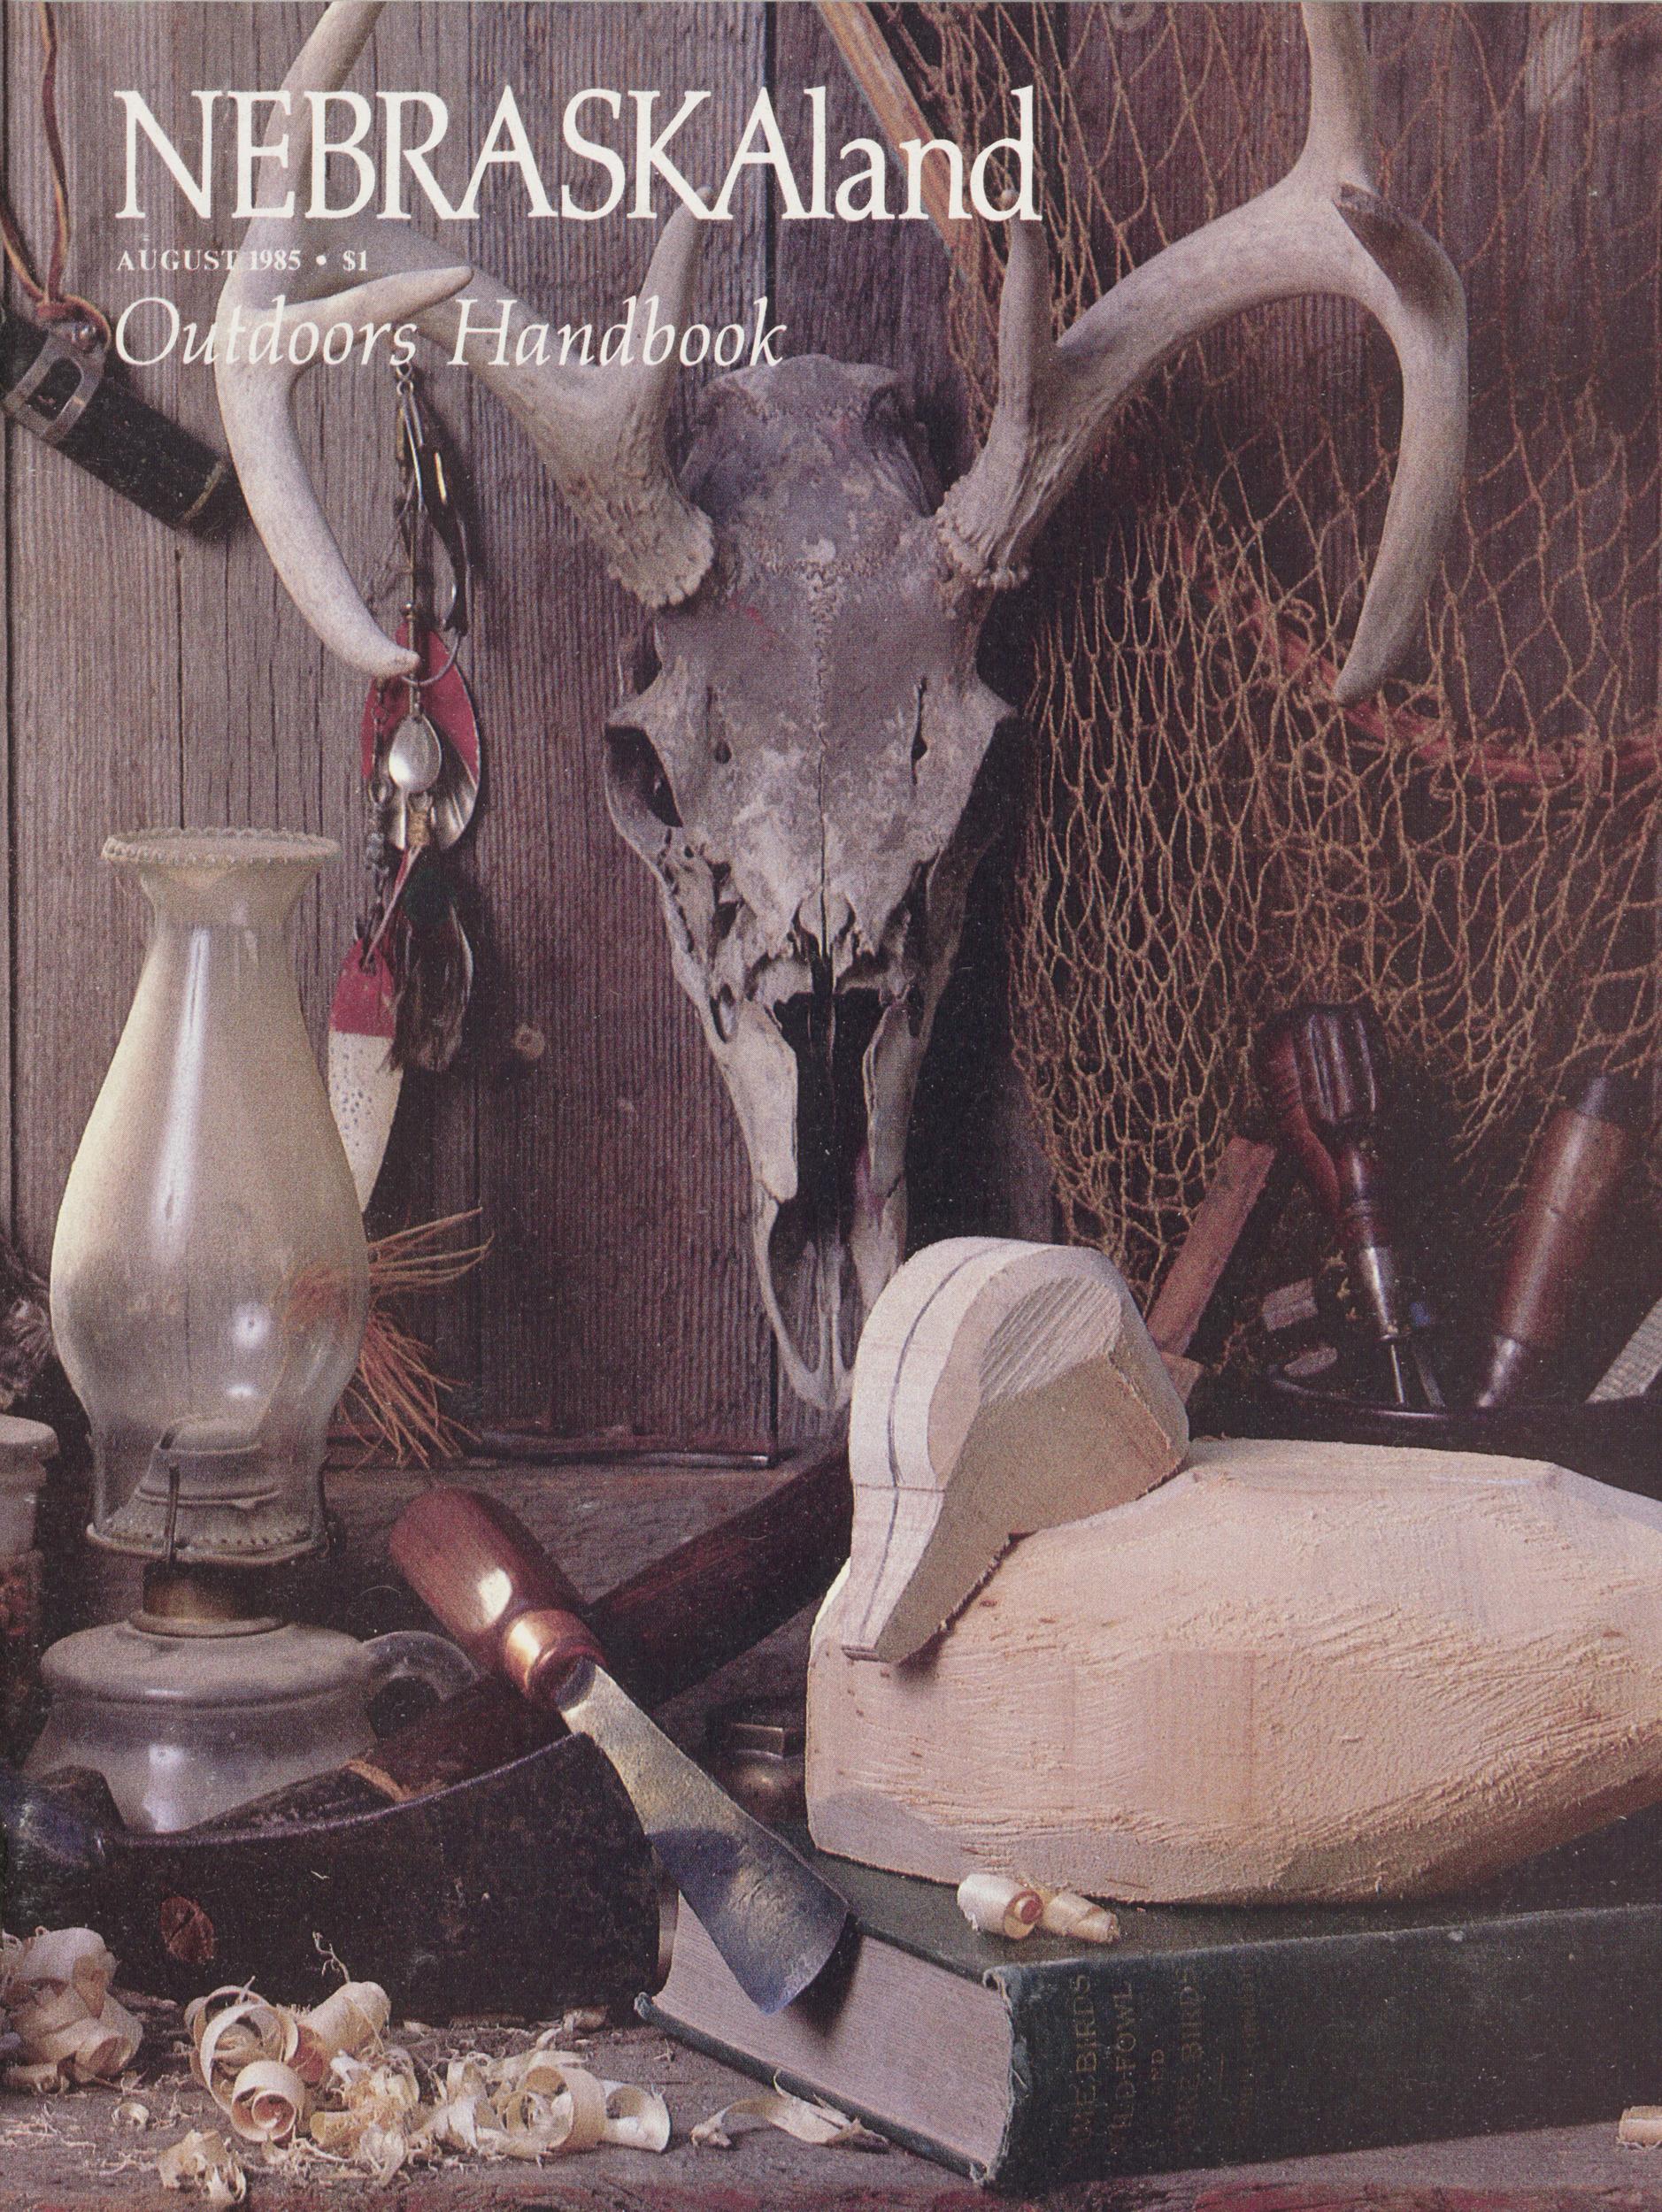
NEBRASKAland
AUGUST 1985 $1 Outdoors Handbook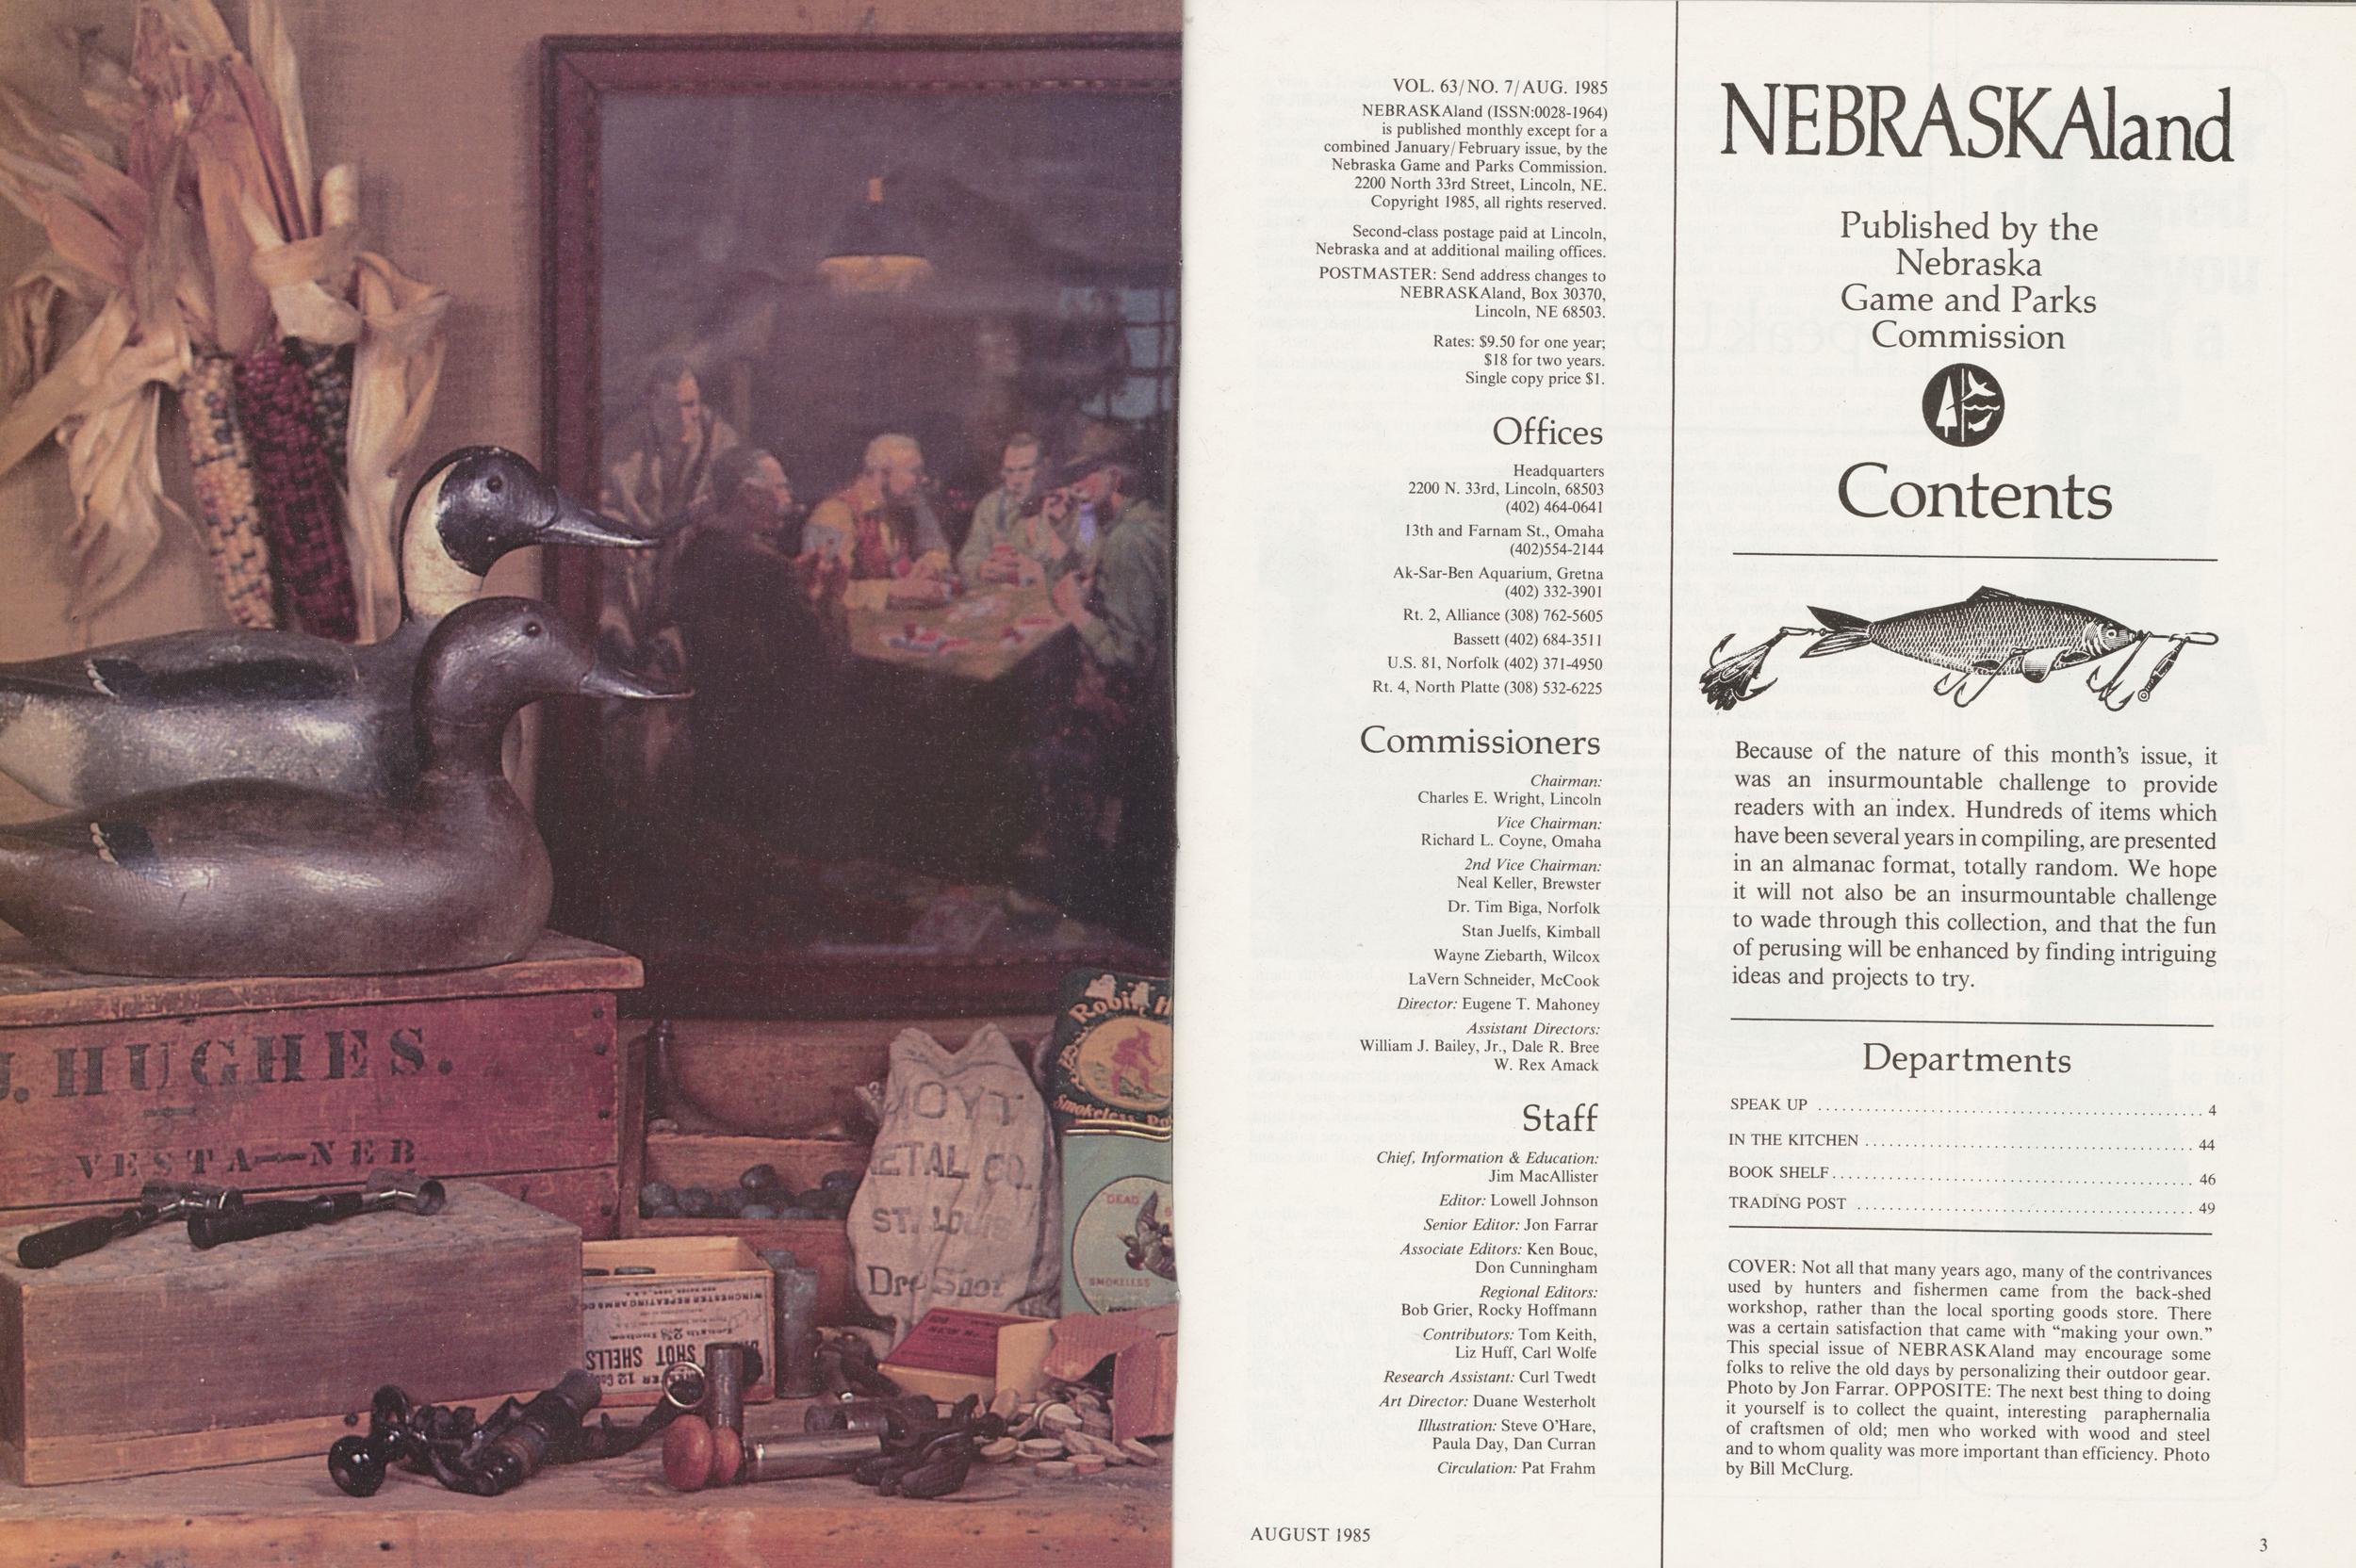
NEBRASKAland
Published by the Nebraska Game and Parks Commission VOL. 63/NO. 7/AUG. 1985 NEBRASKAland (ISSN:0028-1964) is published monthly except for a combined January/ February issue, by the Nebraska Game and Parks Commission. 2200 North 33rd Street, Lincoln, NE. Copyright 1985, all rights reserved. Second-class postage paid at Lincoln, Nebraska and at additional mailing offices. POSTMASTER: Send address changes to NEBRASKAland, Box 30370, Lincoln, NE 68503. Rates: $9.50 for one year; $ 18 for two years. Single copy price $1. Offices Headquarters 2200 N. 33rd, Lincoln, 68503 (402)464-0641 13th and Farnam St., Omaha (402)554-2144 Ak-Sar-Ben Aquarium, Gretna (402)332-3901 Rt. 2, Alliance (308) 762-5605 Bassett (402) 684-3511 U.S. 81, Norfolk (402) 371-4950 Rt. 4, North Platte (308) 532-6225 Commissioners Chairman: Charles E. Wright, Lincoln Vice Chairman: Richard L. Coyne, Omaha 2nd Vice Chairman: Neal Keller, Brewster Dr. Tim Biga, Norfolk Stan Juelfs, Kimball Wayne Ziebarth, Wilcox LaVern Schneider, McCook Director: Eugene T. Mahoney Assistant Directors: William J. Bailey, Jr., Dale R. Bree W. Rex Amack Staff Chief, Information & Education: Jim MacAllister Editor: Lowell Johnson Senior Editor: Jon Farrar Associate Editors: Ken Bouc, Don Cunningham Regional Editors: Bob Grier, Rocky Hoffmann Contributors: Tom Keith, Liz Huff, Carl Wolfe Research Assistant: Curl Twedt Art Director: Duane Westerholt Illustration: Steve O'Hare, Paula Day, Dan Curran Circulation: Pat Frahm ContentsBecause of the nature of this month's issue, it was an insurmountable challenge to provide readers with an index. Hundreds of items which have been several years in compiling, are presented in an almanac format, totally random. We hope it will not also be an insurmountable challenge to wade through this collection, and that the fun of perusing will be enhanced by finding intriguing ideas and projects to try.
Departments SPEAK UP 4 IN THE KITCHEN44 BOOK SHELF46 TRADING POST 49 COVER: Not all that many years ago, many of the contrivances used by hunters and fishermen came from the back-shed workshop, rather than the local sporting goods store. There was a certain satisfaction that came with "making your own." This special issue of NEBRASKAland may encourage some folks to relive the old days by personalizing their outdoor gear. Photo by Jon Farrar. OPPOSITE: The next best thing to doing it yourself is to collect the quaint, interesting paraphernalia of craftsmen of old; men who worked with wood and steel and to whom quality was more important than efficiency. Photo by Bill McClurg. AUGUST 1985 3
Speak Up
Readers may notice that this, the August issue of NEBRASKAland, has a different look. We have considered how to present "How to" type stories over the years, and finally decided to try this approach. We hope there is something of interest to all, and even more, that readers will compare the projects presented here with some of their pet ideas and projects. In fact, we hereby solicit ideas from all of you for ideas — do-it-yourself items, ideas for doing things in the outdoors, hints, tips, suggestions, just about anything.
Suggestions about field techniques, safety, comfort, making of gadgets or useful items, things that work for you, great recipes, handicraft, a new fishing knot, a wide range of stuff is welcome. Anything you might want to pass along to other readers will be considered, so please take this as your invitation. And, we hope you enjoy this issue. (Editor)
and knew that we were late
But Dad just swung around the curve
and dropped us hy the gate.
Mom went to the jelly show
and Sis to the dress revue
And 1 to the rodeo to see
what those broncs could do.
Dad would see the hogs and sheep
and then that big Brahma bull
Then stop by the machinery shed
to watch the tractor pull.
The August suns burn, hot winds blow
but no one seems to care
People flock by thousands
to a Nebraska County Fair. Mildred Andrews Larson
Sir/ We always look forward to our NEBRASKAland Magazine, especially enjoying the outstanding color photography and historical stories such as those by Roe R. Black (Horseshoe-Bar Ranch).
I am enclosing a snapshot of my father, Joe Karas, and little brother Joe E. Karas, taken at the family farm house near Table Rock in Pawnee County in 1925. Jackrabbits were plentiful; Dad used to hunt them and Mother would feed the carcasses to her laying flock. One never sees a jackrabbit in our area now.
I thought you might be interested in this bit of history.
Nettie Stehlik Table Rock, Nebr.Sir / Em Nebraska bom from early pioneer stock and still have kinfolk all over the state. But, I'm mad!
In the March issue you did an article on hunting dogs. I agree it's a good article except there was no mention of one of the best breeds for Nebraska—the weimaraner.
I resent this oversight. They are one of the best all-around breeds there is. I've been a breeder since 1952 when I first got one. I've hunted all types of upland birds with them; used them as retrievers in snow country and icy waters.
Some of my dogs I've used on lions, bears, bobcats, 'coons, etc. They are outstanding house dogs—extra smart, affectionate, quick, dependable, protective and easy-going.
I could write all day about them, but I think it's best to suggest that you see one work and talk to an owner. Then you will understand why I'm mad.
Oh well, now I'm over it.
George "Tom" Poole Riverside, Calif.The weimaraner wasn't omitted by oversight or spite. The article was primarily concerned with the ' 'popular'' breeds used in Nebraska. We also did not include Irish water spaniels, flate oats, Irish setters, English setters, beagles, bassetts, hounds, etc. etc. We have in the past included many of these breeds, but space was the main limitation here. Sorry I had to leave some out like them all. (Tom Keith)
4 NEBRASKAland A visit to IrelandSir / In your May 1982 issue, you printed a letter from a Willie Slattery from Ireland. He was requesting a pen friend with interests in "Folk music, animals, nature, the old ways___" Although you replied it was a somewhat unusual letter to print, I'm glad you did use it in Speak Up. I responded to Willie and we have been corresponding three years this May.
This past September, my sister Kathleen and I traveled to Ireland and I was able to meet Willie. I literally had to find him, as he lives in Portavoher Wood, similar to a national forest here. His house is located above a pub. It took some looking, but it was more than worth it. We spent the evening and morning singing, drinking Irish Cream, listening to Willie and his friends play music, all cozy by a peat fire.
Writing to Willie is the grandest. He's truly a sweet person, warm and sincere. Meeting him was exciting.
When I had to say farewell, I was sad. But as Willie says, "Ireland is only nine hours away." Thanks for printing that unusual letter. . .you helped begin a lasting friendship.
Kellie Cain Lincoln, Nebr.Thanks for letting us know about your visit, Kellie.. .1 know he was more enthralled than you were. By the way, that device Willie is holding in the photo is merely a pan for feeding fish at a trout rearing station where he works — it is not a strange Irish musical instrument. Thanks again, Kellie. (Editor)
* * * Another SitterSir/In reference to Sitting Bull, the unusual photo of the whitefaced bull from California. I wanted to say that my Grandfather also had a Hereford bull, named Dog, who spent most of his time sitting on his hindquarters like a dog. I was interested to know there was another such bull; we too, thought we had the only one.
I am 10 years old and in fourth grade learning all about Nebraska, so I enjoy reading NEBRASKAland.
Eric J. Ostendorf Cozad, Nebr. Lust for natureSir/ Do you ever stop to think what an impact of kill, kill, kill our wildlife has on those of us who are great outdoor lovers and conservationists? I love many of the articles on history, flora and features about historical parks, etc. in the magazine.
But, I abhor an issue like the December 1984, which seems to me is promoting little more than lust to kill by blood-thirsty, selfish huntsmen. What are hunters or fishermen interested in further than getting his limit, with no regard for the species being hunted or us nature lovers?
I would like to see far more articles on what all people should be doing to preserve our wildlife, of which more and more species are becoming endangered and extinct. Isn't this an aspect of law and concern for those who follow us oldsters that you should promote for Nebraska in NEBRASKAland Magazine?
You are a tax-supported entity of state government and collect many fees, besides, to promote our game and parks. Are you truly helping "control" the raping of our wildlife or are you promoting it more and more?
Please be considerate of those of us who are not conditioned with lust to kill.
Elinor L. Brown Ceresco, Nebr.We are always happy to hear from those who eat neither fish nor fowl, or if they do, don't seem to know where they came from. However, without going into the details of modern game management, suffice it to say that it is our function to manage these natural resources, and we try to do it properly. Wildlife populations are just like wheat or carrots and can be harvested the same unless utilized, they go to waste. Also, if you have perused our pages over any period of time, you will notice many, many articles on this subject, why and how it is done, and some figures to back up our procedures; and data on the Habitat Stamp, whereby hunters (and basically hunters alone) provide money for this management. Our agency is funded only 30 percent by tax revenues, and that money is spent on parks, not wildlife. Hunters and fishermen pay for wildlife in this and most other states. Nongame management, for such things as shorebirds, song birds, birds of prey and such, do get a modicum of general fund money, plus income from donations and the new tax checkoff, which has been quite successful — apparently resulting in over $100,000 in this, its first year. And, you should be aware, no animals which are hunted or fished — are in any danger of extinction. It is those not looked after by hunters which are in trouble; from well-intentioned people destroying habitat and food resources in order to "improve" our world. If all the facts are known, hunters do far more good than even the most dedicated outdoor lover who doesn't hunt. And, they also like historical articles and nice photos. (Editor)
a binder designed to get you out of a bind a binder designed just for NEBRASKAland Magazine. Easy-to-insert metal rods hold each issue securely in place. NEBRASKAland is a keeper, and here's the ideal way to keep it. Easy to use, and easy to read without removing a sturdy brown vinyl Just $5 plus sales tax. Send order to: NEBRASKAland Magazine P.O. Box 30370 Lincoln, Nebr. 68503 Check D Money Order Name Street. State. NEBRASKAland AUGUST 1985 AUGUST 1985 5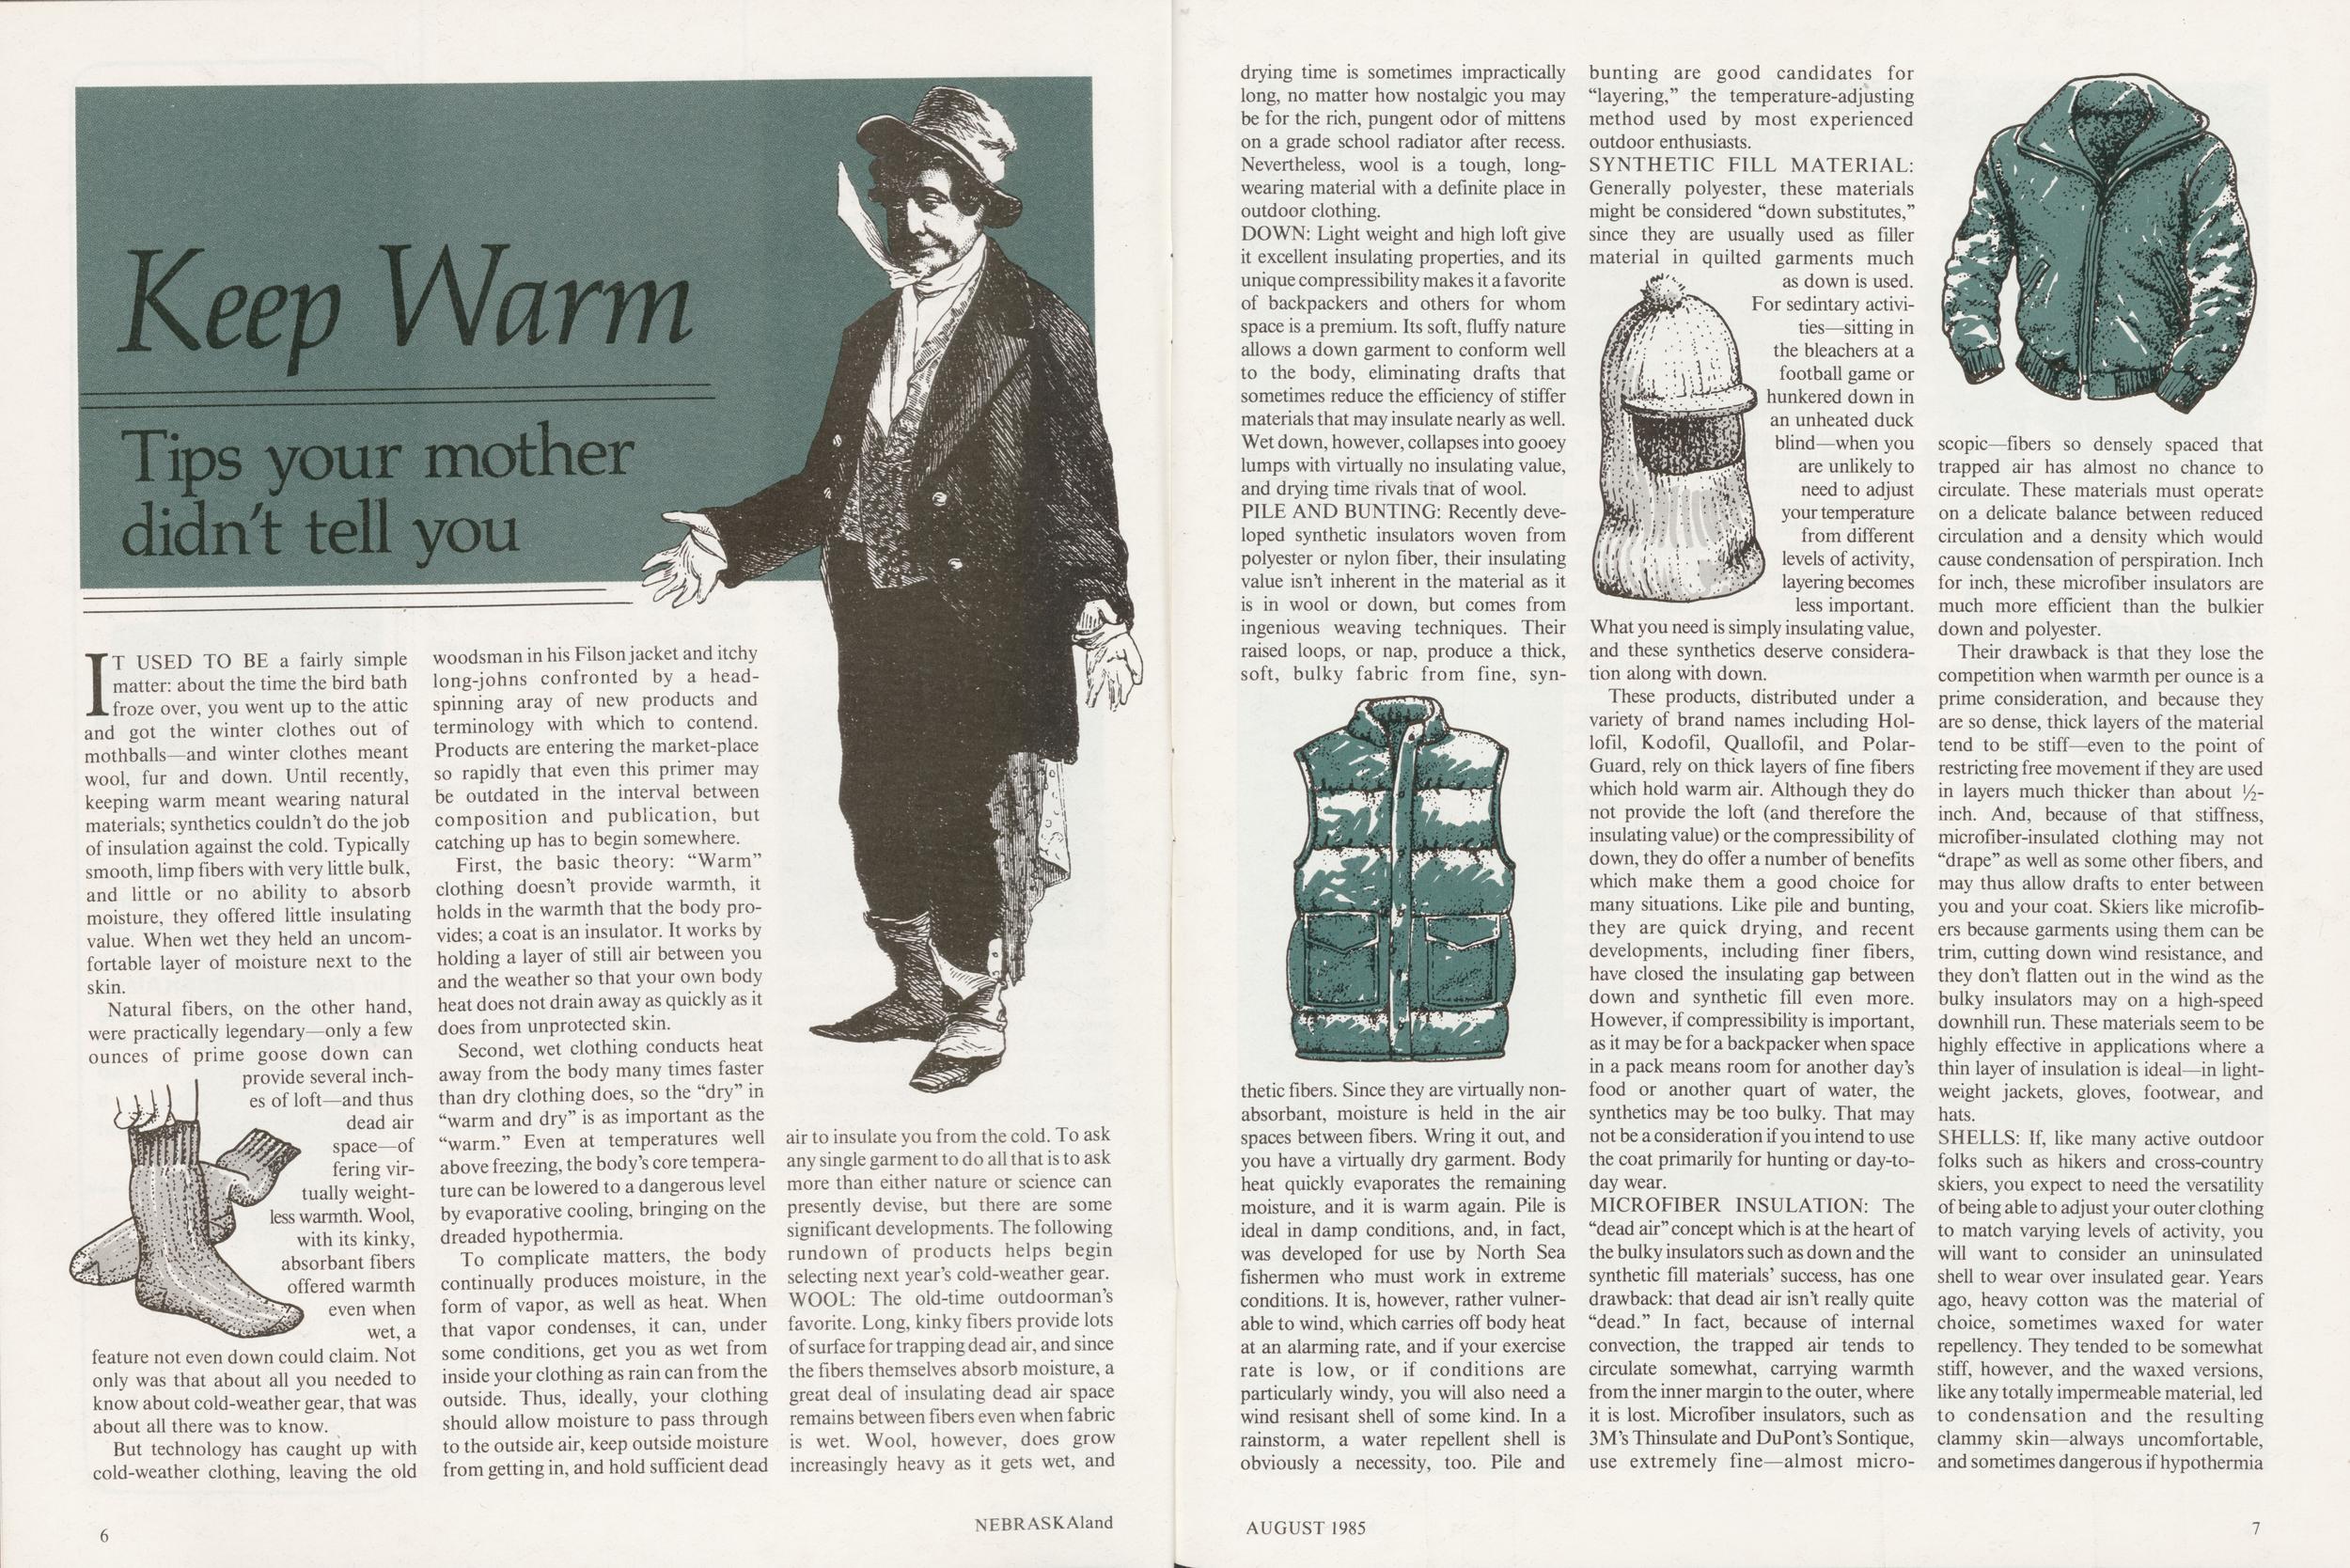
Keep Warm Tips your mother didn't tell you
IT USED TO BE a fairly simple matter: about the time the bird bath froze over, you went up to the attic and got the winter clothes out of mothballs—and winter clothes meant wool, fur and down. Until recently, keeping warm meant wearing natural materials; synthetics couldn't do the job of insulation against the cold. Typically smooth, limp fibers with very little bulk, and little or no ability to absorb moisture, they offered little insulating value. When wet they held an uncomfortable layer of moisture next to the skin.
Natural fibers, on the other hand, were practically legendary—only a few ounces of prime goose down can provide several inches of loft—and thus dead air space—of fering virtually weightless warmth. Wool, with its kinky, absorbant fibers offered warmth even when wet, a feature not even down could claim. Not only was that about all you needed to know about cold-weather gear, that was about all there was to know.
But technology has caught up with cold-weather clothing, leaving the old woodsman in his Filson jacket and itchy long-johns confronted by a headspinning aray of new products and terminology with which to contend. Products are entering the market-place so rapidly that even this primer may be outdated in the interval between composition and publication, but catching up has to begin somewhere.
First, the basic theory: "Warm" clothing doesn't provide warmth, it holds in the warmth that the body provides; a coat is an insulator. It works by holding a layer of still air between you and the weather so that your own body heat does not drain away as quickly as it does from unprotected skin.
Second, wet clothing conducts heat away from the body many times faster than dry clothing does, so the "dry" in "warm and dry" is as important as the "warm." Even at temperatures well above freezing, the body's core temperature can be lowered to a dangerous level by evaporative cooling, bringing on the dreaded hypothermia.
To complicate matters, the body continually produces moisture, in the form of vapor, as well as heat. When that vapor condenses, it can, under some conditions, get you as wet from inside your clothing as rain can from the outside. Thus, ideally, your clothing should allow moisture to pass through to the outside air, keep outside moisture from getting in, and hold sufficient dead air to insulate you from the cold. To ask any single garment to do all that is to ask more than either nature or science can presently devise, but there are some significant developments. The following rundown of products helps begin selecting next year's cold-weather gear. WOOL: The old-time outdoorman's favorite. Long, kinky fibers provide lots of surface for trapping dead air, and since the fibers themselves absorb moisture, a great deal of insulating dead air space remains between fibers even when fabric is wet. Wool, however, does grow increasingly heavy as it gets wet, and 6 NEBRASKAland drying time is sometimes impractically long, no matter how nostalgic you may be for the rich, pungent odor of mittens on a grade school radiator after recess. Nevertheless, wool is a tough, longwearing material with a definite place in outdoor clothing.
DOWN: Light weight and high loft give it excellent insulating properties, and its unique compressibility makes it a favorite of backpackers and others for whom space is a premium. Its soft, fluffy nature allows a down garment to conform well to the body, eliminating drafts that sometimes reduce the efficiency of stiffer materials that may insulate nearly as well. Wet down, however, collapses into gooey lumps with virtually no insulating value, and drying time rivals tnat of wool.
PILE AND BUNTING: Recently developed synthetic insulators woven from polyester or nylon fiber, their insulating value isn't inherent in the material as it is in wool or down, but comes from ingenious weaving techniques. Their raised loops, or nap, produce a thick, soft, bulky fabric from fine, synthetic fibers. Since they are virtually nonabsorbant, moisture is held in the air spaces between fibers. Wring it out, and you have a virtually dry garment. Body heat quickly evaporates the remaining moisture, and it is warm again. Pile is ideal in damp conditions, and, in fact, was developed for use by North Sea fishermen who must work in extreme conditions. It is, however, rather vulnerable to wind, which carries off body heat at an alarming rate, and if your exercise rate is low, or if conditions are particularly windy, you will also need a wind resisant shell of some kind. In a rainstorm, a water repellent shell is obviously a necessity, too. Pile and bunting are good candidates for "layering," the temperature-adjusting method used by most experienced outdoor enthusiasts.
SYNTHETIC FILL MATERIAL: Generally polyester, these materials might be considered "down substitutes," since they are usually used as filler material in quilted garments much as down is used. For sedintary activities—sitting in the bleachers at a football game or hunkered down in an unheated duck blind—when you are unlikely to need to adjust your temperature from different levels of activity, layering becomes less important. What you need is simply insulating value, and these synthetics deserve consideration along with down.
These products, distributed under a variety of brand names including Hollofil, Kodofil, Quallofil, and PolarGuard, rely on thick layers of fine fibers which hold warm air. Although they do not provide the loft (and therefore the insulating value) or the compressibility of down, they do offer a number of benefits which make them a good choice for many situations. Like pile and bunting, they are quick drying, and recent developments, including finer fibers, have closed the insulating gap between down and synthetic fill even more. However, if compressibility is important, as it may be for a backpacker when space in a pack means room for another day's food or another quart of water, the synthetics may be too bulky. That may not be a consideration if you intend to use the coat primarily for hunting or day-to-day wear.
MICROFIBER INSULATION: The "dead air" concept which is at the heart of the bulky insulators such as down and the synthetic fill materials' success, has one drawback: that dead air isn't really quite "dead." In fact, because of internal convection, the trapped air tends to circulate somewhat, carrying warmth from the inner margin to the outer, where it is lost. Microfiber insulators, such as 3M's Thinsulate and DuPont's Sontique, use extremely fine—almost micro- scopic—fibers so densely spaced that trapped air has almost no chance to circulate. These materials must operate on a delicate balance between reduced circulation and a density which would cause condensation of perspiration. Inch for inch, these microfiber insulators are much more efficient than the bulkier down and polyester.
Their drawback is that they lose the competition when warmth per ounce is a prime consideration, and because they are so dense, thick layers of the material tend to be stiff—even to the point of restricting free movement if they are used in layers much thicker than about 14inch. And, because of that stiffness, microfiber-insulated clothing may not "drape" as well as some other fibers, and may thus allow drafts to enter between you and your coat. Skiers like microfibers because garments using them can be trim, cutting down wind resistance, and they don't flatten out in the wind as the bulky insulators may on a high-speed downhill run. These materials seem to be highly effective in applications where a thin layer of insulation is ideal—in lightweight jackets, gloves, footwear, and hats.
SHELLS: If, like many active outdoor
folks such as hikers and cross-country
skiers, you expect to need the versatility
of being able to adjust your outer clothing
to match varying levels of activity, you
will want to consider an uninsulated
shell to wear over insulated gear. Years
ago, heavy cotton was the material of
choice, sometimes waxed for water
repellency. They tended to be somewhat
stiff, however, and the waxed versions,
like any totally impermeable material, led
to condensation and the resulting
clammy skin—always uncomfortable,
and sometimes dangerous if hypothermia
AUGUST 1985
7
 was a possibility.
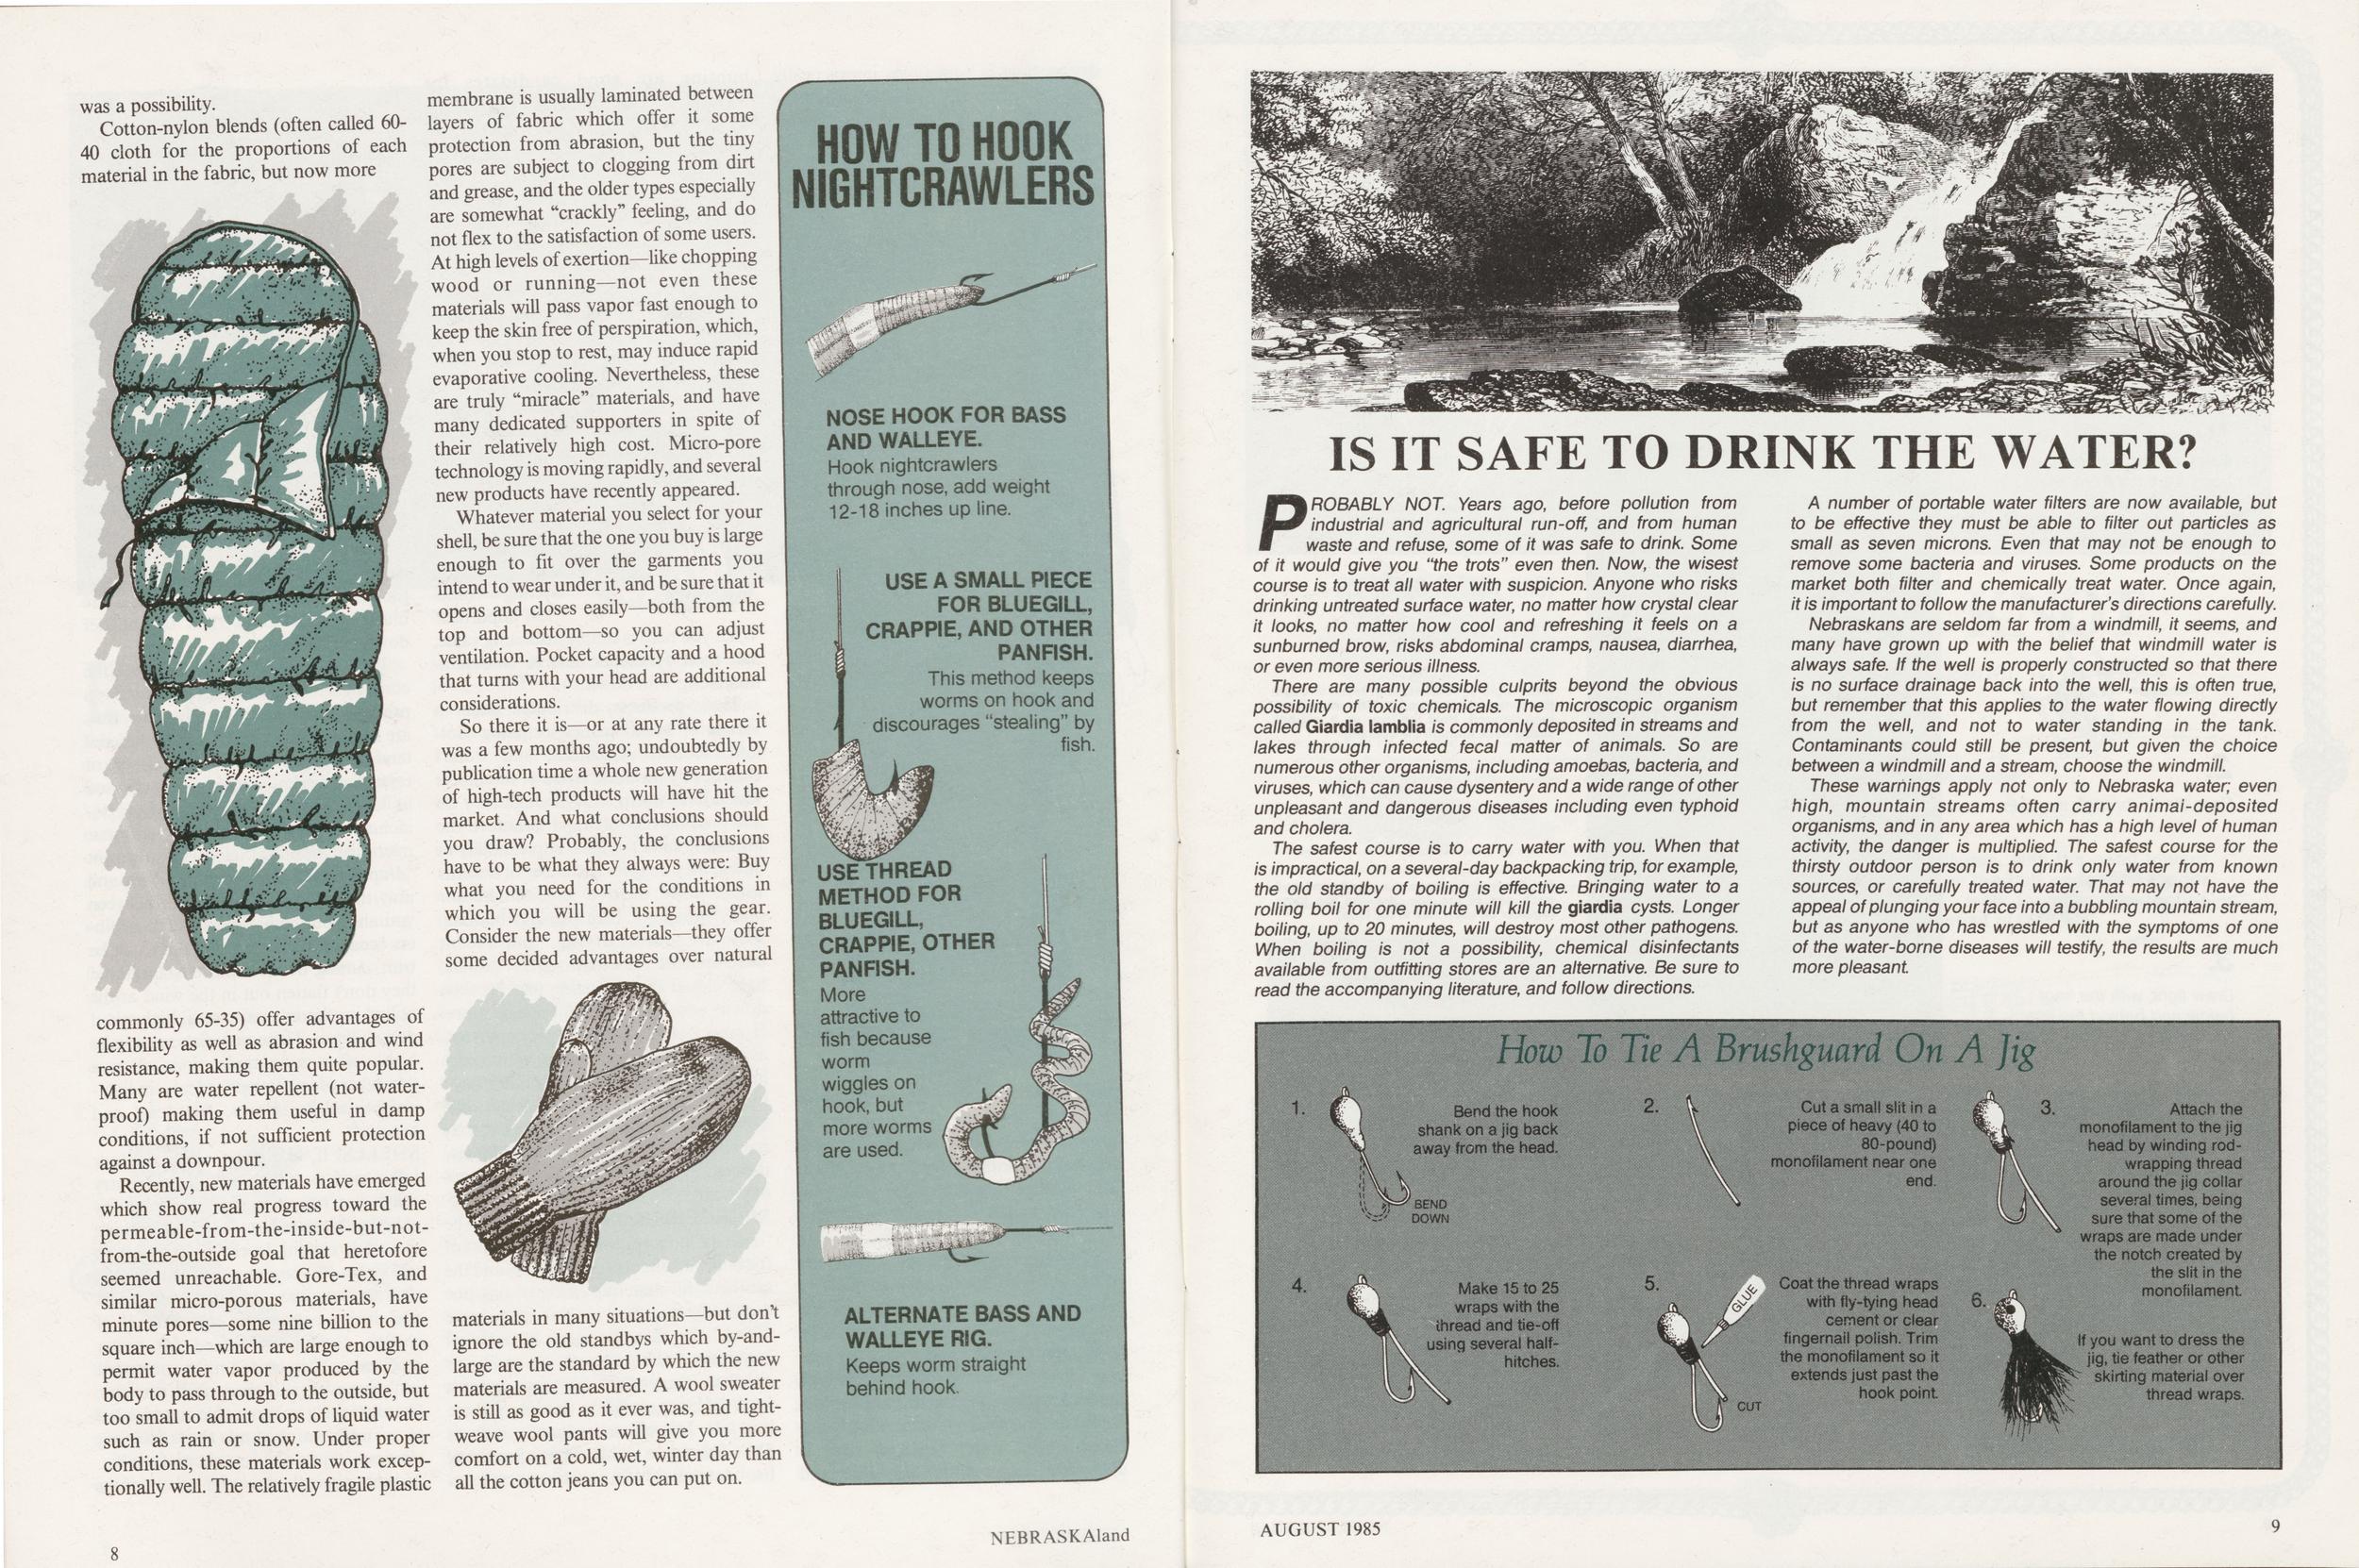
Cotton-nylon blends (often called 60-40 cloth for the proportions of each material in the fabric, but now more commonly 65-35) offer advantages of flexibility as well as abrasion and wind resistance, making them quite popular. Many are water repellent (not waterproof) making them useful in damp conditions, if not sufficient protection against a downpour.
Recently, new materials have emerged which show real progress toward the permeable-from-the-inside-but-not-from-the-outside goal that heretofore seemed unreachable. Gore-Tex, and similar micro-porous materials, have minute pores—some nine billion to the square inch—which are large enough to permit water vapor produced by the body to pass through to the outside, but too small to admit drops of liquid water such as rain or snow. Under proper conditions, these materials work exceptionally well. The relatively fragile plastic membrane is usually laminated between layers of fabric which offer it some protection from abrasion, but the tiny pores are subject to clogging from dirt and grease, and the older types especially are somewhat "crackly" feeling, and do not flex to the satisfaction of some users. At high levels of exertion—like chopping wood or running—not even these materials will pass vapor fast enough to keep the skin free of perspiration, which, when you stop to rest, may induce rapid evaporative cooling. Nevertheless, these are truly "miracle" materials, and have many dedicated supporters in spite of their relatively high cost. Micro-pore technology is moving rapidly, and several new products have recently appeared.
Whatever material you select for your shell, be sure that the one you buy is large enough to fit over the garments you intend to wear under it, and be sure that it opens and closes easily—both from the top and bottom—so you can adjust ventilation. Pocket capacity and a hood that turns with your head are additional considerations.
So there it is—or at any rate there it was a few months ago; undoubtedly by publication time a whole new generation of high-tech products will have hit the market. And what conclusions should you draw? Probably, the conclusions have to be what they always were: Buy what you need for the conditions in which you will be using the gear. Consider the new materials—they offer some decided advantages over natural materials in many situations—but don't ignore the old standbys which by-and-large are the standard by which the new materials are measured. A wool sweater is still as good as it ever was, and tightweave wool pants will give you more comfort on a cold, wet, winter day than all the cotton jeans you can put on.
IS IT SAFE TO DRINK THE WATER?
P)ROBABLY NOT. Years ago, before pollution from industrial and agricultural run-off, and from human waste and refuse, some of it was safe to drink. Some of it would give you "the trots" even then. Now, the wisest course is to treat all water with suspicion. Anyone who risks drinking untreated surface water, no matter how crystal clear it looks, no matter how cool and refreshing it feels on a sunburned brow, risks abdominal cramps, nausea, diarrhea, or even more serious illness.
There are many possible culprits beyond the obvious possibility of toxic chemicals. The microscopic organism called Giardia iamblia is commonly deposited in streams and lakes through infected fecal matter of animals. So are numerous other organisms, including amoebas, bacteria, and viruses, which can cause dysentery and a wide range of other unpleasant and dangerous diseases including even typhoid and cholera.
The safest course is to carry water with you. When that is impractical, on a several-day backpacking trip, for example, the old standby of boiling is effective. Bringing water to a rolling boil for one minute will kill the giardia cysts. Longer boiling, up to 20 minutes, will destroy most other pathogens. When boiling is not a possibility, chemical disinfectants available from outfitting stores are an alternative. Be sure to read the accompanying literature, and follow directions.
A number of portable water filters are now available, but to be effective they must be able to filter out particles as small as seven microns. Even that may not be enough to remove some bacteria and viruses. Some products on the market both filter and chemically treat water. Once again, it is important to follow the manufacturer's directions carefully.
Nebraskans are seldom far from a windmill, it seems, and many have grown up with the belief that windmill water is always safe. If the well is properly constructed so that there is no surface drainage back into the well, this is often true, but remember that this applies to the water flowing directly from the well, and not to water standing in the tank. Contaminants could still be present, but given the choice between a windmill and a stream, choose the windmill.
These warnings apply not only to Nebraska water; even high, mountain streams often carry animai-deposited organisms, and in any area which has a high level of human activity, the danger is multiplied. The safest course for the thirsty outdoor person is to drink only water from known sources, or carefully treated water. That may not have the appeal of plunging your face into a bubbling mountain stream, but as anyone who has wrestled with the symptoms of one of the water-borne diseases will testify, the results are much more pleasant.
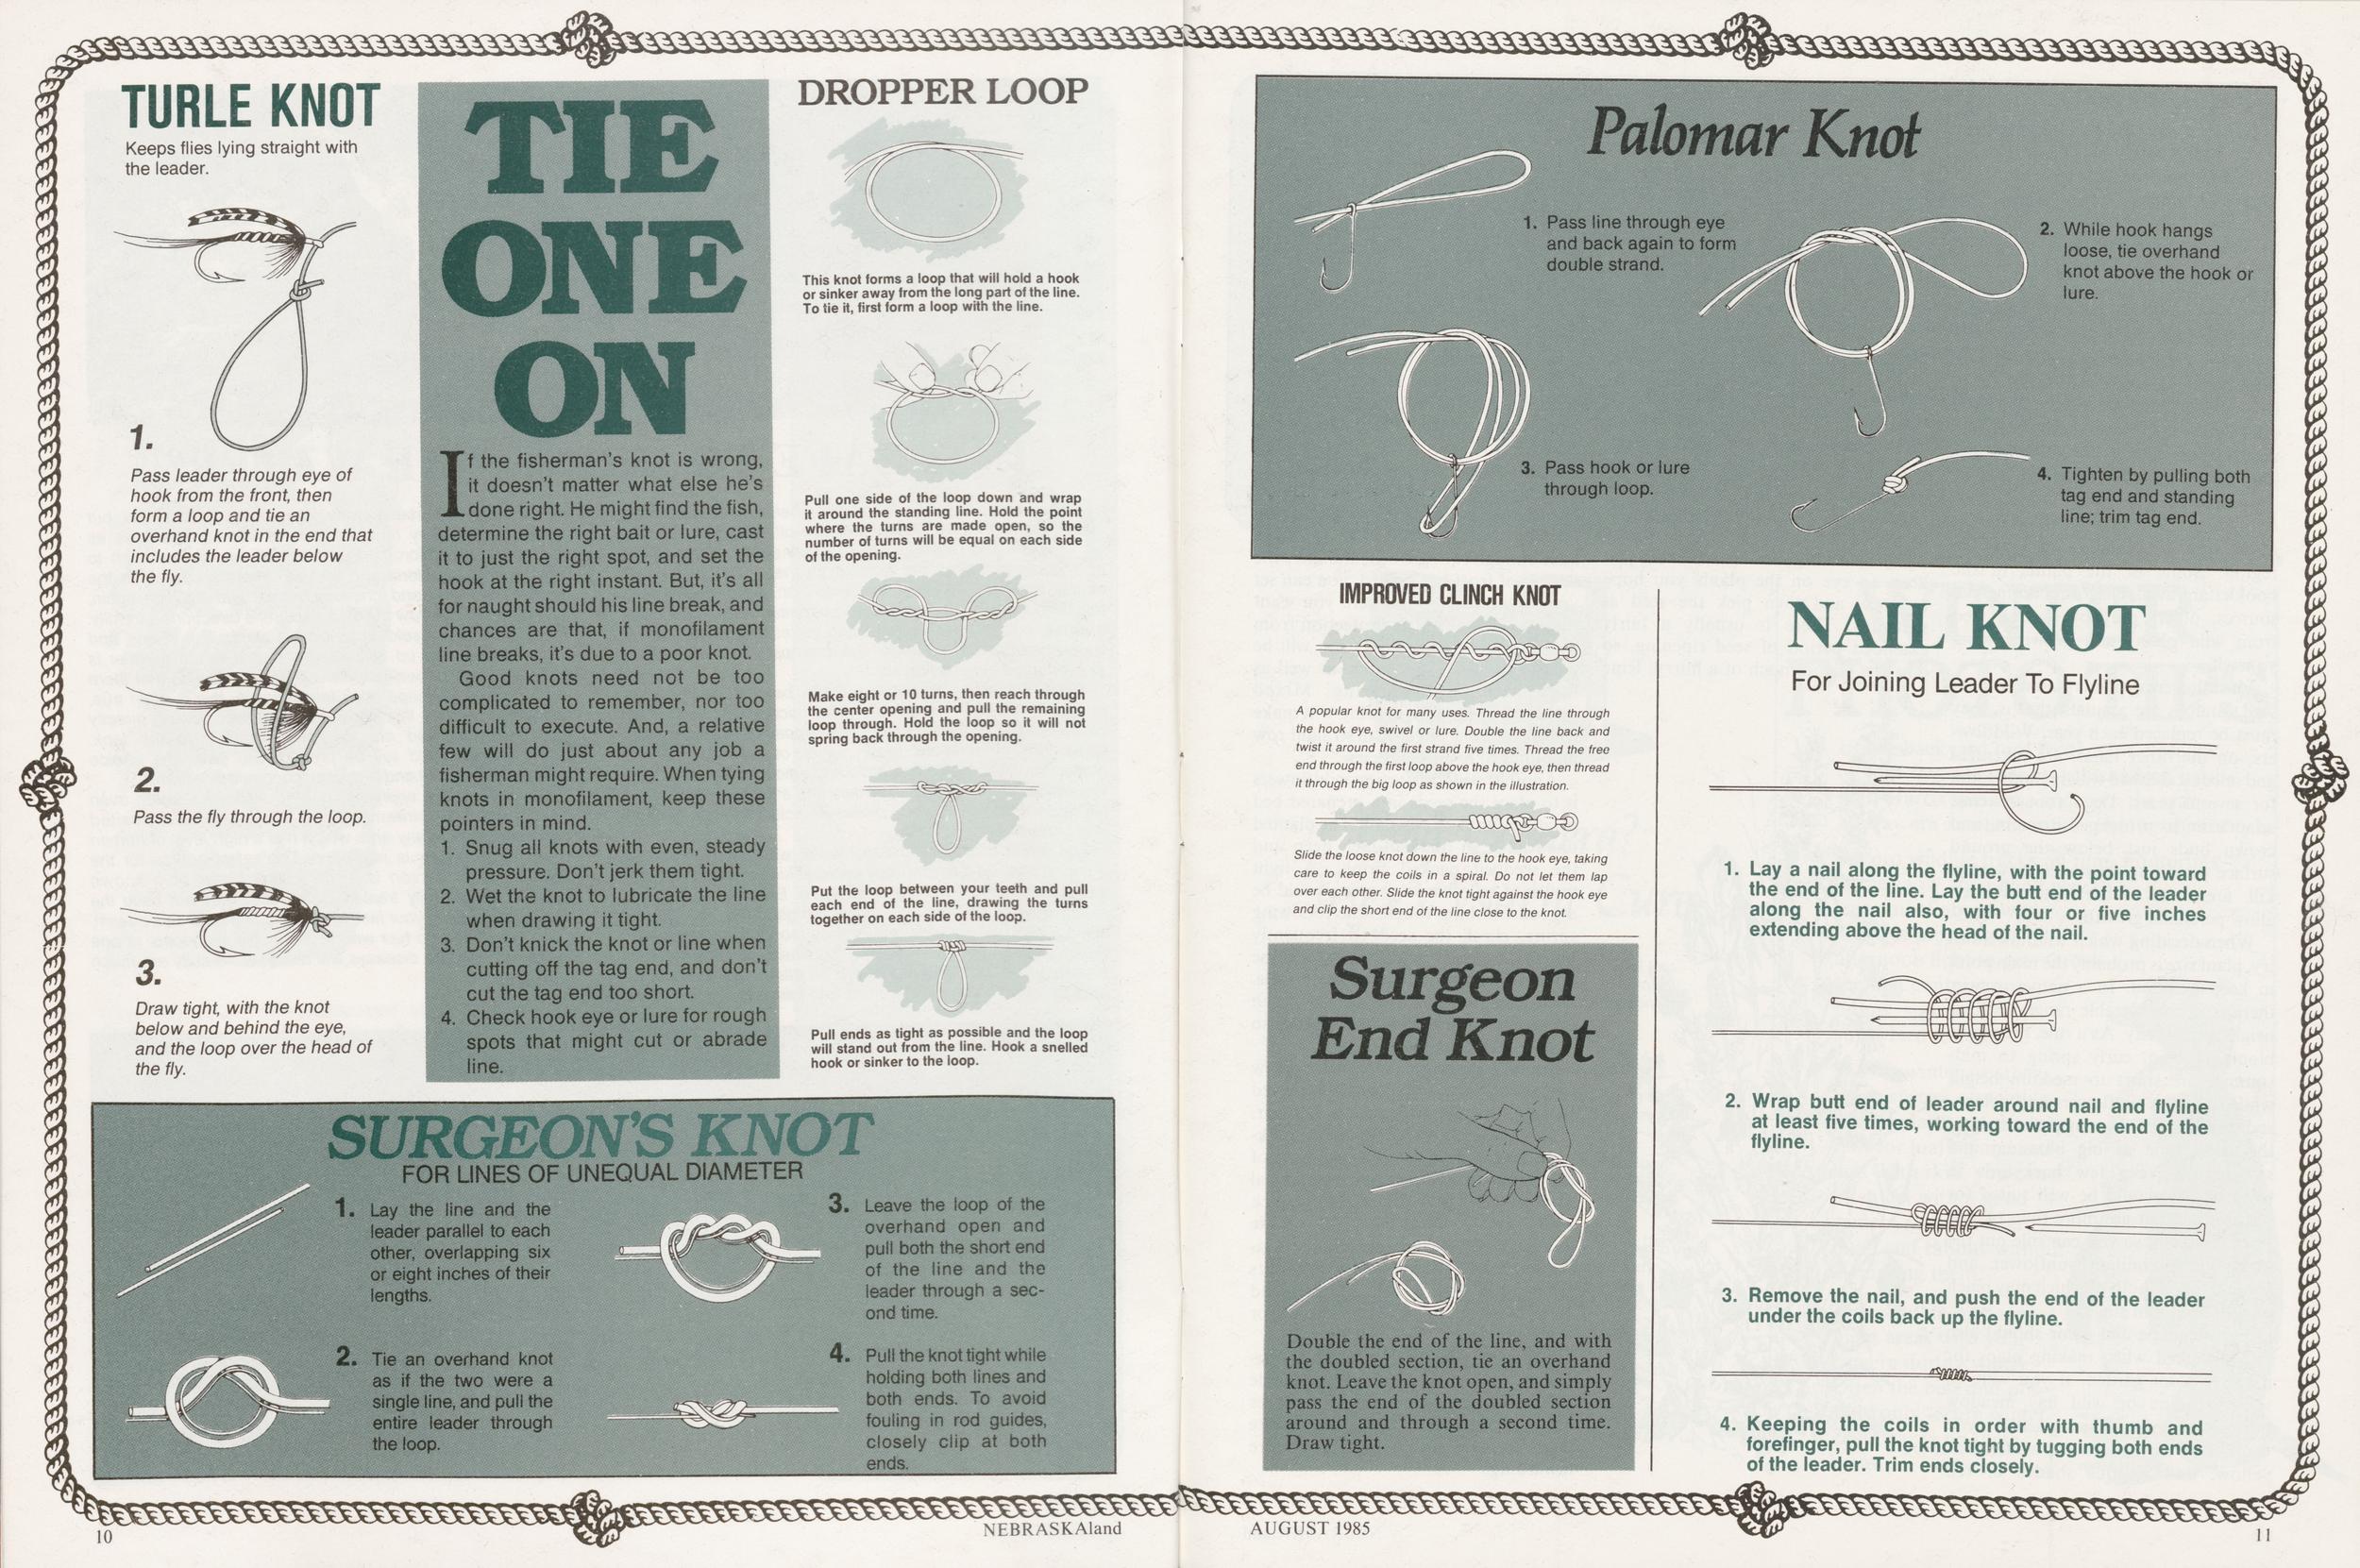
TIE ONE ON
If the fisherman's knot is wrong, it doesn't matter what else he's done right. He might find the fish, determine the right bait or lure, cast it to just the right spot, and set the hook at the right instant. But, it's all for naught should his line break, and chances are that, if monofilament line breaks, it's due to a poor knot.
Good knots need not be too complicated to remember, nor too difficult to execute. And, a relative few will do just about any job a fisherman might require. When tying knots in monofilament, keep these pointers in mind.
1. Snug all knots with even, steady pressure. Don't jerk them tight.
2. Wet the knot to lubricate the line when drawing it tight.
3. Don't knick the knot or line when cutting off the tag end, and don't cut the tag end too short.
4. Check hook eye or lure for rough spots that might cut or abrade line.
TURTLE KNOT Keeps flies lying straight with the leader.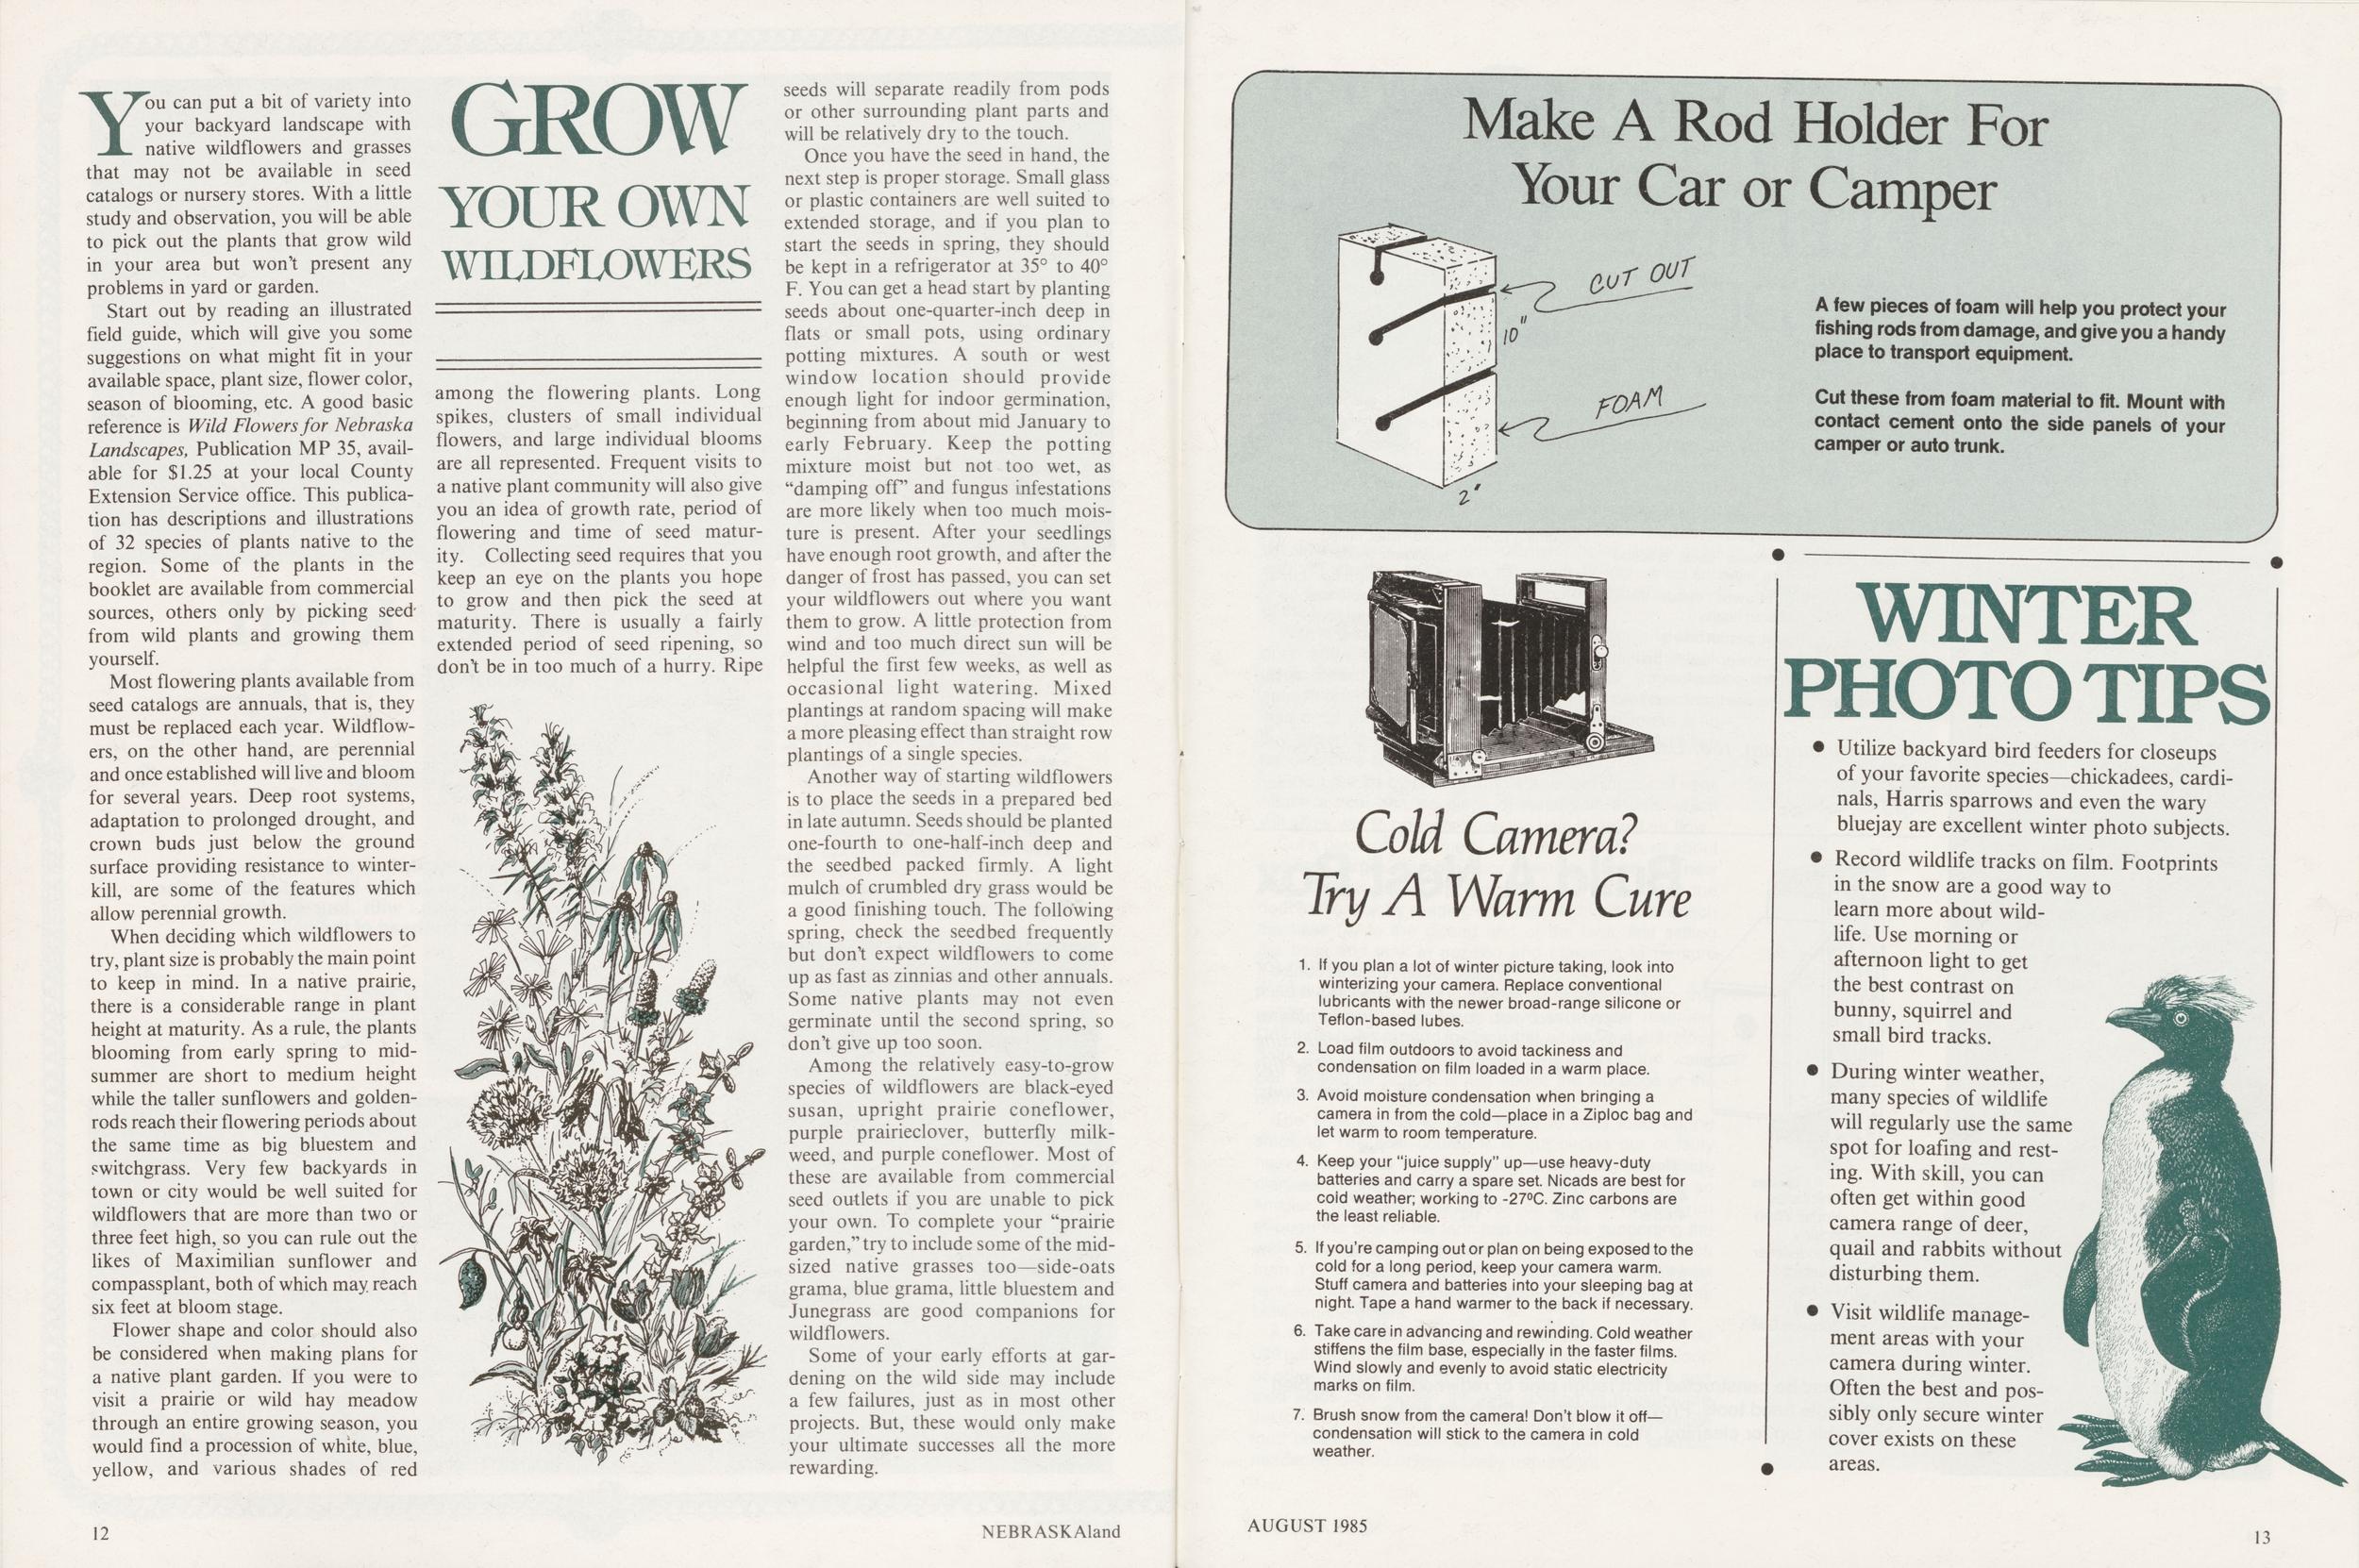
GROW YOUR OWN WILDFLOWERS
You can put a bit of variety into your backyard landscape with native wildflowers and grasses that may not be available in seed catalogs or nursery stores. With a little study and observation, you will be able to pick out the plants that grow wild in your area but won't present any problems in yard or garden.
Start out by reading an illustrated field guide, which will give you some suggestions on what might fit in your available space, plant size, flower color, season of blooming, etc. A good basic reference is Wild Flowers for Nebraska Landscapes, Publication MP 35, available for $1.25 at your local County Extension Service office. This publication has descriptions and illustrations of 32 species of plants native to the region. Some of the plants in the booklet are available from commercial sources, others only by picking seed' from wild plants and growing them yourself.
Most flowering plants available from seed catalogs are annuals, that is, they must be replaced each year. Wildflowers, on the other hand, are perennial and once established will live and bloom for several years. Deep root systems, adaptation to prolonged drought, and crown buds just below the ground surface providing resistance to winterkill, are some of the features which allow perennial growth.
When deciding which wildflowers to try, plant size is probably the main point to keep in mind. In a native prairie, there is a considerable range in plant height at maturity. As a rule, the plants blooming from early spring to midsummer are short to medium height while the taller sunflowers and goldenrods reach their flowering periods about the same time as big bluestem and switchgrass. Very few backyards in town or city would be well suited for wildflowers that are more than two or three feet high, so you can rule out the likes of Maximilian sunflower and compassplant, both of which may reach six feet at bloom stage.
Flower shape and color should also be considered when making plans for a native plant garden. If you were to visit a prairie or wild hay meadow through an entire growing season, you would find a procession of white, blue, yellow, and various shades of red among the flowering plants. Long spikes, clusters of small individual flowers, and large individual blooms are all represented. Frequent visits to a native plant community will also give you an idea of growth rate, period of flowering and time of seed maturity. Collecting seed requires that you keep an eye on the plants you hope to grow and then pick the seed at maturity. There is usually a fairly extended period of seed ripening, so don't be in too much of a hurry. Ripe seeds will separate readily from pods or other surrounding plant parts and will be relatively dry to the touch.
Once you have the seed in hand, the next step is proper storage. Small glass or plastic containers are well suited to extended storage, and if you plan to start the seeds in spring, they should be kept in a refrigerator at 35° to 40° F. You can get a head start by planting seeds about one-quarter-inch deep in flats or small pots, using ordinary potting mixtures. A south or west window location should provide enough light for indoor germination, beginning from about mid January to early February. Keep the potting mixture moist but not too wet, as "damping off and fungus infestations are more likely when too much moisture is present. After your seedlings have enough root growth, and after the danger of frost has passed, you can set your wildflowers out where you want them to grow. A little protection from wind and too much direct sun will be helpful the first few weeks, as well as occasional light watering. Mixed plantings at random spacing will make a more pleasing effect than straight row plantings of a single species.
Another way of starting wildflowers is to place the seeds in a prepared bed in late autumn. Seeds should be planted one-fourth to one-half-inch deep and the seedbed packed firmly. A light mulch of crumbled dry grass would be a good finishing touch. The following spring, check the seedbed frequently but don't expect wildflowers to come up as fast as zinnias and other annuals. Some native plants may not even germinate until the second spring, so don't give up too soon.
Among the relatively easy-to-grow species of wildflowers are black-eyed susan, upright prairie coneflower, purple prairieclover, butterfly milkweed, and purple coneflower. Most of these are available from commercial seed outlets if you are unable to pick your own. To complete your "prairie garden," try to include some of the midsized native grasses too—side-oats grama, blue grama, little bluestem and Junegrass are good companions for wildflowers.
Some of your early efforts at gardening on the wild side may include a few failures, just as in most other projects. But, these would only make your ultimate successes all the more rewarding.
12 NEBRASKAland Make A Rod Holder For Your Car or Camper1. If you plan a lot of winter picture taking, look into winterizing your camera. Replace conventional lubricants with the newer broad-range silicone or Teflon-based lubes.
2. Load film outdoors to avoid tackiness and condensation on film loaded in a warm place.
3. Avoid moisture condensation when bringing a camera in from the cold—place in a Ziploc bag and let warm to room temperature.
4. Keep your "juice supply" up—use heavy-duty batteries and carry a spare set. Nicads are best for cold weather; working to -27°C. Zinc carbons are the least reliable.
5. If you're camping out or plan on being exposed to the cold for a long period, keep your camera warm. Stuff camera and batteries into your sleeping bag at night. Tape a hand warmer to the back if necessary.
6. Take care in advancing and rewinding. Cold weather stiffens the film base, especially in the faster films. Wind slowly and evenly to avoid static electricity marks on film.
7. Brush snow from the camera! Don't blow it off condensation will stick to the camera in cold weather.
WINTER PHOTO TIPS• Utilize backyard bird feeders for closeups of your favorite species—chickadees, cardinals, Harris sparrows and even the wary bluejay are excellent winter photo subjects.
• Record wildlife tracks on film. Footprints in the snow are a good way to learn more about wildlife. Use morning or afternoon light to get the best contrast on bunny, squirrel and small bird tracks.
• During winter weather, many species of wildlife will regularly use the same spot for loafing and resting. With skill, you can often get within good camera range of deer, quail and rabbits without disturbing them.
• Visit wildlife management areas with your camera during winter. Often the best and possibly only secure winter cover exists on these areas.
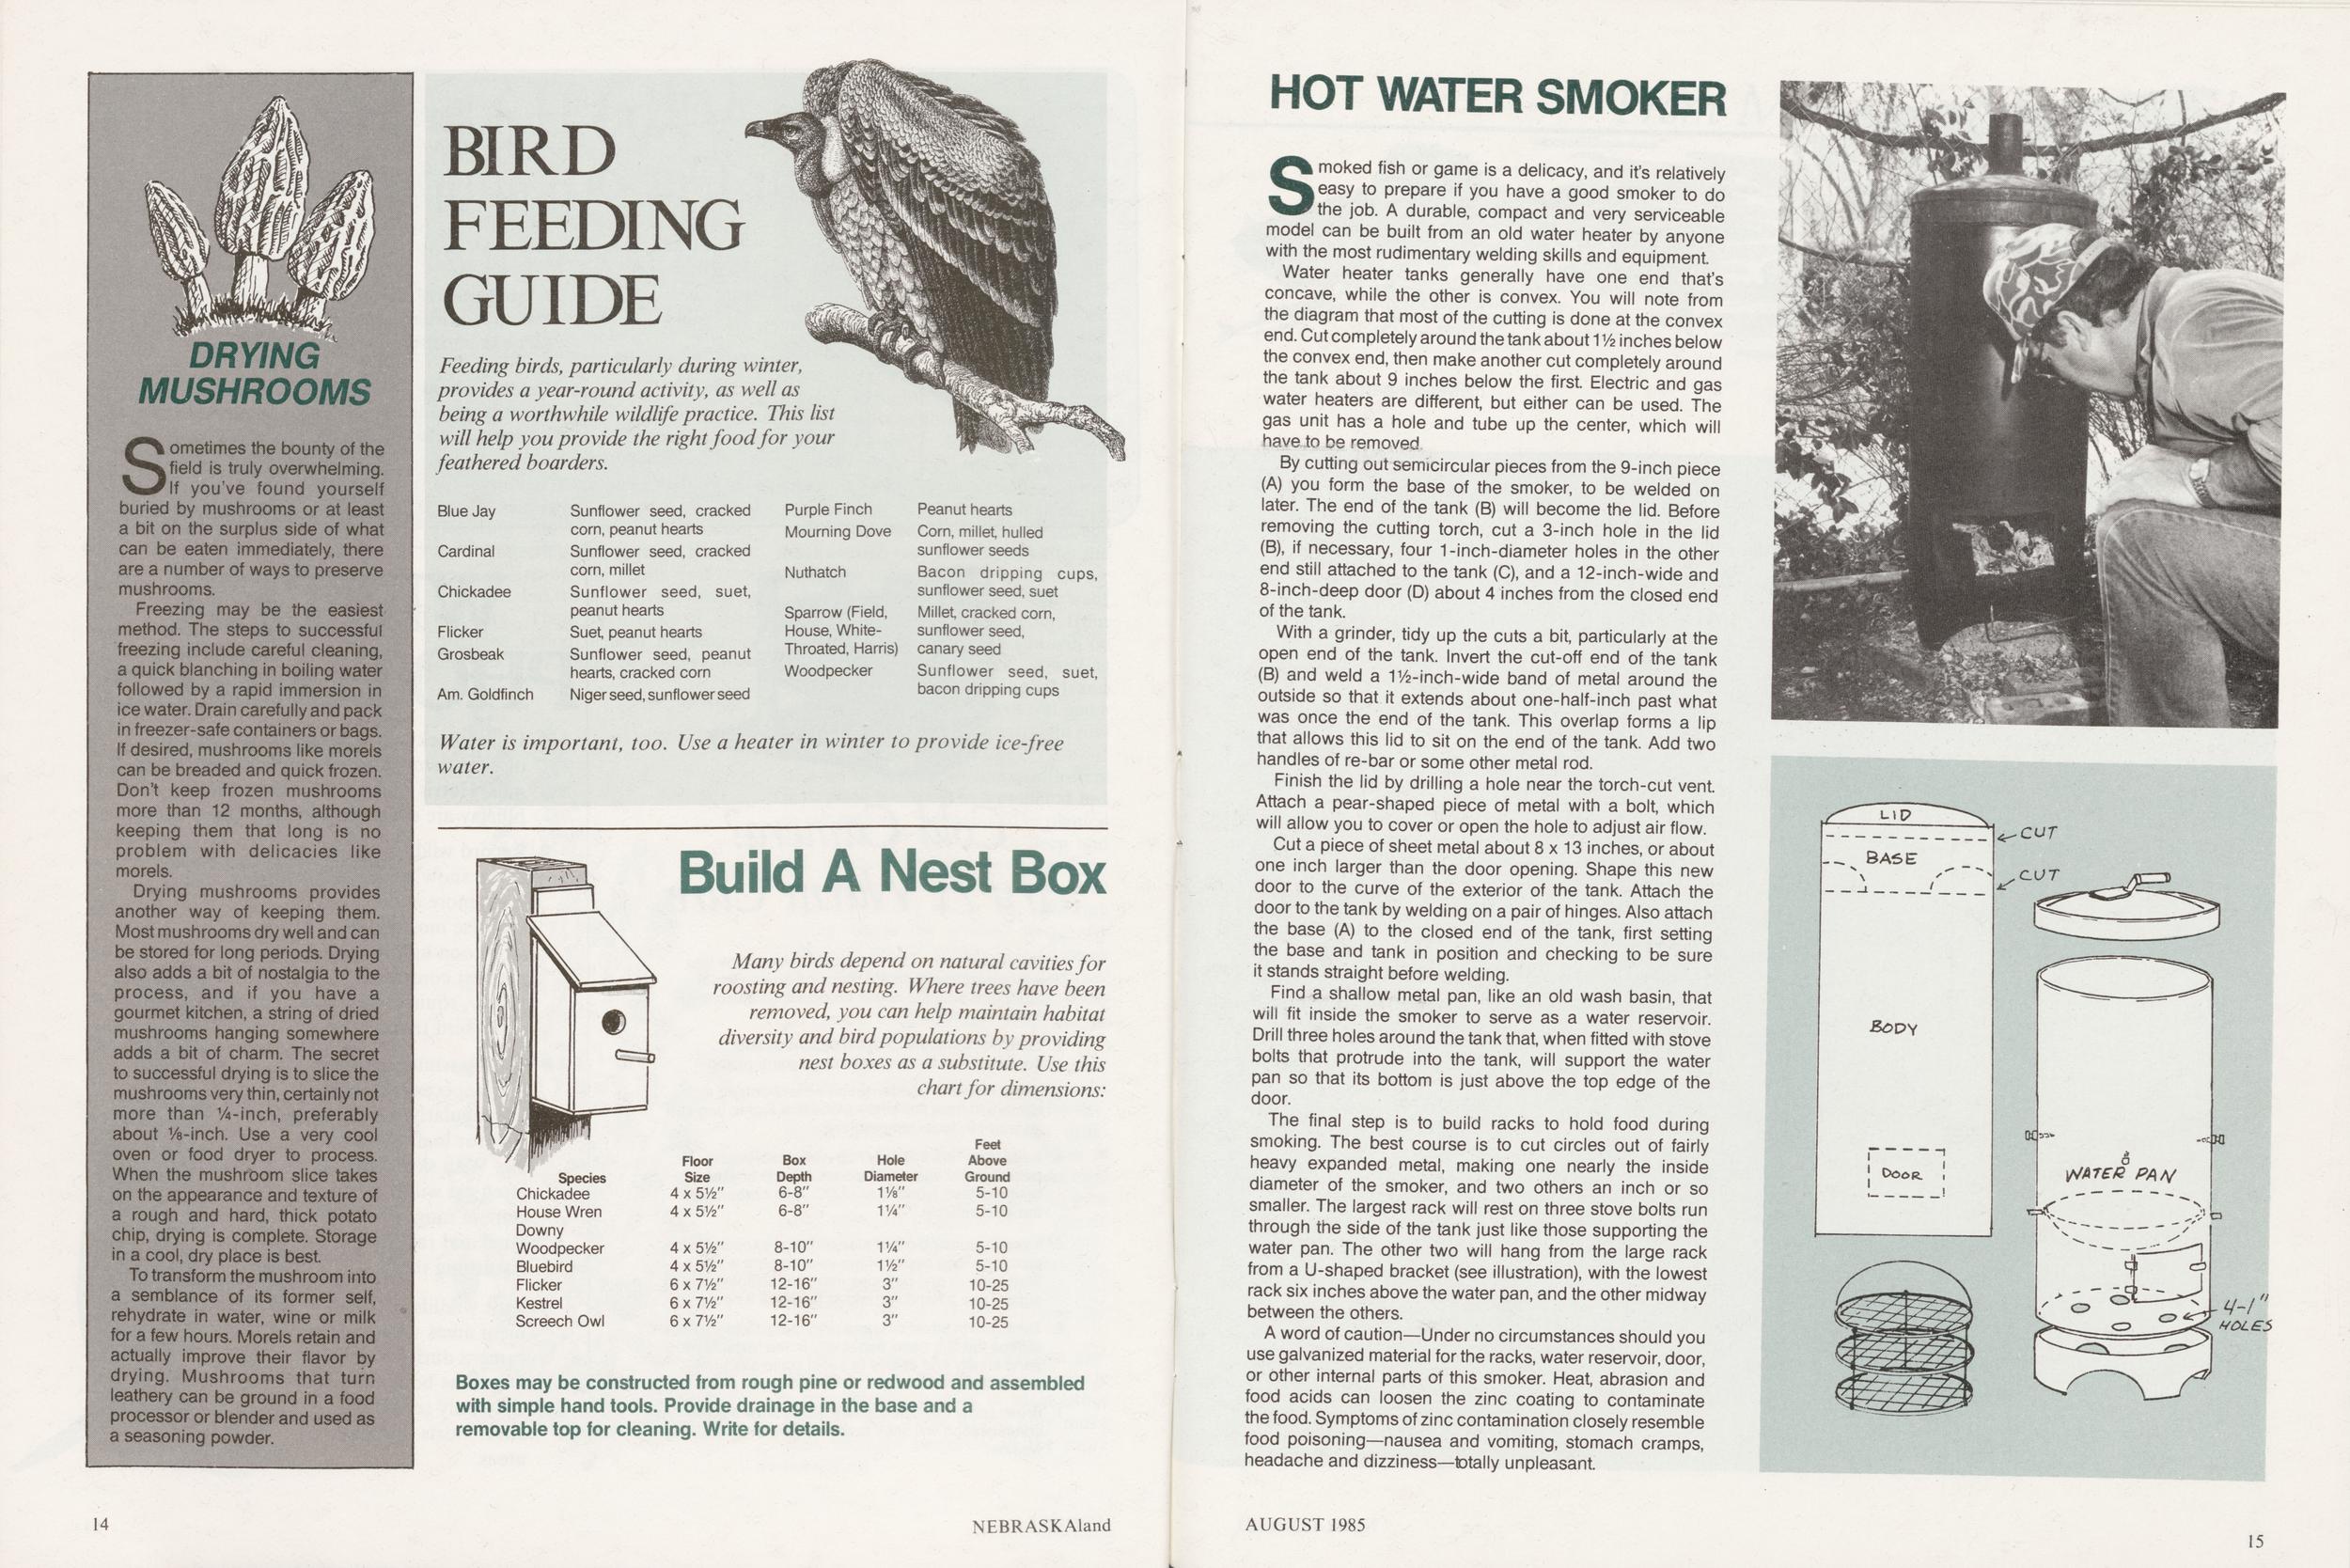 DRYING
MUSHROOMS
DRYING
MUSHROOMS
Sometimes the bounty of the field is truly overwhelming. If you've found yourself buried by mushrooms or at least a bit on the surplus side of what can be eaten immediately, there are a number of ways to preserve mushrooms.
Freezing may be the easiest method. The steps to successful freezing include careful cleaning, a quick blanching in boiling water followed by a rapid immersion in ice water. Drain carefully and pack in freezer*safe containers or bags, if desired, mushrooms like morels can be breaded and quick frozen. Don't keep frozen mushrooms more than 12 months, although keeping them that long is no problem with delicacies like morels.
Drying mushrooms provides another way of keeping them. Most mushrooms dry well and can be stored for long periods. Drying also adds a bit of nostalgia to the process, and if you have a gourmet kitchen, a string of dried mushrooms hanging somewhere adds a bit of charm. The secret to successful drying is to slice the mushrooms very thin, certainly not more than Y4*inch, preferably about Ye-tnch. Use a very cool oven or food dryer to process. When the mushroom slice takes on the appearance and texture of a rough and hard, thick potato chip, drying is complete. Storage in a cool, dry place is best
To transform the mushroom into a semblance of its former self, rehydrate in water, wine or milk for a few hours. Morels retain and actually improve their flavor by drying. Mushrooms that turn leathery can be ground in a food processor or blender and used as a seasoning powder.
BIRD FEEDING GUIDE
Feeding birds, particularly during winter, provides a year-round activity, as well as being a worthwhile wildlife practice. This list will help you provide the right food for your feathered boarders.
Blue Jay Cardinal Chickadee Flicker Grosbeak Am. Goldfinch Sunflower seed, cracked corn, peanut hearts Sunflower seed, cracked corn, millet Sunflower seed, suet, peanut hearts Suet, peanut hearts Sunflower seed, peanut hearts, cracked corn Niger seed, sunflower seed Purple Finch Mourning Dove Nuthatch Sparrow (Field, House, White- Throated, Harris) Woodpecker Peanut hearts Corn, millet, hulled sunflower seeds Bacon dripping cups, sunflower seed, suet Millet, cracked corn, sunflower seed, canary seed Sunflower seed, suet, bacon dripping cups Water is important, too. Use a heater in winter to provide ice-free water. Build A Nest BoxMany birds depend on natural cavities for roosting and nesting. Where trees have been removed, you can help maintain habitat diversity and bird populations by providing nest boxes as a substitute. Use this chart for dimensions:
Feet Floor Box Hole Above Species Chickadee House Wren Size 4 x 51/2" 4 x 5W Depth 6-8" 6-8" Diameter 1 Vs" 1 Va" Ground 5-10 5-10 Downy Woodpecker Bluebird 4 x 51/2" 4 x 51/2" 8-10" 8-10" 1 y4" 1 y2" 5-10 5-10 Flicker 6 x IVi 12-16" 3" 10-25 Kestrel 6 x 71/2" 12-16" 3" 10-25 Screech Owl 6 x 71/2" 12-16" 3" 10-25Boxes may be constructed from rough pine or redwood and assembled with simple hand tools. Provide drainage in the base and a removable top for cleaning. Write for details.
14 NEBRASKAlandHOT WATER SMOKER
Smoked fish or game is a delicacy, and it's relatively easy to prepare if you have a good smoker to do the job. A durable, compact and very serviceable model can be built from an old water heater by anyone with the most rudimentary welding skills and equipment.
Water heater tanks generally have one end that's concave, while the other is convex. You will note from the diagram that most of the cutting is done at the convex end. Cut completely around the tank about 1V2 inches below the convex end, then make another cut completely around the tank about 9 inches below the first. Electric and gas water heaters are different, but either can be used. The gas unit has a hole and tube up the center, which will have to be removed
By cutting out semicircular pieces from the 9-inch piece (A) you form the base of the smoker, to be welded on later. The end of the tank (B) will become the lid. Before removing the cutting torch, cut a 3-inch hole in the lid (B), if necessary, four 1-inch-diameter holes in the other end still attached to the tank (C), and a 12-inch-wide and 8-inch-deep door (D) about 4 inches from the closed end of the tank.
With a grinder, tidy up the cuts a bit, particularly at the open end of the tank. Invert the cut-off end of the tank (B) and weld a 1Y2-inch-wide band of metal around the outside so that it extends about one-half-inch past what was once the end of the tank. This overlap forms a lip that allows this lid to sit on the end of the tank. Add two handles of re-bar or some other metal rod.
Finish the lid by drilling a hole near the torch-cut vent. Attach a pear-shaped piece of metal with a bolt, which will allow you to cover or open the hole to adjust air flow.
Cut a piece of sheet metal about 8x13 inches, or about one inch larger than the door opening. Shape this new door to the curve of the exterior of the tank. Attach the door to the tank by welding on a pair of hinges. Also attach the base (A) to the closed end of the tank, first setting the base and tank in position and checking to be sure it stands straight before welding.
Find a shallow metal pan, like an old wash basin, that will fit inside the smoker to serve as a water reservoir. Drill three holes around the tank that, when fitted with stove bolts that protrude into the tank, will support the water pan so that its bottom is just above the top edge of the door.
The final step is to build racks to hold food during smoking. The best course is to cut circles out of fairly heavy expanded metal, making one nearly the inside diameter of the smoker, and two others an inch or so smaller. The largest rack will rest on three stove bolts run through the side of the tank just like those supporting the water pan. The other two will hang from the large rack from a U-shaped bracket (see illustration), with the lowest rack six inches above the water pan, and the other midway between the others.
A word of caution—Under no circumstances should you use galvanized material for the racks, water reservoir, door, or other internal parts of this smoker. Heat, abrasion and food acids can loosen the zinc coating to contaminate the food. Symptoms of zinc contamination closely resemble food poisoning—nausea and vomiting, stomach cramps, headache and dizziness—totally unpleasant.
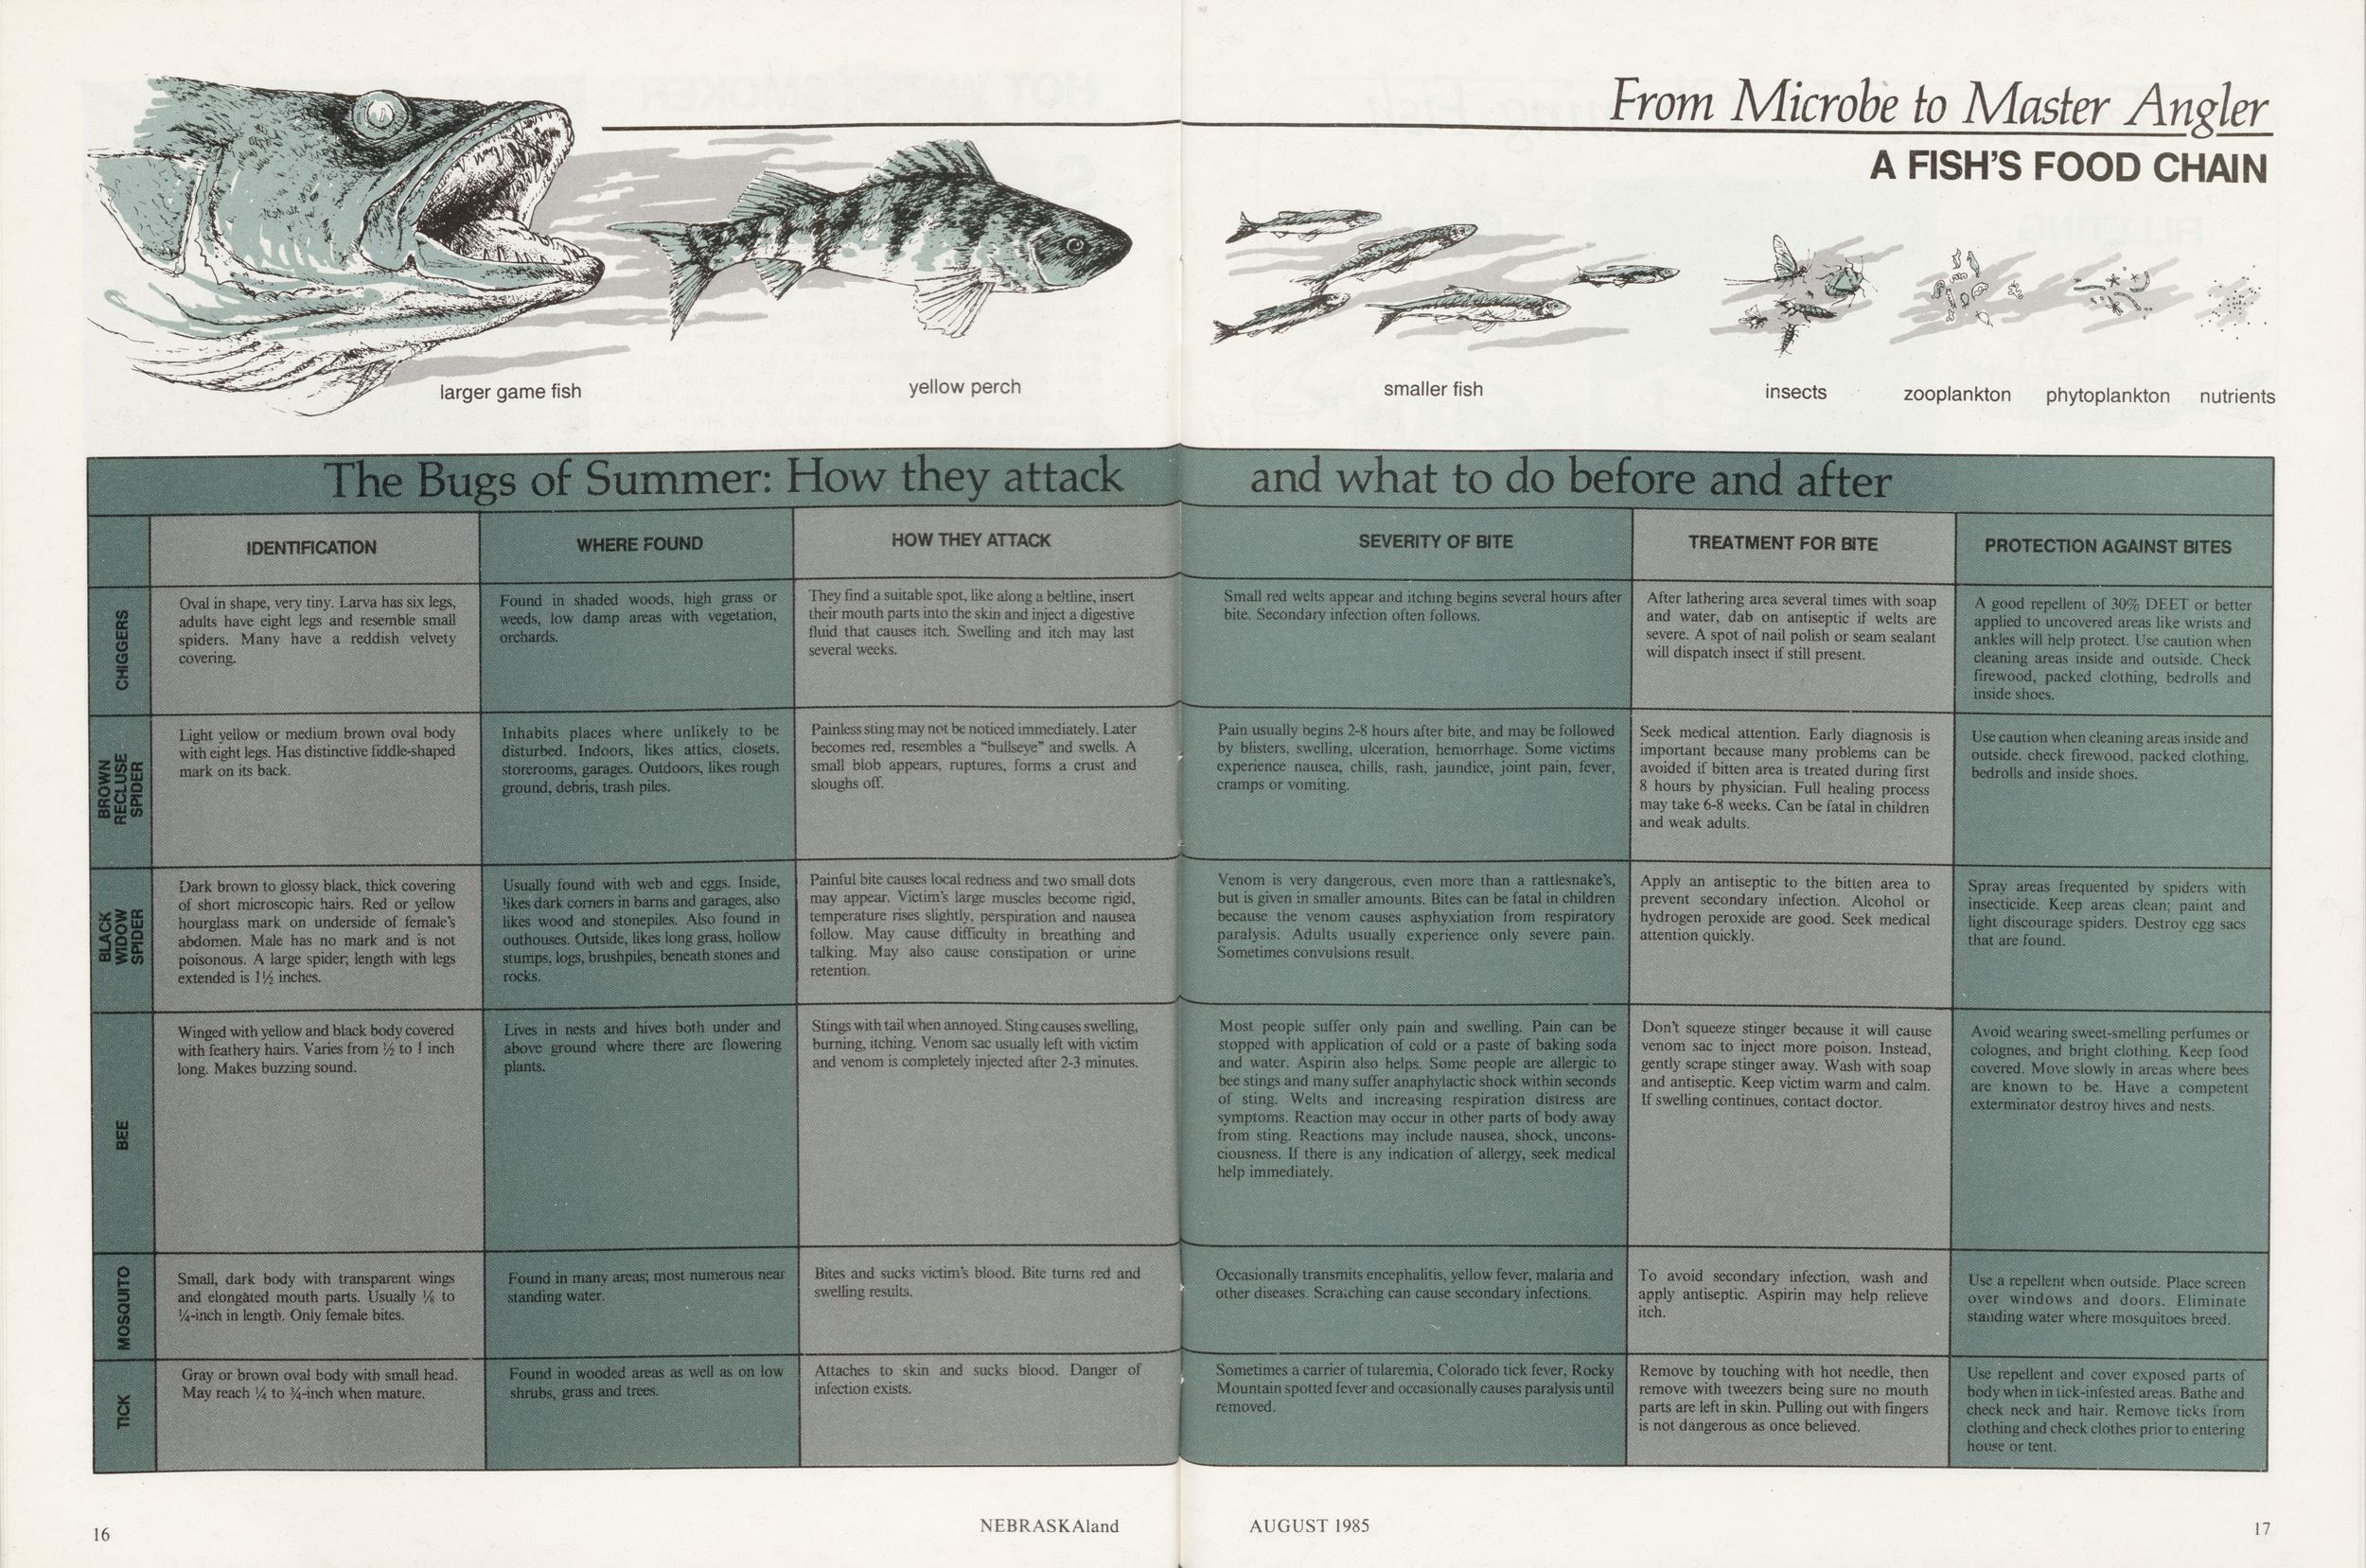
From Microbe to Master Angler smaller fish insects A FISH'S FOOD CHAIN
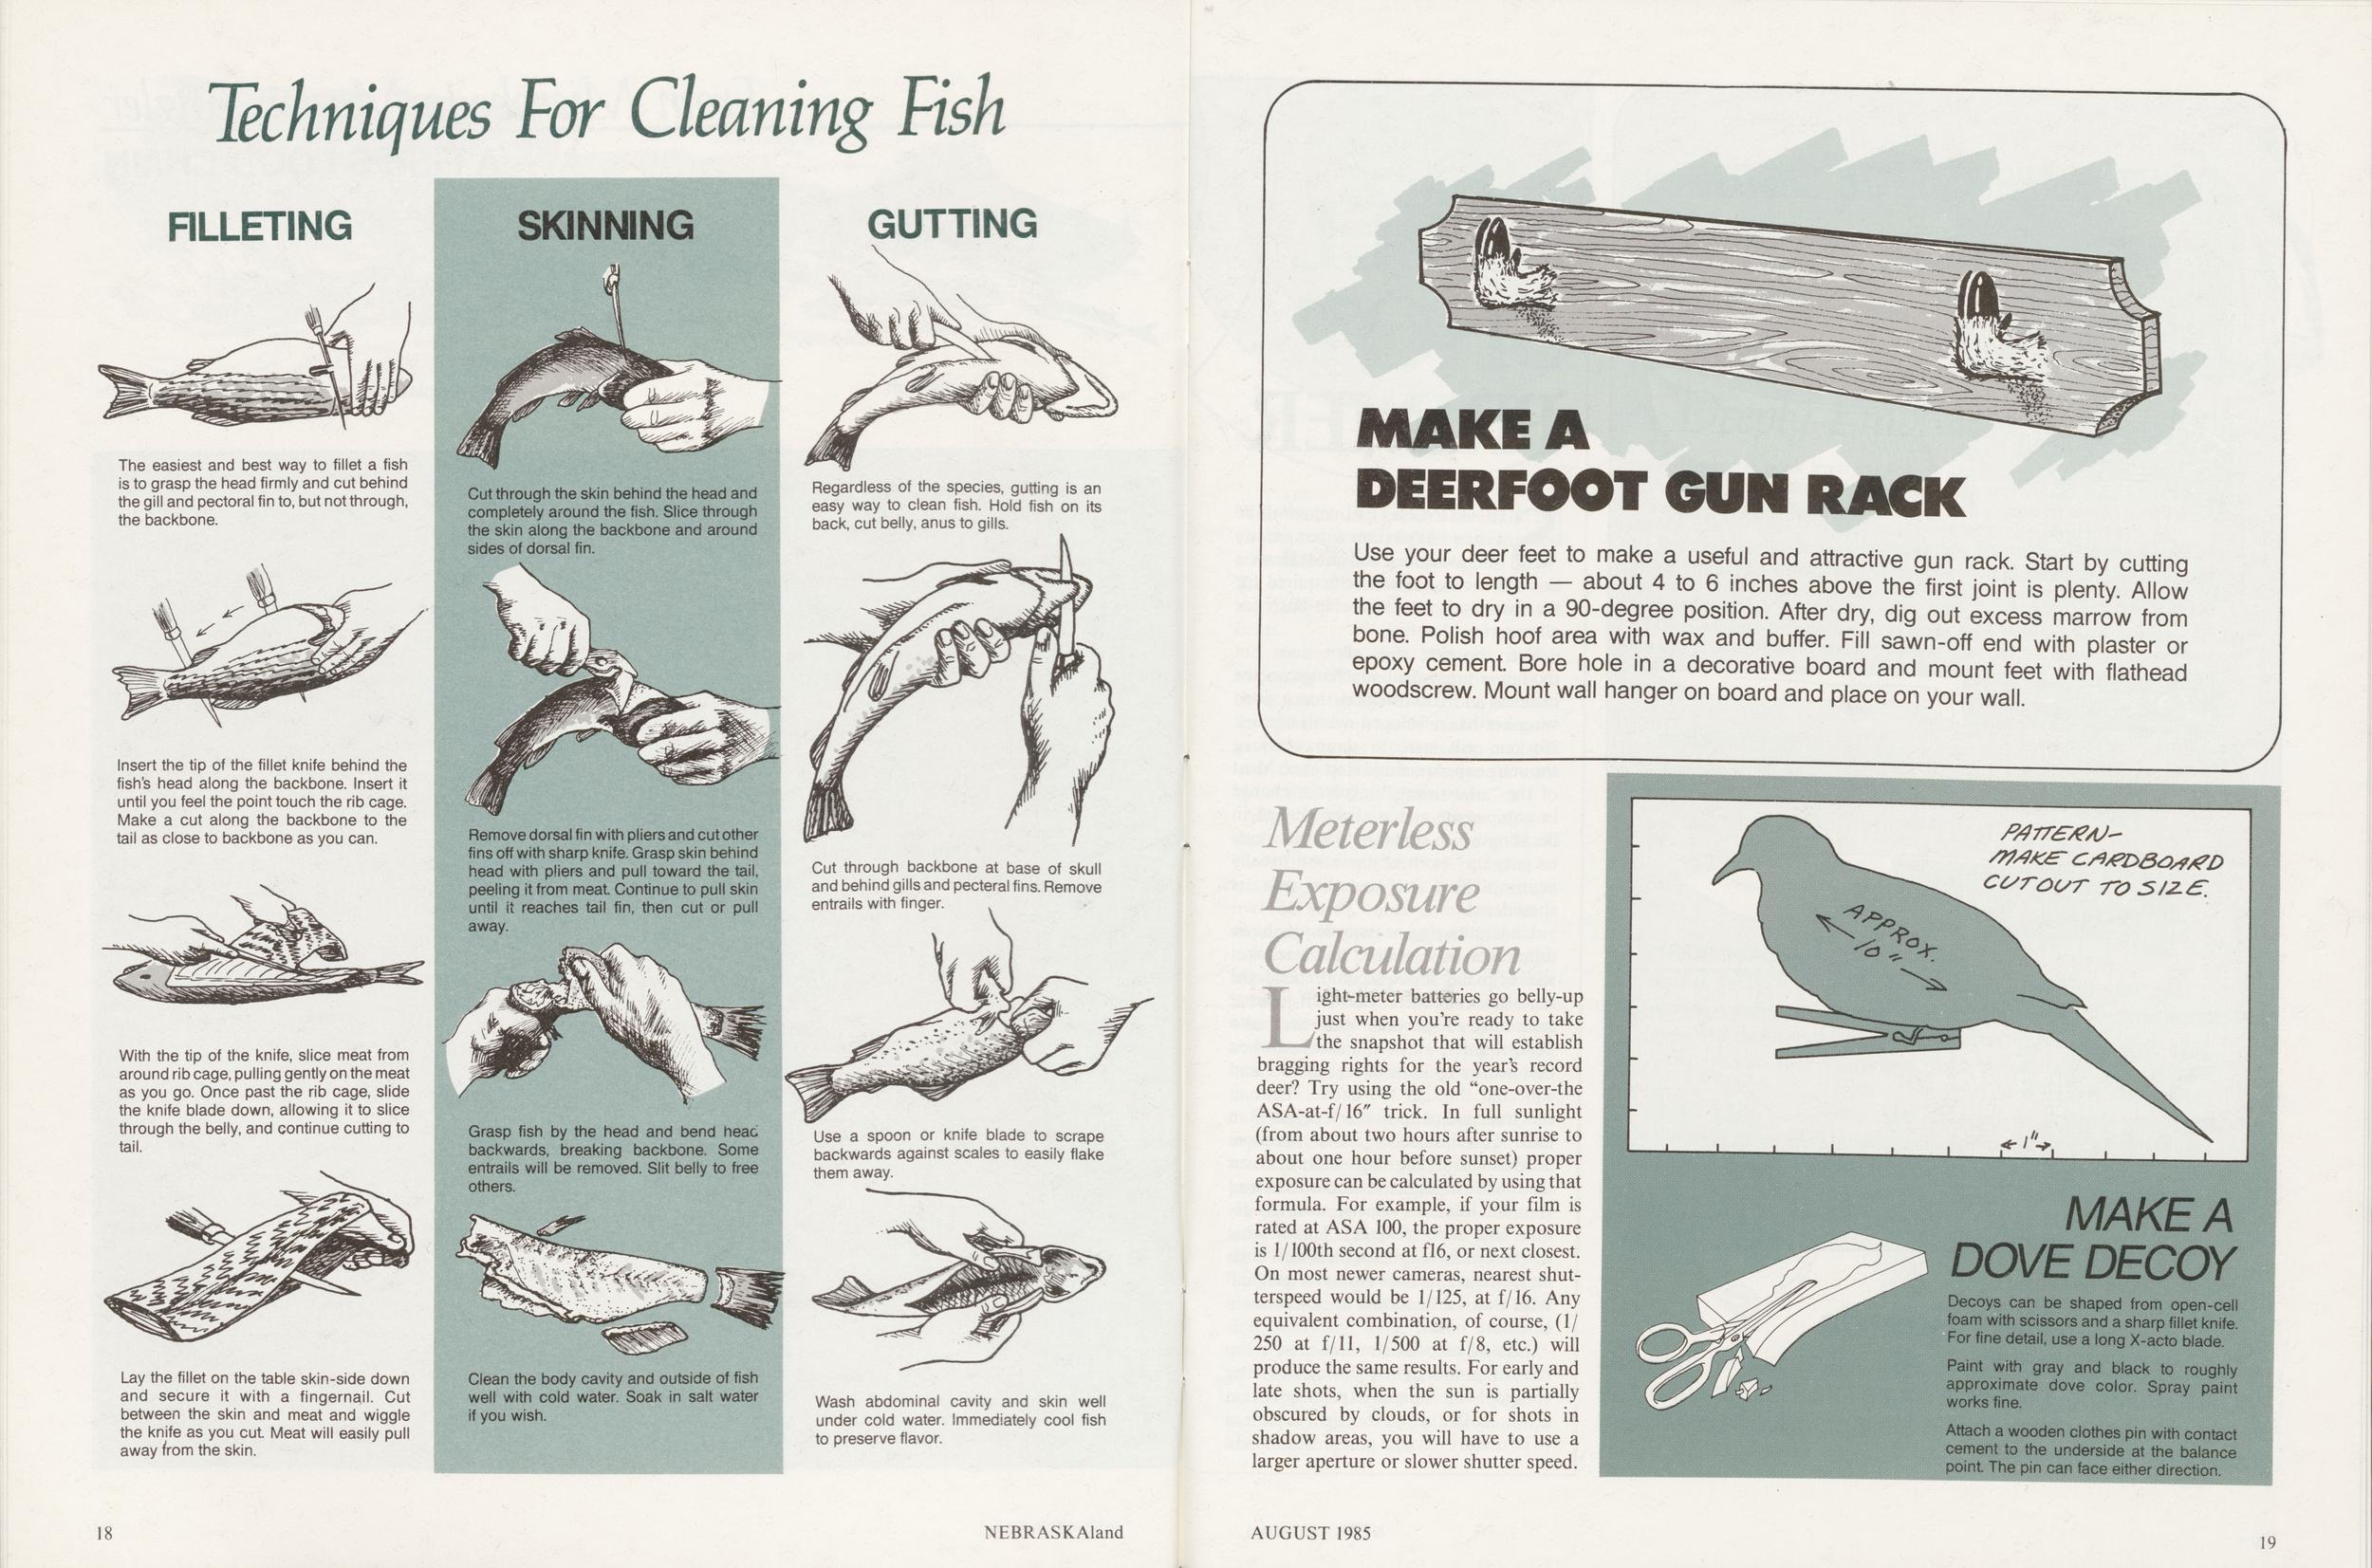
Techniques For Cleaning Fish
FILLETINGUse your deer feet to make a useful and attractive gun rack. Start by cutting the foot to length — about 4 to 6 inches above the first joint is plenty. Allow the feet to dry in a 90-degree position. After dry, dig out excess marrow from bone. Polish hoof area with wax and buffer. Fill sawn-off end with plaster or epoxy cement. Bore hole in a decorative board and mount feet with flathead woodscrew. Mount wall hanger on board and place on your wall.
Meterless d/ez>3/a*/e£> CalculationLight-meter batteries go belly-up just when you're ready to take the snapshot that will establish bragging rights for the year's record deer? Try using the old "one-over-the ASA-at-f/16" trick. In full sunlight (from about two hours after sunrise to about one hour before sunset) proper exposure can be calculated by using that formula. For example, if your film is rated at ASA 100, the proper exposure is 1/100th second at fl6, or next closest. On most newer cameras, nearest shutterspeed would be 1/125, at f/16. Any equivalent combination, of course, (1/ 250 at f/11, 1/500 at f/8, etc.) will produce the same results. For early and late shots, when the sun is partially obscured by clouds, or for shots in shadow areas, you will have to use a larger aperture or slower shutter speed.
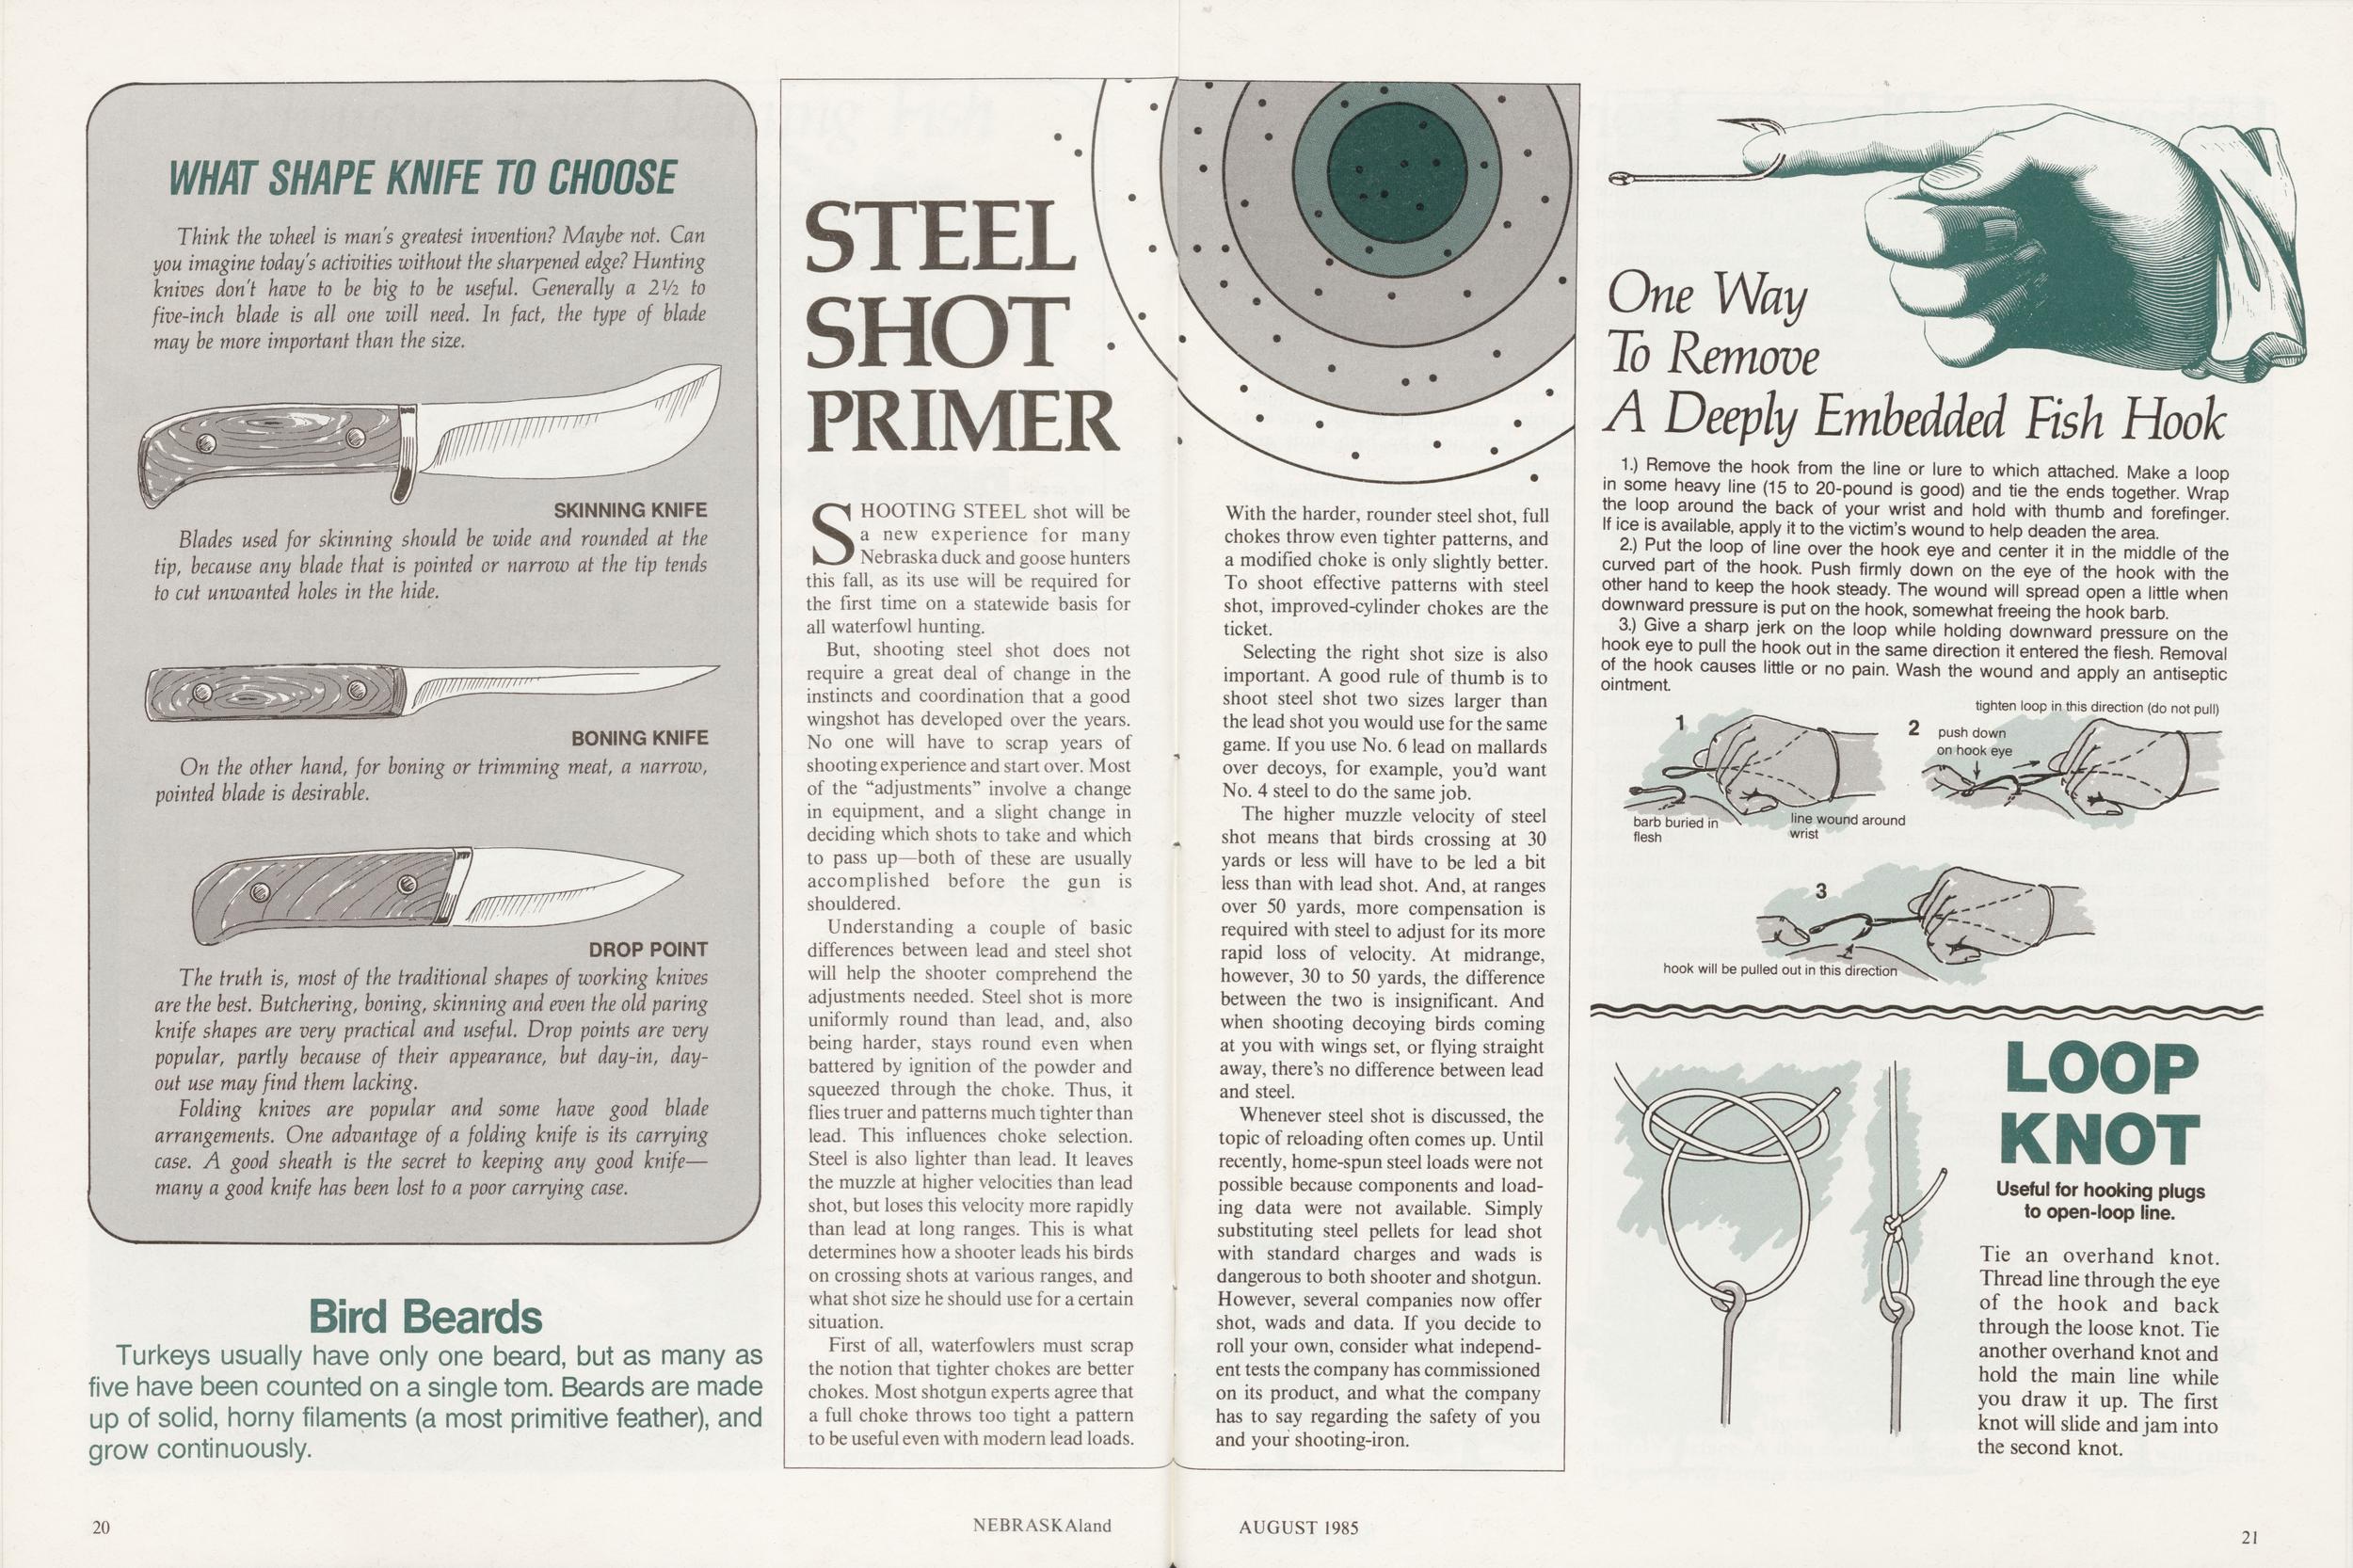
WHAT SHAPE KNIFE TO CHOOSE
Think the wheel is mans greatest invention? Maybe not. Can you imagine todays activities without the sharpened edge? Hunting knives don't have to be big to be useful. Generally a IVi to five-inch blade is all one will need. In fact, the type of blade may be more important than the size.
Blades used for skinning should be wide and rounded at the tip, because any blade thai is pointed or narrow at the tip tends to cut unwanted holes in the hide.
On the other hand, for boning or trimming meat, a narrow, pointed blade is desirable.
The truth is, most of the traditional shapes of working knives are the best. Butchering, boning, skinning and even the old paring knife shapes are very practical and useful Drop points are very popular, partly because of their appearance, but day-in, day- out use may find them lacking.
Folding knives are popular and some have good blade arrangements. One advantage of a folding knife is its carrying case. A good sheath is the secret to keeping any good knife— many a good knife has been lost to a poor carrying case.
Turkeys usually have only one beard, but as many as five have been counted on a single torn. Beards are made up of solid, horny filaments (a most primitive feather), and grow continuously.
STEEL SHOT PRIMER
SHOOTING STEEL shot will be a new experience for many Nebraska duck and goose hunters this fall, as its use will be required for the first time on a statewide basis for all waterfowl hunting.
But, shooting steel shot does not require a great deal of change in the instincts and coordination that a good wingshot has developed over the years. No one will have to scrap years of shooting experience and start over. Most of the "adjustments" involve a change in equipment, and a slight change in deciding which shots to take and which to pass up—both of these are usually accomplished before the gun is shouldered.
Understanding a couple of basic differences between lead and steel shot will help the shooter comprehend the adjustments needed. Steel shot is more uniformly round than lead, and, also being harder, stays round even when battered by ignition of the powder and squeezed through the choke. Thus, it flies truer and patterns much tighter than lead. This influences choke selection. Steel is also lighter than lead. It leaves the muzzle at higher velocities than lead shot, but loses this velocity more rapidly than lead at long ranges. This is what determines how a shooter leads his birds on crossing shots at various ranges, and what shot size he should use for a certain situation.
First of all, waterfowlers must scrap the notion that tighter chokes are better chokes. Most shotgun experts agree that a full choke throws too tight a pattern to be useful even with modern lead loads. 20 NEBRASKAland With the harder, rounder steel shot, full chokes throw even tighter patterns, and a modified choke is only slightly better. To shoot effective patterns with steel shot, improved-cylinder chokes are the ticket.
Selecting the right shot size is also important. A good rule of thumb is to shoot steel shot two sizes larger than the lead shot you would use for the same game. If you use No. 6 lead on mallards over decoys, for example, you'd want No. 4 steel to do the same job.
The higher muzzle velocity of steel shot means that birds crossing at 30 yards or less will have to be led a bit less than with lead shot. And, at ranges over 50 yards, more compensation is required with steel to adjust for its more rapid loss of velocity. At midrange, however, 30 to 50 yards, the difference between the two is insignificant. And when shooting decoying birds coming at you with wings set, or flying straight away, there's no difference between lead and steel.
Whenever steel shot is discussed, the topic of reloading often comes up. Until recently, home-spun steel loads were not possible because components and loading data were not available. Simply substituting steel pellets for lead shot with standard charges and wads is dangerous to both shooter and shotgun. However, several companies now offer shot, wads and data. If you decide to roll your own, consider what independent tests the company has commissioned on its product, and what the company has to say regarding the safety of you and your shooting-iron.
One Way To Remove A Deeply Embedded Fish Hook
1.) Remove the hook from the line or lure to which attached. Make a loop in some heavy line (15 to 20-pound is good) and tie the ends together. Wrap the loop around the back of your wrist and hold with thumb and forefinger. If ice is available, apply it to the victim's wound to help deaden the area.
2.) Put the loop of line over the hook eye and center it in the middle of the curved part of the hook. Push firmly down on the eye of the hook with the other hand to keep the hook steady. The wound will spread open a little when downward pressure is put on the hook, somewhat freeing the hook barb.
3.) Give a sharp jerk on the loop while holding downward pressure on the hook eye to pull the hook out in the same direction it entered the fiesh. Removal of the hook causes little or no pain. Wash the wound and apply an antiseptic ointment.
Tie an overhand knot. Thread line through the eye of the hook and back through the loose knot. Tie another overhand knot and hold the main line while you draw it up. The first knot will slide and jam into the second knot.
Urban Tree Planting For Wildlife
PLANTS, AND particularly trees, play an extremely important role in providing the basic needs of wildlife. And even more, trees in the urban environment provide many additional benefits to the homeowner or property manager.
Recognition of the value of trees for wildlife would seem pretty easy for most. Fruits, nuts and other tree parts furnish much of the diet of many animals. What we often forget, though, is the fact that trees provide homes for a variety of creatures from squirrels to birds to insects. Tree cavities or other natural hollows play host to nests and permanent dens. Often we don't even notice important habitat components such as these because of their locations. Trees are also good feeding areas for a number of critters, especially birds, because of the insects found on foliage, bark or dead limbs and branches. Through the year, trees may serve as perching areas for many birds, as well as secure and sheltered roosting sites during weather extremes.
In order to reap the reward of having wildlife in your backyard, trees become, perhaps, the most important component in an urban setting. All other benefits such as shade, beauty, privacy, special treats for human consumption like wild nuts and other fruits, and significant energy-savings all combine to make trees a truly necessary environmental feature for the urban dweller.
What you ultimately may plant, and how you arrange these plantings, will play an important role in the final success of an urban tree planting endeavor. Trees, like people, have certain peculiarities. Growing conditions such as soil type, exposure, climate and even species themselves make for a wide list of variables in a typical midwest setting. Trees vary also in other characteristics: some may grow very rapidly and have a short lifespan, while others are extremely long-lived but grow very slowly. Shape and foliage characteristics vary too: some trees will always maintain a squat, robust appearance, others may be tall and gangly. Some leaves may portray the epitome of delicacy and fine lines; others such as the sycamore are well-shingled with large and heavy leaves.
Each and every one of these characteristics provides variations that for some potential tree planters cause nothing but confusion. For others, the , wide range of tree types and their special qualities allow a potential tree planter to meet almost every need for the urban homesite.
If the backyard tree planter can take just one concept from the professional wildlife manager's handbook, chances for success will almost always be assured. This concept is diversity. Having a variety of trees and shrubs will provide a wide choice of food and shelter. And, by providing diversity in a planting, seasonal and weather-related shortfalls can be alleviated or tempered. For example, a wet, cool spring may cause some early-blooming crabapples not to bear fruit. Varieties that bloom later will be able to make up part of the deficit.
Diversity in the structure of a tree and shrub planting also provides a number of "liveable layers," each providing special qualities for different species. A low, shrubby thicket, for example, is preferred by species such as the cardinal and brown thrasher. The chickadee, however, nests in small tree cavities that may be relatively open in character. Tall, mature trees will provide nesting sites for kingbirds, northern orioles, screech owls and a host of other tree-dwelling animals.
Diversity in structure also provides diversity of food. Shrubs and small, flowering trees can provide a wide array of berries and fleshy fruits used by birds. Larger, mature trees provide nuts and other seeds used by both birds and mammals.
A backyard or urban planting does not have to have a wild, jungle-like appearance in order to be attractive to wildlife. A well-cared-for planting will also hold attraction to wildlife. As a planting develops, it will become evident that some edges or interfaces of grass and shrub, or grass and trees will get more use than others. Close observation will serve as a guide in formulating and maintaining an ongoing planting plan. Using combinations of fast and slowgrowing trees, heavy and light-canopied trees, food as well as shelter sources, and trees of various shapes and forms, will allow you to mold an enjoyable environment for both you and your backyard wildlife.
If you are fortunate enough to have a few mature trees existing in your yard, the task of developing a productive urban planting for wildlife becomes even easier. Design additional plantings that complement these mature trees. An "island planting" of smaller trees or shrubs around the older residents will provide excellent summer habitat in a short time. Older trees with dead or damaged branches also have potential. 22 NEBRASKAland If they are not a threat to property or people, consider leaving them to ultimately provide nesting cavities as they continue to age. Often dead snags have very significant value to wildlife. When it becomes necessary to take a tree down, leave a high stump or trimmed snag as a food source and nesting site. Flickers, woodpeckers and nuthatches will surprise you with their response to this unique form of tree habitat.
While we often put more emphasis on food and nesting sites, you'll want to remember that in a management concept that focuses on diversity, shelter also becomes one of the needs in your planting scheme. When the winds of our midwestern blizzards begin to howl, dense cover, especially, becomes essential. A plum or honeysuckle thicket that appeared impenetrable in July, often begins to look pretty bare by January. This is where the conifer species fill an important niche. Trees such as cedar, spruce and pine play an important role in the dense-cover strategy.
The often-maligned eastern red cedar may be one of the better winter shelter species. Many birds use these for roosting, as well as eating the usually plentiful supply of gray-blue fruits. If red cedar isn't quite to your liking, the Rocky Mountain juniper becomes a good second choice since it tends to be a greener-blue color with more upright form. A well-branched Austrian pine also will do a good job. Consider setting aside a corner of your yard for a cluster of conifers.
With a little thought and a few trees, your backyard just may become the best place in town to watch and enjoy wildlife.
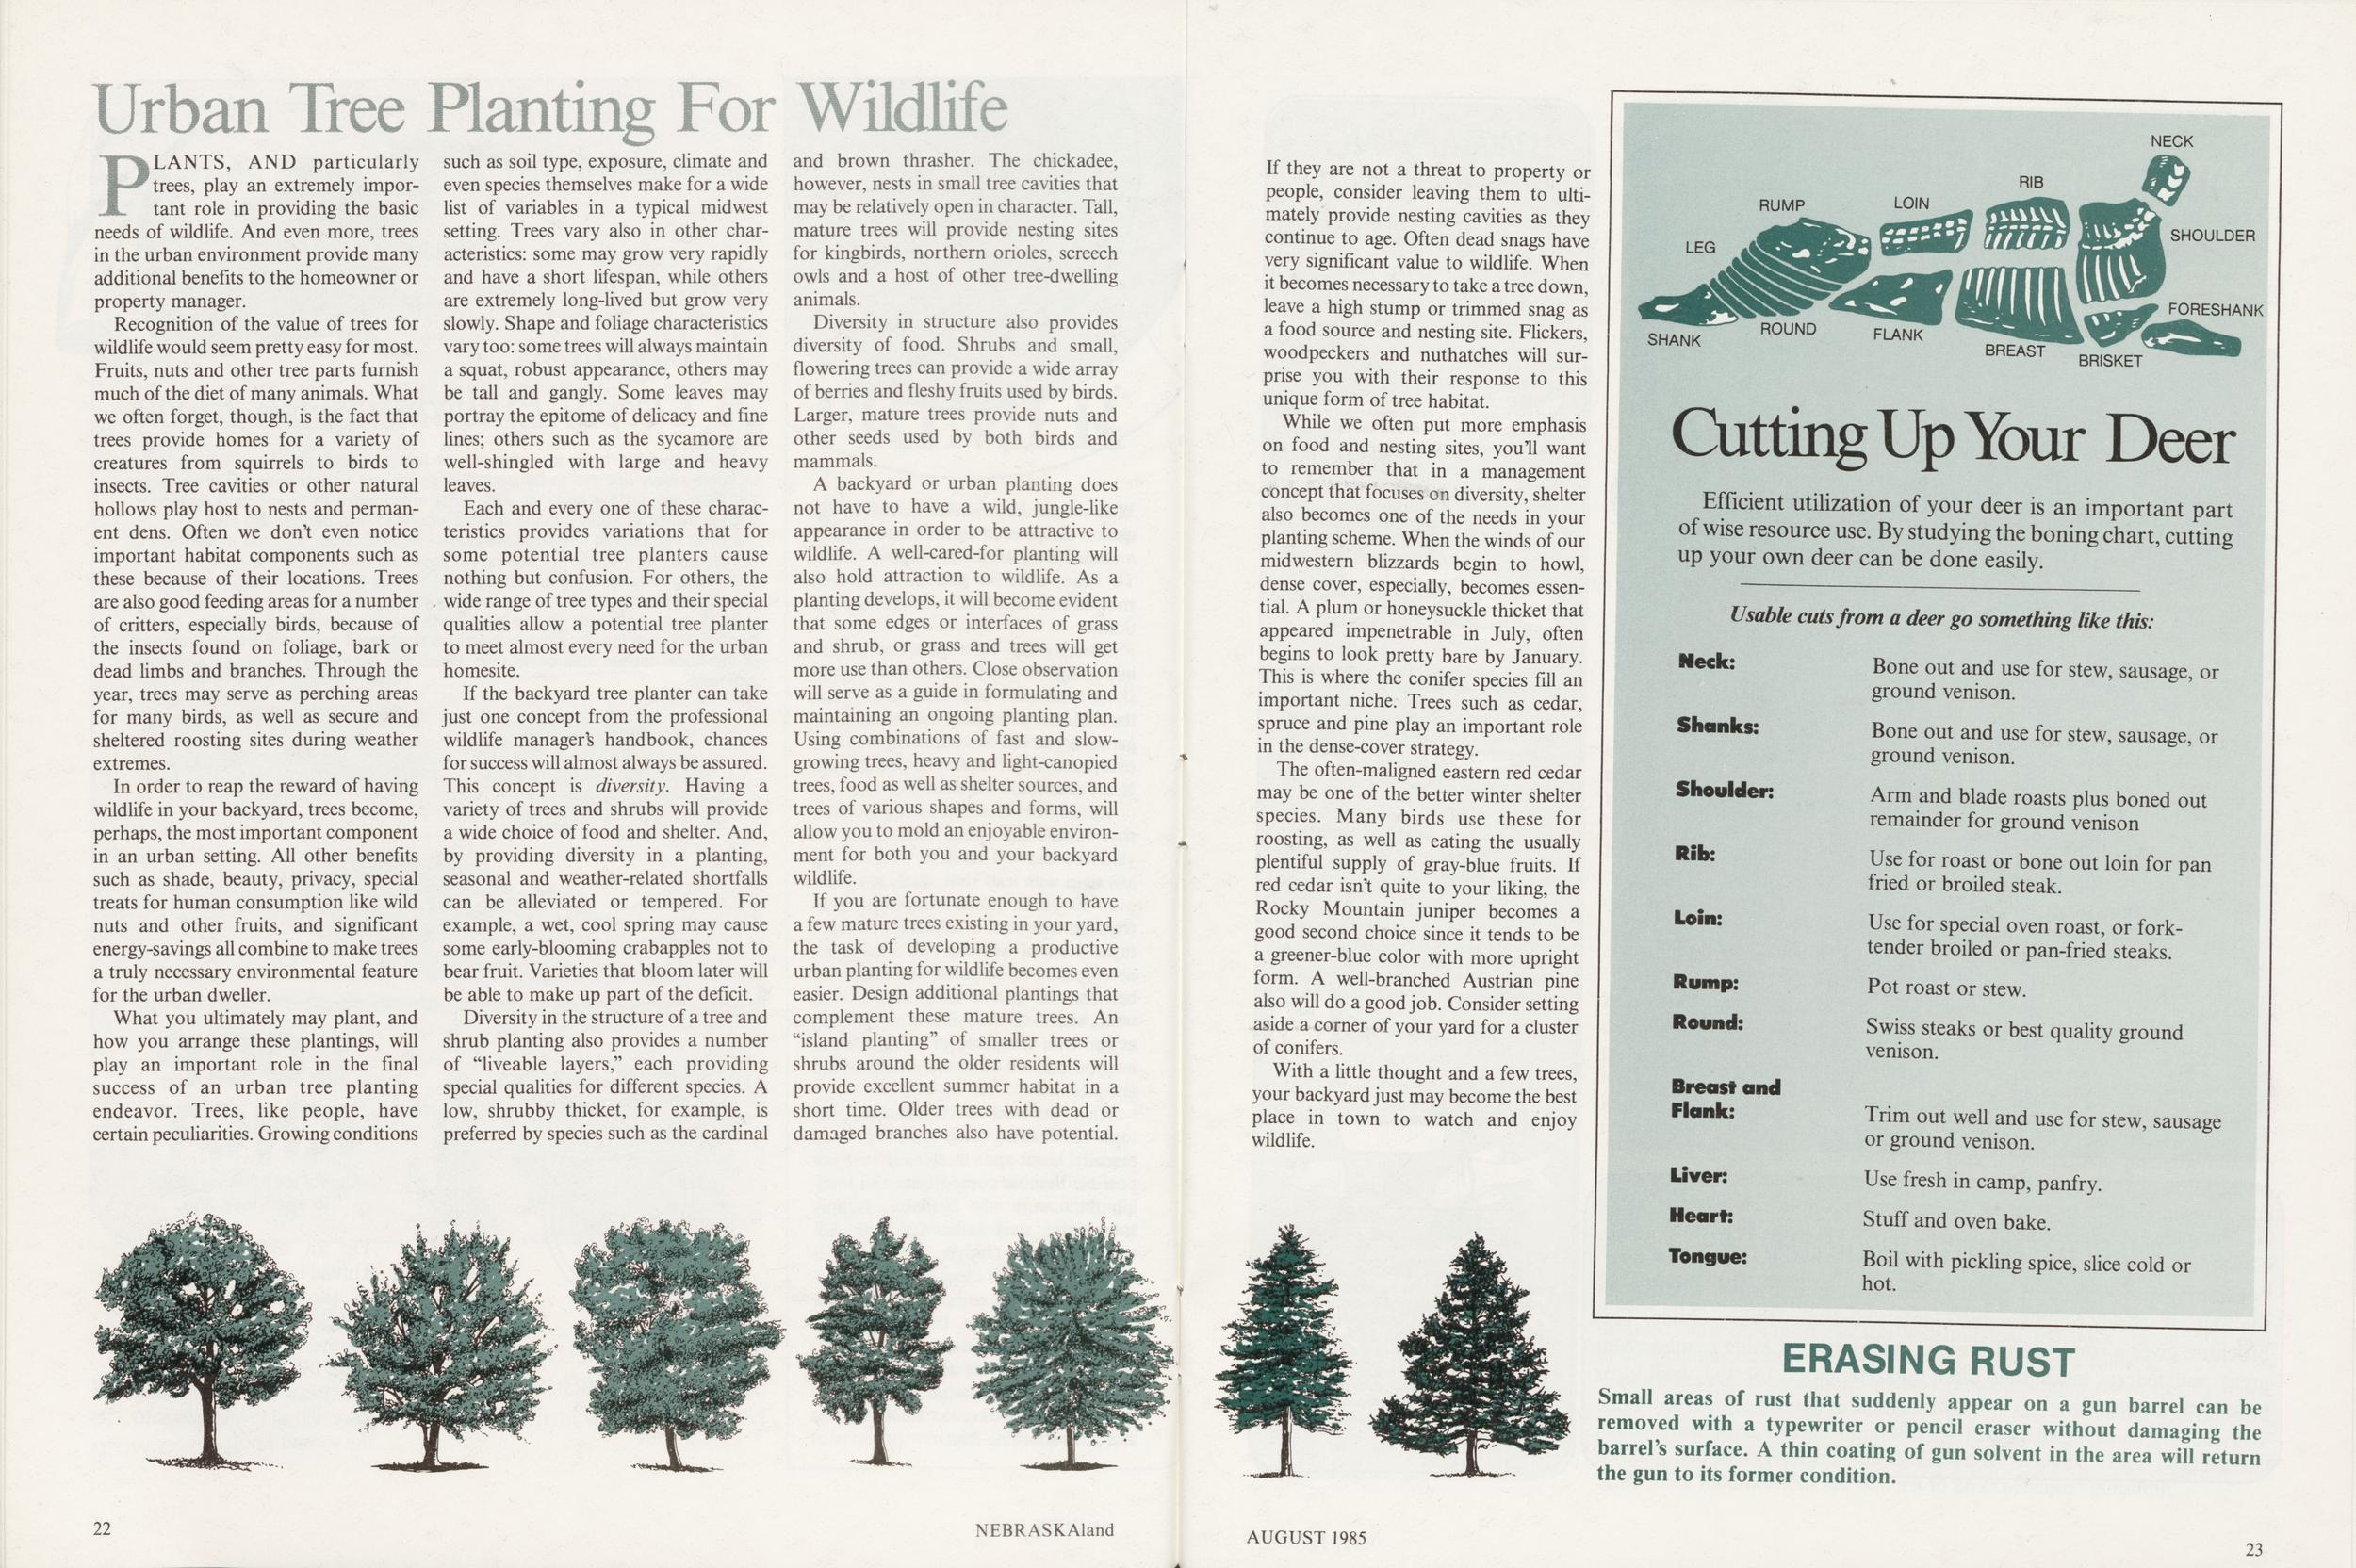
Cutting Up Your Deer
Efficient utilization of your deer is an important part of wise resource use. By studying the boning chart, cutting up your own deer can be done easily. Usable cuts from a deer go something like this: Neck: Shanks: Shoulder: Rib: Loin: Rump: Round: Breast and Flank: Liver: Heart: Tongue: Bone out and use for stew, sausage, or ground venison. Bone out and use for stew, sausage, or ground venison. Arm and blade roasts plus boned out remainder for ground venison Use for roast or bone out loin for pan fried or broiled steak. Use for special oven roast, or forktender broiled or pan-fried steaks. Pot roast or stew. Swiss steaks or best quality ground venison. Trim out well and use for stew, sausage or ground venison. Use fresh in camp, panfry. Stuff and oven bake. Boil with pickling spice, slice cold or hot. ERASING RUSTSmall areas of rust that suddenly appear on a gun barrel can be removed with a typewriter or pencil eraser without damaging the barrel's surface. A thin coating of gun solvent in the area will return the gun to its former condition.
AUGUST 1985 23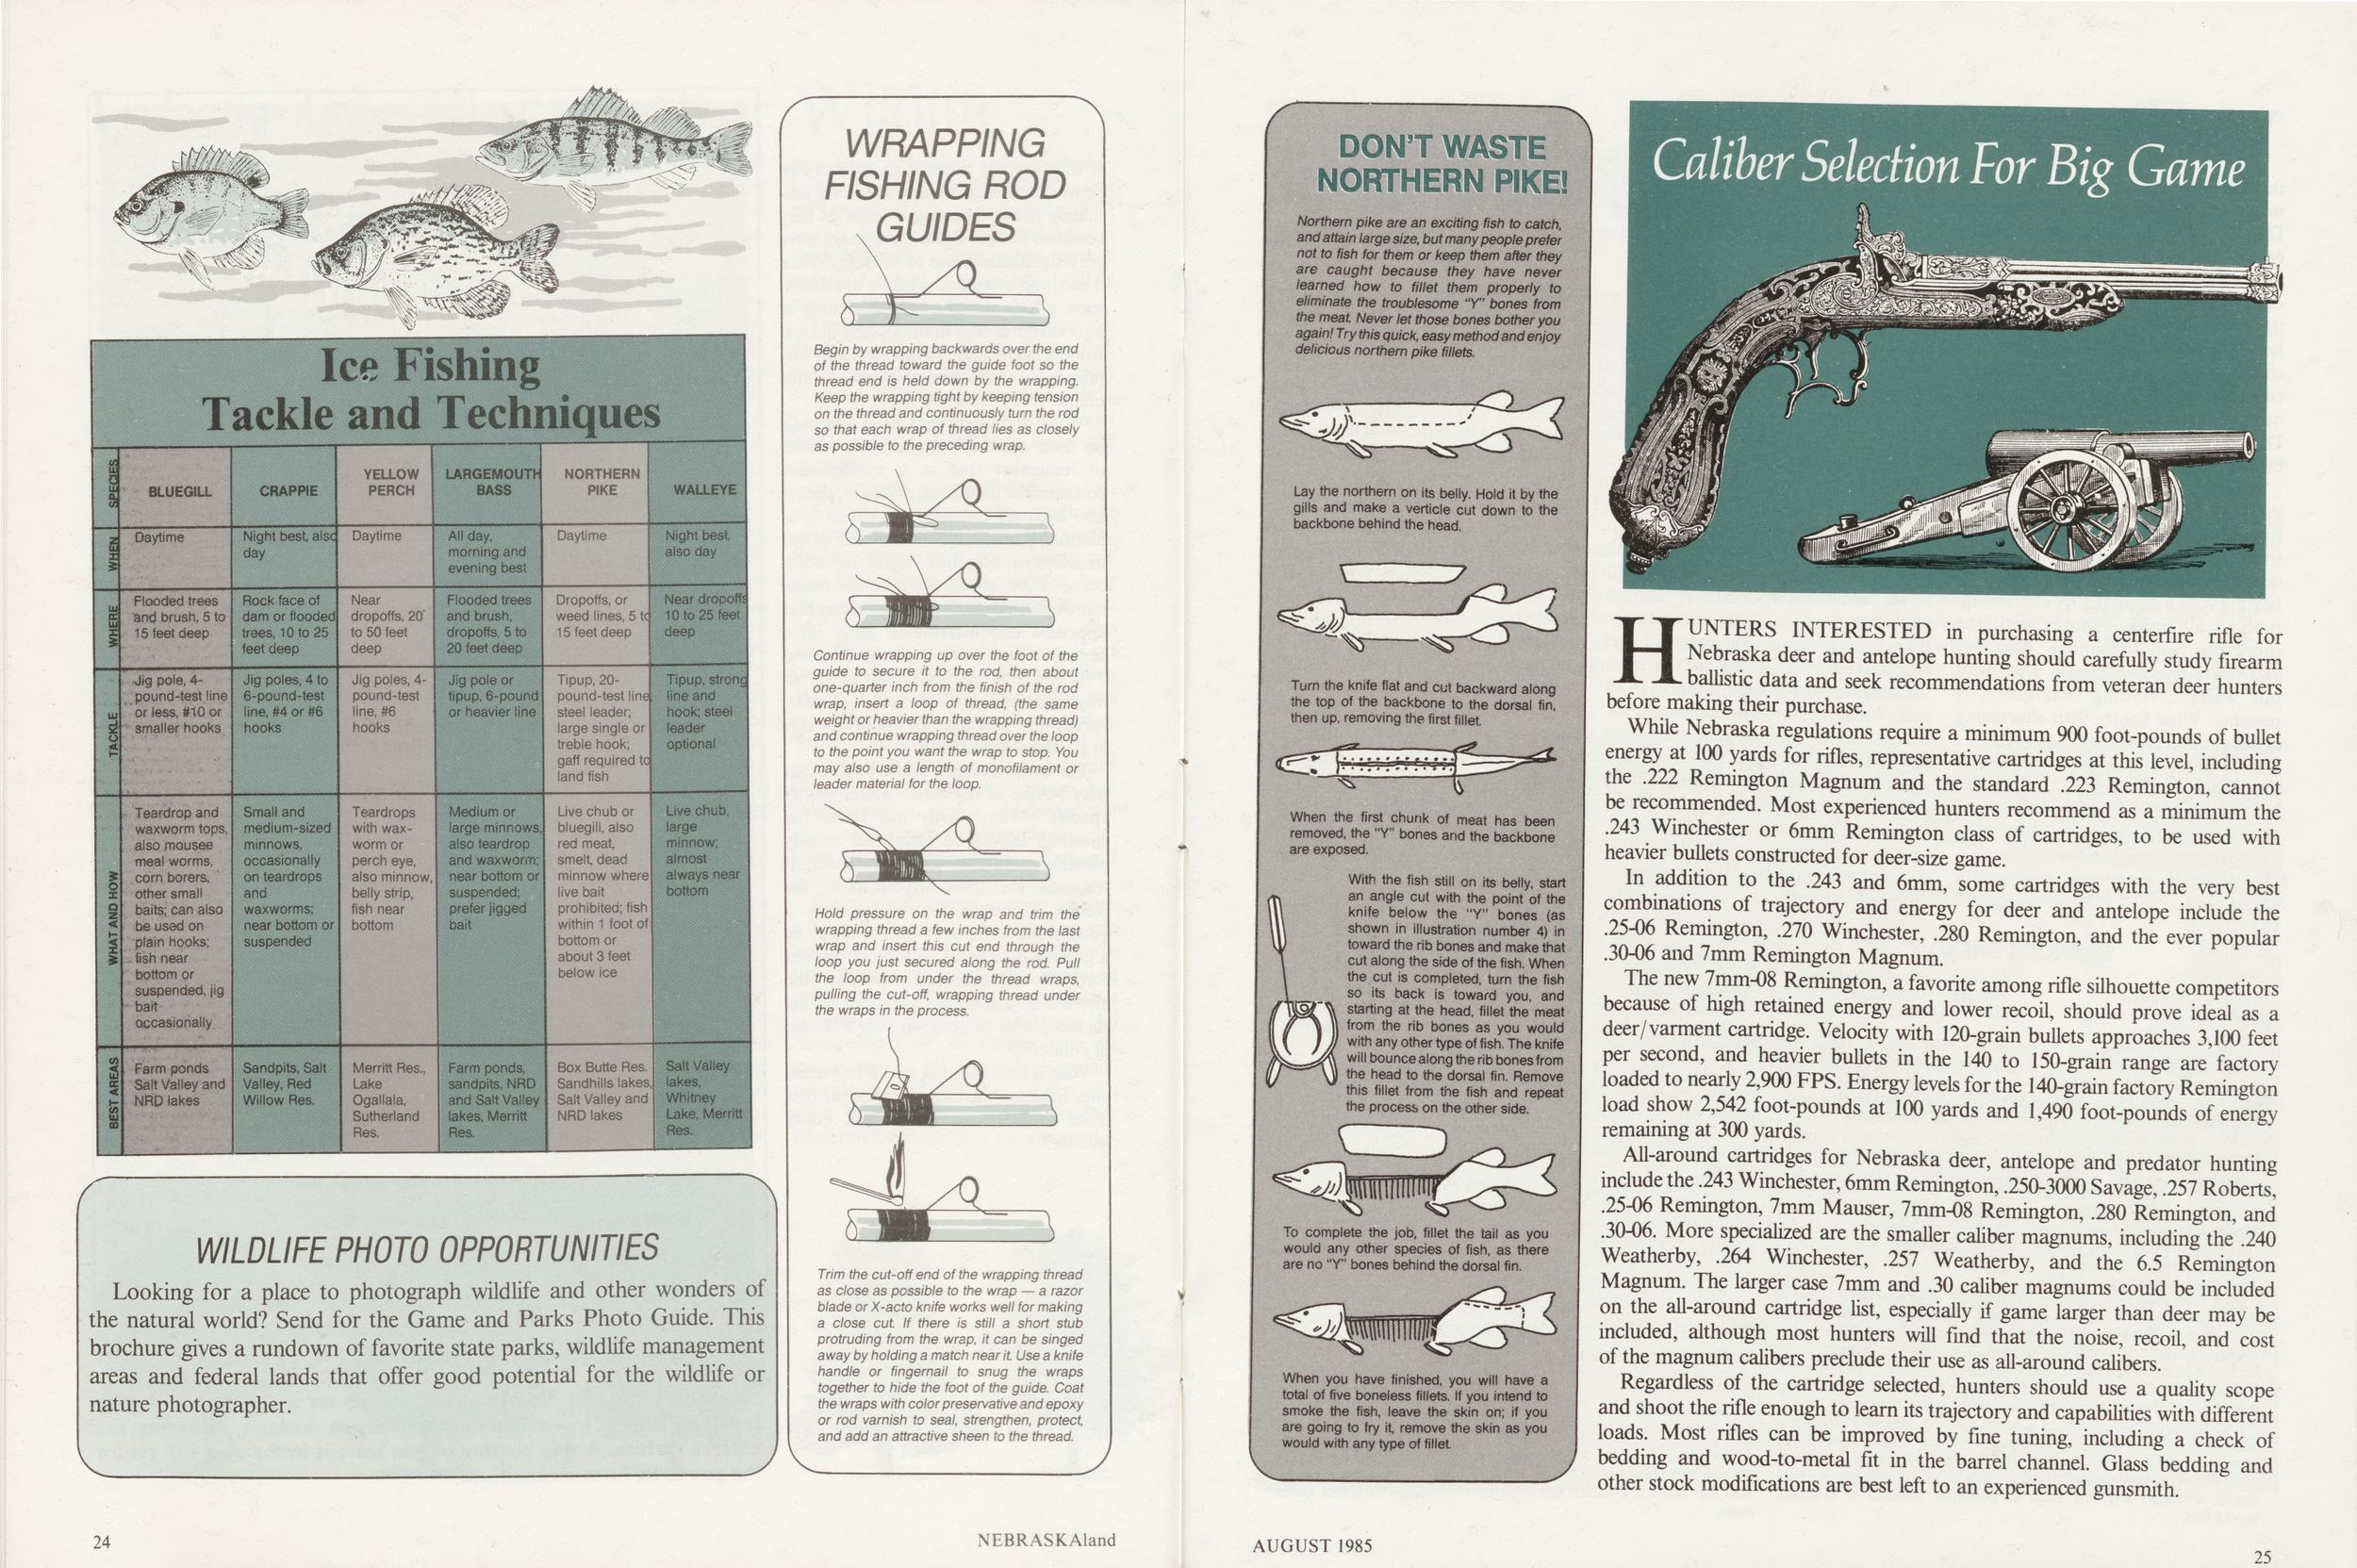
Ice Fishing Tackle and Techniques
8LUEGILL Daytime Flooded trees and brush, 5 to 15 feet deep dig pole, 4-pound-test line or iess, #10 or smaller hooks CRAPPIE Night best, day Rock face of dam or flooded! trees, 10 to 25 feet deep YELLOW PERCH Daytime Near dropoffs, 20 to 50 feet deep LARGEMOUTH BASS Ail day, morning and evening best Jig poles, 4 to 6-pound-test line, #4 or #6 hooks Teardrop and waxworm tops, also mousee meal worms, corn borers, other small baits; can also be used on plain hooks; fish near bottom or suspended, jig bait occasionally Small and medium-sized minnows, occasionally on teardrops and waxworms; near bottom or suspended Jig poles, 4-pound-test line, #6 hooks Flooded trees and brush, dropoffs, 5 to 20 feet deep Jig pole or tipup, 6-pound or heavier line I NORTHERN PIKE Daytime WALLEYE Night best, also day Dropoffs, or weed lines, 5 tcj 15 feet deep Teardrops with wax- worm or perch eye, also minnow, belly strip, fish near bottom Medium or large minnows, also teardrop and waxworm; near bottom or suspended; prefer jigged bait Tipup, 20- I pound-test iine| steel leader; large single or treble hook; gaff required toj land fish Farm ponds Salt Valley and NRD lakes Sandpits, Salt Valley, Red Willow Res. Merritt Res. Lake Ogallala, Sutherland Res. Farm ponds, sandpits, NRD and Salt Valley lakes, Merritt Res. Live chub or bluegili, also red meat, smelt dead minnow where live bait prohibited; fish within 1 foot of bottom or about 3 feet below Ice Near dropoffs 10 to 25 feet deep Tipup, stronc line and took; steel leader optional Live chub, large minnow; almost always near bottom Box Butte Res Sandhills lakes, Salt Valley and NRD lakes Salt Valley lakes, Whitney Lake, Merritt Res. WILDLIFE PHOTO OPPORTUNITIESLooking for a place to photograph wildlife and other wonders of the natural world? Send for the Game and Parks Photo Guide. This brochure gives a rundown of favorite state parks, wildlife management areas and federal lands that offer good potential for the wildlife or nature photographer.
WRAPPING FISHING ROD GUIDESNorthern pike are an exciting fish to catch, and attain large size, but many people prefer not to fish for them or keep mem after they are caught because they have never learned how to fillet them properly to eliminate the troublesome "Y* bones from the meat Never let those bones bother you again! Try this quick, easy method and enjoy delicious northern pike fillets.
Caliber selection For Big Game
HUNTERS INTERESTED in purchasing a centerfire rifle for Nebraska deer and antelope hunting should carefully study firearm ballistic data and seek recommendations from veteran deer hunters before making their purchase.
While Nebraska regulations require a minimum 900 foot-pounds of bullet energy at 100 yards for rifles, representative cartridges at this level, including the .222 Remington Magnum and the standard .223 Remington, cannot be recommended. Most experienced hunters recommend as a minimum the .243 Winchester or 6mm Remington class of cartridges, to be used with heavier bullets constructed for deer-size game.
In addition to the .243 and 6mm, some cartridges with the very best combinations of trajectory and energy for deer and antelope include the .25-06 Remington, .270 Winchester, .280 Remington, and the ever popular .30-06 and 7mm Remington Magnum.
The new 7mm-08 Remington, a favorite among rifle silhouette competitors because of high retained energy and lower recoil, should prove ideal as a deer/varment cartridge. Velocity with 120-grain bullets approaches 3,100 feet per second, and heavier bullets in the 140 to 150-grain range are factory loaded to nearly 2,900 FPS. Energy levels for the 140-grain factory Remington load show 2,542 foot-pounds at 100 yards and 1,490 foot-pounds of energy remaining at 300 yards.
All-around cartridges for Nebraska deer, antelope and predator hunting include the .243 Winchester, 6mm Remington, .250-3000 Savage, .257 Roberts, .25-06 Remington, 7mm Mauser, 7mm-08 Remington, .280 Remington, and .30-06. More specialized are the smaller caliber magnums, including the .240 Weatherby, .264 Winchester, .257 Weatherby, and the 6.5 Remington Magnum. The larger case 7mm and .30 caliber magnums could be included on the all-around cartridge list, especially if game larger than deer may be included, although most hunters will find that the noise, recoil, and cost of the magnum calibers preclude their use as all-around calibers.
Regardless of the cartridge selected, hunters should use a quality scope and shoot the rifle enough to learn its trajectory and capabilities with different loads. Most rifles can be improved by fine tuning, including a check of bedding and wood-to-metal fit in the barrel channel. Glass bedding and other stock modifications are best left to an experienced gunsmith.
AUGUST 1985 25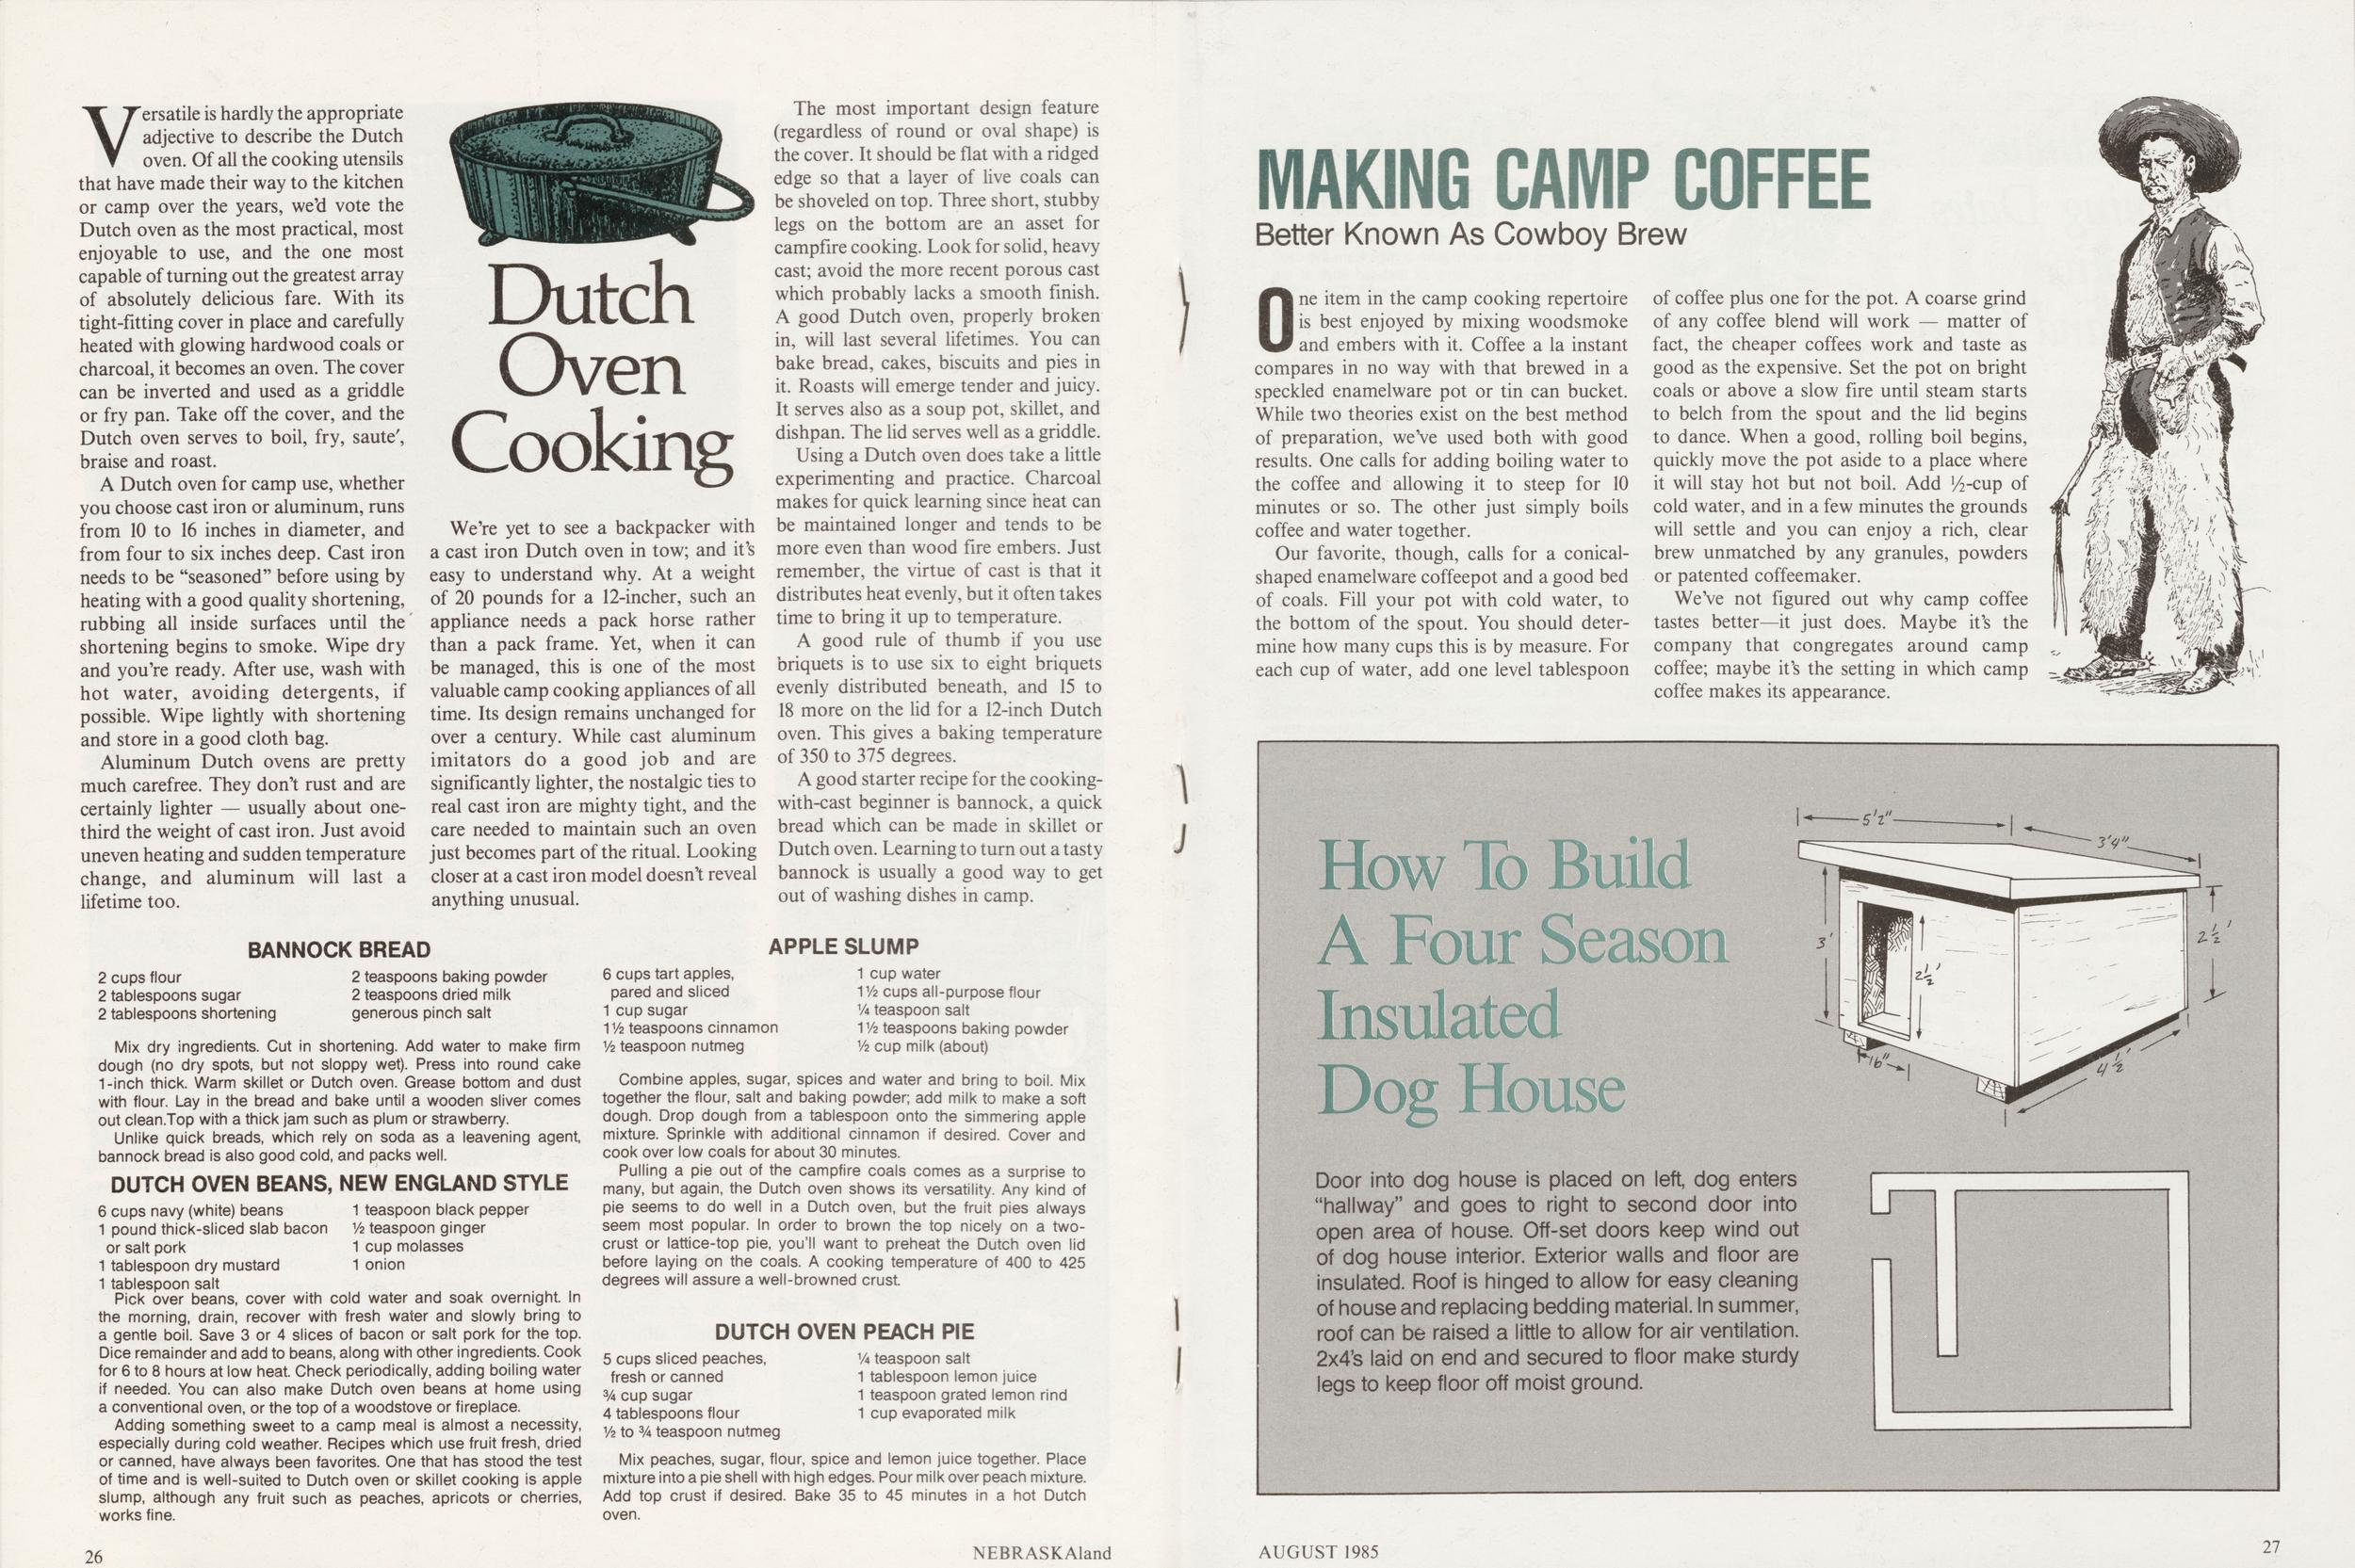
Dutch Oven Cooking
Versatile is hardly the appropriate adjective to describe the Dutch oven. Of all the cooking utensils that have made their way to the kitchen or camp over the years, we'd vote the Dutch oven as the most practical, most enjoyable to use, and the one most capable of turning out the greatest array of absolutely delicious fare. With its tight-fitting cover in place and carefully heated with glowing hardwood coals or charcoal, it becomes an oven. The cover can be inverted and used as a griddle or fry pan. Take off the cover, and the Dutch oven serves to boil, fry, saute', braise and roast.
A Dutch oven for camp use, whether you choose cast iron or aluminum, runs from 10 to 16 inches in diameter, and from four to six inches deep. Cast iron needs to be "seasoned" before using by heating with a good quality shortening, rubbing all inside surfaces until the shortening begins to smoke. Wipe dry and you're ready. After use, wash with hot water, avoiding detergents, if possible. Wipe lightly with shortening and store in a good cloth bag.
Aluminum Dutch ovens are pretty much carefree. They don't rust and are certainly lighter — usually about one-third the weight of cast iron. Just avoid uneven heating and sudden temperature change, and aluminum will last a lifetime too.
We're yet to see a backpacker with a cast iron Dutch oven in tow; and it's easy to understand why. At a weight of 20 pounds for a 12-incher, such an appliance needs a pack horse rather than a pack frame. Yet, when it can be managed, this is one of the most valuable camp cooking appliances of all time. Its design remains unchanged for over a century. While cast aluminum imitators do a good job and are significantly lighter, the nostalgic ties to real cast iron are mighty tight, and the care needed to maintain such an oven just becomes part of the ritual. Looking closer at a cast iron model doesn't reveal anything unusual.
The most important design feature (regardless of round or oval shape) is the cover. It should be flat with a ridged edge so that a layer of live coals can be shoveled on top. Three short, stubby legs on the bottom are an asset for campfire cooking. Look for solid, heavy cast; avoid the more recent porous cast which probably lacks a smooth finish. A good Dutch oven, properly broken in, will last several lifetimes. You can bake bread, cakes, biscuits and pies in it. Roasts will emerge tender and juicy. It serves also as a soup pot, skillet, and dishpan. The lid serves well as a griddle.
Using a Dutch oven does take a little experimenting and practice. Charcoal makes for quick learning since heat can be maintained longer and tends to be more even than wood fire embers. Just remember, the virtue of cast is that it distributes heat evenly, but it often takes time to bring it up to temperature.
A good rule of thumb if you use briquets is to use six to eight briquets evenly distributed beneath, and 15 to 18 more on the lid for a 12-inch Dutch oven. This gives a baking temperature of 350 to 375 degrees.
A good starter recipe for the cooking-with-cast beginner is bannock, a quick bread which can be made in skillet or Dutch oven. Learning to turn out a tasty bannock is usually a good way to get out of washing dishes in camp.
BANNOCK BREAD 2 cups flour 2 tablespoons sugar 2 tablespoons shortening 2 teaspoons baking powder 2 teaspoons dried milk generous pinch saltMix dry ingredients. Cut in shortening. Add water to make firm dough (no dry spots, but not sloppy wet). Press into round cake 1-inch thick. Warm skillet or Dutch oven. Grease bottom and dust with flour. Lay in the bread and bake until a wooden sliver comes out clean.Top with a thick jam such as plum or strawberry. Unlike quick breads, which rely on soda as a leavening agent, bannock bread is also good cold, and packs well.
DUTCH OVEN BEANS, NEW ENGLAND STYLE 6 cups navy (white) beans 1 pound thick-sliced slab bacon or salt pork 1 tablespoon dry mustard 1 tablespoon salt 1 teaspoon black pepper 1/2 teaspoon ginger 1 cup molasses 1 onionPick over beans, cover with cold water and soak overnight. In the morning, drain, recover with fresh water and slowly bring to a gentle boil. Save 3 or 4 slices of bacon or salt pork for the top. Dice remainder and add to beans, along with other ingredients. Cook for 6 to 8 hours at low heat. Check periodically, adding boiling water if needed. You can also make Dutch oven beans at home using a conventional oven, or the top of a woodstove or fireplace.
Adding something sweet to a camp meal is almost a necessity, especially during cold weather. Recipes which use fruit fresh, dried or canned, have always been favorites. One that has stood the test of time and is well-suited to Dutch oven or skillet cooking is apple slump, although any fruit such as peaches, apricots or cherries, works fine.
APPLE SLUMP 6 cups tart apples, pared and sliced 1 cup sugar 11/2 teaspoons cinnamon 1/2 teaspoon nutmeg 1 cup water 11/2 cups all-purpose flour 1/4 teaspoon salt 11/2 teaspoons baking powder 1/2 cup milk (about)Combine apples, sugar, spices and water and bring to boil. Mix together the flour, salt and baking powder; add milk to make a soft dough. Drop dough from a tablespoon onto the simmering apple mixture. Sprinkle with additional cinnamon if desired. Cover and cook over low coals for about 30 minutes.
Pulling a pie out of the campfire coals comes as a surprise to many, but again, the Dutch oven shows its versatility. Any kind of pie seems to do well in a Dutch oven, but the fruit pies always seem most popular. In order to brown the top nicely on a two- crust or lattice-top pie, you'll want to preheat the Dutch oven lid before laying on the coals. A cooking temperature of 400 to 425 degrees will assure a well-browned crust.
DUTCH OVEN PEACH PIE 5 cups sliced peaches, fresh or canned % cup sugar 4 tablespoons flour 1/2 to 3A teaspoon nutmeg 1/4 teaspoon salt 1 tablespoon lemon juice 1 teaspoon grated lemon rind 1 cup evaporated milkMix peaches, sugar, flour, spice and lemon juice together. Place mixture into a ie shell with high edges. Pour milk over peach mixture. Add top crust if desired. Bake 35 to 40 minutes in a hot Dutch oven.
26 NEBRASKAlandMAKING CAMP COFFEE
Better Known As Cowboy BrewOne item in the camp cooking repertoire is best enjoyed by mixing woodsmoke and embers with it. Coffee a la instant compares in no way with that brewed in a speckled enamelware pot or tin can bucket. While two theories exist on the best method of preparation, we've used both with good results. One calls for adding boiling water to the coffee and allowing it to steep for 10 minutes or so. The other just simply boils coffee and water together.
Our favorite, though, calls for a conicalshaped enamelware coffeepot and a good bed of coals. Fill your pot with cold water, to the bottom of the spout. You should determine how many cups this is by measure. For each cup of water, add one level tablespoon of coffee plus one for the pot. A coarse grind of any coffee blend will work — matter of fact, the cheaper coffees work and taste as good as the expensive. Set the pot on bright coals or above a slow fire until steam starts to belch from the spout and the lid begins to dance. When a good, rolling boil begins, quickly move the pot aside to a place where it will stay hot but not boil. Add l/2-cup of cold water, and in a few minutes the grounds will settle and you can enjoy a rich, clear brew unmatched by any granules, powders or patented coffeemaker.
We've not figured out why camp coffee tastes better—it just does. Maybe it's the company that congregates around camp coffee; maybe it's the setting in which camp coffee makes its appearance.
How To Build A Four Season Insulated Dog House
Door into dog house is placed on left, dog enters "hallway" and goes to right to second door into open area of house. Off-set doors keep wind out of dog house interior. Exterior walls and floor are insulated. Roof is hinged to allow for easy cleaning of house and replacing bedding material. In summer, roof can be raised a little to allow for air ventilation, 2x4's laid on end and secured to floor make sturdy legs to keep floor off moist ground.
Approximate Ripening Dates for Native Fruits and Berries
If you plan to make syrups, jellies or wines, it is important to know when the fruit becomes available. These are general ripening periods for various Nebraska fruits and berries.
Strawberry mid June to mid July Mulberry mid June to mid July Raspberry late June to mid July Chokecherry mid July to mid August Currant mid July to early August Sand Cherry early July to early August Gooseberry mid July to mid August Ground Cherry July to September Blackberry late July to early August Buffalo Berry late July to early September Elderberry mid August to mid September Wild Grape late August to early October* Plum late August to early October* ♦light frost improves flavor Blackberry Wine 4 quarts blackberries 4 quarts boiling water Sugar 1 pkg. all-purpose wine yeast 1 slice toastCover berries with water in a large crock. Allow to stand for 24 hours. Pour out in large kettle, boil for 5 minutes, and allow to cool. Strain through fine mesh. Return to crock, adding 1 part of sugar for each 2 parts of liquid (by volume). Float yeast on toast slice, cover and let stand for about 3 weeks at room temperature. Strain and bottle, taking care to cork loosely. When fermentation ceases, cork tightly and store in cool, dry place. Age 6 to 12 months.
Wild Plum JamPit and chop ripe plums to make 45 cups. Dissolve 3 cups sugar in \XA cups boiling water. Add pinch of nutmeg and cinnamon. Add juice and shredded peel of one lemon. Add chopped plums to liquid. Bring to a boil and simmer about 1 l/i hours until thick. Pour into sterile jars and seal.
Chokecherry Syrup 8 cups ripe chokecherries about Vi-V* cup water 4 cups sugar 1 pkg. fruit pectin (use liquid type)Wash and remove stems from cherries. Place in a large kettle, adding just enough water to prevent scorching. Simmer until soft, mash, then strain and measure about 4 cups of juice. Place back in kettle, add pectin, and bring to a boil. Stir in sugar, boil hard for 1 minute, skim, and pour into sterilized jars.
Strawberry Sun Jam 8 cups wild strawberries 5 cups sugarWash, hull and drain berries. Place fruit and sugar in a wide saucepan. Slowly bring to boil, stirring to dissolve sugar. Boil hard for 2 minutes. Skim. Spread in large, flat baking pans. Cover with window glass and allow to stand in full sun for 7 to 10 hours. Pour into hot, sterile jars and seal. Store in cool, dark place.
Outdoor First-Aid
O.K., get it out of your system: "I'm never going to be more than a mile from the car." "They've got plenty of first-aid stuff at the park headquarters, don't they?" "This is only an overnighter—nothing's going to happen."
Good. Now let's talk about first-aid. When you are out—for a hunting trip, for a day hike, for a campout, for a weekend at the lake in your RV—it just makes good sense to be prepared for emergencies, even minor ones. Cuts, scrapes, sprains and bites do nothing to increase your pleasure even if they aren't life threatening, and complications are possible even from minor wounds left untreated. A personal first-aid kit, expanded to fit the circumstances of your outing and with some knowledge of how to use it, can make you and your companions more comfortable, and in some cases, can even save your lives.
Obviously the most important consideration is not the kit, it's knowing basic firstaid techniques. The Red Cross and other groups regularly hold first-aid classes, and if you've never taken one, consider doing so. Then, consider going a step further and becoming certified in Cardio-Pulmonary Resuscitation (CPR). Those techniques have saved many lives, and not only in the outdoors.
Snake-bite kit There is some debate about the safety and usefuiness of these kits, though many snake-country walkers continue to carry them. Be sure you read the directions and understand the dangers.
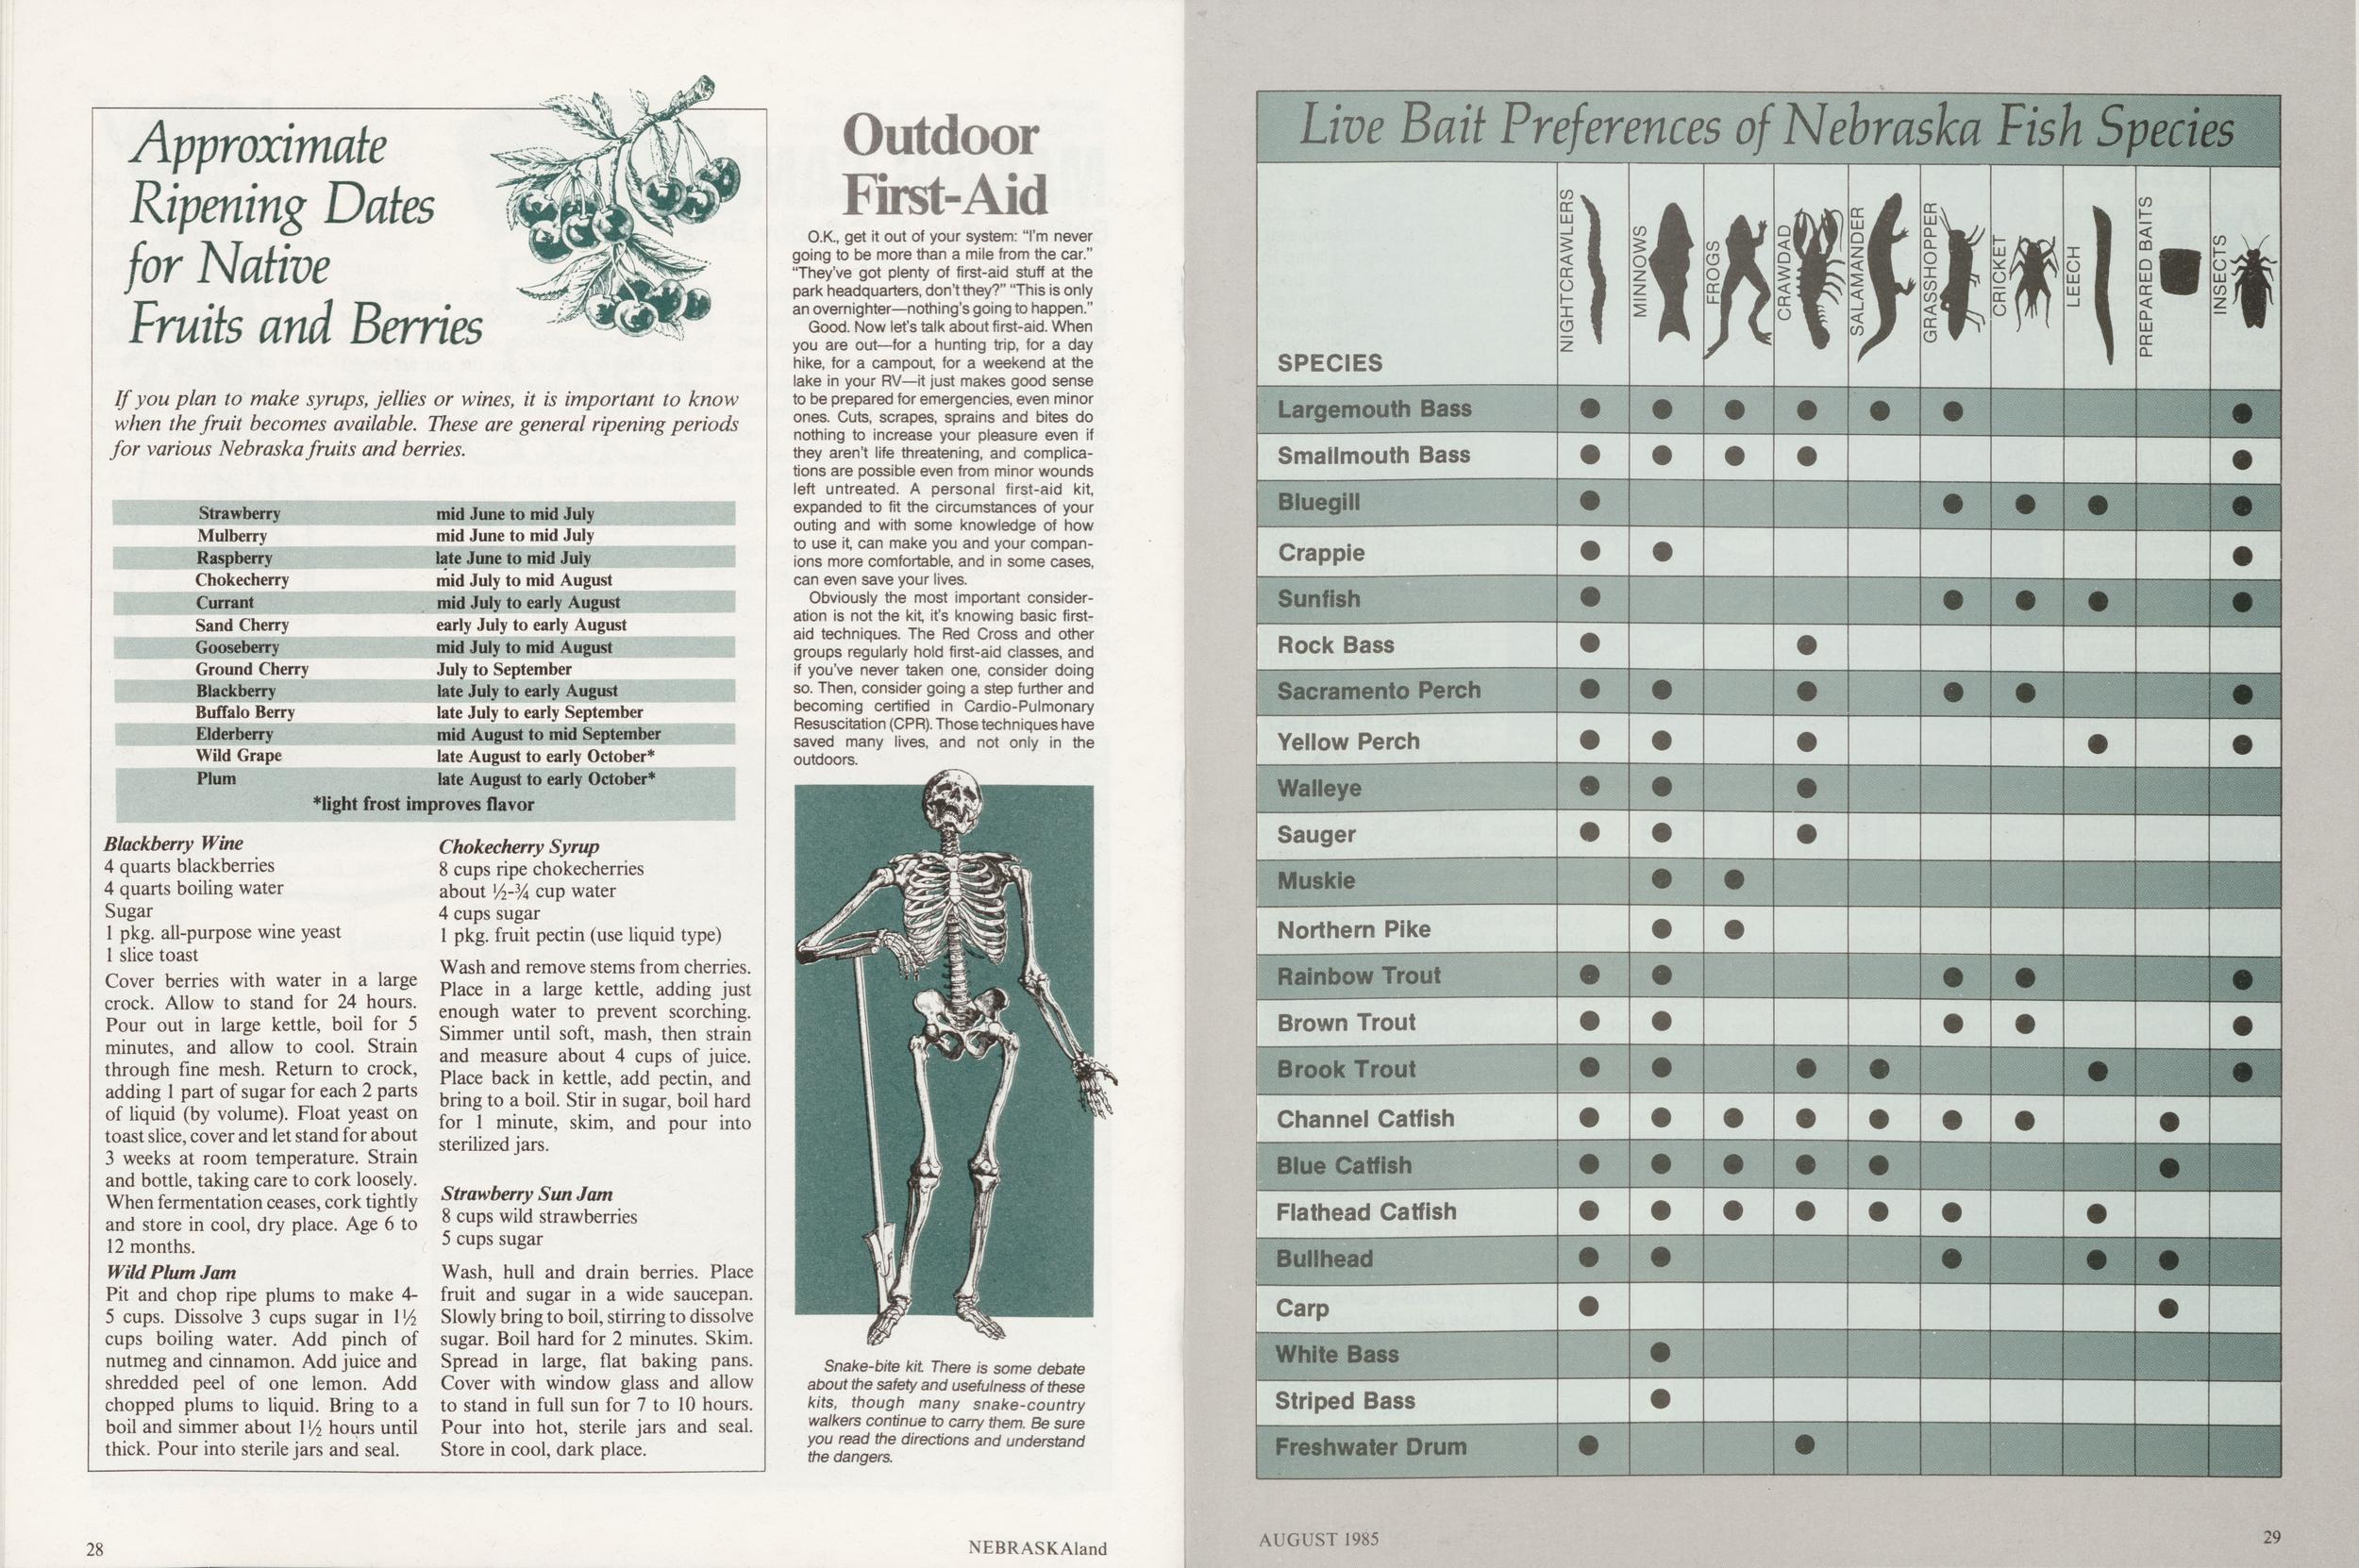
28 NEBRASKAlandLive Bait Preferences of Nebraska Fish Species
SPECIES Largemouth Bass Smallmouth Bass Bluegill Crappie Sunfish Rock Bass Sacramento Perch Yellow Perch Walleye Sauger Muskie Northern Pike Rainbow Trout Brown Trout Brook Trout Bullhead Carp White Bass Striped Bass Channel Catfish lue Catfish Flathead Catfish Freshwater Drum AUGUST 1985 29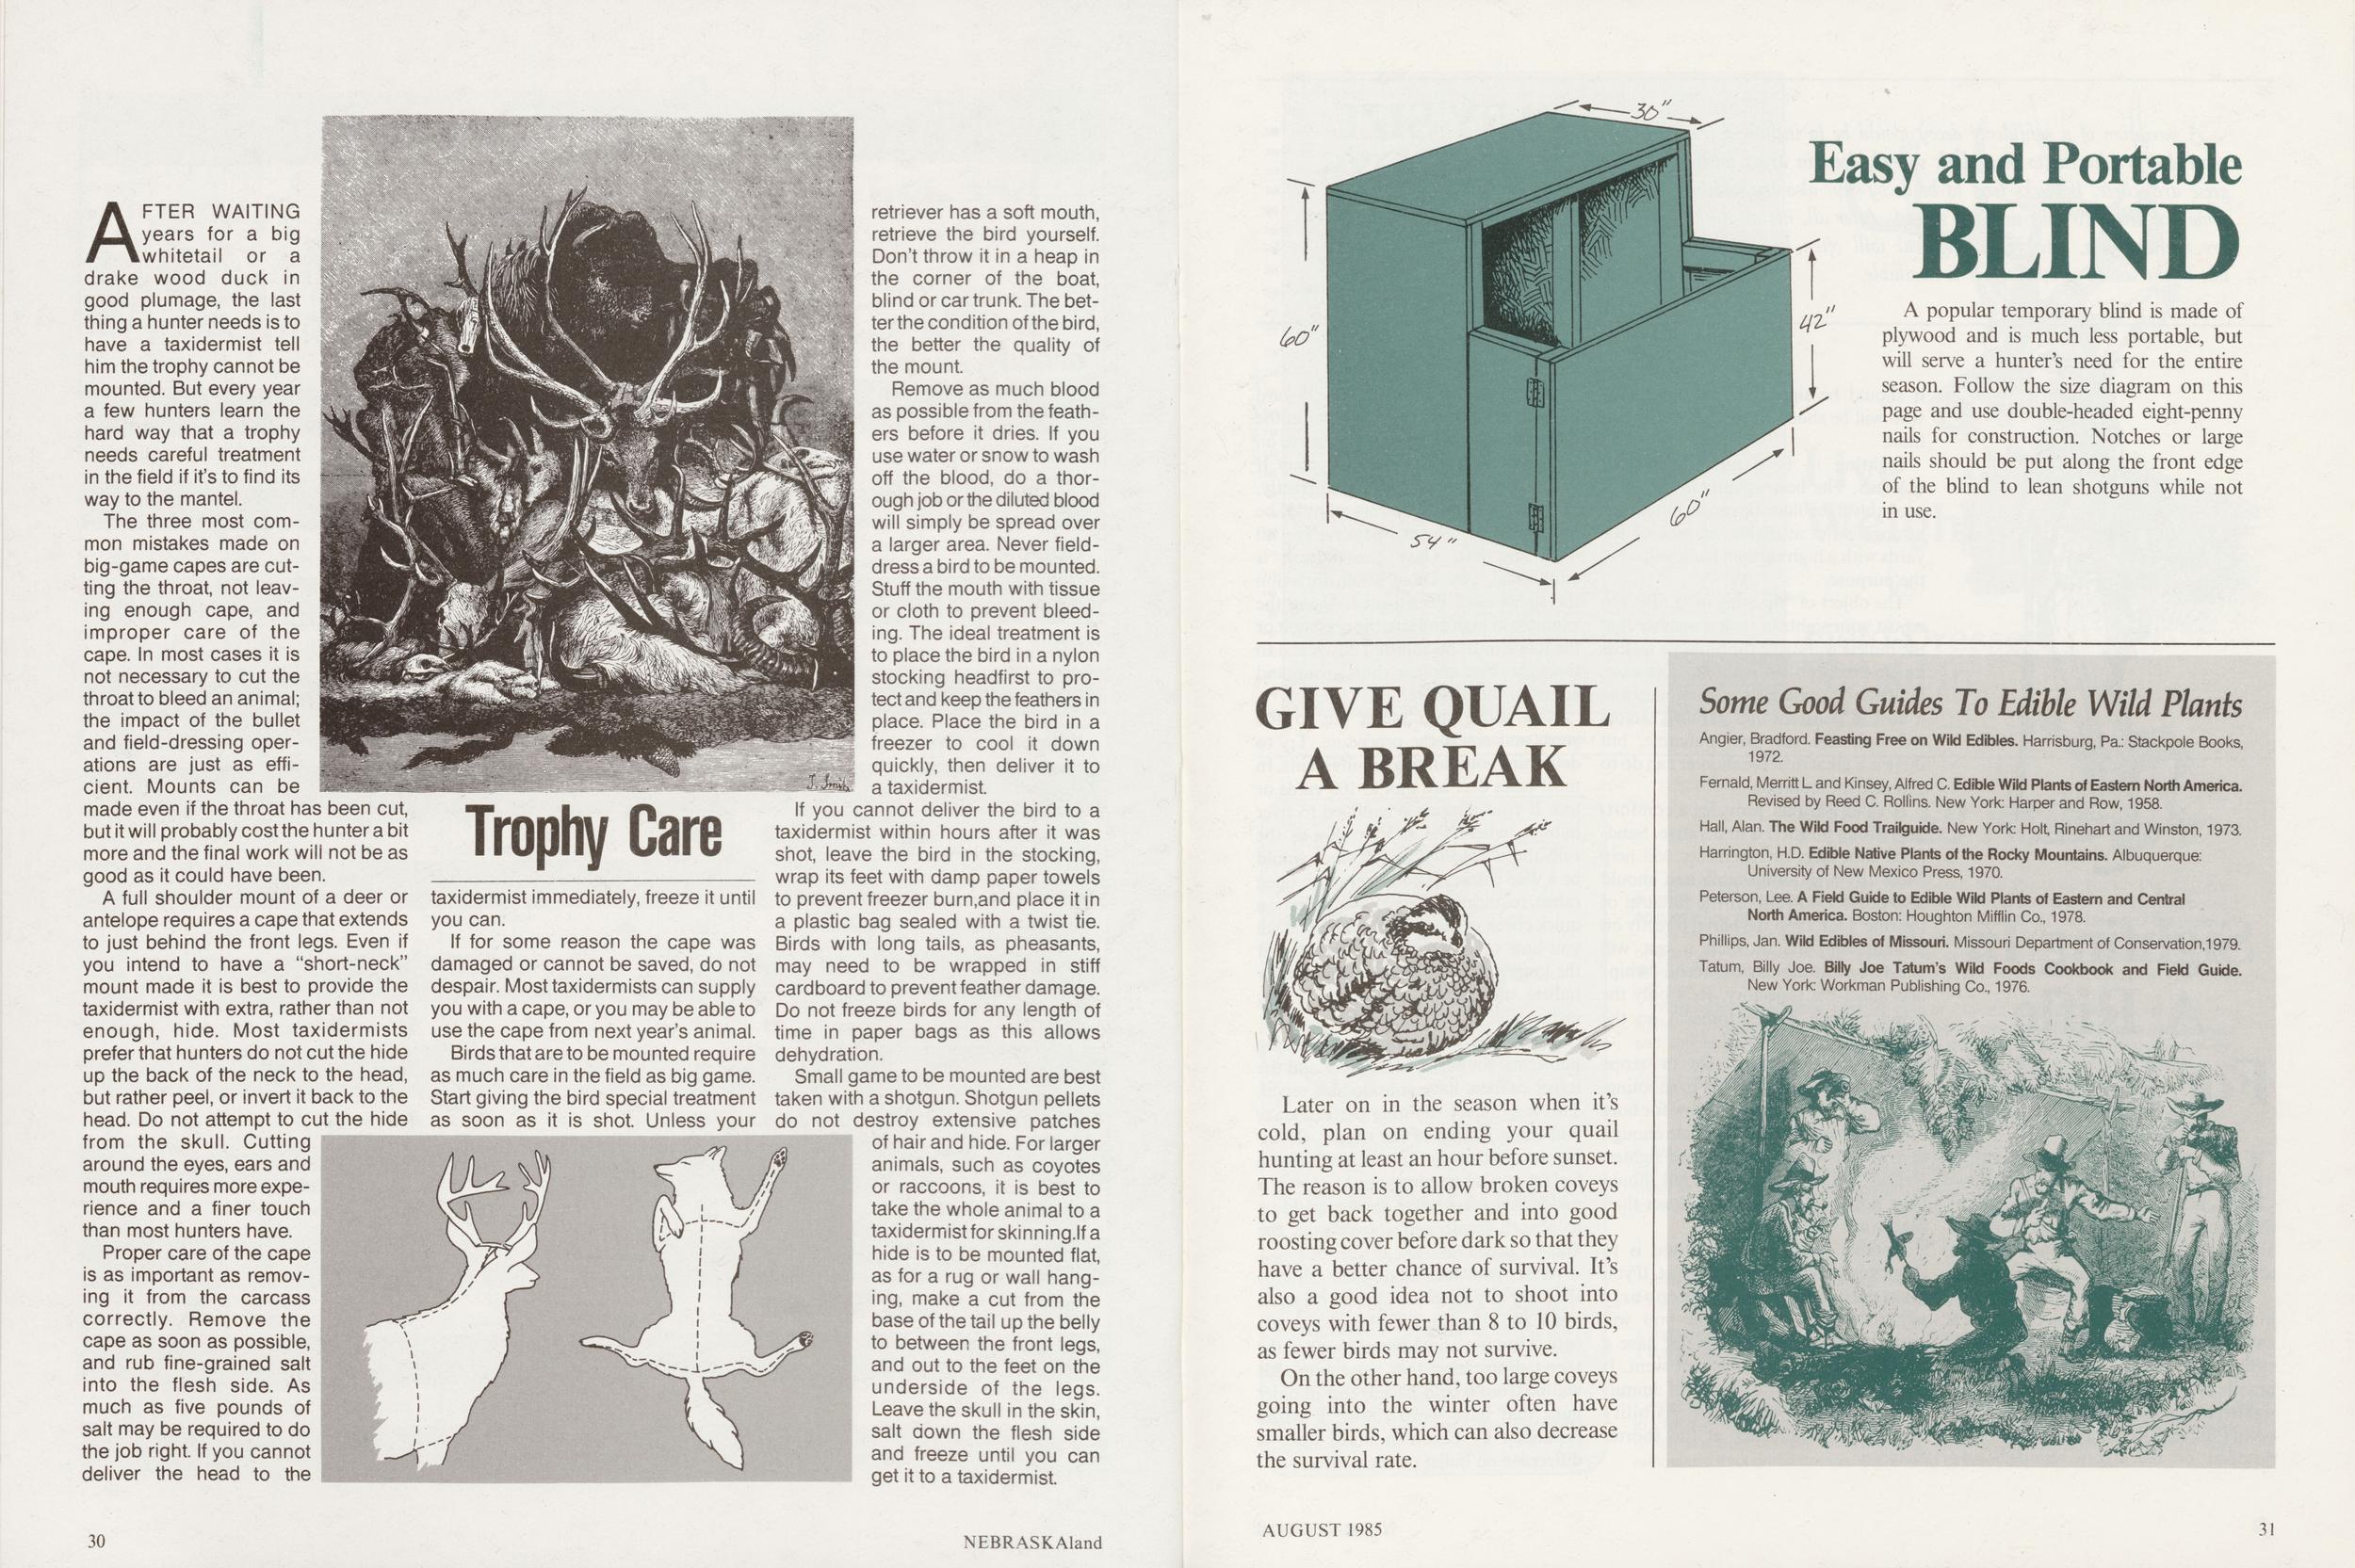
Trophy Care
AFTER WAITING years for a big whitetail or a drake wood duck in good plumage, the last thing a hunter needs is to have a taxidermist tell him the trophy cannot be mounted. But every year a few hunters learn the hard way that a trophy needs careful treatment in the field if it's to find its way to the mantel.
The three most common mistakes made on big-game capes are cutting the throat, not leaving enough cape, and improper care of the cape. In most cases it is not necessary to cut the throat to bleed an animal; the impact of the bullet and field-dressing operations are just as efficient. Mounts can be made even if the throat has been cut, but it will probably cost the hunter a bit more and the final work will not be as good as it could have been.
A full shoulder mount of a deer or antelope requires a cape that extends to just behind the front legs. Even if you intend to have a "short-neck" mount made it is best to provide the taxidermist with extra, rather than not enough, hide. Most taxidermists prefer that hunters do not cut the hide up the back of the neck to the head, but rather peel, or invert it back to the head. Do not attempt to cut the hide from the skull. Cutting HHj around the eyes, ears and mouth requires more experience and a finer touch than most hunters have.
Proper care of the cape is as important as removing it from the carcass correctly. Remove the cape as soon as possible, and rub fine-grained salt into the flesh side. As much as five pounds of salt may be required to do the job right. If you cannot deliver the head to the taxidermist immediately, freeze it until you can.
If for some reason the cape was damaged or cannot be saved, do not despair. Most taxidermists can supply you with a cape, or you may be able to use the cape from next year's animal.
Birds that are to be mounted require as much care in the field as big game. Start giving the bird special treatment as soon as it is shot. Unless your retriever has a soft mouth, retrieve the bird yourself. Don't throw it in a heap in the corner of the boat, blind or car trunk. The better the condition of the bird, the better the quality of the mount.
Remove as much blood as possible from the feathers before it dries. If you use water or snow to wash off the blood, do a thorough job or the diluted blood will simply be spread over a larger area. Never fielddress a bird to be mounted. Stuff the mouth with tissue or cloth to prevent bleed- ing. The ideal treatment is to place the bird in a nylon stocking headfirst to protect and keep the feathers in place. Place the bird in a freezer to cool it down quickly, then deliver it to a taxidermist.
If you cannot deliver the bird to a taxidermist within hours after it was shot, leave the bird in the stocking, wrap its feet with damp paper towels to prevent freezer burn,and place it in a plastic bag sealed with a twist tie. Birds with long tails, as pheasants, may need to be wrapped in stiff cardboard to prevent feather damage. Do not freeze birds for any length of time in paper bags as this allows dehydration.
Small game to be mounted are best taken with a shotgun. Shotgun pellets do not destroy extensive patches of hair and hide. For larger animals, such as coyotes or raccoons, it is best to take the whole animal to a taxidermist for skinning.lf a hide is to be mounted flat, as for a rug or wall hanging, make a cut from the base of the tail up the belly to between the front legs, and out to the feet on the underside of the legs. Leave the skull in the skin, salt down the flesh side and freeze until you can get it to a taxidermist.
30 NEBRASKAlandEasy and Portable BLIND
A popular temporary blind is made of plywood and is much less portable, but will serve a hunter's need for the entire season. Follow the size diagram on this page and use double-headed eight-penny nails for construction. Notches or large nails should be put along the front edge of the blind to lean shotguns while not in use.
GIVE QUAIL A BREAKLater on in the season when it's cold, plan on ending your quail hunting at least an hour before sunset. The reason is to allow broken coveys to get back together and into good roosting cover before dark so that they have a better chance of survival. It's also a good idea not to shoot into coveys with fewer than 8 to 10 birds, as fewer birds may not survive.
On the other hand, too large coveys going into the winter often have smaller birds, which can also decrease the survival rate.
Some Good Guides To Edible Wild Plants Angler, Bradford. Feasting Free on Wild Edibles. Harrisburg, Pa.: Stackpole Books, 1972. Fernald, Merritt L and Kinsey, Alfred C. Edible Wild Plants of Eastern North America. Revised by Reed C. Rollins. New York: Harper and Row, 1958. Hall, Alan. The Wild Food Trailguide. New York: Holt Rinehart and Winston, 1973. Harrington, H.D. Edible Native Plants of the Rocky Mountains. Albuquerque: University of New Mexico Press, 1970. Peterson, Lee. A Field Guide to Edible Wild Plants of Eastern and Central North America. Boston: Houghton Mifflin Co., 1978. Phillips, Jan. Wild Edibles of Missouri. Missouri Department of Conservation,1979. Tatum, Billy Joe. Billy Joe Tatum's Wild Foods Cookbook and Field Guide. New York: Workman Publishing Co., 1976. VARY SIZE
OF DECOYS
VARY SIZE
OF DECOYS
A variation of a confidence decoy would be to include a few goose decoys adjacent to your duck spread, even in areas where geese are scarce. If ducks tend to be decoy-shy, also try adding some leal decoys to your mallard spread. After all, not all ducks are mallard size, and greenwing teal will often be found as late in the season as open water is available.
Sighting In A Rifle For Hunting
Knowing how to sight in a rifle is an important aspect of successful hunting, and an ethical responsibility to the game you hunt. It is also one of the most frequently omitted items on the hunt preparation checklist.
A rifle should be sighted in before each hunt. It should be sighted in each time a new bullet weight or style is selected, or even if you should switch to a different brand of ammunition. It should be sighted in again if an unexplainable miss occurs during the hunt or if the rifle is dropped or the sights bumped, and it should be sighted in by the person who will be shooting the gun during the hunt.
Sighting in is simple but serious business. The best sighting-in facility is probably a regular rifle range, but if such a range is not available, an area of 100 yards with a high earthen bank will serve the purpose.
The object of "shooting in" a rifle is to adjust your sights in such a manner that the bullets will strike the bullseye with as much precision as possible. Distance, bullet weight, charge, shooter ability and a host of constant and variable factors will influence the final outcome, but there is a great deal the shooter can do to enhance the situation.
A solid rest that provides a comfortable sitting position is imperative. Sandfilled shot bags or innertubes will help "beef-up" a shooting table and should also be used to support the forearm of the rifle. Don't rest the barrel directly on a hard support, as such a rest will interfere with the barrel's recoil "whip" and affect the trajectory. Rest only the wood portion of the forearm on the support.
A newly purchased rifle or scope should be bore-sighted prior to shooting, but only bolt-action rifles allow for bore sighting unless you are fortunate enough to own an optical guide bore sighter. Neither method is necessary, but should have point of impact much closer than otherwise.
Another bullet-saving method is to shoot your rifle at a 25-yard target. If you start at 100 yards with poorly adjusted sights, it's possible you will miss the paper entirely and not have a reference as to where the shot went. It may also take several rounds of ammunition to find out, plus visibility of hits is much better at the shorter distance.
Make adjustments on the 25-yard bullseye by moving the rear sight in the direction you wish the bullets to move on the target. First fire a three-shot group. If you are doing everything correctly, bullet holes in the target should be grouped in an obvious pattern, i.e., all high and left. Once the pattern is established, you know which direction the sights need be adjusted. Using the example of high and left, the rear sight or the scope must be adjusted down and to the right. Fire another short group and adjust to the bullseye.
Now move your target out to 100 yards and repeat the procedure. Try to determine your hunting requirements. In most cases deer are shot at 100 yards or less. If your hunting is confined to river habitat, where the shorter shot is the rule, then "dead-on" at 100 yards would be a wise choice. If you hunt more open range, requiring 200 or 250-yard shots, a quick check of the ballistics table will tell you how much drop to be expected at the longer distance. Heavier and slower bullets will require sighting in a few inches high at 100 yards.
Sighting in a rifle may require firing numerous rounds in succession, and the larger calibers have considerable recoil. This may affect shooting performance, and cause jerking of the trigger, flinching, or eye closure. Take a break if you feel the gun is battering you. Also, wear a padded shooting jacket or other padding to absorb recoil, and always wear eye and ear protectors.
After you feel that your rifle is shooting as you would like, take a short break and allow the barrel to completely cool. Then fire a cold-barrel round at the target. Remember that a hunting shot will be from a cold barrel, and in older guns that have worn rifling, a barrel expanded by heat can make quite a difference on bullet performance.
32 NEBRASKAland Live Weights vs. FIELD DRESSED WEIGHT (LB. Field-Dressed Weigh! In DeerA Rod Holder
Use a block of foam rubber to make this rodholder. Shape to fit gunwale of your canoe or boat Cut angles depending on your fishing style. Cut out rod notch. Use contact cement for a permanent installation. If you want to remove the holders each time, a coating of rubber cement on the contact surfaces will prevent slippage but yet allow easy removal.
Shape the blocks with a sharp fillet knife or X-acto blade.
PICKLED FISH
If you love the taste of pickled herring, but hate the price tag on the lid, here's a simple fresh-water fish-pickling recipe that W.E Rosencrans of South Bend passed onto us a few years back, and we think it rates somewhere near the top of the crock.
The recipe, as written, is clear-cut and simple to employ. There's no boiling, baking or poaching involved. In fact there is no cooking of the fish whatever. It's a twostep soaking recipe that takes about eight days, but like good wine, continues to improve with age.
White bass, striped bass, northern pike or suckers make excellent pickled fish. The lighter-fleshed game fish such as walleye, crappie, perch, or bluegill tend to lose firmness and should be saved for the fry pan. The following recipe is for one quart of fish, but a good suggestion would be to quadruple the recipe and pickle a gallon of fish using pint jars for final storage.
STEP ONEPlace one quart of V/i inch squares of fish into a crock or jar with 5/8-cup pickling salt and 1 cup white vinegar. Let stand for 6 days in refrigerator, then remove and wash in cold water. The washing process is extremely important. Use very cold or ice water and continue to rinse until water is completely clear.
STEP TWOAfter rinsing, cover fish with ice water and let stand for one hour, drain well, slice 2 or more medium onions, then mix vinegar solution as follows:
1 cup white vinegar 1 cup sugar Wcup white wine 1/4-box pickling spicesHeat the solution so sugar dissolves. Do Not Boil! Let cool completely. We prefer to chill the solution before adding fish. Fish should be packed in jars with a layer of fish to a layer of onion and so on until jars are full. Add solution to jars and keep refrigerated throughout storage. Fish should be ready to eat in 48 hours.
AUGUST 1985 33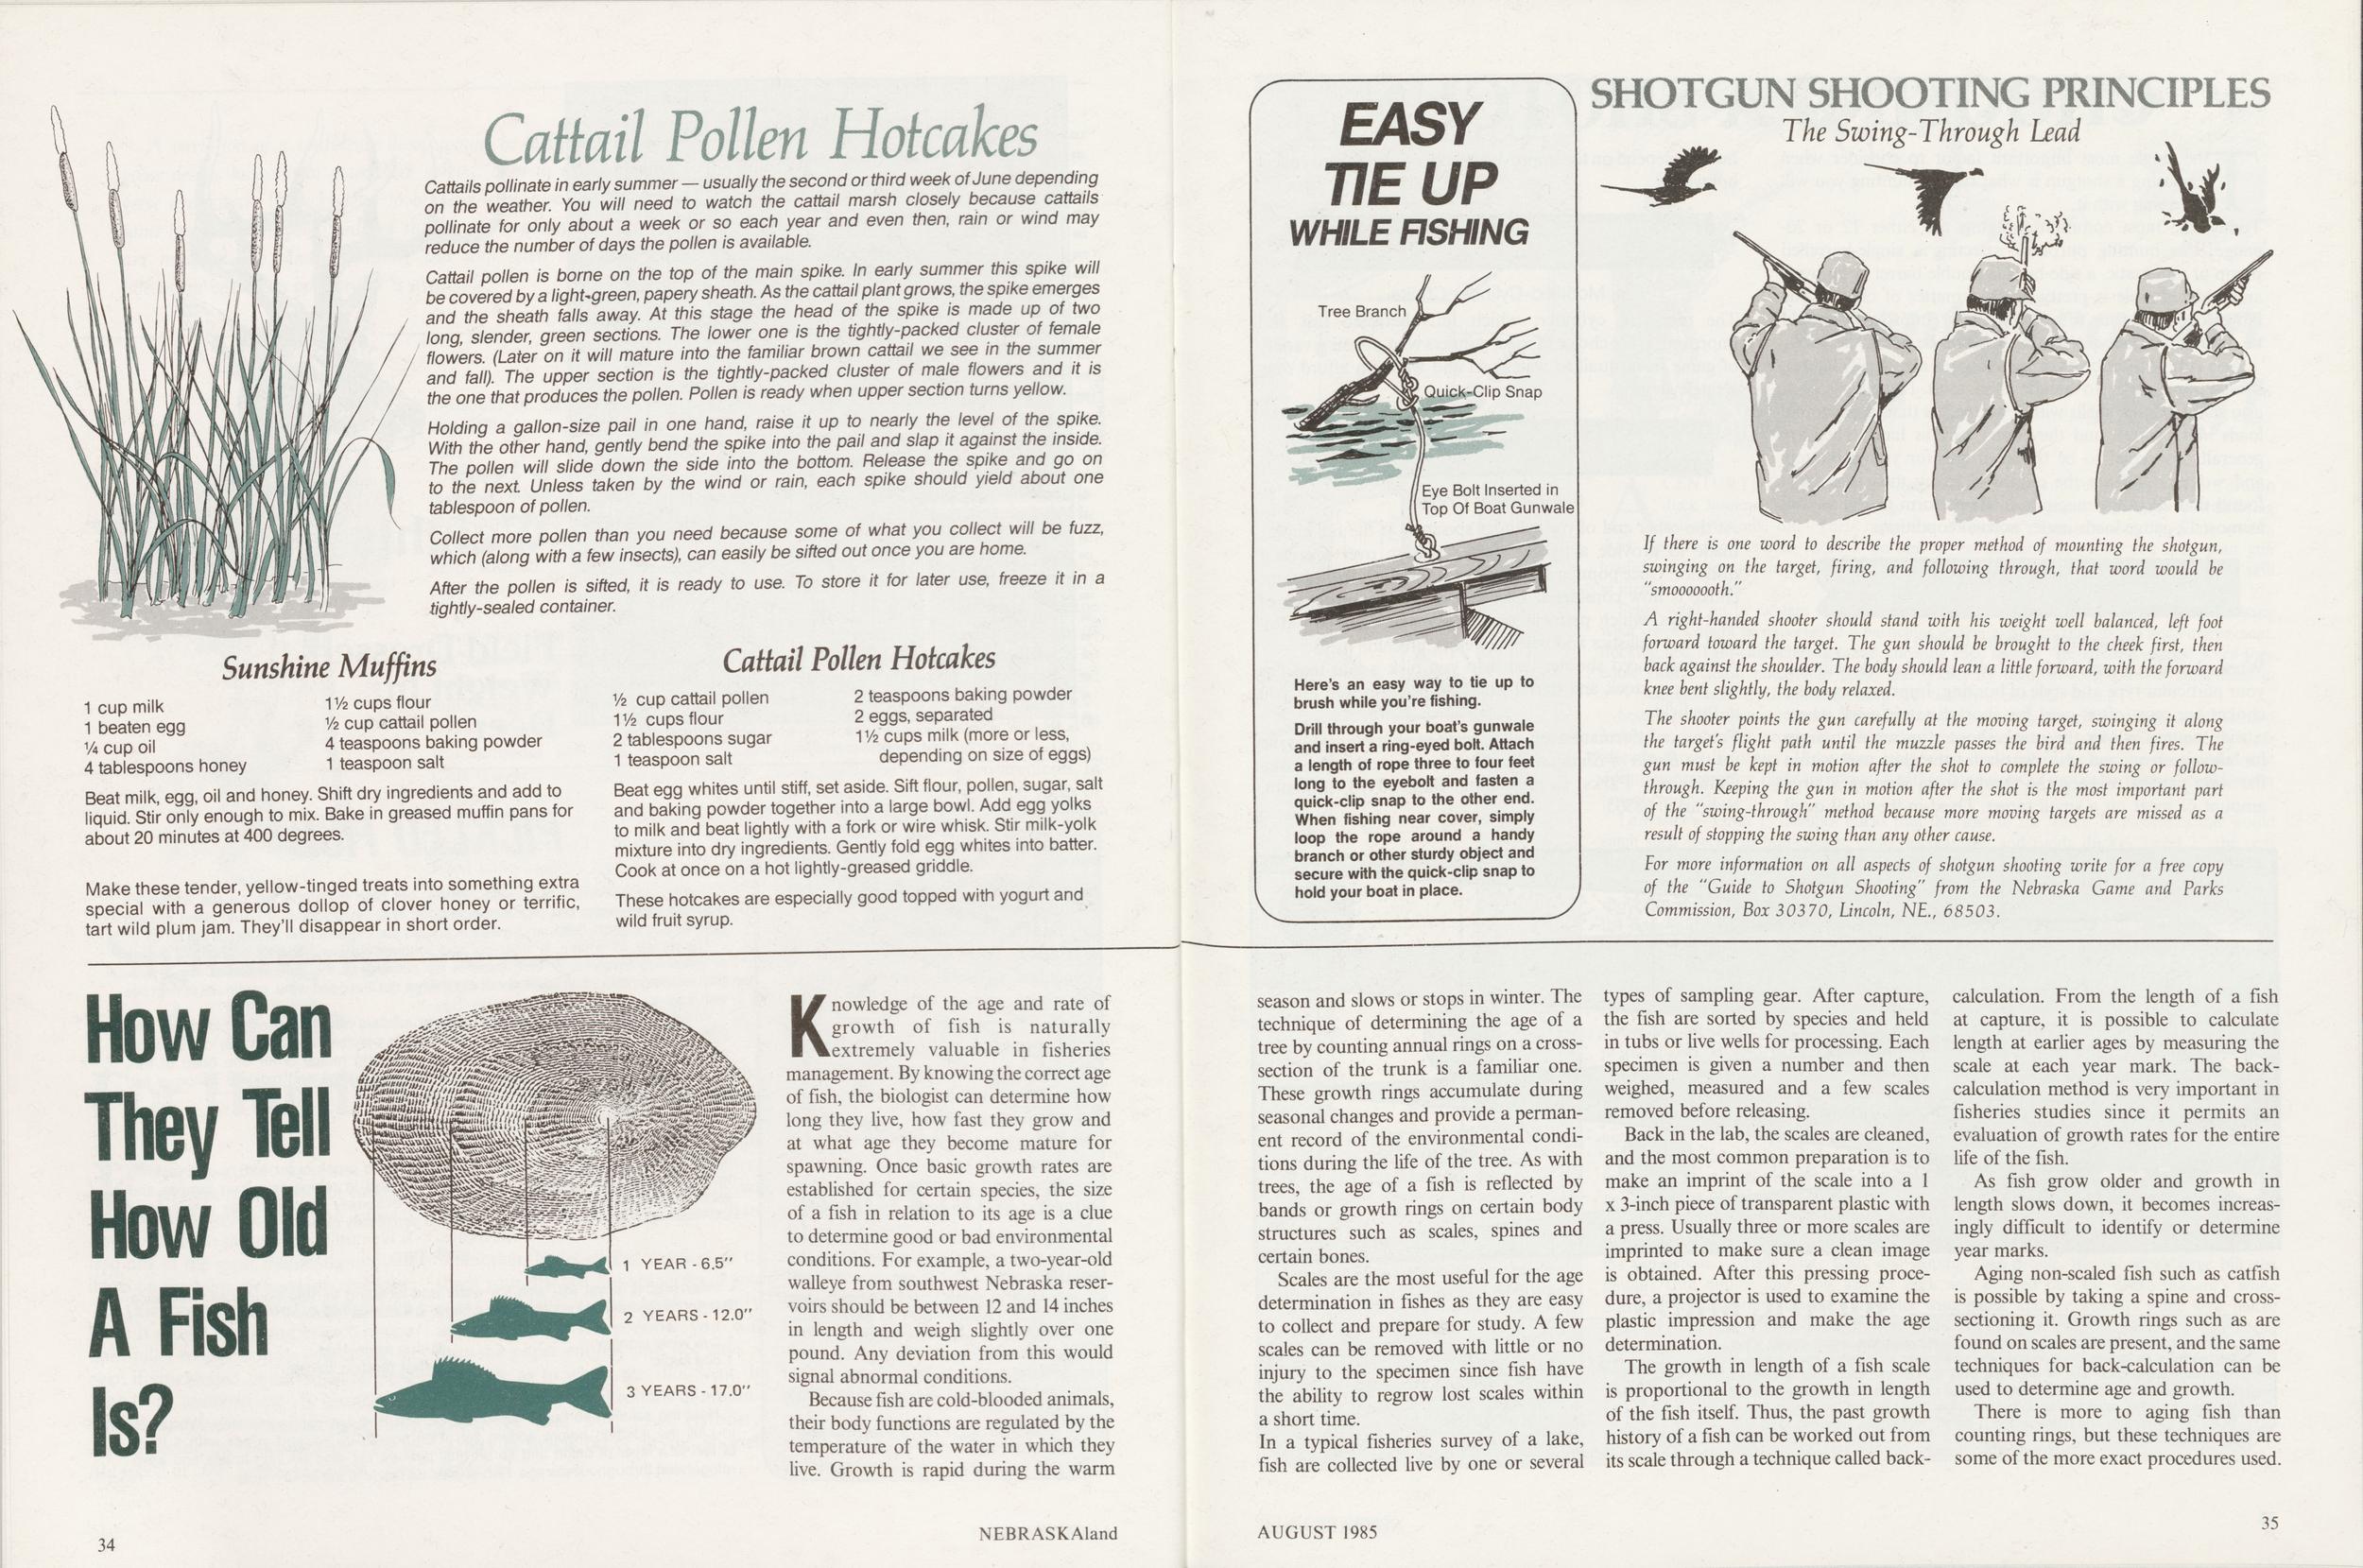
Cattail Pollen Hotcakes
Cattails pollinate in early summer — usually the second or third week of June depending on the weather. You will need to watch the cattail marsh closely because cattails pollinate for only about a week or so each year and even then, rain or wind may reduce the number of days the pollen is available.
Cattail pollen is borne on the top of the main spike. In early summer this spike will be covered by a HghUgreen, papery sheath. As the cattail plant grows, the spike emerges and the sheath falls away. At this stage the head of the spike is made up of two long, slender, green sections. The iower one is the tightly-packed cluster of female flowers. (Later on it will mature into the familiar brown cattail we see in the summer and fall). The upper section is the tightly-packed cluster of male flowers and it is the one that produces the pollen. Pollen is ready when upper section turns yellow.
Holding a gallon-size pail in one hand, raise it up to nearly the level of the spike. With the other hand, gently bend the spike into the pail and slap it against the inside. The pollen will slide down the side into the bottom. Release the spike and go on to the next. Unless taken by the wind or rain, each spike should yield about one tablespoon of pollen.
Collect more pollen than you need because some of what you collect will be fuzz, which (along with a few insects), can easily be sifted out once you are home.
After the pollen is sifted, it is ready to use. To store it for later use, freeze it in a tightly-sealed container.
Sunshine Muffins 1 cup milk 1 beaten egg Va cup oil 4 tablespoons honey 11/2 cups flour 1/2 cup cattail pollen 4 teaspoons baking powder 1 teaspoon saltBeat milk, egg, oil and honey. Shift dry ingredients and add to liquid. Stir only enough to mix. Bake in greased muffin pans for about 20 minutes at 400 degrees.
Make these tender, yellow-tinged treats into something extra special with a generous dollop of clover honey or terrific, tart wild plum jam. They'll disappear in short order.
Cattail Pollen Hotcakes V2 cup cattail pollen 11/2 cups flour 2 tablespoons sugar 1 teaspoon salt 2 teaspoons baking powder 2 eggs, separated 11/2 cups milk (more or less, depending on size of eggs)Beat egg whites until stiff, set aside. Sift flour, pollen, sugar, salt and baking powder together into a large bowl. Add egg yolks to milk and beat lightly with a fork or wire whisk. Stir milk-yolk mixture into dry ingredients. Gently fold egg whites into batter. Cook at once on a hot lightly-greased griddle.
These hotcakes are especially good topped with yogurt and wild fruit syrup.
How Can They Tell How Old A Fish Is?
Knowledge of the age and rate of growth of fish is naturally extremely valuable in fisheries management. By knowing the correct age of fish, the biologist can determine how long they live, how fast they grow and at what age they become mature for spawning. Once basic growth rates are established for certain species, the size of a fish in relation to its age is a clue to determine good or bad environmental conditions. For example, a two-year-old walleye from southwest Nebraska reservoirs should be between 12 and 14 inches in length and weigh slightly over one pound. Any deviation from this would signal abnormal conditions.
Because fish are cold-blooded animals, their body functions are regulated by the temperature of the water in which they live. Growth is rapid during the warm 34 NEBRASKAland season and slows or stops in winter. The technique of determining the age of a tree by counting annual rings on a crosssection of the trunk is a familiar one. These growth rings accumulate during seasonal changes and provide a permanent record of the environmental conditions during the life of the tree. As with trees, the age of a fish is reflected by bands or growth rings on certain body structures such as scales, spines and certain bones.
Scales are the most useful for the age determination in fishes as they are easy to collect and prepare for study. A few scales can be removed with little or no injury to the specimen since fish have the ability to regrow lost scales within a short time.
In a typical fisheries survey of a lake, fish are collected live by one or several types of sampling gear. After capture, the fish are sorted by species and held in tubs or live wells for processing. Each specimen is given a number and then weighed, measured and a few scales removed before releasing.
Back in the lab, the scales are cleaned, and the most common preparation is to make an imprint of the scale into a 1 x 3-inch piece of transparent plastic with a press. Usually three or more scales are imprinted to make sure a clean image is obtained. After this pressing procedure, a projector is used to examine the plastic impression and make the age determination.
The growth in length of a fish scale is proportional to the growth in length of the fish itself. Thus, the past growth history of a fish can be worked out from its scale through a technique called backcalculation. From the length of a fish at capture, it is possible to calculate length at earlier ages by measuring the scale at each year mark. The backcalculation method is very important in fisheries studies since it permits an evaluation of growth rates for the entire life of the fish.
As fish grow older and growth in length slows down, it becomes increasingly difficult to identify or determine year marks.
Aging non-scaled fish such as catfish is possible by taking a spine and crosssectioning it. Growth rings such as are found on scales are present, and the same techniques for back-calculation can be used to determine age and growth.
There is more to aging fish than counting rings, but these techniques are some of the more exact procedures used.
EASY TIE UP WHILE FISHING
Here's an easy way to tie up to brush while you're fishing.
Drill through your boat's gunwale and insert a ring-eyed bolt. Attach a length of rope three to four feet long to the eyebolt and fasten a quick-clip snap to the other end. When fishing near cover, simply loop the rope around a handy branch or other sturdy object and secure with the quick-clip snap to hold your boat in place.
SHOTGUN SHOOTING PRINCIPLES
The Swing-Through LeadIf there is one word to describe the proper method of mounting the shotgun, swinging on the target, firing, and following through, that word would be "smooooooth."
A right-handed shooter should stand with his weight well balanced, left foot forward toward the target. The gun should be brought to the cheek first, then back against the shoulder. The body should lean a little forward, with the forward knee bent slightly, the body relaxed.
The shooter points the gun carefully at the moving target, swinging it along the target's flight path until the muzzle passes the bird and then fires. The gun must be kept in motion after the shot to complete the swing or follow- through. Keeping the gun in motion after the shot is the most important part of the "swing-through" method because more moving targets are missed as a result of stopping the swing than any other cause.
For more information on all aspects of shotgun shooting write for a free copy of the "Guide to Shotgun Shooting" from the Nebraska Game and Parks Commission, Box 30370, Lincoln, NE., 68503.
AUGUST 1985 35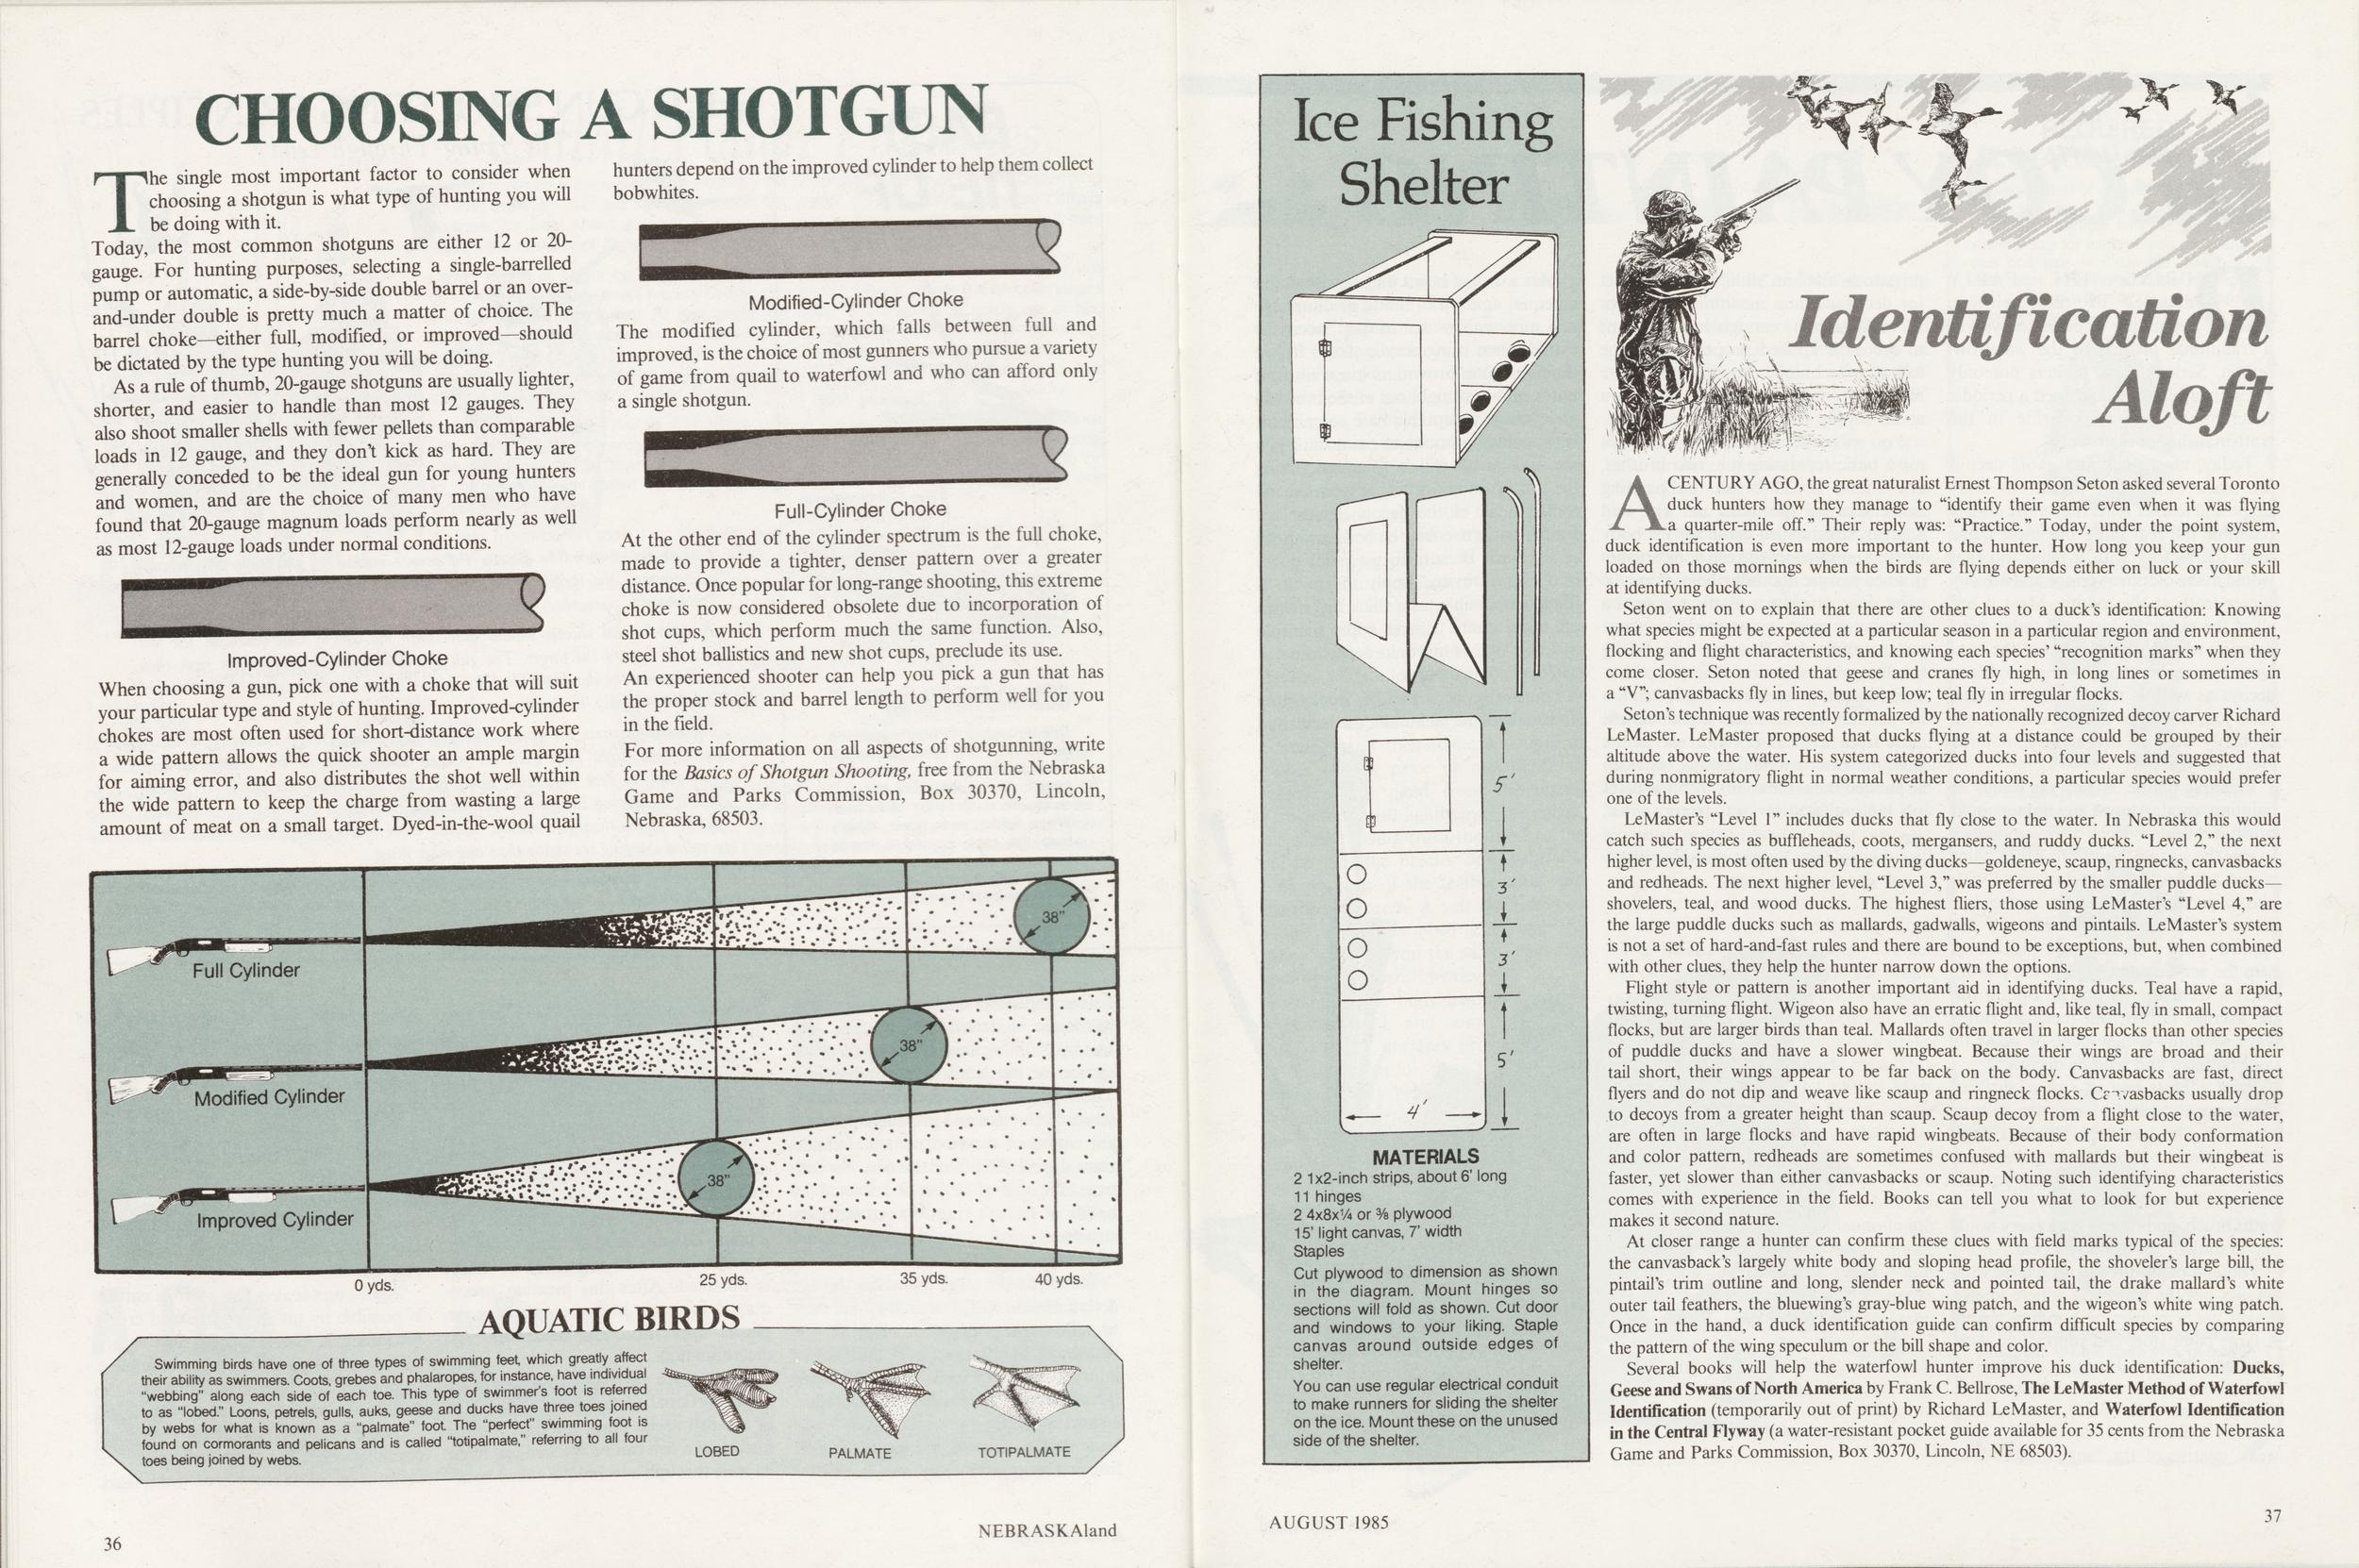
CHOOSING A SHOTGUN
The single most important factor to consider when choosing a shotgun is what type of hunting you will be doing with it. Today, the most common shotguns are either 12 or 20gauge. For hunting purposes, selecting a single-barrelled pump or automatic, a side-by-side double barrel or an overand-under double is pretty much a matter of choice. The barrel choke—either full, modified, or improved—should be dictated by the type hunting you will be doing.
As a rule of thumb, 20-gauge shotguns are usually lighter, shorter, and easier to handle than most 12 gauges. They also shoot smaller shells with fewer pellets than comparable loads in 12 gauge, and they don't kick as hard. They are generally conceded to be the ideal gun for young hunters and women, and are the choice of many men who have found that 20-gauge magnum loads perform nearly as well as most 12-gauge loads under normal conditions.
When choosing a gun, pick one with a choke that will suit your particular type and style of hunting. Improved-cylinder chokes are most often used for short-distance work where a wide pattern allows the quick shooter an ample margin for aiming error, and also distributes the shot well within the wide pattern to keep the charge from wasting a large amount of meat on a small target. Dyed-in-the-wool quail hunters depend on the improved cylinder to help them collect bobwhites.
The modified cylinder, which falls between full and improved, is the choice of most gunners who pursue a variety of game from quail to waterfowl and who can afford only a single shotgun.
At the other end of the cylinder spectrum is the full choke, made to provide a tighter, denser pattern over a greater distance. Once popular for long-range shooting, this extreme choke is now considered obsolete due to incorporation of shot cups, which perform much the same function. Also, steel shot ballistics and new shot cups, preclude its use. An experienced shooter can help you pick a gun that has the proper stock and barrel length to perform well for you in the field.
For more information on all aspects of shotgunning, write for the Basics of Shotgun Shooting, free from the Nebraska Game and Parks Commission, Box 30370, Lincoln, Nebraska, 68503.
Swimming birds have one of three types of swimming feet, which greatly affect their ability as swimmers. Coots, grebes and phalaropes, for instance, have individual "webbing" along each side of each toe. This type of swimmer's foot is refer to as "lobed." Loons, petrels, gulls, auks, geese and ducks have three toes joined by webs for what is known as a "palmate" foot The "perfect" swimming foot is found on cormorants and pelicans and is called "totipalmate," referring to all four toes being joined by webs.
Identification Aloft
CENTURY AGO, the great naturalist Ernest Thompson Seton asked several Toronto duck hunters how they manage to "identify their game even when it was flying a quarter-mile off." Their reply was: "Practice." Today, under the point system, duck identification is even more important to the hunter. How long you keep your gun loaded on those mornings when the birds are flying depends either on luck or your skill at identifying ducks.
Seton went on to explain that there are other clues to a duck's identification: Knowing what species might be expected at a particular season in a particular region and environment, flocking and flight characteristics, and knowing each species' "recognition marks" when they come closer. Seton noted that geese and cranes fly high, in long lines or sometimes in a "V"; canvasbacks fly in lines, but keep low; teal fly in irregular flocks.
Seton's technique was recently formalized by the nationally recognized decoy carver Richard LeMaster. LeMaster proposed that ducks flying at a distance could be grouped by their altitude above the water. His system categorized ducks into four levels and suggested that during nonmigratory flight in normal weather conditions, a particular species would prefer one of the levels.
LeMaster's "Level 1" includes ducks that fly close to the water. In Nebraska this would catch such species as buffleheads, coots, mergansers, and ruddy ducks. "Level 2," the next higher level, is most often used by the diving ducks—goldeneye, scaup, ringnecks, canvasbacks and redheads. The next higher level, "Level 3," was preferred by the smaller puddle ducksshovelers, teal, and wood ducks. The highest fliers, those using LeMaster's "Level 4," are the large puddle ducks such as mallards, gadwalls, wigeons and pintails. LeMaster's system is not a set of hard-and-fast rules and there are bound to be exceptions, but, when combined with other clues, they help the hunter narrow down the options.
Flight style or pattern is another important aid in identifying ducks. Teal have a rapid, twisting, turning flight. Wigeon also have an erratic flight and, like teal, fly in small, compact flocks, but are larger birds than teal. Mallards often travel in larger flocks than other species of puddle ducks and have a slower wingbeat. Because their wings are broad and their tail short, their wings appear to be far back on the body. Canvasbacks are fast, direct flyers and do not dip and weave like scaup and ringneck flocks. Cr ~vasbacks usually drop to decoys from a greater height than scaup. Scaup decoy from a flight close to the water, are often in large flocks and have rapid wingbeats. Because of their body conformation and color pattern, redheads are sometimes confused with mallards but their wingbeat is faster, yet slower than either canvasbacks or scaup. Noting such identifying characteristics comes with experience in the field. Books can tell you what to look for but experience makes it second nature.
At closer range a hunter can confirm these clues with field marks typical of the species: the canvasback's largely white body and sloping head profile, the shoveler's large bill, the pintail's trim outline and long, slender neck and pointed tail, the drake mallard's white outer tail feathers, the bluewing's gray-blue wing patch, and the wigeon's white wing patch. Once in the hand, a duck identification guide can confirm difficult species by comparing the pattern of the wing speculum or the bill shape and color.
Several books will help the waterfowl hunter improve his duck identification: Ducks, Geese and Swans of North America by Frank C. Bellrose, The LeMaster Method of Waterfowl Identification (temporarily out of print) by Richard LeMaster, and Waterfowl Identification in the Central Flyway (a water-resistant pocket guide available for 35 cents from the Nebraska Game and Parks Commission, Box 30370, Lincoln, NE 68503).
AUGUST 1985 37 Ice Fishing Shelter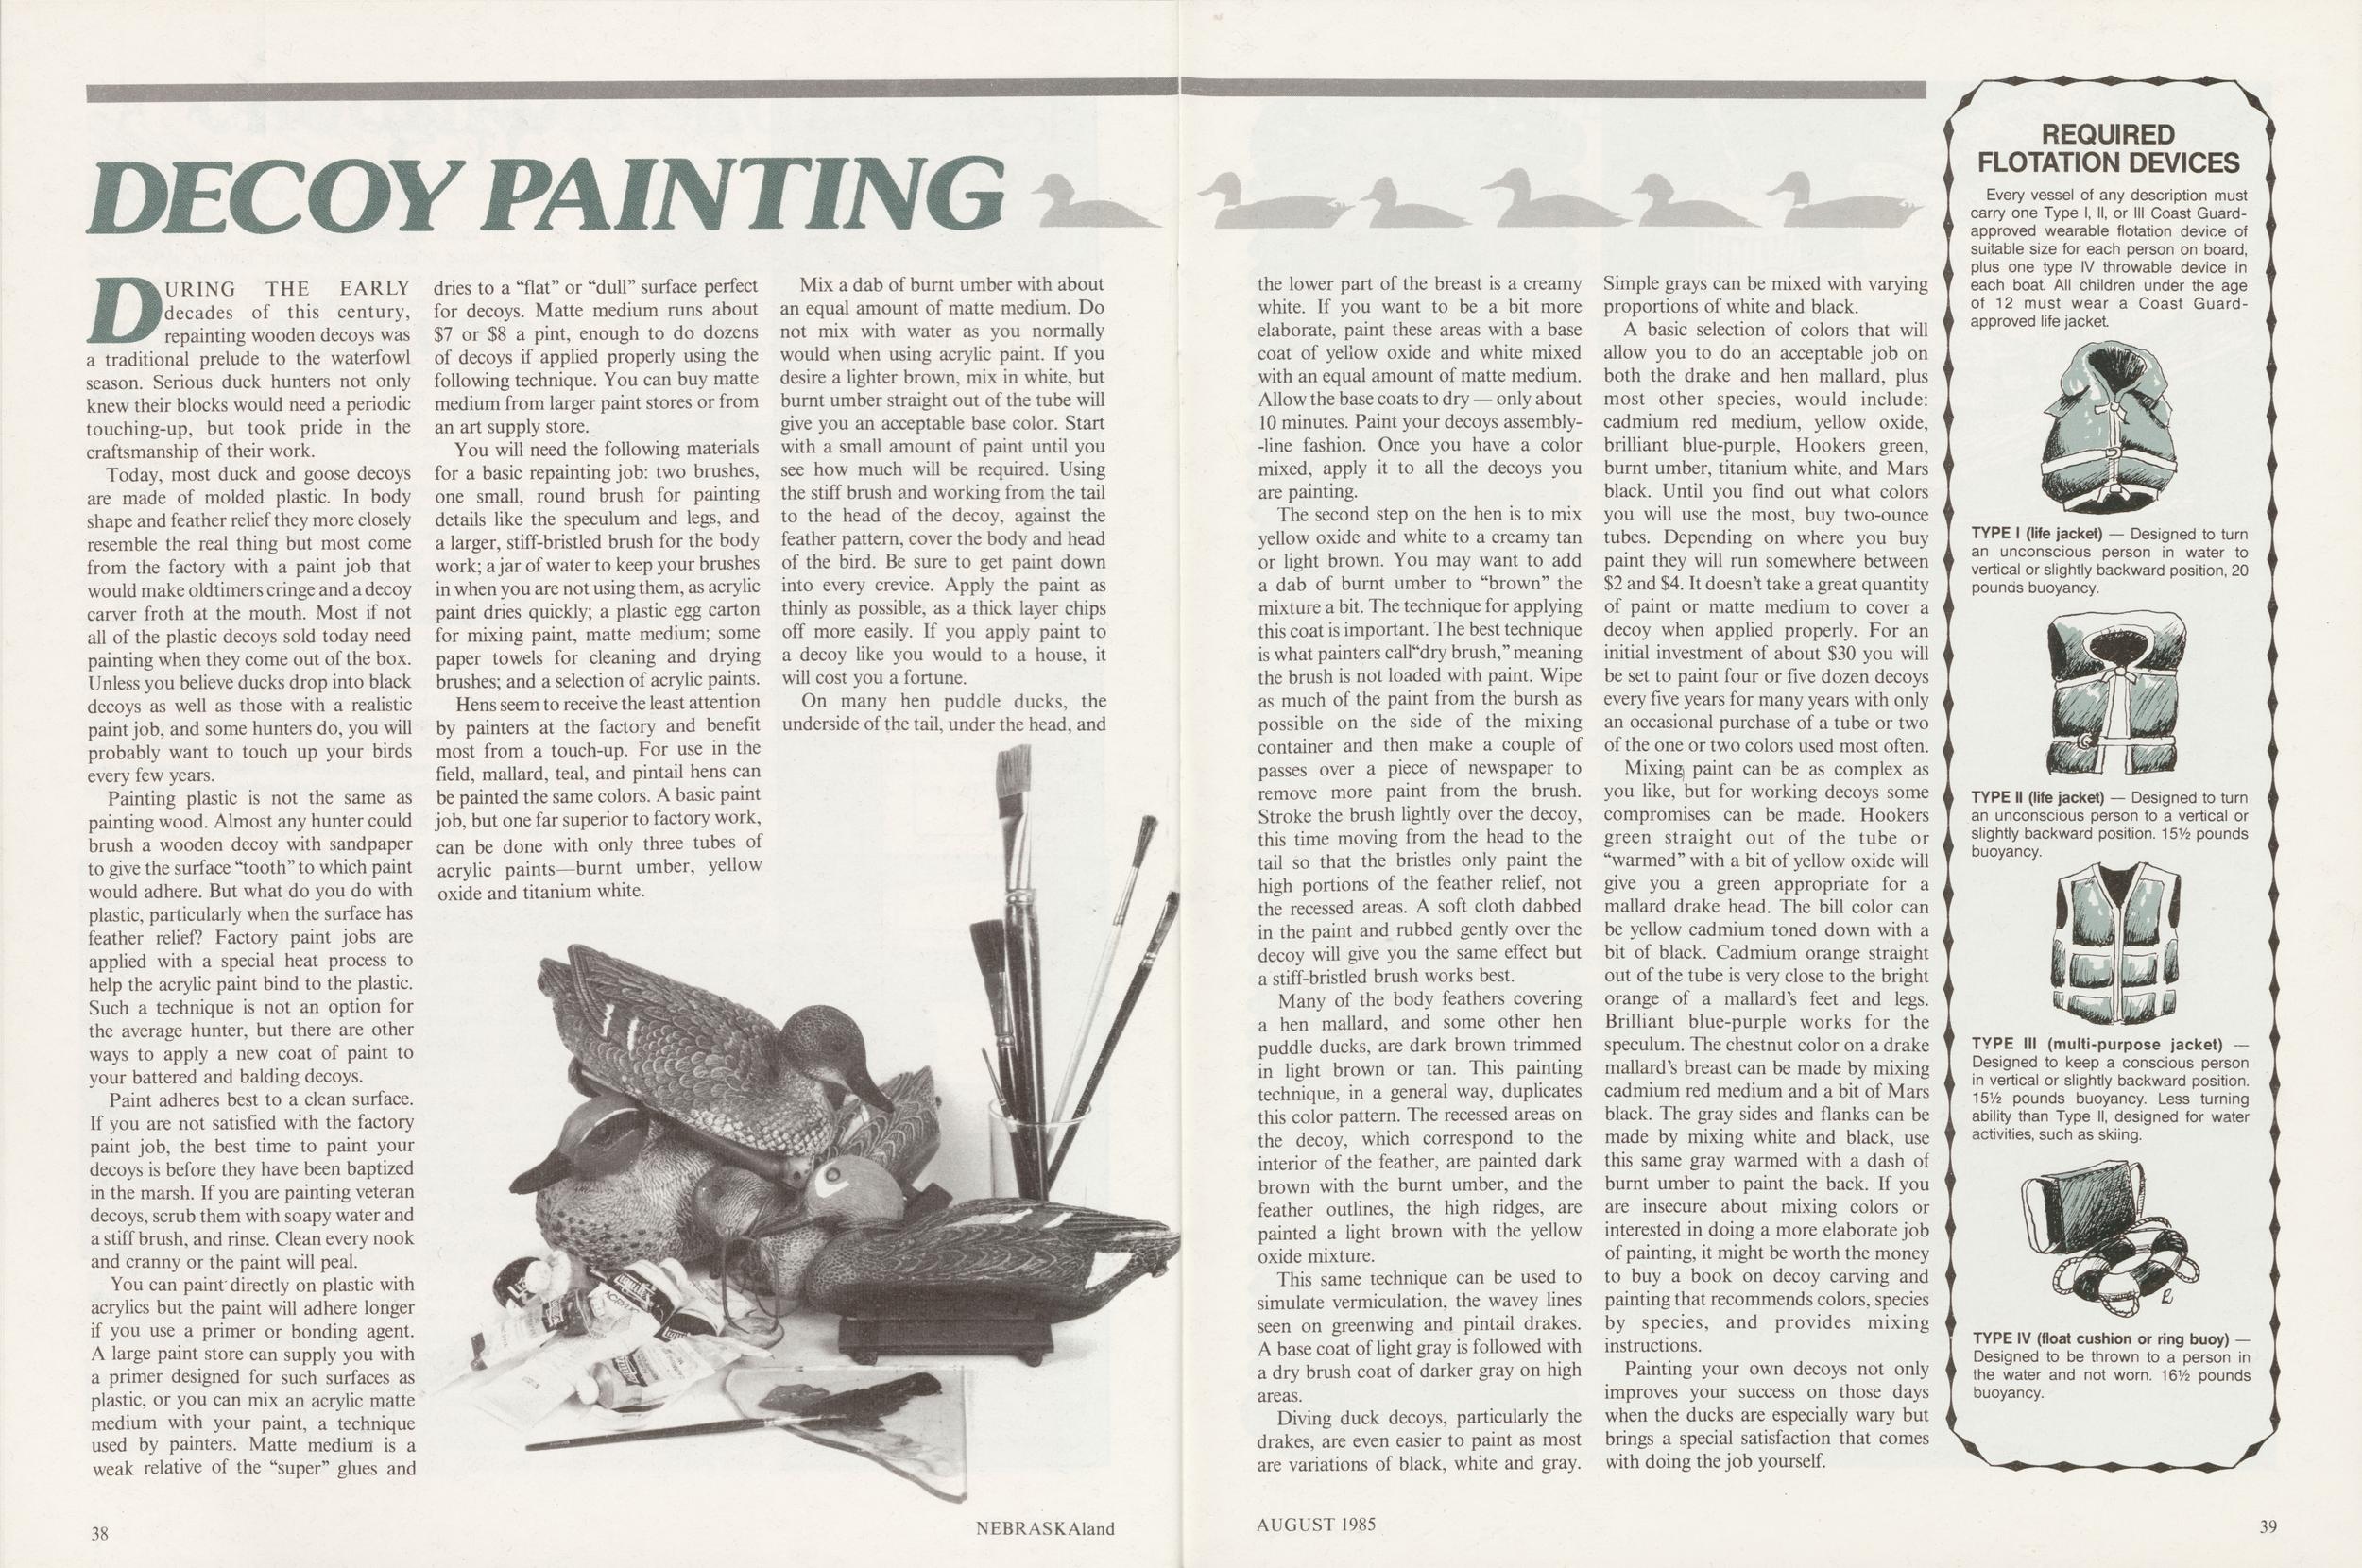
DECOY PAINTING
DURING THE EARLY decades of this century, repainting wooden decoys was a traditional prelude to the waterfowl season. Serious duck hunters not only knew their blocks would need a periodic touching-up, but took pride in the craftsmanship of their work.
Today, most duck and goose decoys are made of molded plastic. In body shape and feather relief they more closely resemble the real thing but most come from the factory with a paint job that would make oldtimers cringe and a decoy carver froth at the mouth. Most if not all of the plastic decoys sold today need painting when they come out of the box. Unless you believe ducks drop into black decoys as well as those with a realistic paint job, and some hunters do, you will probably want to touch up your birds every few years.
Painting plastic is not the same as painting wood. Almost any hunter could brush a wooden decoy with sandpaper to give the surface "tooth" to which paint would adhere. But what do you do with plastic, particularly when the surface has feather relief? Factory paint jobs are applied with a special heat process to help the acrylic paint bind to the plastic. Such a technique is not an option for the average hunter, but there are other ways to apply a new coat of paint to your battered and balding decoys.
Paint adheres best to a clean surface. If you are not satisfied with the factory paint job, the best time to paint your decoys is before they have been baptized in the marsh. If you are painting veteran decoys, scrub them with soapy water and a stiff brush, and rinse. Clean every nook and cranny or the paint will peal.
You can paint directly on plastic with acrylics but the paint will adhere longer if you use a primer or bonding agent. A large paint store can supply you with a primer designed for such surfaces as plastic, or you can mix an acrylic matte medium with your paint, a technique used by painters. Matte medium is a weak relative of the "super" glues and dries to a "flat" or "dull" surface perfect for decoys. Matte medium runs about $7 or $8 a pint, enough to do dozens of decoys if applied properly using the following technique. You can buy matte medium from larger paint stores or from an art supply store.
You will need the following materials for a basic repainting job: two brushes, one small, round brush for painting details like the speculum and legs, and a larger, stiff-bristled brush for the body work; ajar of water to keep your brushes in when you are not using them, as acrylic paint dries quickly; a plastic egg carton for mixing paint, matte medium; some paper towels for cleaning and drying brushes; and a selection of acrylic paints.
Hens seem to receive the least attention by painters at the factory and benefit most from a touch-up. For use in the field, mallard, teal, and pintail hens can be painted the same colors. A basic paint job, but one far superior to factory work, can be done with only three tubes of acrylic paints—burnt umber, yellow oxide and titanium white.
Mix a dab of burnt umber with about an equal amount of matte medium. Do not mix with water as you normally would when using acrylic paint. If you desire a lighter brown, mix in white, but burnt umber straight out of the tube will give you an acceptable base color. Start with a small amount of paint until you see how much will be required. Using the stiff brush and working from the tail to the head of the decoy, against the feather pattern, cover the body and head of the bird. Be sure to get paint down into every crevice. Apply the paint as thinly as possible, as a thick layer chips off more easily. If you apply paint to a decoy like you would to a house, it will cost you a fortune.
On many hen puddle ducks, the underside of the tail, under the head, and 38 NEBRASKAland the lower part of the breast is a creamy white. If you want to be a bit more elaborate, paint these areas with a base coat of yellow oxide and white mixed with an equal amount of matte medium. Allow the base coats to dry — only about 10 minutes. Paint your decoys assembly-line fashion. Once you have a color mixed, apply it to all the decoys you are painting.
The second step on the hen is to mix yellow oxide and white to a creamy tan or light brown. You may want to add a dab of burnt umber to "brown" the mixture a bit. The technique for applying this coat is important. The best technique is what painters call"dry brush," meaning the brush is not loaded with paint. Wipe as much of the paint from the bursh as possible on the side of the mixing container and then make a couple of passes over a piece of newspaper to remove more paint from the brush. Stroke the brush lightly over the decoy, this time moving from the head to the tail so that the bristles only paint the high portions of the feather relief, not the recessed areas. A soft cloth dabbed in the paint and rubbed gently over the decoy will give you the same effect but a stiff-bristled brush works best.
Many of the body feathers covering a hen mallard, and some other hen puddle ducks, are dark brown trimmed in light brown or tan. This painting technique, in a general way, duplicates this color pattern. The recessed areas on the decoy, which correspond to the interior of the feather, are painted dark brown with the burnt umber, and the feather outlines, the high ridges, are painted a light brown with the yellow oxide mixture.
This same technique can be used to simulate vermiculation, the wavey lines seen on greenwing and pintail drakes. A base coat of light gray is followed with a dry brush coat of darker gray on high areas.
Diving duck decoys, particularly the drakes, are even easier to paint as most are variations of black, white and gray. Simple grays can be mixed with varying proportions of white and black.
A basic selection of colors that will allow you to do an acceptable job on both the drake and hen mallard, plus most other species, would include: cadmium red medium, yellow oxide, brilliant blue-purple, Hookers green, burnt umber, titanium white, and Mars black. Until you find out what colors you will use the most, buy two-ounce tubes. Depending on where you buy paint they will run somewhere between $2 and $4. It doesn't take a great quantity of paint or matte medium to cover a decoy when applied properly. For an initial investment of about $30 you will be set to paint four or five dozen decoys every five years for many years with only an occasional purchase of a tube or two of the one or two colors used most often.
Mixing) paint can be as complex as you like, but for working decoys some compromises can be made. Hookers green straight out of the tube or "warmed" with a bit of yellow oxide will give you a green appropriate for a mallard drake head. The bill color can be yellow cadmium toned down with a bit of black. Cadmium orange straight out of the tube is very close to the bright orange of a mallard's feet and legs. Brilliant blue-purple works for the speculum. The chestnut color on a drake mallard's breast can be made by mixing cadmium red medium and a bit of Mars black. The gray sides and flanks can be made by mixing white and black, use this same gray warmed with a dash of burnt umber to paint the back. If you are insecure about mixing colors or interested in doing a more elaborate job of painting, it might be worth the money to buy a book on decoy carving and painting that recommends colors, species by species, and provides mixing instructions.
Painting your own decoys not only improves your success on those days when the ducks are especially wary but brings a special satisfaction that comes with doing the job yourself.
REQUIRED FLOTATION DEVICESEvery vessel of any description must carry one Type I, II, or III Coast Guard approved wearable flotation device of suitable size for each person on board, plus one type IV throwable device in each boat. All children under the age of 12 must wear a Coast Guard- approved life jacket.
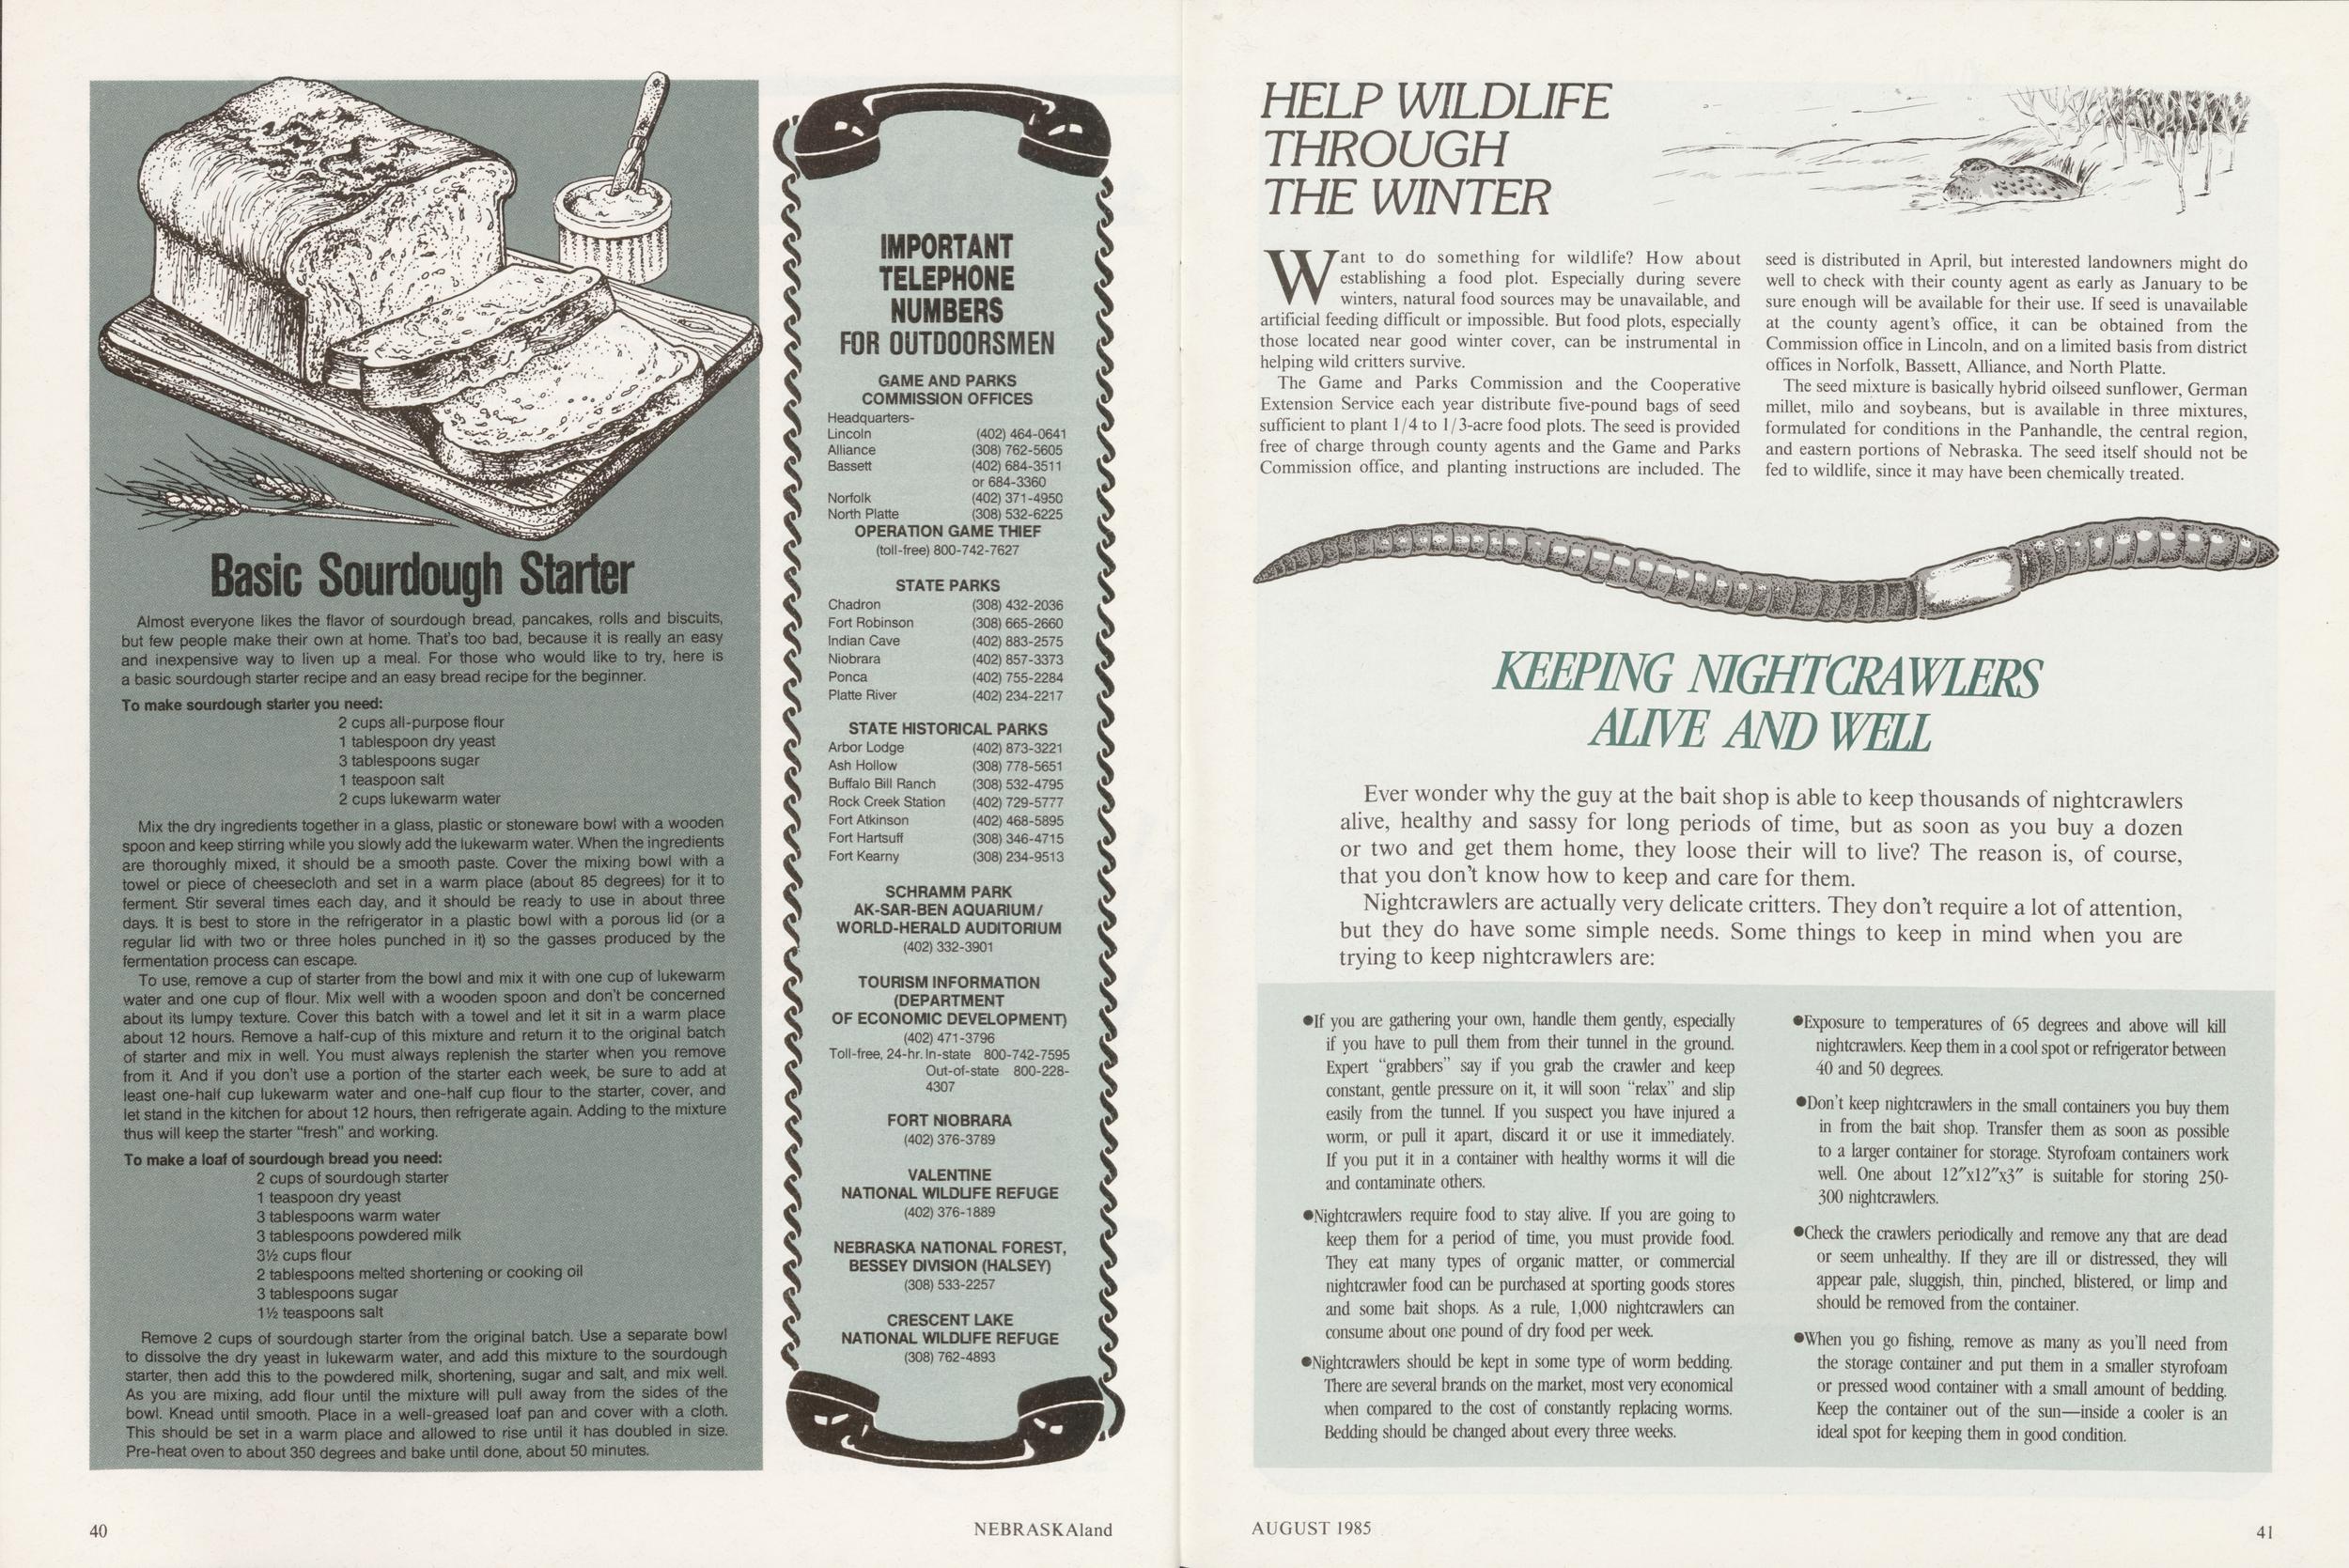
Basic Sourdough Starter
Almost everyone likes the flavor of sourdough bread, pancakes, rolls and biscuits, but few people make their own at home. That's too bad, because it is really an easy and inexpensive way to liven up a meal. For those who would like to try, here is a basic sourdough starter recipe and an easy bread recipe for the beginner.
To make sourdough starter you need: 2 cups all-purpose flour 1 tablespoon dry yeast 3 tablespoons sugar 1 teaspoon salt 2 cups lukewarm waterMix the dry ingredients together in a glass, plastic or stoneware bowl with a wooden spoon and keep stirring while you slowly add the iukewarm water. When the ingredients are thoroughly mixed, it should be a smooth paste. Cover the mixing bowl with a towel or piece of cheesecloth and set in a warm place (about 85 degrees) for it to ferment Stir several times each day, and it should be ready to use in about three days. It is best to store in the refrigerator in a plastic bowl with a porous lid (or a regular lid with two or three holes punched in it) so the gasses produced by the fermentation process can escape.
To use, remove a cup of starter from the bowl and mix it with one cup of lukewarm water and one cup of flour. Mix well with a wooden spoon and don't be concerned about its lumpy texture. Cover this batch with a towel and let it sit in a warm place about 12 hours. Remove a half-cup of this mixture and return it to the original batch of starter and mix in well. You must always replenish the starter when you remove from it. And if you don't use a portion of the starter each week, be sure to add at least one-half cup lukewarm water and one-half cup flour to the starter, cover, and let stand in the kitchen for about 12 hours, then refrigerate again. Adding to the mixture thus will keep the starter "fresh" and working.
To make a loaf of sourdough bread you need: 2 cups of sourdough starter 1 teaspoon dry yeast 3 tablespoons warm water 3 tablespoons powdered milk 31/2 cups flour 2 tablespoons melted shortening or cooking oil 3 tablespoons sugar 1 Vi teaspoons saltRemove 2 cups of sourdough starter from the original batch. Use a separate bowl to dissolve the dry yeast in lukewarm water, and add this mixture to the sourdough starter, then add this to the powdered milk, shortening, sugar and salt, and mix well. As you are mixing, add flour until the mixture will pull away from the sides of the bowl. Knead until smooth. Place in a well-greased loaf pan and cover with a cloth. This should be set in a warm place and allowed to rise until it has doubled in size. Pre-heat oven to about 350 degrees and bake until done, about 50 minutes
IMPORTANT TELEPHONE NUMBERS FOR OUTDOORSMEN
GAME AND PARKS COMMISSION OFFICES Headquarters Lincoln Alliance Bassett Norfolk North Platte (402) 464-0641 (308) 762-5605 (402)684-3511 or 684-3360 (402)371-4950 (308) 532-6225 OPERATION GAME TWEF (toll-free) 800-742-7627 STATE PARKS Chadron (308) 432-2036 Fort Robinson (308) 665-2660 Indian Cave (402) 883-2575 Niobrara (402) 857-3373 Ponca (402) 755-2284 Platte River (402)234-2217 STATE HISTORICAL PARKS Arbor Lodge (402) 873-3221 Ash Hollow (308) 778-5651 Buffalo Bill Ranch (308) 532-4795 Rock Creek Station (402) 729-5777 Fort Atkinson (402) 468-5895 Fort Hartsuff (308)346-4715 Fort Kearny (308)234-9513 SCHRAMM PARK AK-SAR-BEN AQUARIUM/ WORLD-HERALD AUDITORIUM (402) 332-3901 TOURISM INFORMATION (DEPARTMENT OF ECONOMIC DEVELOPMENT) (402)471-3796 Toll-free, 24-hr. In-state 800-742-7595 Out-of-state 800-228- 4307 FORT NIOBRARA (402) 376-3789 VALENTINE NATIONAL WILDLIFE REFUGE (402)376-1889 NEBRASKA NATIONAL FOREST, BESSEY DIVISION (HALSEY) (308) 533-2257 CRESCENT LAKE NATIONAL WILDUFE REFUGE (308) 762-4893 40 NEBRASKAlandHELP WILDLIFE THROUGH THE WINTER
Want to do something for wildlife? How about establishing a food plot. Especially during severe winters, natural food sources may be unavailable, and artificial feeding difficult or impossible. But food plots, especially those located near good winter cover, can be instrumental in helping wild critters survive.
The Game and Parks Commission and the Cooperative Extension Service each year distribute five-pound bags of seed sufficient to plant 1/4 to 1/3-acre food plots. The seed is provided free of charge through county agents and the Game and Parks Commission office, and planting instructions are included. The seed is distributed in April, but interested landowners might do well to check with their county agent as early as January to be sure enough will be available for their use. If seed is unavailable at the county agent's office, it can be obtained from the Commission office in Lincoln, and on a limited basis from district offices in Norfolk, Bassett, Alliance, and North Platte.
The seed mixture is basically hybrid oilseed sunflower, German millet, milo and soybeans, but is available in three mixtures, formulated for conditions in the Panhandle, the central region, and eastern portions of Nebraska. The seed itself should not be fed to wildlife, since it may have been chemically treated.
KEEPING NIGHTCRAWLERS ALIVE AND WELL
Ever wonder why the guy at the bait shop is able to keep thousands of nightcrawlers alive, healthy and sassy for long periods of time, but as soon as you buy a dozen or two and get them home, they loose their will to live? The reason is, of course, that you don't know how to keep and care for them.
Nightcrawlers are actually very delicate critters. They don't require a lot of attention, but they do have some simple needs. Some things to keep in mind when you are trying to keep nightcrawlers are:
If you are gathering your own, handle them gently, especially if you have to pull them from their tunnel in the ground. Expert "grabbers" say if you grab the crawler and keep constant, gentle pressure on it, it will soon "relax" and slip easily from the tunnel. If you suspect you have injured a worm, or pull it apart, discard it or use it immediately. If you put it in a container with healthy worms it will die and contaminate others.
'Nightcrawlers require food to stay alive. If you are going to keep them for a period of time, you must provide food. They eat many types of organic matter, or commercial nightcrawler food can be purchased at sporting goods stores and some bait shops. As a rule, 1,000 nightcrawlers can consume about one pound of dry food per week
Nightcrawlers should be kept in some type of worm bedding. There are several brands on the market, most very economical when compared to the cost of constantly replacing worms. Bedding should be changed about every three weeks.
Exposure to temperatures of 65 degrees and above will kill nightcrawlers. Keep them in a cool spot or refrigerator between 40 and 50 degrees.
Don't keep nightcrawlers in the small containers you buy them in from the bait shop. Transfer them as soon as possible to a larger container for storage. Styrofoam containers work well. One about 12"xl2"x3" is suitable for storing 250-300 nightcrawlers.
Check the crawlers periodically and remove any that are dead or seem unhealthy. If they are ill or distressed, they will appear pale, sluggish, thin, pinched, blistered, or limp and should be removed from the container.
When you go fishing, remove as many as you'll need from the storage container and put them in a smaller styrofoam or pressed wood container with a small amount of bedding. Keep the container out of the sun—inside a cooler is an ideal spot for keeping them in good condition.
AUGUST 1985 41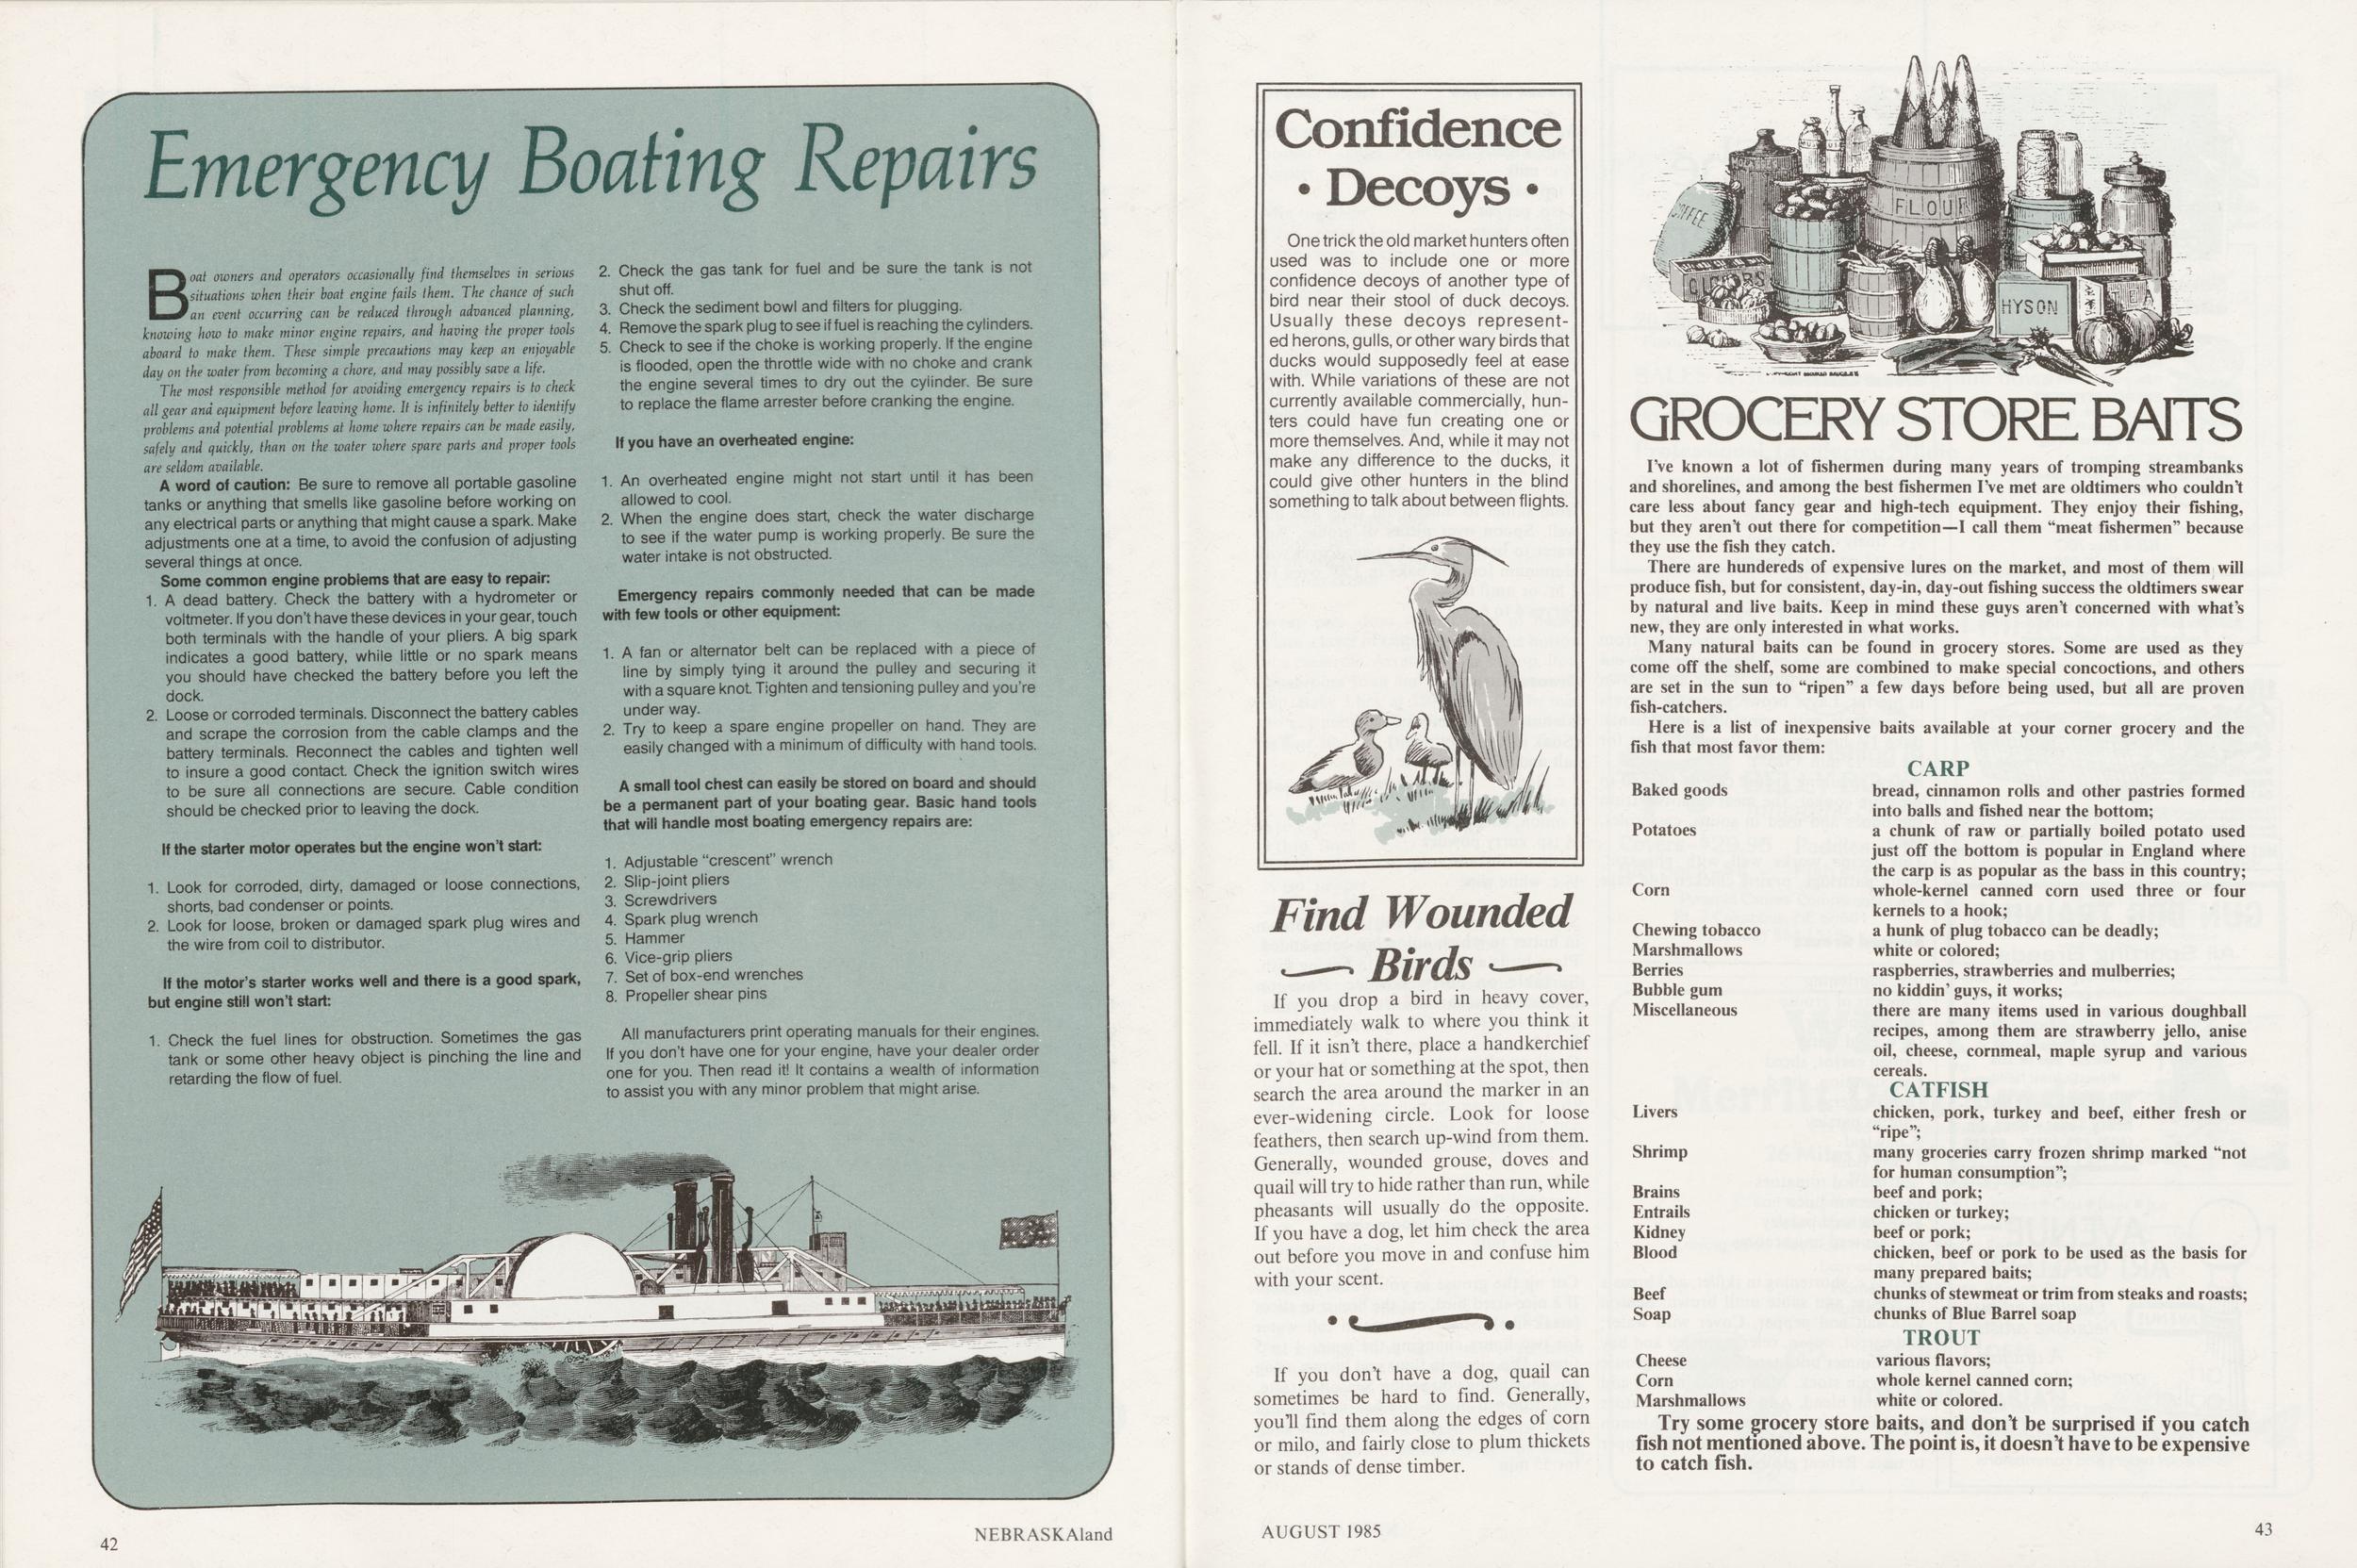
Emergency Boating Repairs
Boat owners and operators occasionally find themselves in serious situations when their boat engine fails them. The chance of such an event occurring can be reduced through advanced planning, knowing how to make minor engine repairs, and having the proper tools aboard to make them. These simple precautions may keep an enjoyable day on the water from becoming a chore, and may possibly save a life.
The most responsible method for avoiding emergency repairs is to check all gear and equipment before leaving home. It is infinitely better to identify problems and potential problems at home where repairs can be made easily, safely and quickly, than on the water where spare parts and proper tools are seldom available.
A word of caution: Be sure to remove all portable gasoline tanks or anything that smells like gasoline before working on any electrical parts or anything that might cause a spark. Make adjustments one at a time, to avoid the confusion of adjusting several things at once.
Some common engine problems that are easy to repair:1. A dead battery. Check the battery with a hydrometer or voltmeter. If you don't have these devices in your gear, touch both terminals with the handle of your pliers. A big spark indicates a good battery, while little or no spark means you should have checked the battery before you left the dock.
2. Loose or corroded terminals. Disconnect the battery cables and scrape the corrosion from the cable clamps and the battery terminals. Reconnect the cables and tighten well to insure a good contact. Check the ignition switch wires to be sure all connections are secure. Cable condition should be checked prior to leaving the dock.
if the starter motor operates but the engine won't start:1. Look for corroded, dirty, damaged or loose connections, shorts, bad condenser or points.
2. Look for loose, broken or damaged spark plug wires and the wire from coil to distributor.
If the motor's starter works well and there is a good spark, but engine still won't start:1. Check the fuel lines for obstruction. Sometimes the gas tank or some other heavy object is pinching the line and retarding the flow of fuel.
2. Check the gas tank for fuel and be sure the tank is not shut off.
3. Check the sediment bowl and filters for plugging.
4. Remove the spark plug to see if fuel is reaching the cylinders.
5. Check to see if the choke is working properly. If the engine is flooded, open the throttle wide with no choke and crank the engine several times to dry out the cylinder. Be sure to replace the flame arrester before cranking the engine.
If you have an overheated engine:1. An overheated engine might not start until it has been allowed to cool.
2. When the engine does start, check the water discharge to see if the water pump is working properly. Be sure the water intake is not obstructed.
Emergency repairs commonly needed that can be made with few tools or other equipment:1. A fan or alternator belt can be replaced with a piece of line by simply tying it around the pulley and securing it with a square knot. Tighten and tensioning pulley and you're under way.
2. Try to keep a spare engine propeller on hand. They are easily changed with a minimum of difficulty with hand tools.
A small tool chest can easily be stored on board and should be a permanent part of your boating gear. Basic hand tools that will handle most boating emergency repairs are:1. Adjustable "crescent" wrench
2. Slip-joint pliers
3. Screwdrivers
4. Spark plug wrench
5. Hammer
6. Vice-grip pliers
7. Set of box-end wrenches
8. Propeller shear pins
All manufacturers print operating manuals for their engines. If you don't have one for your engine, have your dealer order one for you. Then read it! It contains a wealth of information to assist you with any minor problem that might arise.
One trick the old market hunters often used was to include one or more confidence decoys of another type of bird near their stool of duck decoys. Usually these decoys represented herons, gulls, or other wary birds that ducks would supposedly feel at ease with. While variations of these are not currently available commercially, hunters could have fun creating one or more themselves. And, while it may not make any difference to the ducks, it could give other hunters in the blind something to talk about between flights.
If you drop a bird in heavy cover, immediately walk to where you think it fell. If it isn't there, place a handkerchief or your hat or something at the spot, then search the area around the marker in an ever-widening circle. Look for loose feathers, then search up-wind from them. Generally, wounded grouse, doves and quail will try to hide rather than run, while pheasants will usually do the opposite.
If you have a dog, let him check the area out before you move in and confuse him with your scent. If you don't have a dog, quail can sometimes be hard to find. Generally, you'll find them along the edges of corn or milo, and fairly close to plum thickets or stands of dense timber.
GROCERY STORE BATTS
I've known a lot of fishermen during many years of tromping streambanks and shorelines, and among the best fishermen I've met are oldtimers who couldn't care less about fancy gear and high-tech equipment. They enjoy their fishing, but they aren't out there for competition—I call them "meat fishermen" because they use the fish they catch.
There are hundereds of expensive lures on the market, and most of them will produce fish, but for consistent, day-in, day-out fishing success the oldtimers swear by natural and live baits. Keep in mind these guys aren't concerned with what's new, they are only interested in what works.
Many natural baits can be found in grocery stores. Some are used as they come off the shelf, some are combined to make special concoctions, and others are set in the sun to "ripen" a few days before being used, but all are proven fish-catchers.
Here is a list of inexpensive baits available at your corner grocery and the fish that most favor them:
CARP bread, cinnamon rolls and other pastries formed into balls and fished near the bottom; a chunk of raw or partially boiled potato used just off the bottom is popular in England where the carp is as popular as the bass in this country; whole-kernel canned corn used three or four kernels to a hook; a hunk of plug tobacco can be deadly; white or colored; raspberries, strawberries and mulberries; no kiddin' guys, it works; there are many items used in various doughball recipes, among them are strawberry jello, anise oil, cheese, cornmeal, maple syrup and various cereals. CATFISH chicken, pork, turkey and beef, either fresh or Baked goods Potatoes Corn Chewing tobacco Marshmallows Berries Bubble gum Miscellaneous Livers Shrimp ripe ; many groceries carry frozen shrimp marked "not for human consumption"; beef and pork; chicken or turkey; beef or pork; chicken, beef or pork to be used as the basis for many prepared baits; chunks of stewmeat or trim from steaks and roasts; chunks of Blue Barrel soap TROUT various flavors; whole kernel canned corn; white or colored.Try some grocery store baits, and don't be surprised if you catch fish not mentioned above. The point is, it doesn't have to be expensive to catch fish.
AUGUST 1985 43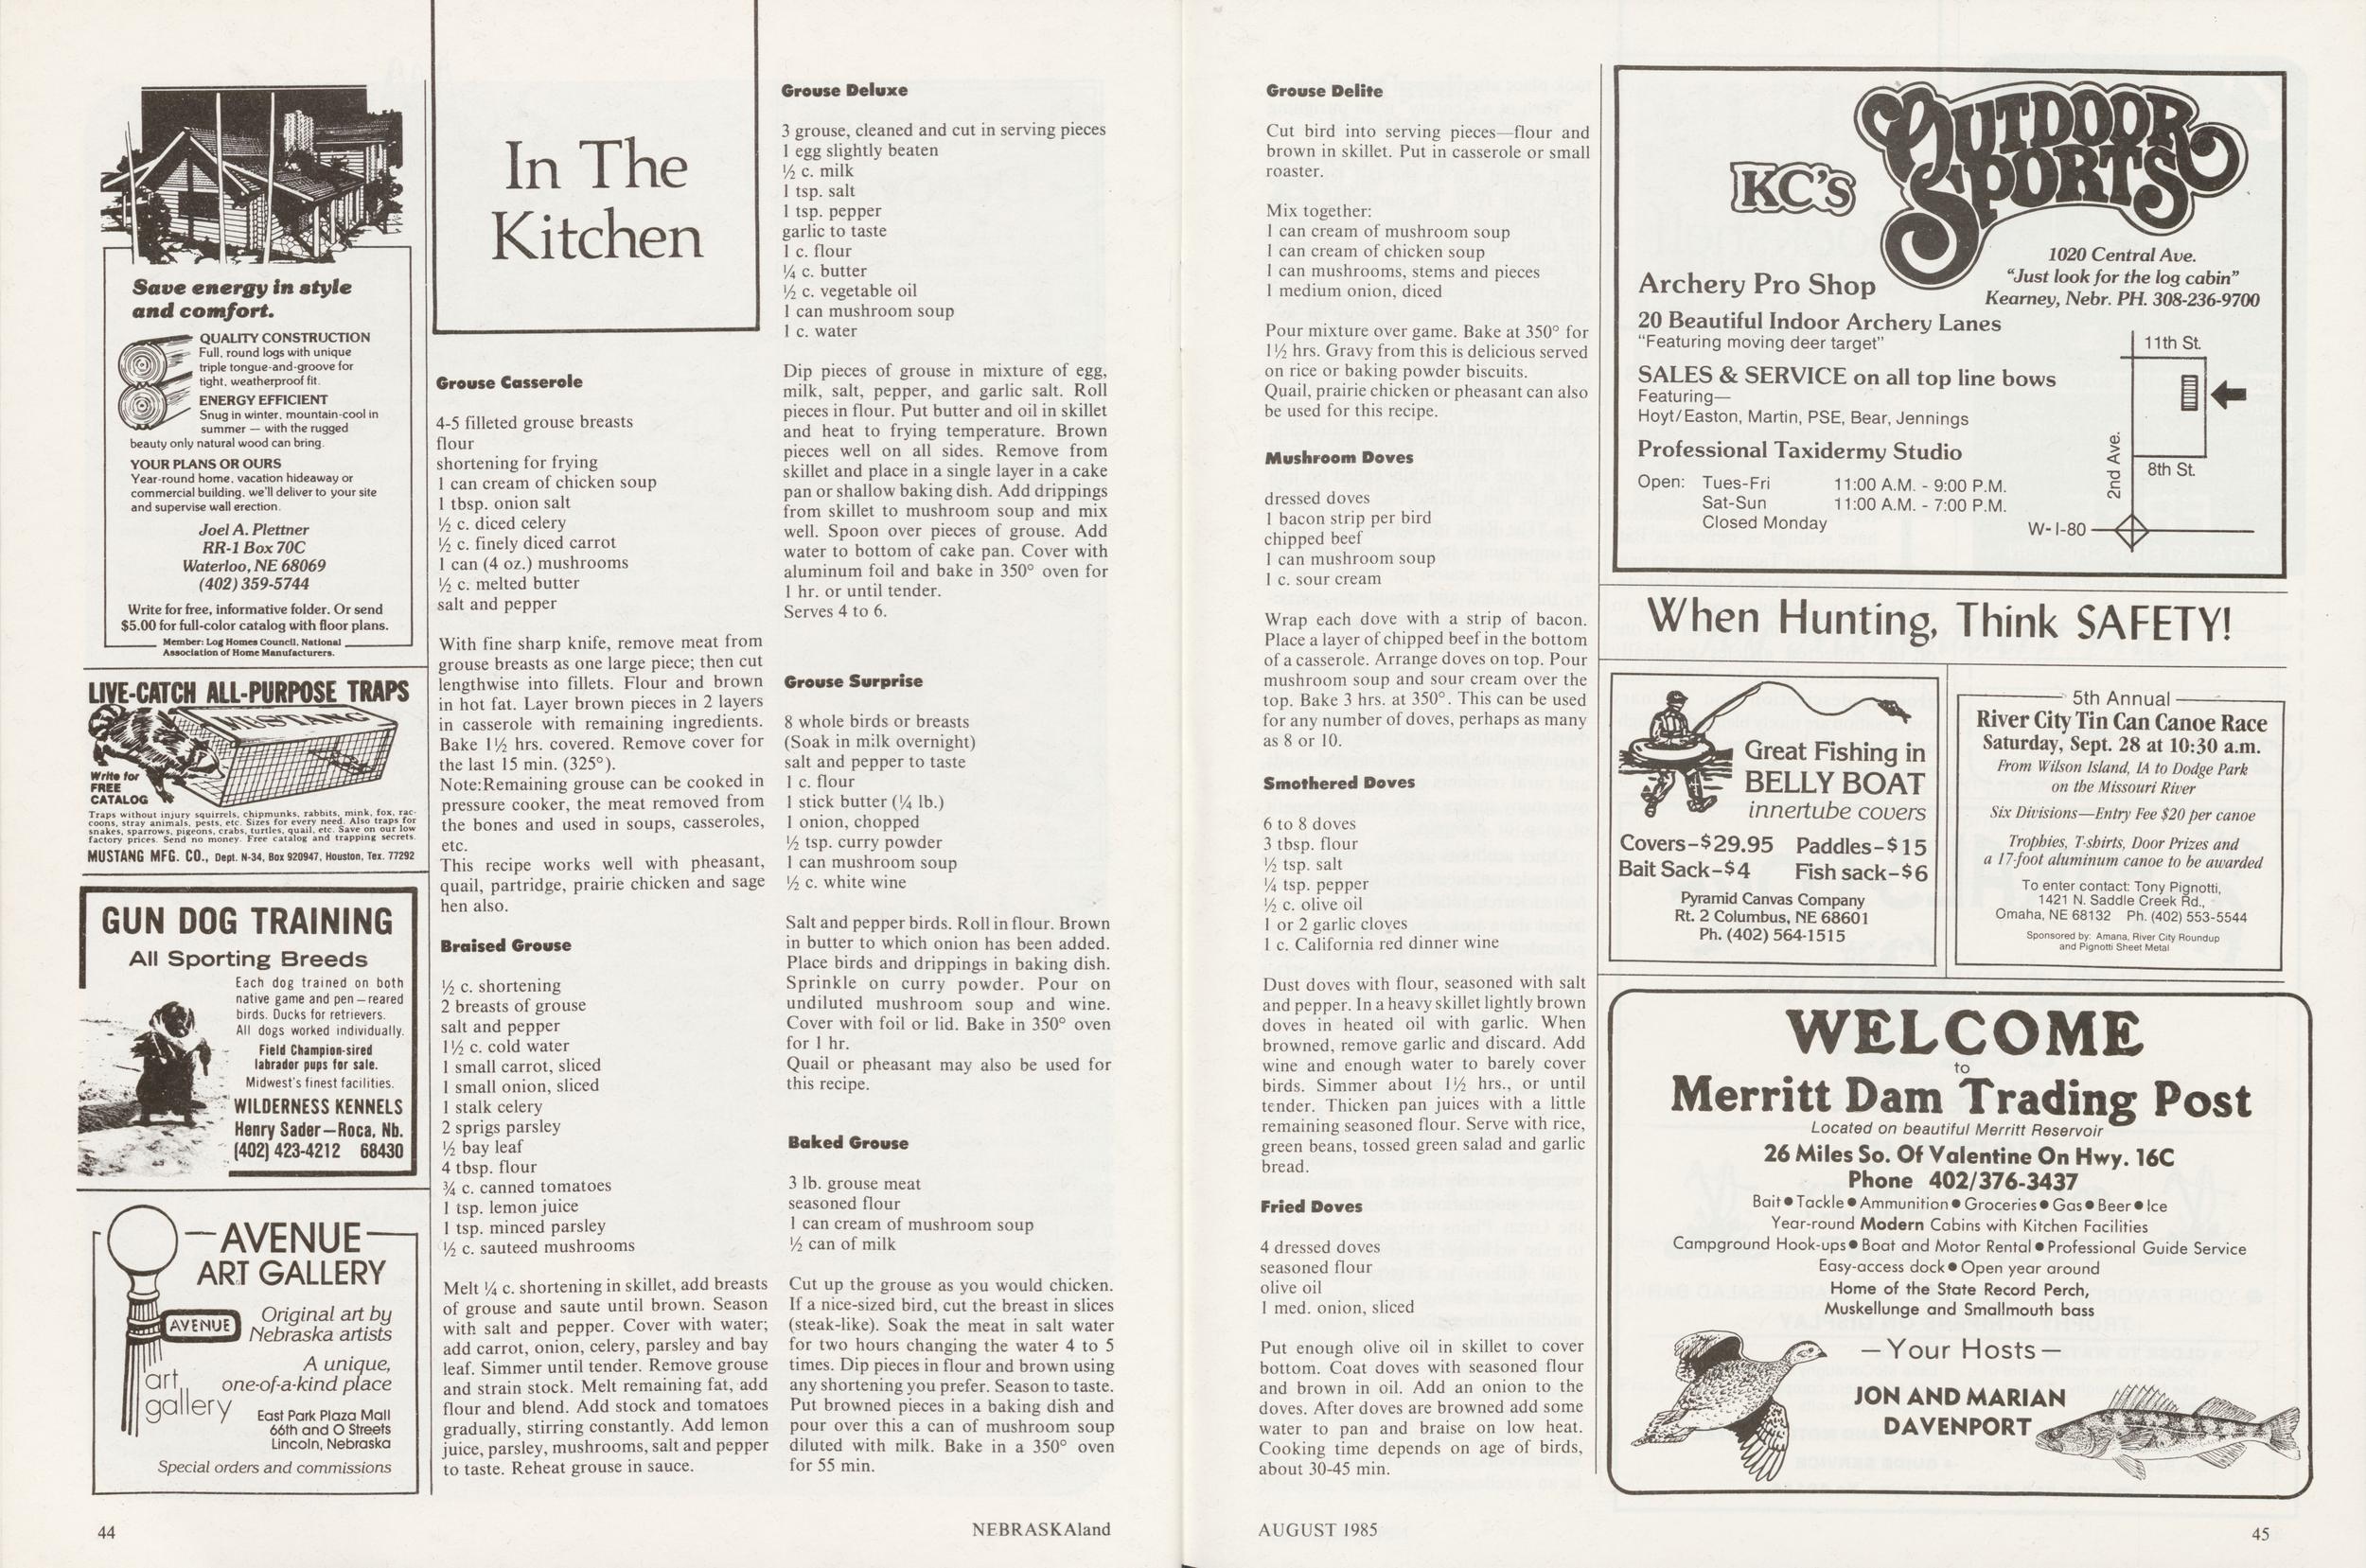 Save energy in style
and comfort.
QUALITY CONSTRUCTION
Full, round logs with unique
triple tongue-and-groove for
tight, weatherproof fit.
ENERGY EFFICIENT
Snug in winter, mountain-cool in
summer — with the rugged
beauty only natural wood can bring.
YOUR PLANS OR OURS
Year-round home, vacation hideaway or
commercial building, we'll deliver to your site
and supervise wall erection.
Joel A. Plettner
RR-1 Box 70C
Waterloo, NE 68069
(402) 359-5744
Write for free, informative folder. Or send
$5.00 for full-color catalog with floor plans.
Member: Log Homes Council. National
Association of Home Manufacturers.
LIVE-CATCH ALL-PURPOSE TRAPS
Writ* tor
FREE
Traps without injury squirrels, chipmunks, rabbits, mink, fox, rac-
coons, stray animals, pests, etc. Sizes for every need. Also traps for
snakes, sparrows, pigeons, crabs, turtles, quail, etc. Save on our low
factory prices. Send no money Free catalog and trapping secrets
MUSTANG MFG. CO., Dept. N-34, Box 920947, Houston, Tex. 77292
GUN DOG TRAINING
All Sporting Breeds
Each dog trained on both
native game and pen-reared
birds. Ducks for retrievers.
All dogs worked individually.
Field Champion-sired
labrador pups for sale.
Midwest's finest facilities.
* WILDERNESS KENNELS
Henry Sader-Roca. Nb.
(402)423-4212 68430
AVENUE
ART GALLERY
Original art by
Nebraska artists
A unique,
one-of-a-kind place
9 East Park Plaza Mall
66th and O Streets
Lincoln, Nebraska
Special orders and commissions
Save energy in style
and comfort.
QUALITY CONSTRUCTION
Full, round logs with unique
triple tongue-and-groove for
tight, weatherproof fit.
ENERGY EFFICIENT
Snug in winter, mountain-cool in
summer — with the rugged
beauty only natural wood can bring.
YOUR PLANS OR OURS
Year-round home, vacation hideaway or
commercial building, we'll deliver to your site
and supervise wall erection.
Joel A. Plettner
RR-1 Box 70C
Waterloo, NE 68069
(402) 359-5744
Write for free, informative folder. Or send
$5.00 for full-color catalog with floor plans.
Member: Log Homes Council. National
Association of Home Manufacturers.
LIVE-CATCH ALL-PURPOSE TRAPS
Writ* tor
FREE
Traps without injury squirrels, chipmunks, rabbits, mink, fox, rac-
coons, stray animals, pests, etc. Sizes for every need. Also traps for
snakes, sparrows, pigeons, crabs, turtles, quail, etc. Save on our low
factory prices. Send no money Free catalog and trapping secrets
MUSTANG MFG. CO., Dept. N-34, Box 920947, Houston, Tex. 77292
GUN DOG TRAINING
All Sporting Breeds
Each dog trained on both
native game and pen-reared
birds. Ducks for retrievers.
All dogs worked individually.
Field Champion-sired
labrador pups for sale.
Midwest's finest facilities.
* WILDERNESS KENNELS
Henry Sader-Roca. Nb.
(402)423-4212 68430
AVENUE
ART GALLERY
Original art by
Nebraska artists
A unique,
one-of-a-kind place
9 East Park Plaza Mall
66th and O Streets
Lincoln, Nebraska
Special orders and commissions
In The Kitchen
Grouse Casserole 4-5 filleted grouse breasts flour shortening for frying 1 can cream of chicken soup 1 tbsp. onion salt Vi c. diced celery Vi c. finely diced carrot 1 can (4 oz.) mushrooms Vi c. melted butter salt and pepperWith fine sharp knife, remove meat from grouse breasts as one large piece; then cut lengthwise into fillets. Flour and brown in hot fat. Layer brown pieces in 2 layers in casserole with remaining ingredients. Bake V/i hrs. covered. Remove cover for the last 15 min. (325°). Note:Remaining grouse can be cooked in pressure cooker, the meat removed from the bones and used in soups, casseroles, etc.
This recipe works well with pheasant, quail, partridge, prairie chicken and sage hen also.
Braised Grouse shortening 2 breasts of grouse salt and pepper 1 /2 c. cold water 1 small carrot, sliced 1 small onion, sliced 1 stalk celery 2 sprigs parsley Vi bay leaf 4 tbsp. flour Va c. canned tomatoes 1 tsp. lemon juice 1 tsp. minced parsley Vi c sauteed mushroomsMelt !/4 c. shortening in skillet, add breasts of grouse and saute until brown. Season with salt and pepper. Cover with water; add carrot, onion, celery, parsley and bay leaf. Simmer until tender. Remove grouse and strain stock. Melt remaining fat, add flour and blend. Add stock and tomatoes gradually, stirring constantly. Add lemon juice, parsley, mushrooms, salt and pepper to taste. Reheat grouse in sauce.
Grouse Deluxe 3 grouse, cleaned and cut in serving pieces 1 egg slightly beaten Vi c. milk 1 tsp. salt 1 tsp. pepper garlic to taste 1 c. flour 74 c. butter Vi c. vegetable oil 1 can mushroom soup 1 c. waterDip pieces of grouse in mixture of egg, milk, salt, pepper, and garlic salt. Roll pieces in flour. Put butter and oil in skillet and heat to frying temperature. Brown pieces well on all sides. Remove from skillet and place in a single layer in a cake pan or shallow baking dish. Add drippings from skillet to mushroom soup and mix well. Spoon over pieces of grouse. Add water to bottom of cake pan. Cover with aluminum foil and bake in 350° oven for 1 hr. or until tender. Serves 4 to 6.
Grouse Surprise 8 whole birds or breasts (Soak in milk overnight) salt and pepper to taste 1 c. flour 1 stick butter (74 lb.) 1 onion, chopped 1/2 tsp. curry powder 1 can mushroom soup 72 c. white wineSalt and pepper birds. Roll in flour. Brown in butter to which onion has been added. Place birds and drippings in baking dish. Sprinkle on curry powder. Pour on undiluted mushroom soup and wine. Cover with foil or lid. Bake in 350° oven for 1 hr. Quail or pheasant may also be used for this recipe.
Baked Grouse 3 lb. grouse meat seasoned flour 1 can cream of mushroom soup V2 can of milkCut up the grouse as you would chicken. If a nice-sized bird, cut the breast in slices (steak-like). Soak the meat in salt water for two hours changing the water 4 to 5 times. Dip pieces in flour and brown using any shortening you prefer. Season to taste. Put browned pieces in a baking dish and pour over this a can of mushroom soup diluted with milk. Bake in a 350° oven for 55 min.
44 NEBRASKAland Grouse DeliteCut bird into serving pieces—flour and brown in skillet. Put in casserole or small roaster.
Mix together: 1 can cream of mushroom soup 1 can cream of chicken soup 1 can mushrooms, stems and pieces 1 medium onion, dicedPour mixture over game. Bake at 350° for 172 hrs. Gravy from this is delicious served on rice or baking powder biscuits. Quail, prairie chicken or pheasant can also be used for this recipe.
Mushroom Doves dressed doves 1 bacon strip per bird chipped beef 1 can mushroom soup 1 c. sour creamWrap each dove with a strip of bacon. Place a layer of chipped beef in the bottom of a casserole. Arrange doves on top. Pour mushroom soup and sour cream over the top. Bake 3 hrs. at 350°. This can be used for any number of doves, perhaps as many as 8 or 10.
Smothered Doves 6 to 8 doves 3 tbsp. flour 72 tsp. salt 74 tsp. pepper 72 c. olive oil 1 or 2 garlic cloves 1 c. California red dinner wineDust doves with flour, seasoned with salt and pepper. In a heavy skillet lightly brown doves in heated oil with garlic. When browned, remove garlic and discard. Add wine and enough water to barely cover birds. Simmer about l/2 hrs., or until tender. Thicken pan juices with a little remaining seasoned flour. Serve with rice, green beans, tossed green salad and garlic bread.
Fried Doves 4 dressed doves seasoned flour olive oil 1 med. onion, slicedPut enough olive oil in skillet to cover bottom. Coat doves with seasoned flour and brown in oil. Add an onion to the doves. After doves are browned add some water to pan and braise on low heat. Cooking time depends on age of birds, about 30-45 min.
1020 Central Ave. Archpru Pro Shot! "Just look for the log cabin" nrcnery rru onup Kearney, Nebr. PH. 308-236-9700 20 Beautiful Indoor Archery Lanes "Featuring moving deer target" I 11th St. SALES & SERVICE on all top line bows Featuring— Hoyt/Easton, Martin, PSE, Bear, Jennings Professional Taxidermy Studio Open: Tues-Fri 11:00 A.M. - 9:00 P.M. Sat-Sun 11:00 A.M. - 7:00 P.M. Closed Monday W-l-80 8th St. When Hunting, Think SAFETY! Great Fishing in P1 BELLY BOAT innertube covers Covers-$29.95 Paddles-$ 15 Bait Sack - $ 4 Fish sack - $ 6 Pyramid Canvas Company Rt. 2 Columbus, NE 68601 Ph.(402)564-1515 5th Annual River City Tin Can Canoe Race Saturday, Sept. 28 at 10:30 a.m. From Wilson Island, IA to Dodge Park on the Missouri River Six Divisions—Entry' Fee $20 per canoe Trophies, T-shirts, Door Prizes and a 17-foot aluminum canoe to be awarded To enter contact: Tony Pignotti, 1421 N. Saddle Creek Rd., Omaha, NE 68132 Ph. (402) 553-5544 Sponsored by: Amana, River City Roundup and Pignotti Sheet Metal WELCOME to Merritt Dam Trading Post Located on beautiful Merritt Reservoir 26 Miles So. Of Valentine On Hwy. 16C Phone 402/376-3437 Bait •Tackle •Ammunition* Groceries* Gas* Beer* Ice Year-round Modern Cabins with Kitchen Facilities Campground Hook-ups* Boat and Motor Rental* Professional Guide Service Easy-access dock*Open year around Home of the State Record Perch, Muskellunge and Smalimouth bass — Your Hosts — JON AND MARIAN DAVENPORT Cabela's
100% SATISFACTION GUARNATEED
hunting Equipment... Decoys
Footwear... Knives... Guncases
Bows... Arrows... Clothing
Optics... Gifts... and Mush More
FREE
CATALOG SUBSCRIPTION
Mail today to reserve your Fall issue
NAME
ADDRESS
CITY
STATE
ZIP
yCa6e£af
863-508
Sidney
Nebraska 69160
THE ADMIRAL'S COVE
EXIT 6 ON THE NORTH SIDE
VISIT THE ADMIRAL'S GALLEY
RESTAURANT
YOUR FAVORITE COCKTAILS FANCY LARGE SALAD BAR
TROPHY STRIPERS ON DISPLAY
CLOSE TO WATER MOTEL
SERVICES BOAT AND MOTOR RENTAL
GUIDE SERVICE
Ph: 308-355-2102 Lemoyne, Ne 69146
Cabela's
100% SATISFACTION GUARNATEED
hunting Equipment... Decoys
Footwear... Knives... Guncases
Bows... Arrows... Clothing
Optics... Gifts... and Mush More
FREE
CATALOG SUBSCRIPTION
Mail today to reserve your Fall issue
NAME
ADDRESS
CITY
STATE
ZIP
yCa6e£af
863-508
Sidney
Nebraska 69160
THE ADMIRAL'S COVE
EXIT 6 ON THE NORTH SIDE
VISIT THE ADMIRAL'S GALLEY
RESTAURANT
YOUR FAVORITE COCKTAILS FANCY LARGE SALAD BAR
TROPHY STRIPERS ON DISPLAY
CLOSE TO WATER MOTEL
SERVICES BOAT AND MOTOR RENTAL
GUIDE SERVICE
Ph: 308-355-2102 Lemoyne, Ne 69146
Bookshelf
by Curt Twedt In God's Countries Bil Gilbert University of Nebraska Press, Lincoln. 1984 203 pp. $14.95; clothTHE 12 PIECES in this collection have settings as remote as Baffinland and Tasmania, or as near as Missouri and western South Dakota. Bil Gilbert is a regular contributor to Sports Illustrated, in which all but one of the collected articles originally appeared, from 1972 to 1981. Background, description and ordinary conversation are nicely blended throughout. Some of the articles include brief epilogs telling of pertinent events which took place after original publication.
"Turn of a Century" is an intriguing historical tale which records (with occasional conjecture) little dramas that were played out in the last few days of the year 1799. The particular events that Gilbert concentrates on center on the final exit of one of the last herds of eastern bison. Forced to move into settled areas because of deep snow and extreme cold, the bison more or less blundered into their death sentence. Hungry and confused, the animals tore into haystacks, and when being driven off they rushed headlong into a small cabin, trampling the occupants to death. A hastily organized hunting party set out at once and literally called no halt until the last buffalo had been killed.
In "The Rites of Autumn," we have the opportunity to be in on the opening day of deer season in Pennsylvania, " the wildest and woolliest participatory recreational event extant." One and a quarter million hunters and a herd of 700,000 deer are the participants. Gilbert introduces us to a variety of hunters—old hands and beginners; city dwellers who seldom venture more than a quarter-mile from well traveled roads and rural residents capable of roaming over many square miles without benefit of map or compass.
Other accounts in the collection take the reader on a search for the rare black-footed ferret, follow the author and a friend on a trek across Baffinland, or go underground with a group exploring a West Virginia cave. Then there is "The Missouri Kid," a remarkable moose who left his northwoods home and headed south, winding up eventually in northeastern Missouri where residents sort of adopted the wayward animal for a couple of years. In "The Second Keeper," we get acquainted with Jack Lynch and Mary Wheeler who are waging a lonely battle to maintain a captive population of buffalo wolves, the Great Plains subspecies presumed to exist no longer in a wild state.
Bil Gilbert is a gifted storyteller capable of placing the reader in the middle of the action of his narratives. Attention to detail and the ability to describe out-of-the-ordinary people are among his strong points. If you haven't had the good fortune to get acquainted with this thoughtful, entertaining writer's work, In God's Countries would be an excellent introduction.
46 NEBRASKAlandCaudle Peduncleless?
BIG-GAME HUNTERS have known for a long time that proper field care, including bleeding the carcass, is important for preserving the quality of the meat. Bird hunters, too, know that gutting and bleeding birds as soon as practical helps to improve flavor. Catfishermen often cut the tail off channel cat to bleed them, but otherwise, fishermen seem not to have considered the value of bleeding their catch. The March 1983 issue of the SFI Bulletin, published by the Sport Fishing Institute, however, reports research carried out for commercial fishermen on the Great Lakes suggesting that all fish might be better table fare if bled within 20 minutes of being caught.
In experiments carried out with rainbow trout, investigators found that the most efficient method for bleeding fish was to cut off the tail (biologists call it the caudal peduncle) and allow the fish to bleed for about five minutes. This produced "a superior food product on the basis of appearance, odor, and fat stability."
The flesh of fish bled for five minutes had a lighter color and less odor than those of unbled fish, and their keeping properties, even in the freezer, were far superior. Unbled fish kept frozen for three months showed some evidence of rancidity, but it took a full eight months for bled fish to reach the same stage. Tests of fat stability (which affects rancidity) showed similar results.
So, it may be well worth your while to add bleeding to the other aspects of good field care for fish: gut them as soon as practical, keep them cool (in ice, if possible), and avoid keeping them on stringers in shallow water where they may warm up too much or damage tender flesh with their thrashing.
UNIQUE FISHTHE MOSQUITO fish is the only "live-bearer" in Nebraska waters. The term "ovoviviparous" is used to describe this process of bearing live young. The male mosquito fish produces spermatophores—masses of sperm which are transferred to the oviduct of the female. One such transfer can accomplish fertilization of several successive batches of eggs.
"Forest Path" Image Size 12x18 inches ffoy Montgomery Price Artist Limited Edition 500 Lithographs signed and numbered on Archival 100% Rag Paper $22.50 postpaid Joy Montgomery Price Route 1, Box 73 Hemingford, NE 69348 Phone (308) 487-5204 Please fill out to order Name Address Phone Please enclose certified check or money order with purchase order. AUGUST 1985 47 For Sale
SNAKE RIVER
HOMESITES
Any Size, 1/2 acre to 5 acres, some with
complete package with or without home
Financing available.
FOR MORE DETAILS CALL
(402) 376-1662
Make this your private retreat
for fishing, hiking, camping,
canoeing or year-round living.
Harold Stokey
Flying Diamond Land Company
H.C.02 Dox 21, Valentine, NE 69201
AGRICULTURAL LAW
William B. Bevans
Attorney at Law
Serving the special needs of
Nebraska farmers and agbusinesses.
Phone (402) 473-2960
CEDAR LANE
Ranch Vacations
Working ranch in the heart of the Sandhills of
Nebraska. Swimming, spa, horses, canoeing,
trailrides, barbeques.
BOOKING NOW
Richard and Betty Schroeder HC 2 Box 9C
Stapleton, Nebraska 69163 Ph. 308-587-2233
From the Pre season thru Oklahoma
to Bowl Game Coverage, Give the
Gift that delivers the Action!
HUSKER HOT
NEWS PAK
The Husker Hot News Pak is a special 16 week Sunday JournalStar subscription from
August 25th through December 1st. It includes a complete pre-season Husker football
tabloid, full game
coverage with action photos, a current rundown of prep sports, and
all the capital, regional and Nebraska news. This year we will include a full week
of Nebraska bowl game coverage.
It's the perfect gift for friends, relatives, N.U. grads, former Nebraskans, students,
and service men and women overseas. Order today
for that special Husker fan!
16 weeks
for only
$13.95
Complete order
form and mail with
check or money
order to:
HUSKER HOT
NEWS PAK
Circulation Dept.
Journal-Star
Printing Co.
Box 81609
Lincoln, NE 68501
or Call
(402)473-7300
Please send Husker HOT NEWS PAK gift subscription and
card to those listed beiow for which I enclose
Your Name
Your Address
City
Phone
State
Name
Street
Send Husker HOT NEWS PAK to:
City (or APO#)
State
HUNTING TIPS
For Sale
SNAKE RIVER
HOMESITES
Any Size, 1/2 acre to 5 acres, some with
complete package with or without home
Financing available.
FOR MORE DETAILS CALL
(402) 376-1662
Make this your private retreat
for fishing, hiking, camping,
canoeing or year-round living.
Harold Stokey
Flying Diamond Land Company
H.C.02 Dox 21, Valentine, NE 69201
AGRICULTURAL LAW
William B. Bevans
Attorney at Law
Serving the special needs of
Nebraska farmers and agbusinesses.
Phone (402) 473-2960
CEDAR LANE
Ranch Vacations
Working ranch in the heart of the Sandhills of
Nebraska. Swimming, spa, horses, canoeing,
trailrides, barbeques.
BOOKING NOW
Richard and Betty Schroeder HC 2 Box 9C
Stapleton, Nebraska 69163 Ph. 308-587-2233
From the Pre season thru Oklahoma
to Bowl Game Coverage, Give the
Gift that delivers the Action!
HUSKER HOT
NEWS PAK
The Husker Hot News Pak is a special 16 week Sunday JournalStar subscription from
August 25th through December 1st. It includes a complete pre-season Husker football
tabloid, full game
coverage with action photos, a current rundown of prep sports, and
all the capital, regional and Nebraska news. This year we will include a full week
of Nebraska bowl game coverage.
It's the perfect gift for friends, relatives, N.U. grads, former Nebraskans, students,
and service men and women overseas. Order today
for that special Husker fan!
16 weeks
for only
$13.95
Complete order
form and mail with
check or money
order to:
HUSKER HOT
NEWS PAK
Circulation Dept.
Journal-Star
Printing Co.
Box 81609
Lincoln, NE 68501
or Call
(402)473-7300
Please send Husker HOT NEWS PAK gift subscription and
card to those listed beiow for which I enclose
Your Name
Your Address
City
Phone
State
Name
Street
Send Husker HOT NEWS PAK to:
City (or APO#)
State
HUNTING TIPS
If you shoot at more pheasants than you hit, it may be that you are shooting behind the bird on crossing shots. The pheasant's long tail feathers tend to make the hunter misjudge the bird's size and shorten his lead considerably. To put more birds in the bag, concentrate on the rooster's head rather than the entire bird.
To help make the job of cleaning gamebirds and small-game animals quicker and easier, carry a small pair of tin or pruning shears with you while hunting. They are ideal for cutting through bone, and make the removal of head, feet, wings, and legs a breeze. And, your knife stays sharp longer because it has only to contend with cutting through softer skin and flesh.
If you shoot one squirrel from a particular place, resist the temptation to run right over and pick it up. Carefully identify the spot where it landed, but if you are sure it is dead, stay put and remain motionless. If you wait a few minutes before moving, you may get a shot at another squirrel in the same area.
If your hunting time is limited, you can increase your chances of bagging game by being in the field when the animal you are after is most active. For instance, rabbit hunters score most consistently while hunting along field edges, near brushpiles and thickets in late afternoon until sunset when rabbits are most active.
Watch your deer's eye to determine whether he is dead and safe to approach. If his eyes are closed he may be only wounded and stunned. However, if his eyes are open and look "glassy," he is probably dead. Always approach a downed animal with caution—they can easily cause serious injuries to the unsuspecting hunter.
Turkeys usually have only one beard, but as many as five have been counted on a single male. Beards are made up of solid, horny filaments (a most primitive feather), and grow continuously.
The common loon has been snagged in fishing nets at 200 feet below the surface.
48 NEBRASKAlandTrading Post
DOGSTRAINING ALL BREEDS Hunting dogs—Vizslas for sale. Rozanek Kennels, Rt. 2, Schuyler, NE6866L Phone (402) 352-8769.
GERMAN SHORTHAIRS—English Pointers and Beagles—Stud service, puppies and started dogs. Wayne Clark, Box 54, Union, Nebr. 68455. Phone (402) 263-3495 or 263-3155.
YELLOW LABRADOR pups, bred to be large, trainable hunters. Dam is 80 pounds of intelligence and desire to please. Sire is big, broad and agressive former field-trialer and now a super hunter. AKC. Shots. Robert A. Bendler, 214 East 13th, Lexington, Nebr. 68850. Phone (308) 324-2200.
ENGLISH SETTERS and Labradors: "Bred for the hunter''; outstanding bloodlines! Puppies, started dogs and stud service available. High Plains Kennels, 1411 Emerson, Alliance, Nebr. 69301. Phone (308) 762-6709.
AKC BLACK LABS whelped the 5th of June. 3 males, 5 females. Excellent bloodlines with bench and field champions on both sides. Will be big, great dogs. Call Mike in Papillion (402) 592-3036.
FOR SALE: AKC Irish Setter pups, excellent bloodlines. Will make fine hunting dogs and great pets; great noses; shots and wormed. Will be available August 1. Please contact Jon Stohs, 1129 Plainview, Seward, NE 68434. Phone (402) 643-2715.
AKC GERMAN Shepherds, quality bloodlines, guaranteed sound, pedigrees furnished. Free brochure. DA-CO Kennels, Box 316, Meadow Grove, NE 68752. Phone (402) 634-2605.
MISCELLANEOUS147.6 ACRES on Pine Creek. Close to Highway 20. Trout stream, fish pond, plenty of deer and turkey. Write or call James G. Fredrickson, Long Pine, Nebr. 69217 or phone (402) 273-4584.
WINE AND BEER: Make your own. Send for free recipes and instructions. Omaha Supply, 13616 Polk St., Omaha, NE 68137.
GUNS—Browning, Winchester, Remington, others, Hi-powers, shotguns, new, used, antiques. Want Pre1964 Winchesters. Buy-Sell-Trade. Ph. (402) 729-6112.
Bedlan's Sporting Goods, Fairbury, NE 68352. MAD RIVER CANOES offers the finest in quality and performance. For the finest canoes and accessories, look to Great Plains Canoe Co., 205 Main, Springfield, NE 68059. Phone (402) 253-2001.
LET'S GO FISHING! Take a day away from the office. Let us take care of all the hassles like getting the boat ready and running down the bait. Some of the best fishing in the state of Nebraska is right here on the scenic Missouri River near Nebraska City. M & C Guide Service out of Nebraska City, (402) 873-5918 or 873-6288 before 8 a.m. or after 5 p.m.
FISH FOR SALE. Channel catfish, bass, bluegill, crappie, trout, perch, white bass, minnows, hybrid grass carp, bullhead. We can ship fish, you can pick them up, or we deliver. Contact the Pleasant Valley Fish Farm, Rt. 1, McCook, NE 69001. Phone (308) 345-6599.
N.E. NEBRASKA TROUT Fishing. For rent Mon.Thurs. or Fri.-Sun. 2 modern cottages completely furnished. 5 spring-fed lakes with trout up to 7 lbs. Bass and bluegill also. Diamond E Trout Resort, Orchard, NE 68764. (402) 893-4745.
BEER KIT—everything to make 5 gallons of delicious home-made beer except bottles. Makes 50 bottles. Drink in 6 weeks. $39 includes tax and shipping. Omaha Supply, 13616 Polk St., Omaha, NE 68137
3 BEAUTIFUL CRYSTAL-clear lakes for sale with over 7000 feet of shoreline. Ideal for your own private resort—or, divide and let your friends in on the action and the investment. Fishing, hunting, skiing, with lots of lovely sand beaches. Located near West Point only l/2 hours from Omaha, Grand Island, Lincoln, or Norfolk. Price has been slashed to less than $200,000 and owner will assist in financing. Call me for private tour and financing. H. B. Winter, N.P. Dodge Co., 8701 W. Dodge Rd., Omaha, Nebr. 68114. Phone (402) 397-5008 or (402) 333-9180.
TOURISM WORK* FOR AMERICA. Harlan County Dam Vacation Apartments fully furnished Color TV Kitchen Facilities Full Baths Game cleaning room with freezer One block from shopping center Weekend or week of pleasant living Security Deposit Required Sorry No Pets Dean and Esther Stone Box 145 Ph. (308) 799-3422 Republican City, NE 68971 NEBRASKAIand Magazine Order Form Please send me a subscription to NEBRASKAIand Magazine which will include next January's special, "Fort Robinson." One-year $9.50 Two-year $18 Three-year $27 STATE ZIP NAME ADDRESS CITY Mail to: NEBRASKAIand, Box 30370, Lincoln, NE 68503SMALLMOUTH BASS and black crappie reared on formulated feed for cage or pond stocking. Fattig Fish Hatchery, Brady, NE. Phone (308) 584-3451.
LAKE McCONAUGHY 1.3-acre deeded lots, $6,000 to $10,000. 2500-square feet. A-frame fully landscaped $68,500. Lakeview Development, Box 1028, Imperial, NE 69033. Phone (308) 882-5267 or (308)284-6136.
COMPLETE FUR service; repair, restyling, large inventory of new coats at saving prices. Will custom make garments from your skins, either raw or dressed. Offer service of tanning including all fine skins, deer and sheep. 50 years' experience. Haeker's Furriers, Alma Tanning Co., Box 270, Alma, NE 68920.
PICKLED FISH - delicious, easy to make recipe. Unique way to preserve freshwater fish. Send $2 plus stamped self-addressed envelope to Box I0-B, Utica, NE 68456.
WILD TURKEYS, pheasants, for sale. Taking orders for spring chicks. Four Pines Game Farm, Roca, Ne. Phone (402) 792-2039 or (402) 435-8159.
TAXIDERMYPEISTER TAXIDERMY a name you can trust. We give you professional life-like work at prices most sportsmen can afford. Member National Taxidermist Association, #5 Regency, Place, Kearney, Nebr. 68847. Phone (308) 237-7575.
KARL SCHWARZ master taxidermist has moved to a new country studio; same professional mounting and tanning service. Schwarz Wild Wing Studio, 16804 South 180th St., Springfield, NE 68059. Phone (402) 253-2481.
CREATIVE TAXIDERMY in all its branches since 1935, now includes Northstar Freeze-Dry processing of approved small specimens. Also tanning and deerskin processing. Naturecraft Studio. Nebraska City, Nebraska 68510. Joe Voges-Owner. Phone (402) 873-5491.
JOHNSON TAXIDERMY- servicing southwest Ne- braska, specializing in big-game mounts, life-sized mounts, rug work, fish, birds, tanning hair-on leather. Brochure and price list on request. Johnson Taxidermy, Rt. 1, Box 78, Lamar, NE 69035. Telephone (308) 882-5555.
ALLISON'S TAXIDERMY STUDIO; Wally and Betty Allison, Licensed Taxidermist. We've mounted 18 Nebraska State Record fish. Specializing in fish and birds, small game and rattlesnakes. We use freeze-dry. 2709 Birchwood Rd., North Platte, Nebr. 69101. Phone (308) 534-2324.
SOUDERS TAXIDERMY. Quality work in all phases of taxidermy. Birds, fish, gameheads, rugs, and tanning. 2861 41st Avenue, Columbus, Nebr. 68601. Phone (402) 564-9013.
BIG BEAR TAXIDERMY, Rt. 2, Mitchell, Nebraska 69357. We specialize in all big game from Alaska to Nebraska, also birds and fish. Hair-on and hair-off tanning. 4'/2 miles west of Scottsbluff on Highway 26. Dale Hubel, phone (308) 635-3013.
DINGES TAXIDERMY Studio, 2763 So. 12th St. Omaha, NE 68108. Fourteen-time National Award Winning Taxidermy. Trust your trophies to a proven winner. Complete professional service. Mike and Mary Dinges (402) 342-3718.
NABITY'S TAXIDERMY. 31 years experience. Specializing in natural grass backgrounds for mammals, birds and fish. 13901 "0"St., Lincoln, NE 68505 4 miles east of 84th and "O". (402) 489-6351.
BADE TAXIDERMY—Quality a must—Fast service. Fish, birds, rugs, tanning, full mounts and game heads. 2111 N. Christy St., Fremont, Nebraska 727-5463.
HOUSE OF BIRDS. Licensed taxidermist with 18 years' experience. Specialize in birds and game heads. Pheasant $47.50, deer head $87.50, Quail $35 a pair. For more information call (402) 228-3959, Beatrice, Nebr.
PLATTE VALLEY TAXIDERMY. Museum quality mounts using latest scientific methods. 1985 World Taxidermy Competition winner. Delton Wegner, 617 "H" Street, Central City, NE 68826. Telephone (308) 946-3773.
AUGUST 1985 49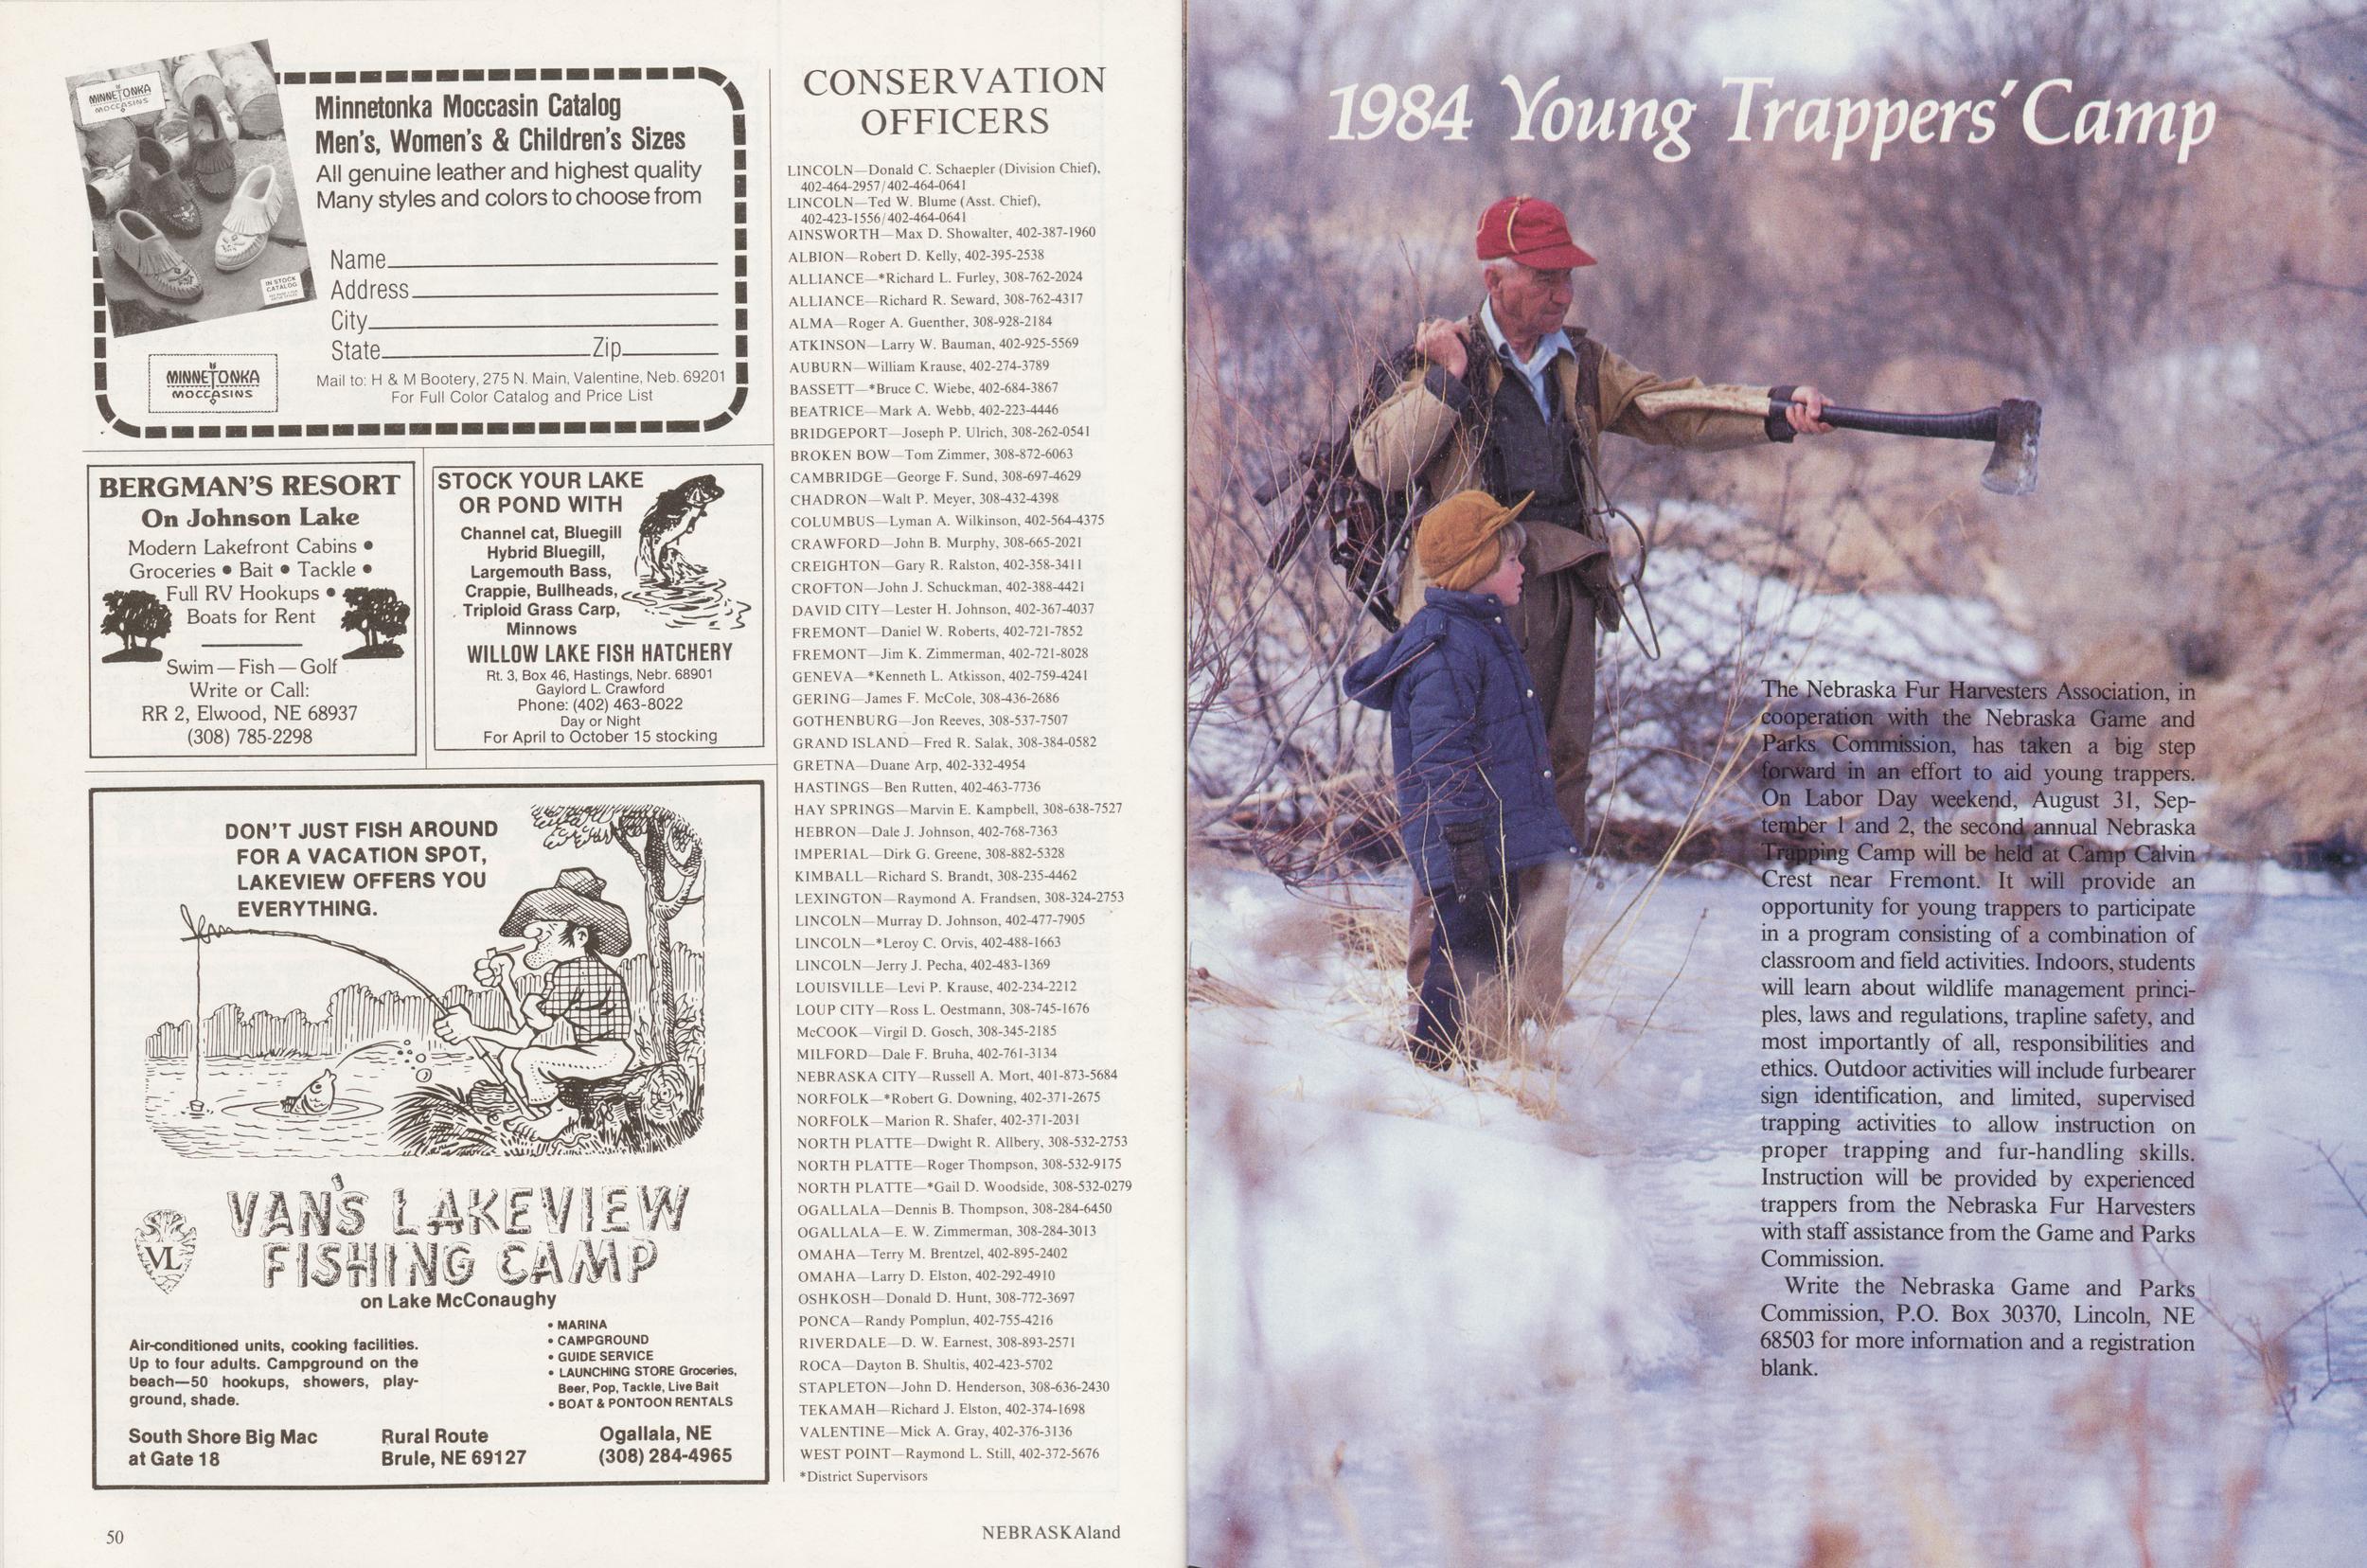 Minnetonka Moccasin Catalog
Men's, Women's & Children's Sizes
All genuine leather and highest quality
Many styles and colors to choose from
MIMEfOMKft
moccasins
Name
Address
City
State
Zip.
Mail to: H & M Bootery, 275 N. Main, Valentine, Neb. 69201
For Full Color Catalog and Price List
BERGMAN'S RESORT
On Johnson Lake
Modern Lakefront Cabins
Groceries Bait Tackle
Full RV Hookups
Boats for Rent
Swim — Fish — Golf
Write or Call:
RR 2, Elwood, NE 68937
(308) 785-2298
STOCK YOUR LAKE
OR POND WITH
Channel cat, Bluegill
Hybrid Bluegill,
Largemouth Bass,
Crappie, Bullheads,
Triploid Grass Carp,
Minnows
WILLOW LAKE FISH HATCHERY
Rt. 3, Box 46, Hastings, Nebr. 68901
Gaylord L. Crawford
Phone: (402) 463-8022
Day or Night
For April to October 15 stocking
DON'T JUST FISH AROUND
FOR A VACATION SPOT,
LAKEVIEW OFFERS YOU
EVERYTHING.
on Lake McConaughy
Air-conditioned units, cooking facilities.
Up to four adults. Campground on the
beach—50 hookups, showers, playground, shade.
MARINA
CAMPGROUND
GUIDE SERVICE
LAUNCHING STORE Groceries,
Beer, Pop, Tackle, Live Bait
BOAT & PONTOON RENTALS
South Shore Big Mac
at Gate 18
Rural Route
Brule, NE 69127
Ogallala, NE
(308) 284-4965
Minnetonka Moccasin Catalog
Men's, Women's & Children's Sizes
All genuine leather and highest quality
Many styles and colors to choose from
MIMEfOMKft
moccasins
Name
Address
City
State
Zip.
Mail to: H & M Bootery, 275 N. Main, Valentine, Neb. 69201
For Full Color Catalog and Price List
BERGMAN'S RESORT
On Johnson Lake
Modern Lakefront Cabins
Groceries Bait Tackle
Full RV Hookups
Boats for Rent
Swim — Fish — Golf
Write or Call:
RR 2, Elwood, NE 68937
(308) 785-2298
STOCK YOUR LAKE
OR POND WITH
Channel cat, Bluegill
Hybrid Bluegill,
Largemouth Bass,
Crappie, Bullheads,
Triploid Grass Carp,
Minnows
WILLOW LAKE FISH HATCHERY
Rt. 3, Box 46, Hastings, Nebr. 68901
Gaylord L. Crawford
Phone: (402) 463-8022
Day or Night
For April to October 15 stocking
DON'T JUST FISH AROUND
FOR A VACATION SPOT,
LAKEVIEW OFFERS YOU
EVERYTHING.
on Lake McConaughy
Air-conditioned units, cooking facilities.
Up to four adults. Campground on the
beach—50 hookups, showers, playground, shade.
MARINA
CAMPGROUND
GUIDE SERVICE
LAUNCHING STORE Groceries,
Beer, Pop, Tackle, Live Bait
BOAT & PONTOON RENTALS
South Shore Big Mac
at Gate 18
Rural Route
Brule, NE 69127
Ogallala, NE
(308) 284-4965
CONSERVATION OFFICERS
LINCOLN—Donald C. Schaepler (Division Chief), 402-464-2957/402-464-0641 LINCOLN—Ted W. Blume (Asst. Chief), 402-423-1556/402-464-0641 AINSWORTH—Max D. Showalter, 402-387-1960 ALBION—Robert D. Kelly, 402-395-2538 ALLIANCE—*Richard L. Furley, 308-762-2024 ALLIANCE—Richard R. Seward, 308-762-4317 ALMA—Roger A. Guenther, 308-928-2184 ATKINSON—Larry W. Bauman, 402-925-5569 AUBURN—William Krause, 402-274-3789 BASSETT—*Bruce C. Wiebe, 402-684-3867 BEATRICE—Mark A. Webb, 402-223-4446 BRIDGEPORT—Joseph P. Ulrich, 308-262-0541 BROKEN BOW—Tom Zimmer, 308-872-6063 CAMBRIDGE—George F. Sund, 308-697-4629 CHADRON—Walt P. Meyer, 308-432-4398 COLUMBUS—Lyman A. Wilkinson, 402-564-4375 CRAWFORD—John B. Murphy, 308-665-2021 CRE1GHTON—Gary R. Ralston, 402-358-3411 CROFTON—John J. Schuckman, 402-388-4421 DAVID CITY—Lester H. Johnson, 402-367-4037 FREMONT—Daniel W. Roberts, 402-721-7852 FREMONT—Jim K. Zimmerman, 402-721-8028 GENEVA—*Kenneth L. Atkisson, 402-759-4241 GERING—James F. McCole, 308-436-2686 GOTHENBURG—Jon Reeves, 308-537-7507 GRAND ISLAND—Fred R. Salak, 308-384-0582 GRETNA—Duane Arp, 402-332-4954 HASTINGS-Ben Rutten, 402-463-7736 HAY SPRINGS—Marvin E. Kampbell, 308-638-7527 HEBRON—Dale J. Johnson, 402-768-7363 IMPERIAL—Dirk G. Greene, 308-882-5328 KIMBALL—Richard S. Brandt, 308-235-4462 LEXINGTON—Raymond A. Frandsen, 308-324-2753 LINCOLN—Murray D. Johnson, 402-477-7905 LINCOLN—*Leroy C. Orvis, 402-488-1663 LINCOLN—Jerry J. Pecha, 402-483-1369 LOUISVILLE—Levi P. Krause, 402-234-2212 LOUP CITY —Ross L. Oestmann, 308-745-1676 McCOOK—Virgil D. Gosch, 308-345-2185 MILFORD—Dale F. Bruha, 402-761-3134 NEBRASKA CITY—Russell A. Mort, 401-873-5684 NORFOLK—*Robert G. Downing, 402-371-2675 NORFOLK—Marion R. Shafer, 402-371-2031 NORTH PLATTE—Dwight R. Allbery, 308-532-2753 NORTH PLATTE—Roger Thompson, 308-532-9175 NORTH PLATTE—*Gail D. Woodside, 308-532-0279 OGALLALA—Dennis B. Thompson, 308-284-6450 OGALLALA—E. W. Zimmerman, 308-284-3013 OMAHA—Terry M. Brentzel, 402-895-2402 OMAHA—Larry D. Elston, 402-292-4910 OSHKOSH—Donald D. Hunt, 308-772-3697 PONCA—Randy Pomplun, 402-755-4216 RIVERDALE—D. W. Earnest, 308-893-2571 ROCA—Dayton B. Shultis, 402-423-5702 STAPLETON—John D. Henderson, 308-636-2430 TEK AM AH—Richard J. Elston, 402-374-1698 VALENTINE—Mick A. Gray, 402-376-3136 WEST POINT-Raymond L. Still, 402-372-5676 District Supervisors 50 NEBRASKAland1984 Young Trappers' Camp
Nebraska Fur Harvesters Association, in cooperation with the Nebraska Game and Parks Commission, has taken a big step irward in an effort to aid young trappers. On Labor Day weekend, August 31, Sep- tejgjer 1 and 2, the second^mual Nebraska Camp will be held at Camp Calvin Crest near Fremont. It will provide an opportunity for young trappers to participate in a program consisting of a combination of classroom and field activities. Indoors, students will learn about wildlife management principles, laws and regulations, trapline safety, and most importantly of all, responsibilities and ethics. Outdoor activities will include furbearer sign identification, and limited, supervised trapping activities to allow instruction on proper trapping and fur-handling skills. Instruction will be provided by experienced trappers from the Nebraska Fur Harvesters with staff assistance from the Game and Parks Commission.
Write the Nebraska Game and Parks Commission, P.O. Box 30370, Lincoln, NE 68503 for more information and a registration blank.
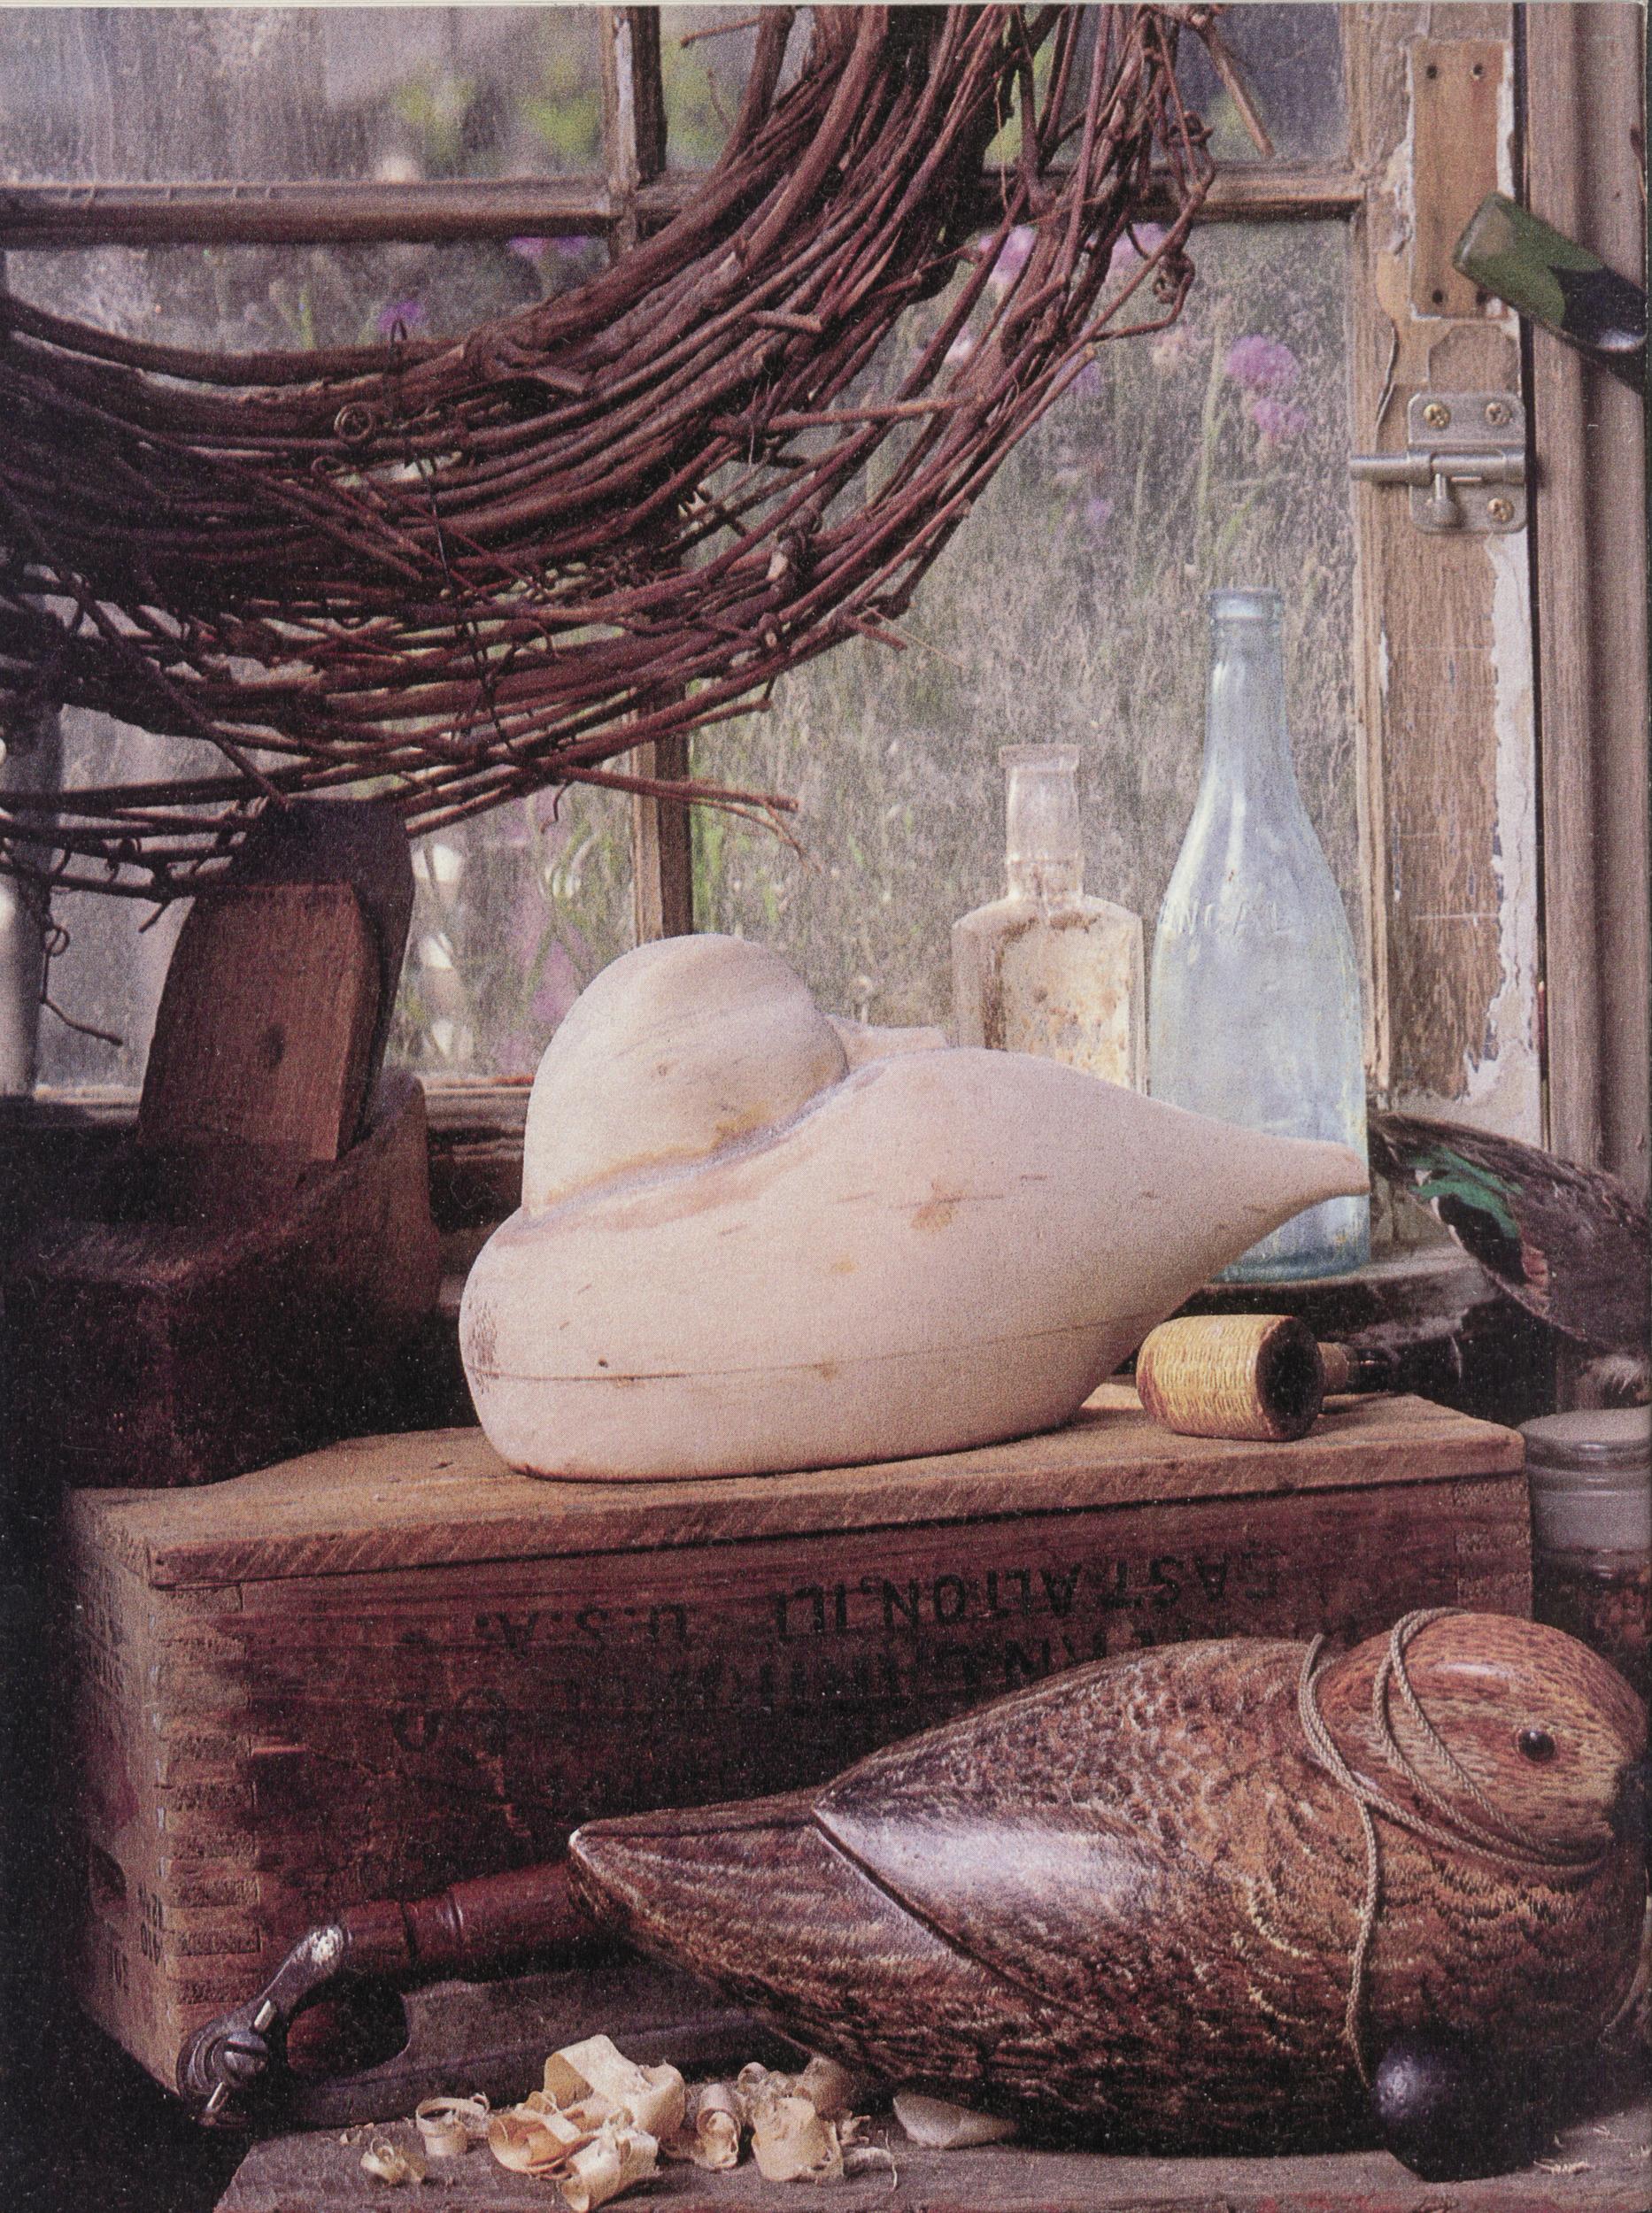
Position: 10 (551 views)